Einleitung

Before replacing the lens, make sure to open the lens cover (use the switch on the side of the lens) for a better look at the scratched or dirty lens. If you suspect the lens is just dusty and in need of cleaning, replacing the lens is not necessary.

  1. CdgI3oOrGwbpqSeX
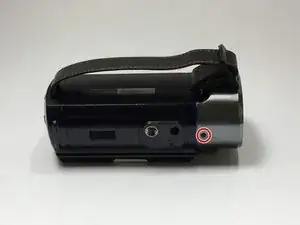
    • Remove the 4 mm screw on the underside of the camcorder near the tripod mount.

  2. 6QSORsxwY2C6ZO65
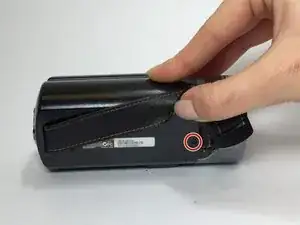
    • Remove the 4 mm screw next to the buckle of the hand strap closest to the lens.

  3. xP4rYS2wOxfKgnK4
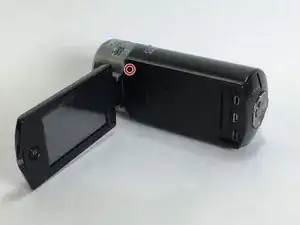
    • Open the LCD screen. Remove the 4 mm screw on the inside panel, located at top left corner.

  4. mHp3kdjonFwQWMDY
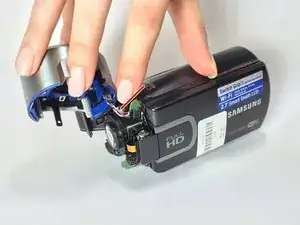
    • Firmly grip and pull the front casing on the lens to remove it.

    • Be sure to remove the front casing at gently as possible to prevent damaging the attached ribbon cable. If not careful, the ribbon cables could be torn.

  5. ldCSABAyOem3NS5K
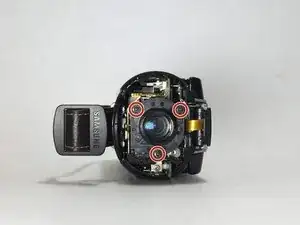
    • Remove the three 5 mm screws surrounding the lens.

Abschluss

To reassemble your device, follow these instructions in reverse order.
Renee

Mitglied seit: 11/03/15

219 Reputation

0 Kommentare