Einleitung

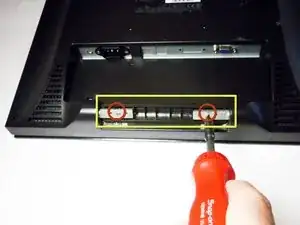
  1. 3sPuGEhNBVpLArdB
    • Place the monitor face down.

    • Remove the four 11.5mm screws with a #2 Phillips screwdriver.

    • Remove the stand by pulling it out.

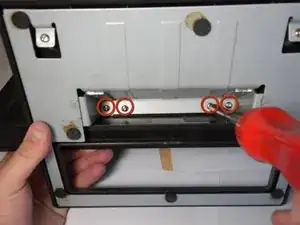
  2. mSwIVPnA2JCXfvZC
    • Remove two 11.5mm screws with a #2 Phillips screwdriver.

    • Remove the plastic bar.

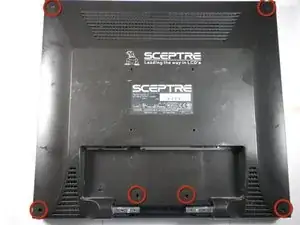
  3. QApVk5V3iLBajqsT
    • Using a #2 Phillips screwdriver, remove the six 7mm screws at the circled locations.

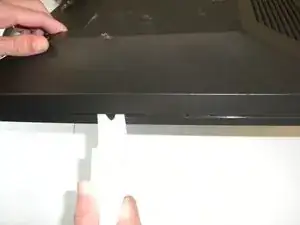
  4. NuEXVFr5hSwrHx3N
    NuEXVFr5hSwrHx3N
    Pb6ZKs3L1kP5fvEZ
    aaTX1YjIrYvKBDWV
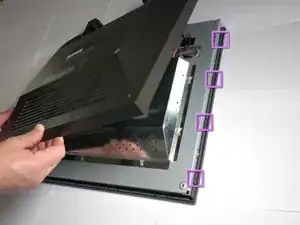
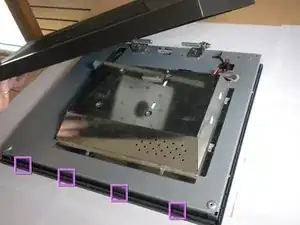
    • Pry the monitor using the plastic opening tool to release the clips holding the cover on.

    • There are four clips on each side, four on the top, and one on the bottom.

    • You may hear a loud snapping noise when releasing the clips. Do not be alarmed, it is natural.

    • Once all the clips have been released, remove the cover by pulling it up.

  5. ERlC4wPeEIZHpWvE
    ERlC4wPeEIZHpWvE
    wZtE2IyGcYFYaMNp
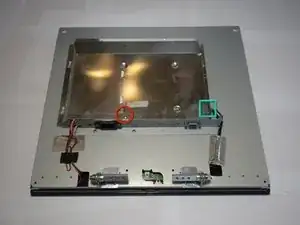
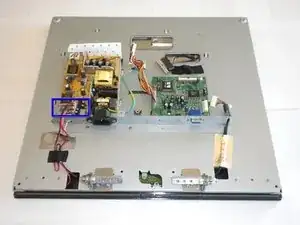
    • Using the #2 Phillips screwdriver, remove the one 6mm screw.

    • Unplug the indicated cable by pulling on the base.

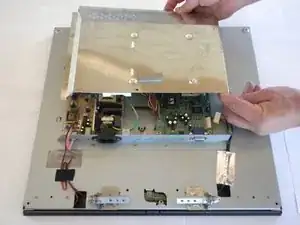
    • Slide the cover toward the top of the monitor.

    • Remove the cover.

  6. VQ6dxpUsHwBaOseH
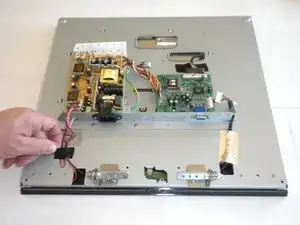
    • Disconnect the two connectors to the speakers by gently pulling on the hard plastic straight up.

  7. JWuHH55j63RcADIH
    • Carefully peel the tape from the board.

  8. KfhaNf5lq1OrdfR4
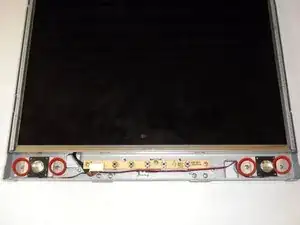
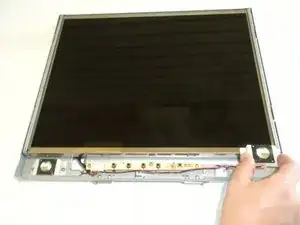
    • Flip the monitor so the screen is facing you.

    • Using Phillips #2 screwdriver remove the four 6.25 mm screws securing the speakers:

  9. sukCZZKwcXTUnchL
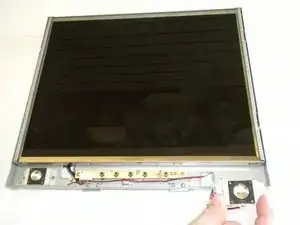
    • Carefully lift the speakers up.

Abschluss

To reassemble your device, follow these instructions in reverse order.
Xenia Leon Rodriguez

Mitglied seit: 27/09/12

37 Reputation

0 Kommentare