Einleitung

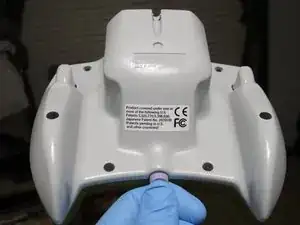
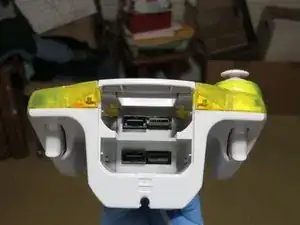
If your retro consoles and controllers are beginning to look a little, or a lot, seasoned from years of use or storage and you're interested in restoring their original look then this is the guide for you.

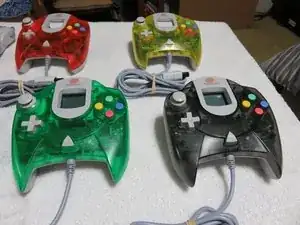
This guide specifically covers the Sega Dreamcast controller, as I have several variants, but the same techniques can be used on all retro systems. Examples in step 15 & 16.

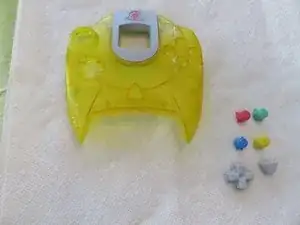
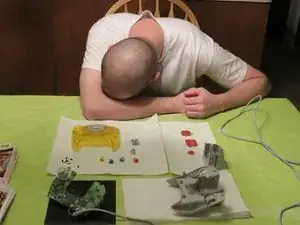
With a little work and elbow grease you can restore the original look, feel and finish to your retro controllers, consoles and games. In this guide I'll walk you through my personal process on how to refurbish your Sega Dreamcast controllers inside and out.

Since this is a retro restoration guide I'm also providing some accessories/techniques to clean your old cartridge based systems and games. These steps will be at the bottom of the guide. Added 5/7/19

  1. wnV5K4GwWDG6xJGD
    wnV5K4GwWDG6xJGD
    ksWlnYkTncJK1GoL
    KVCrkHhhRrv6sBHl
    • One disadvantage of retro console controllers is the cable. Tethered at a specific distance from the console, most controller cables wind up on the floor which makes them prone to being stepped on. Floors, from a medical perspective, are assumed to always be dirty even immediately after being cleaned. There's a reason for this...

    • Imagine all the things you step in, while wearing your shoes, throughout an average day. Need I remind you of the dreaded public restroom? The bottoms of your shoes are among some of the dirtiest things around. Now imagine you or your kids stepping on your cords on a regular basis. Even if it looks clean a bleach wipe will quickly prove you wrong.

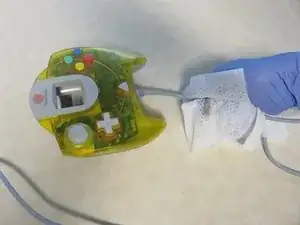
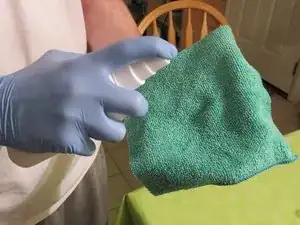
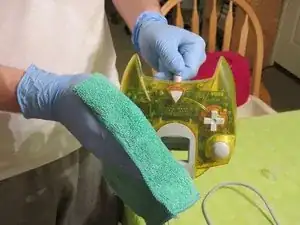
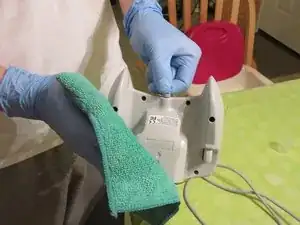
    • This is the easiest part of the refurbishing process. Simply put on some gloves, grab a bleach wipe and start rubbing down your controller cable. I recommend going both directions down the cord. By that I mean start at the base of the controller cord, down to the console port and then reverse the direction. I've found that simply going from top to

    • bottom isn't sufficient enough for some of the more stubborn dirt that's near the console port. Reversing the direction seems to be the easy fix for removing that dirt at the end of the cable. Repeat this process, using as many wipes as necessary, to remove this dirt/bacteria. You'll feel an instant difference when it's dry and it'll almost feel

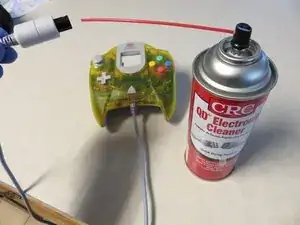
    • like new. When you're satisfied with the cleanliness of the cord take your electronics cleaner and spray inside the console port to clean the inside and ensure a clean and solid connection when you plug in your controller. This step is now complete. It's time to go sanitize everything else.

    • I wear gloves through most of this process in order to prevent touching the chemicals and to prevent my own skin oils from affecting the end result of the plastic finish. Wearing gloves is purely optional but it is recommended. Gloves are not necessary during the cleaning process when only using soap but if you're doing several controllers your

    • hands won't dry out from all the washing and your skin will thank you.

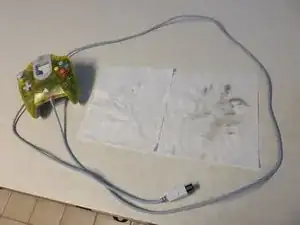
    • This is one of the cleaner controller cords I've cleaned. There's many variables that will affect how dirty your cord is so results will vary here. Used controllers are usually much dirtier than this one.

  2. VOVjGcDaZlCsmPy2
    VOVjGcDaZlCsmPy2
    yKwChhtsThnXDDgY
    OsPeRXQSp65RcQa1
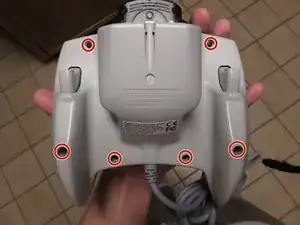
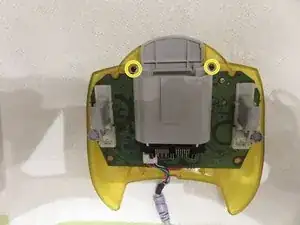
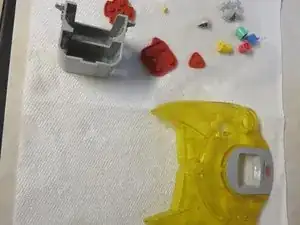
    • There are a total of 8 screws that will need to be removed for this project. 6 external and 2 internal.

    • Use your #1 screwdriver to remove the 6 external screws and remove the back plate of the controller.

    • Remove the 2 internal screws and remove the controller board.

    • Remove the 3 rubber pads and all the buttons from the front controller cover and controller board and set them off to the side for now.

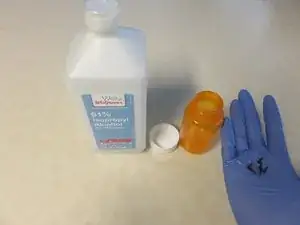
    • I put the 8 screws in a container with enough rubbing alcohol to submerge them. This removes years of dirt and they come out looking like new. This is completely optional.

  3. 2wPpLtOGS4D1aFq2
    2wPpLtOGS4D1aFq2
    V5DJCyVFV1seZMHB
    PFwSWbR4vixAOfmS
    • This step is optional but recommended. If your cleaning a white shell controller follow these steps for the front shell also.

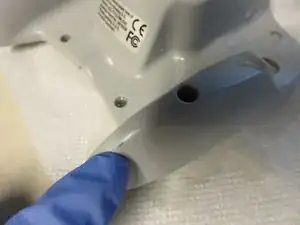
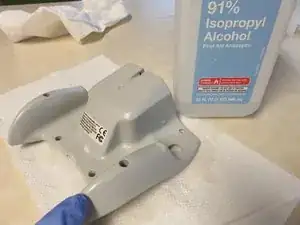
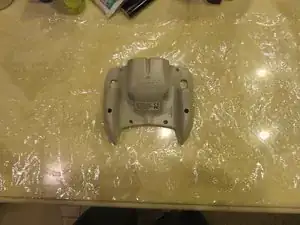
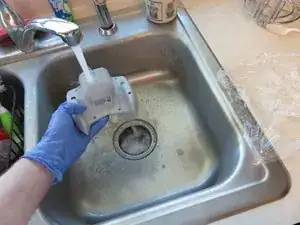
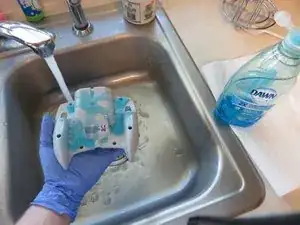
    • Using whatever sink suits you best use hot/warm water and antibacterial soap and clean the back cover by hand. Be sure to also clean the inside of the cover to remove any dirt/dust that's been sitting in there.

    • If preserving the sticker is important to you then take care and be gentle when washing the sticker on the back cover. Use gentle pressure with your fingers in this area.

    • Sometimes there are "trouble spots" or dirt patches on the cover and can remain after you wash it. Take note of these spots and pay extra attention to them when washing. If they remain, even after a vigorous cleaning use a Qtip and rubbing alcohol to try and remove the spot. If a Qtip doesn't work simply use it to wet the trouble spot and use a

    • plastic prying tool to scrape it off. Sometimes they require significant force to remove and the plastic tool doesn't scratch the cover. Nail polish remover can be used here but I don't recommend it.

  4. m5THcTONKEwiaD2U
    m5THcTONKEwiaD2U
    Ly2AEvscYMMoonTZ
    PvmOPhDe4msyTEkq
    • Grab your Saran Wrap and rip off a decent size piece. Large enough to completely wrap the back shell and lay it flat on your work surface.

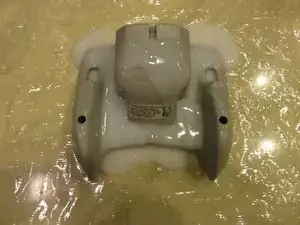
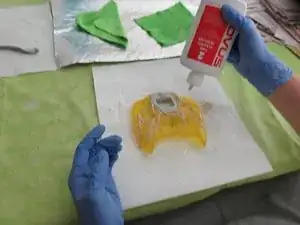
    • Open the bottle of Salon Care 40 Volume Creme and pour some out onto the shell. Do your best to cover the entire surface evenly. This is easier said than done due to the shells odd shape. Just do the best you can.

    • Smooth out the extra creme that poured off your controller, onto the Saran Wrap, in a big enough surface to cover the controller.

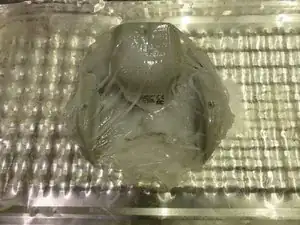
    • Quickly flip the shell over and cover the entire shell with the Saran Wrap. Try not to leave open airways as you don't want the solution to dry. If you need an extra piece of Saran Wrap to completely cover the shell now is the time. When shell is completely wrapped flip it back over and place it into the container that will be holding the shell.

    • I recommend an aluminum pan or glass dish of some kind as they will help reflect the UV light projected from your black light bulb.

    • If you are cleaning a white controller the process is the same for the front shell.

  5. N41Tk4V3mnyOQoTw
    N41Tk4V3mnyOQoTw
    KlGn1kORVUtebKqD
    aLkwaDMdXIukcbyU
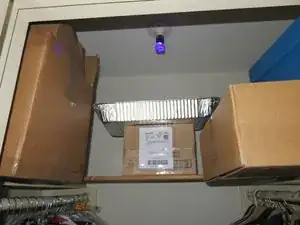
    • This is my setup. It's only an example. Your black light room/setup doesn't need to be identical to mine in order for this to work. Just get your items to be restained as close to the UV light as possible.

    • Here I've used a storage closet that seldom gets used as my black light room. I had to make some adjustments and shift some stuff around but my pan sits about a foot under the light. I can't explain the science behind why this works but there's a chemical reaction when the Salon Care 40 Creme sits under UV light. The end result is quite astounding.

    • Especially if your restoring a console or controller that is badly yellowed, it can restore its original color.

    • DO NOT attempt this with dark plastics as it can warp the original color.

    • The reason for doing this is simple and is done for one of two reasons. Either you have a console/controller that's yellowed or you simply want to restore the original shine to the plastic. Even if your controller isn't discolored it still adds a "new" look and feel to it. I let mine sit for 24hrs before removing it from the room.

    • Coincidentally, if the back sticker is important to you, this will also help discolor that back sticker if it's looking a little nasty from years of use/storage.

    • If time is a factor and you want to finish this ASAP these first 5 steps needs to be done in order. The staining process is simple but timely. Make the most of your time by cleaning everything else after you begin your "baking period". Otherwise, your wasting time.

    • This step is the ONLY reason that this is labeled to take 1-2 days. You can leave your shell under the UV black light as long/little as you want. Just know that the longer it's under the light the better the results.

  6. GAXqYfh1Yd2TAoen
    GAXqYfh1Yd2TAoen
    vXPuYEVoqqqc14Dh
    nRZZvOAeTwUXkGgc
    • If your restoring a white controller then you are only cleaning the buttons, rubber pads and VMU slot holder.

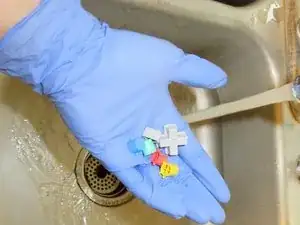
    • Grab your remaining parts to be cleaned and clean them using hot/warm water and antibacterial soap. Remember, the idea with all this is to remove the previous user(s) bacteria.

    • A toothbrush or nail brush works really well at cleaning the hard to reach places that water pressure alone won't clean. Use them to clean the buttons if there's dirt in the A/X/B/Y indention and the circular indention on the front shell. If you're cleaning a white shell this should have been in Step 3.

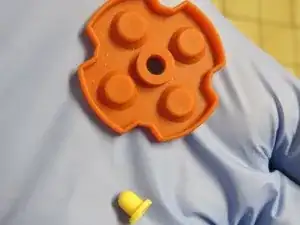
    • When cleaning the rubber pad that goes with your D-Pad be careful not to loose the little plastic piece in the center as it does separate from the rubber pad. Without it your D-Pad won't function properly if at all.

    • When you've finished cleaning your remaining pieces set the rubber pads and VMU slot holder out of the way to air dry. You are done with these pieces until the reassembly process.

    • I HIGHLY recommend using a strainer of some sort that fits your sinks drain for this step. If you loose these pieces down the drain you'll have two choices: 1) Go fishing for them in the pipes or 2) Purchase replacement buttons

  7. vSLXXpE4lLrgyPIL
    vSLXXpE4lLrgyPIL
    1jykIcw2mRu4HkQH
    hJiK1HvYnDaSdwiE
    • If you're restoring a white shell controller you're only polishing the buttons in this step.

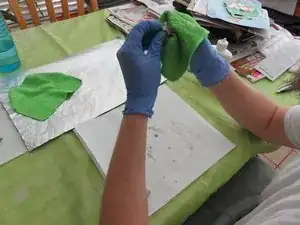
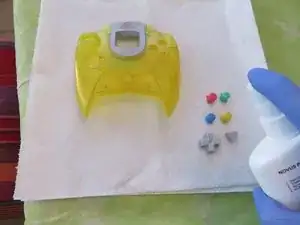
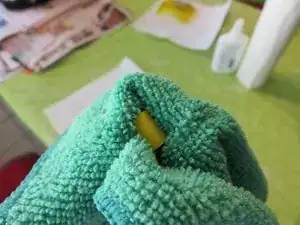
    • Here's where your aluminum foil, microfiber clothes, Novus Plastic Polish #2 and dish soap comes into play. Following the instructions on the back of the bottle, apply and buff polish to the buttons/shell until you're satisfied with results. I personally repeat this process 3 times.

    • After the final coat is applied I use the dish soap to do a final clean of the shell and to remove any remaining polish. I use the dish soap because it's a little thicker, and lathers more which helps get the remaining polish off.

    • This process is tedious and slightly time consuming. I average 1-1.5hrs work time when polishing, buffing, rinsing and repeating 3 times and the final clean with dish soap. The end results are worth it but you can polish your stuff as much as you feel is necessary.

  8. 1UhwW3DcwkXXTOrS
    1UhwW3DcwkXXTOrS
    mGRwWJTkrZAWpwYZ
    oFG4BJxb56hmuTth
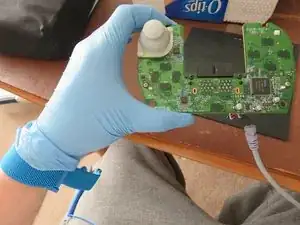
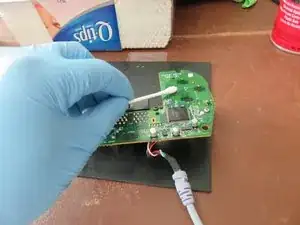
    • Grab your electronics cleaner, Qtips and an ESD bracelet. This part is pretty self explanatory. Spray the cleaner on the board or on a Qtip and give it a gentle scrub. You probably won't yield much filth but it's better not to have it there in the first place.

    • The thumbstick remains on the board unless you unscrew the 2 screws holding it to the board. Clean it with a Qtip and rubbing alcohol and use a toothbrush or nail brush to clean the underside of the stick if you so desire. Don't forget to clean the triggers as a lot of dirt can build up on them.

    • Spray some of your electronics cleaner into the VMU slots and then spray an airgun into the slots. This will help clean and remove any dirt that may be in there.

    • I personally use CRC electronics cleaner for my electronic cleaning needs. It works well, dries fast and costs less than $5 on Amazon. You can use whatever electronics cleaning solution you prefer.

  9. lTwcl2mpZJTTYvng
    lTwcl2mpZJTTYvng
    ugu42amG3sOYBnwA
    • Once you've hit your desired amount of time that you want your controller shell to remain under the UV black light it's time to clean it one last time. I use the dish soap here for the same reasons mentioned in Step 7.

    • Once the Salon Care 40 Volume Creme has been rinsed off the shell take a paper towel and dry the exterior.

    • Be gentle when washing the sticker so it doesn't become damaged.

    • If the sticker is on the back shell pat, DON'T RUB, the sticker dry. This will prevent you from causing any sort of damage to the wet label. Although the water beads may be dried up the label itself will be damp and to much pressure while rubbing it can cause damage.

  10. EiO1jHHnYJKo4VSi
    EiO1jHHnYJKo4VSi
    NNdDaPEJ4KQAQ1BM
    WqTOpWBZKXADTIGU
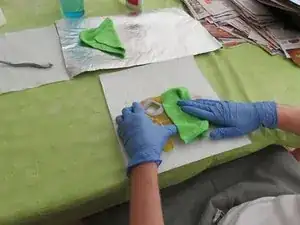
    • Place your buttons, and front controller shell on a clean paper towel. Face the buttons upward so any residual polish drips onto the sides. Following the directions on the back of the bottle, spray the Novus Polish #1 on the top of the shell and buttons. Let them sit for a moment and wipe them dry with a clean microfiber or lint free cloth.

    • Use the same rag to wipe the inside of the shell to remove any dried up water marks that remain from the washing.

    • Take care around the screw posts as they can break off. If this happens simply reattach the broken piece with a small amount of super glue/crazy glue.

    • Don't totally rush the reassembly process. Make sure EVERYTHING is dry before proceeding. Place a small fan in front of all your wet/damp pieces for faster dry times or even better use an airgun and you can usually remove most of the moisture. Depending on the time of day I might just let the pieces sit over night to air dry.

  11. GF2IKZ6BTsOciZLC
    GF2IKZ6BTsOciZLC
    CvXedJJPMsdHEGmO
    • Go from this...

    • To this :)

  12. paQMNrX1evyGLWiK
    paQMNrX1evyGLWiK
    1ckHiBOychauR3FV
    CtVDjaFJlp3BACty
    • This step is optional.

    • After your controller is reassembled take the cloth you used with the Novus Polish #1 and spray 1-2 pumps on the cloth. Give your entire controller a quick wipe down with the damp rag and set aside for a moment to dry.

  13. 11wxbZOCToPChNIh
    11wxbZOCToPChNIh
    vGpLBUpCZITD3X5x
    dGyXuJMlDARUgO1Y
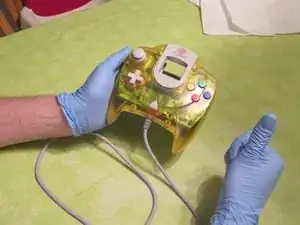
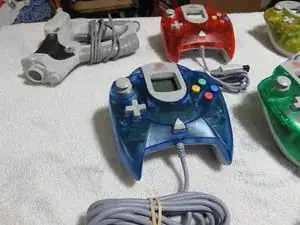
    • Your Sega Dreamcast Controller should now look and feel like new again. I hope you enjoyed this guide and that it assists you on the road to restoring your retro devices. A lot of these techniques can be applied to several other retro systems and controllers. This is my process and I have successfully restored all my retro systems and controllers

    • using the techniques shown in this guide. To include: N64 console & controllers, Dreamcast console & controllers, NES controller, NES & SNES game cartridges, Sega Game Gear console.

  14. eQ6SaLOIMXeGFIww
    eQ6SaLOIMXeGFIww
    fAYcEWIKZpnPjDId
    RwhGQOCpcPtcYLEt
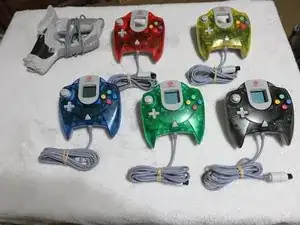
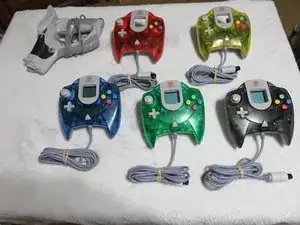
    • My Sega Dreamcast (North America) Refurbished Controller Collection and Pelican Gun.

  15. cRpuYhxyGweeaXBw
    cRpuYhxyGweeaXBw
    XpFT51XyPpMaTJjI
    Elsw55tgPpx6l6A2
    • I restored the NES 2 in a slightly different way. Instead of using saran wrap I put the shell in a ziplock bag and put it under the light with no baking sheet under it. Here's what I found:

    • Without the baking sheet it took significantly longer to restore this shell. The benefit of the aluminum sheet is it reflects the light which does a much better job of hitting the sides of your items. This shell was under for 5-6 days before fully restored with one 24hr period during that time having the rear of the shell facing nearly straight up

    • to restore it.

    • Using a ziplock bag was significantly faster at getting everything covered over saran wrap however it didn't do nearly as good of a job at restoring the consoles shine. The bag is a little more rigid than saran wrap which made it difficult to lay the bag flat onto the shell with the salon creme on it. You have to fold the bag under itself in order

    • to make this work. The console still looks new but after having better previous results I know there's still a little improvement to be made but I don't intend to redo this unless it begins to yellow again.

    • Final thoughts:

    • For faster, and quality, results I would highly recommend an aluminum baking sheet, or some sort of reflective material, under whatever you're trying to restore to ensure all angles of the plastic are hit by the uv light.

    • Although the ziplock bags were a faster alternative to saran wrap in reality it only saved 5-10 mins during the prep stage. All things considered this isn't a big significance. In my test it compensated the quality of the overall finish and personally I prefer quality above all else when it comes to console restoration.

  16. AdPmXr4oWKLivLal
    AdPmXr4oWKLivLal
    4D1CEBFQC6yrmQ5b
    KoncTPbrNCqxxXil
    • Insert wisdom here.

  17. CHJH3HCC2DDAA4qC
    CHJH3HCC2DDAA4qC
    YOlAwEiNmKPE16lm
    NZerrrVxfdPIGrZM
    • Welcome to the cartridge based portion of this guide. Lets dive right in!

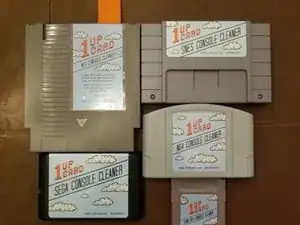
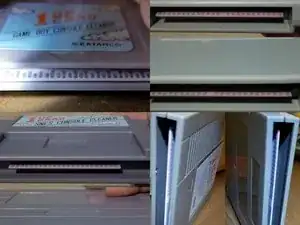
    • Recently I accidentally stumbled upon an amazing product. Allow me to introduce the 1up Card and various forms of the 1up Console Cleaner. The Console Cleaner is a friction based cleaning device and it does exactly as described, gives a 1up to your console. Simply insert and withdraw the cartridge a few times and it's amazing how well these work.

    • My photos show me inserting the cart anywhere from 5-8 times. Until recently there hasn't really been an easy way to clean your consoles pin connectors and the 1up line of products promises to bridge that gap.

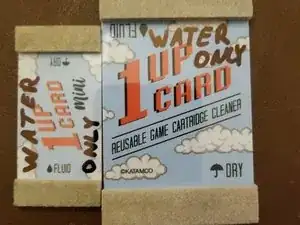
    • After use of the Console Cleaners you'll want to clean them as best as possible. DO NOT use liquid cleaners here as Adam, the creator, informs me that this will reduce the lifespan of the cartridge. Grab yourself a Qtip, or preferabaly a 1up Card, wet it with WATER ONLY and wipe the Console Cleaner. I marked mine so I knew what they were for.

    • Now lets talk about the 1up Card real quick. These are specifically designed to fit the gap between the cartridge and game PCB. They are a much faster and economical solution to pin cleaning compared to Q-tips. They're reusable, create much less mess and leave no fibers on your nice and clean game pins which means less debris in your console.

    • Simply apply some alcohol to the pad labeled fluid, rub your pins vigorously with the card, flip the card and buff with the dry side. It's just that easy. If you're into retro gaming then I HIGHLY advise you to buy these products. I am not sponsored in anyway and will make nothing off of your purchases. Buy them here: https://www.1upcard.com/

    • I purchased the Master Pack which includes a Console Cleaner for every cartridge based system, excluding the Sega Game Gear. I inquired to why this was and Adam informed me that he was having trouble sourcing GG cartridges, either OEM or 3D printed. I happen to find some OEM carts on eBay, sent him the link and he's already received them.

    • Hopefully, soon we will have a cleaner for that system as well. That said, if anyone reading this has the ability to 3D print carts for the game gear please leave a comment with contact information.

  18. Lgn3UZMfTYlXrIcV
    Lgn3UZMfTYlXrIcV
    lVrMlmW3NldLqkHf
    • I don't know about you but I hate dust. It's easy to clean but it's never ending and requires constant combating. Dust is a mortal enemy to gaming devices so lets talk about how to slay the beast.

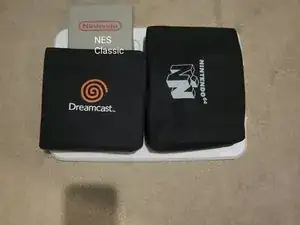
    • If I had a nickle for every console dust cover I owned I'd have .40 cents. Console covers are a great way to reduce dust or any other foreign debris into your devices. They're relatively low cost and very effective. Some sellers on eBay even stamp the covers with colored logos of your favorite systems adding a little flair to your collection.

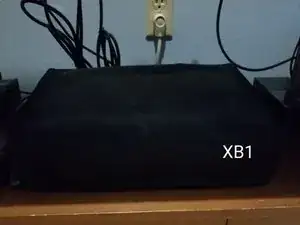
    • Personally I prefer Foamy Lizards cover for my Xbox 1 and if they were still in production I'd grab one for my 360E. The benefits of Foamy Lizard over the competition is 1) their covers are form fitting to the devices they're made for and 2) they come precut to account for the cables protruding from the back of the console. Again, not sponsored.

    • Foamy Lizards line of products aren't designed for retro consoles however so here's a few other places to find what you need:

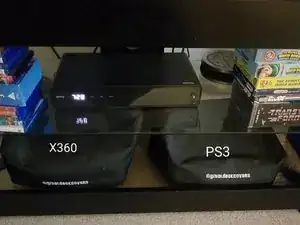
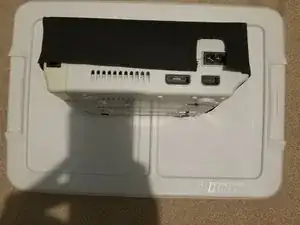
    • https://www.digitaldeckcovers.com has a WIDE variety of dust covers for all sorts of electronics.

    • Their console covers aren't quite as snug on the system which means there's a higher chance of dust entering the device but it would have to be kicked up with a breeze. The only way for it to enter is from underneath. This isn't a major issue by any means and they still provide a quality product. I do have 2 issues with their covers and they are:

    • 1) they put their brand name on the front of the cover. This is a personal discrepancy, it does not hinder the function in anyway. It's just not as uniform as a solid black cover. Plus, I don't get paid for displaying their cover so I could do without the writing. However, I dislike dust even more than this so I can live with it. 2) their covers

    • don't account for cables which means unless you cut the cover you'll have to plug/unplug your wires every time you want to play or cover the device. Again, not a major issue. Just take some scissors and cut the fabric out where your cables plugin.

  19. X2uBeErnIAZdVphM
    X2uBeErnIAZdVphM
    NI1QdxKUIZtQymPi
    • Last but not least, are the retro covers with stamped logos. Mind you, there are probably other sellers on eBay who sell similar items but I like the products from The Pat Rat Shack. Check them out at this link: https://www.ebay.com/sch/i.html?_saslop=...

    • Pros: these hand made covers, for the most part, come in a variety of fabric colors and system logo stamp colors. Choose the option that best suits your taste.

    • Cons: some of these covers account for the pre cut sections for wire inputs but for some reason the fabric encircles the port instead of being a full cut out. It's a simple flaw in its design which needs to be cut otherwise you'll have 2 options. 1) unplug/uncover/replug your cables every time or 2) leave cables plugged and slide the cover down the

    • length of cord. Personally I haven't done the latter but it doesn't sound cosmetically appealing so I've cut all of mine. These covers also don't always fully cover the system and leaves significant ports uncovered which to an extent renders the cover almost pointless but still covers a lot of the entry points. The Dreamcast cover is a good example

    • of this. These covers also aren't made of any sort of water resistant material. I neglected to mention earlier that Foamy Lizards covers come stock with a water resistant fabric on the interior of the cover and digitaldeckcovers has various fabrics you can pick and choose from.

    • Just to reiterate, of the 3 options listed The Pat Rat Shack is the only one without water resistant materials.

  20. GwvxRI1qeABSQdjA
    GwvxRI1qeABSQdjA
    GK1HeYOdNxhXFRDL
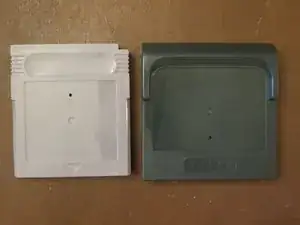
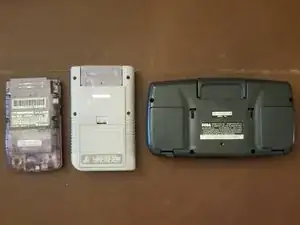
    • This falls under dust prevention. If you display your retro handheld devices you need to invest in a couple of blank dummy carts to put in your system. The cartridge slot is the easiest opening for dust/debris to enter your device, not to mention getting your cartridge reader dirty. Placing a dummy cart in your system will prevent filth from

    • getting in and will put zero added pressure on your pin connector. These systems and cartridges are friction based devices and personally I'd rather have a blank cart inside the system rather than an actual game. This will reduce wear on your cartridge reader as well as the cartridge itself. They're cheap and easily found on eBay.

    • Gameboy cart is generic, Game Gear cart is original.

  21. iF3DRgDPYqmBZfD6
    iF3DRgDPYqmBZfD6
    YsXFHQRooKVpCO5j
    • So you purchased a game or console that some punk kid, who's now an adult, wrote on with a marker and now you have to correct their youngerselfs stupid mistake. The inhumanity!

    • I cannot take credit for this as I stumbled upon this information on a youtube video long ago. The best and fastest way to remove marker from a cartridge is with a... Magic Erase Marker. Yes, use marker to fight marker. You'll still need some alcohol on hand but simply write over the old marker with the magic erase and give it a wipe with a paper

    • towel with a little alcohol on it. This simple method has saved me countless times and has effectively worked every time except for once.

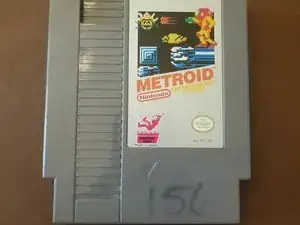
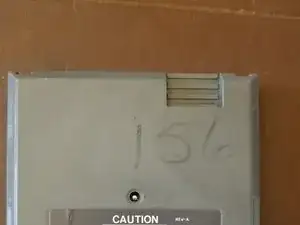
    • Metroid is the only game that's every given me problems. No matter how much magic erase or 91% + alcohol I use it just won't fully go away. If this happens to you remember persistence pays. Do the best you can until you get frustrated. When that happens stop, walk away and return to the task at hand when you're ready. Even if it's a few days or

    • weeks. The more you scrub it the more it will come off but it might take some time.

    • The more force you use can slowly begin to wear down the finish of the cartridge shell so take care here. If you look at my copy of Metroid you can see where the marker was, even if it wasn't pictured, because there's a distinct shine in that area.

    • Clean yours game stuff with soft, non abrasive materials such as Q-tips, cotton balls and microfiber cloths to prevent scratching the plastic surface.

    • Eventually I gave up on removing the ink from this shell. I purchased a blank NES cart on eBay and replaced the front shell. This is a good way to recover a damaged cartridge shell but these new ones don't fully match the OEM cart specs. It's hardly noticeable and if you didn't know it was different you may never notice. Our little secret ;)

  22. BkJ3QO3oXoqsUbnV
    BkJ3QO3oXoqsUbnV
    IVkxglBJrlht25Gv
    J1CCveP5scLLCoIY
    • Technology does a lot of great things for us. We now have the ability to print replacement replica stickers for consoles and games. Well, some of us do anyway. eBay is one of the best spots to pick these up. If you damaged a sticker during cleaning or purchased something with a damaged sticker jump online for a replacement. This is a much cheaper

    • solution than replacing the entire game which you wouldn't be able to sell at full price now anyway. I can't guarantee there's a replacement sticker for everything but chances are pretty good and if you find a seller who makes them you can always ask for a special order. Bear in mind special orders may come at a higher price.

    • Pay close attention when searching for stickers. Even the sellers typically give a disclaimer that they may slightly differ from the original design/colors.

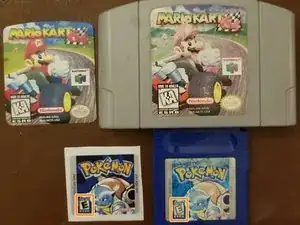
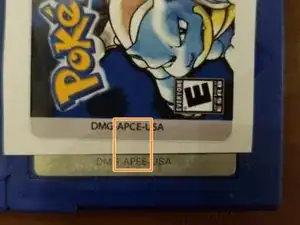
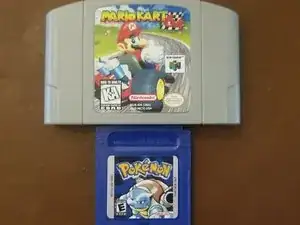
    • My Pokemon Blue replacement sticker is a perfect example of this. I observed the replica and a copy of a undamaged original sticker for comparison. The replica appears to be a perfect copy with the exception of two minor details. If you look at the left side of the game cartridges you'll notice the writing is identical except for 1 letter. A "C" is

    • in place where an "E" is located on the original sticker. Also the ESRB graphic isn't identical to the OEM sticker. I noticed this before purchase but a perfect replica sticker was 3x the price at $12. I didn't see this as a problem but it's something to consider when replacing.

    • Take care when cleaning game stickers. Both Mario Kart64 and Pokemon Blue were the error of complacency. I was in the midst of cleaning several games back to back, inside and out, and wasn't paying attention to the amount of alcohol I had put on the paper towel which was used to wipe the cartridge and sticker. Over saturated clothes will bleed

    • through your stickers. I recommend using 50% rubbing alcohol content or lower when wiping your stickers clean. Anything higher will require a little attention. Use minimal pressure and alcohol when wiping the sticker.

Abschluss

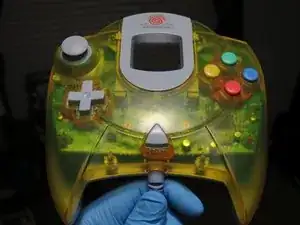
Your Sega Dreamcast Controller(s) should now look and feel like new again. Enjoy and happy gaming!

Navy Vet 2015

Mitglied seit: 26/06/15

6817 Reputation

Ein Kommentar

The final result looks so good! I’d pay you to do this to be honest, I don’t have as much time as I’d like to dedicate to this deep of a clean :(

Paulo -