Einleitung

How to repair the speakers of a Sega Game Gear.

  1. GE4hFNKZvRP6LuIs
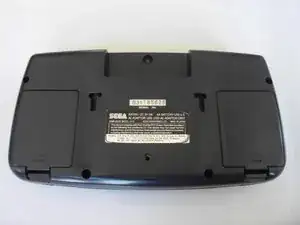
    • Place your device upside down and locate the two battery compartments.

  2. wk6apkXh6aBe4Fko
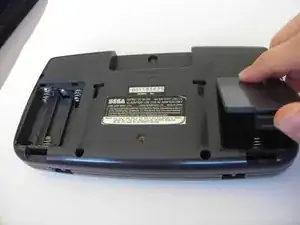
    • Press on the tabs at the bottom of the battery covers then lift up to remove.

    • Remove batteries if they are present.

  3. ZwWPJlkOVdRUkrHt
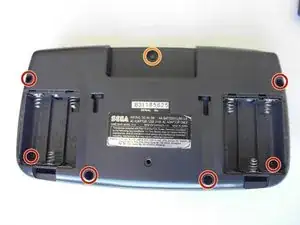
    • Remove the following screws:

    • Six Phillips screws

    • One 4.5 mm Gamebit screw

    It says remove 7 Philips screws, the picture shows 6 but one is incorrect.

    The thread below the label has no screw, but there is another one in the other battery compartment.

    The hole below the label is for a security bolt when stores put them on display.

    rs.beast -

    The screw hole in the bottom center is for the PowerBack. Also there are not 7 screws there are only 6

    Electrohacker -

  4. qlQqEHOHMsAt4FhO
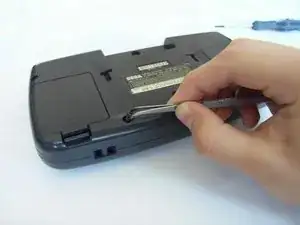
    • Use tweezers to take all other screws out.

  5. MObZFuW56bTkQXfc
    MObZFuW56bTkQXfc
    ZREuCW4S2LlsMYJq
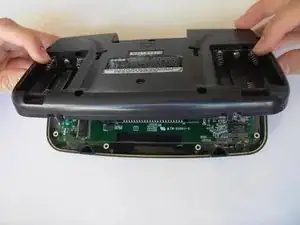
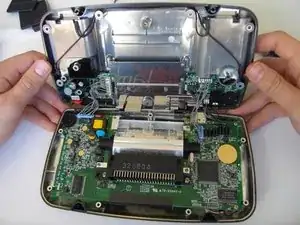
    • Gently open the case by unfolding it over the top of the Sega Game Gear.

    • Do not pull the back of the case away, as cables are connected between both sides.

  6. InIEN2SBlf6QdGoL
    InIEN2SBlf6QdGoL
    XAkFtNnNMUEqTGp2
    YPTXrRwwN3ol62RE
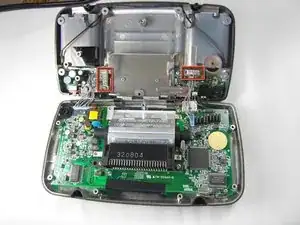
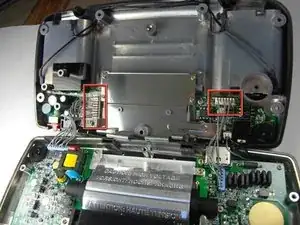
    • Carefully unplug the 2 white-tipped connectors on the top cover.

    Il faut aussi débrancher le connecteur du haut parleur (2 broches, en haut à droite).

    Arnaud Melun -

    There is a third cable on the right side of the top half in this picture which is the speaker. Unplug that too.

    Electrohacker -

  7. M4DRKso6Go6Ih3CS
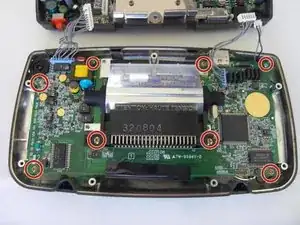
    • Unscrew the 8 Phillips screws from the logic board.

    There are 2 additional screws to remove from the motherboard to the left and right of the cartridge port's shiny metal shield's screws on my Sega Game Gear with the RED GREEN and BLUE colors on the front.

    Karl Dusenbery -

  8. R2O5DEtAI1Q6DxgM
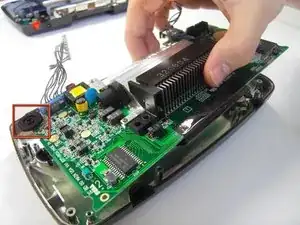
    • Slide the logic board out from under the circular black fastener at the top-left corner of the case.

  9. fo3BOBkK5PVTK6uk
    fo3BOBkK5PVTK6uk
    PEJsMhUushhVbp24
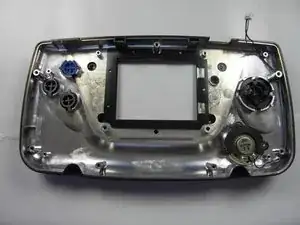
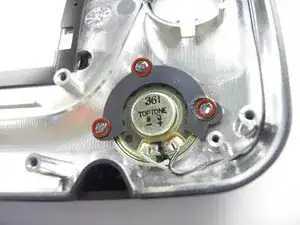
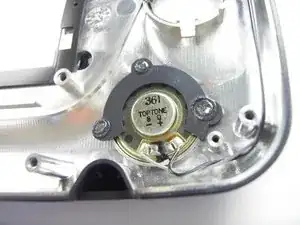
    • Removing the plastic holding the speaker to the case may permanently detach the speaker.

    • The plastic at these three locations is melted to the plastic. Pry off with caution.

    Recommendations for the prying off process? It looks like a soldering iron was taken to the points to loosen the plastic but I'm not sure

    Navy Vet 2015 -

    I found that poking around the orange/redish posts with a hobby knife worked really well. Poke a small hole where the black plastic meets the red plastic and continue doing this around the post. Once you have done that it might help to go around the post a second time pressing more firmly as to push the knife just a little further. Use your finger or plastic prying tool to pry up each side. I wouldn't recommend just taking a prying tool to each post without breaking the connection between the posts and the retaining plate as you will potentially break the plate that holds the speaker in place. This is very easy to do but it is time consuming if you're concerned with keeping everything in as close to "new" condition as possible.

    Navy Vet 2015 -

Abschluss

To reassemble your device, follow these instructions in reverse order.
Lauren Thurston

Mitglied seit: 15/04/10

415 Reputation

0 Kommentare