Einleitung

LCD screens are delicate and may crack under little pressure. A cracked LCD screen will leak and leave an inky mark that may be large enough to render the device unusable. Use this guide to take apart your Snapfon ez One and replace its broken screen.

  1. BTj2CAngDCYYbLlD
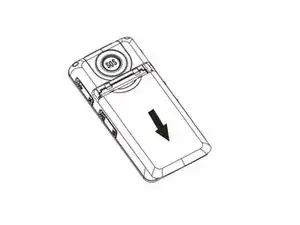
    • Turn off the phone to prevent data loss.

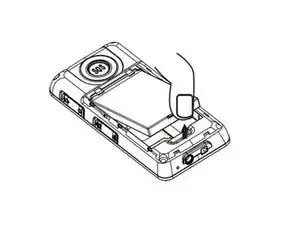
    • Press and slide the battery out to remove it.

    • Picture rights belong to Snapfon®. Picture is used for educational purposes only. No copyright infringement intended.

  2. WhDFD2MpXM1OtaTN
    • Pry the battery out with your thumb or the iFixit opening tool.

    • Make sure to properly dispose of the old battery at a recycling center.

    • Picture rights belong to Snapfon®. Picture is used for educational purposes only. No copyright infringement intended.

  3. MOmCuToAXEOZU6xS
    MOmCuToAXEOZU6xS
    OqrHjRKtrHGTLjav
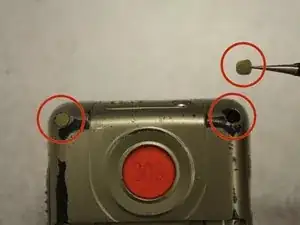
    • Remove the four rubber inserts from the screw holes using a pair of tweezers.

  4. pPPgCTbapFGZDvwr
    pPPgCTbapFGZDvwr
    dLHLw1nWDVAB1LtB
    bTPMmATYmTopFrPx
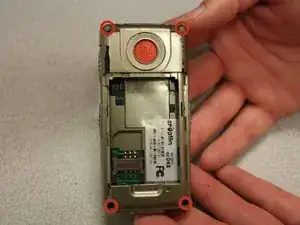
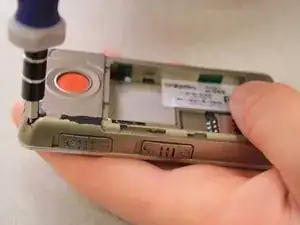
    • Remove the four 3.1mm screws in the corners with a Phillips #00 screwdriver.

  5. WTyOJfpES6hA3y2B
    WTyOJfpES6hA3y2B
    xORj1JYL5wwNeQru
    POaVSENLeUQKDBnS
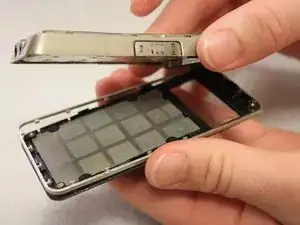
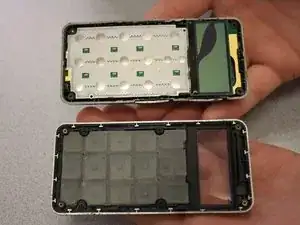
    • Separate the front case from the back case.

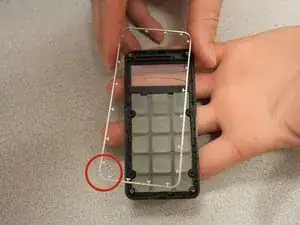
    • Remove the metal bumper from the front case’s perimeter.

  6. hVudxLb15tkiT66F
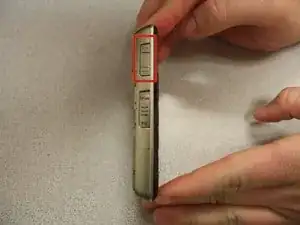
    • Pry the volume slider button out with tweezers.

    • The volume slider button may fall out during the separation of the front and back cases. This is OK.

  7. JAFAMGIn5acHZg1d
    JAFAMGIn5acHZg1d
    GK1qEcFYd6Ej1I4J
    E62vDZLTWNUTaQLp
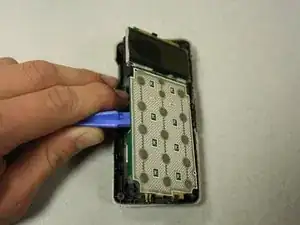
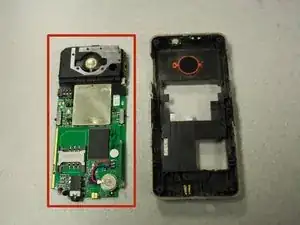
    • Separate the circuit board from the inside of the back case by prying between them with the opening tool.

    • The last picture is a view of the back of the circuit board.

  8. GNULuLUBorfVdtf5
    GNULuLUBorfVdtf5
    xFx1rOTssyjIyYvL
    AKYgIJRkJIFYkZKX
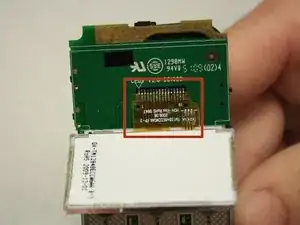
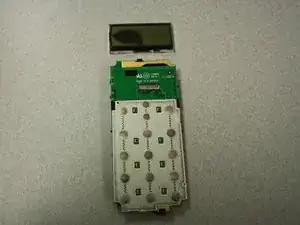
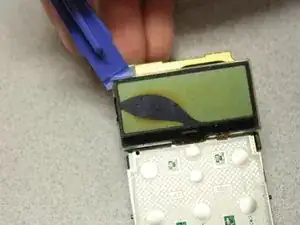
    • Pry the LCD screen off of the circuit board using the opening tool. The screen is connected to the motherboard with light adhesive, which is easy to remove.

    • The LCD screen will still be connected to the circuit board by a ribbon cable.

  9. nAQhRnMwkrEfto3x
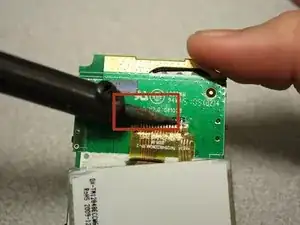
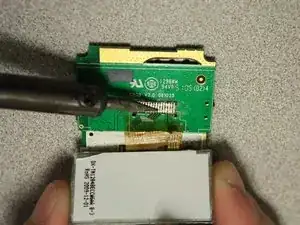
    • Use a soldering iron to melt away the connection between the ribbon cable and circuit board.

    • Be careful! High temperatures from the soldering iron may result in injury.

    • Only make contact with the solder connection so that none of the phone’s components are damaged by the heat.

  10. gAgYPfFUYTDDahIT
    gAgYPfFUYTDDahIT
    iKkLbgj1MyGdZ35E
    • Once you heat the solder connection, lightly tug the ribbon cable free. The LCD screen will be completely removed from the device.

Abschluss

To reassemble your device with a new LCD screen, follow these instructions in reverse order.

Note: you will need to use the soldering iron again to attach the new LCD screen ribbon to the circuit board.
John Bender

Mitglied seit: 26/03/14

818 Reputation

0 Kommentare