Einleitung

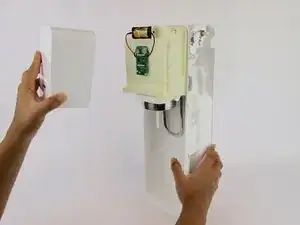
The SodaStream Source is battery operated. But If you are experiencing trouble with your device, and you have replaced the battery, it could be the microchip needs to be replaced. This guide will assist you in removing the carbonation block to access the microchip and replace it.

  1. t6HL1jgyo2tdMRKl
    t6HL1jgyo2tdMRKl
    bT6K3LivoHwQCKTN
    BKHhURnnxvo1pfld
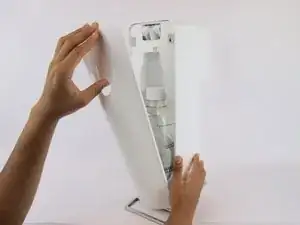
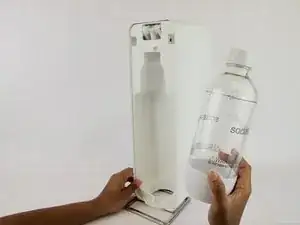
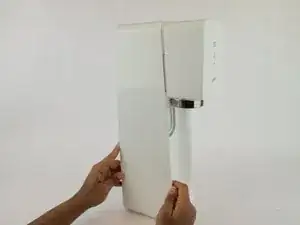
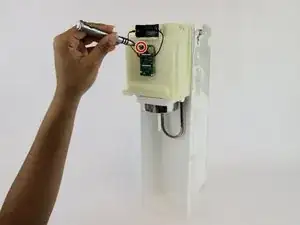
    • Remove the soda bottle and the CO2 canister from the machine.

    My machine is overflowing when i put gas

    Elaine Anja -

    Does this article apply to the Fizzi too?

    When I look at my Fizzi (that I bought secondhand), it does not have any black seal like the one shown in this article.

    Greg Harrington -

    Parts are not specified - why? You would need a replacement circuit board (PCB, not a "chip")/battery holder assembly, if indeed that has failed.

    Malcolm Noble -

  2. 6tjplN6espyZ2NSj
    6tjplN6espyZ2NSj
    PvtSA2EHZEdRW2TL
  3. hpAUZsFckQY5XBYL
    hpAUZsFckQY5XBYL
    vp54tIKFnOrTMIWP
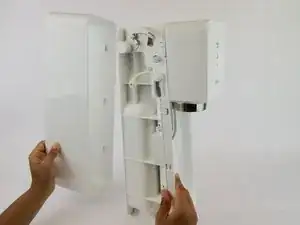
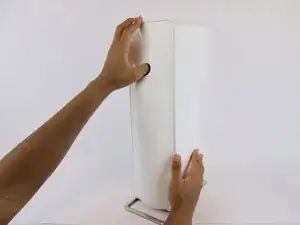
    • Pull the outer cover away from the front of the device.

    We are working on that for the last two hours without succcess. The boytom seems to slide out, but the top is totally stuck.

    Robert Coles -

    Hey Robert Coles, I figured it out. It wants to slide out backwards. You’ll notice the bottom wants to come out but the top is stuck. There is a sturdy plastic catch at the top, I managed to dislodge it by inserting a flathead screwdriver and giving it a little twist while pulling the housing away at the same time. I hope this helps! -jt

    John Tennant -

    I have the same problem.

    John Tennant -

    I’m stuck here too. I’ve pulled a lot of things apart but this has got the better of me. I can’t even get the bottom to slide. I love the way his hands are delicately poised to gently lift the back off. I’ve tried pulling so hard I’m frightened of breaking it. Pity. Such a good, well thought out manual otherwise. Stuck on step 3

    damon.ormsby -

    used two thin wood skewers to break the hold on the top. Slid them in each about 1/2” from the enter. finally released.

    Brian Runyan -

    Brian’s comment is excellent. The only additional piece of information is that the skewers should be inserted from the back. The catch is in the middle near the back. I inserted from the front which was wrong, but still worked. I left a couple of very fine marks that I think would not happen if inserted from the back.

    David Balfour -

    This step was unnecessary. I was able to slide off the front panel without pulling the outer cover off.

    Matthew Dash -

    Same for me. Jump to step4/5 first to see if it's even necessary.

    jwitt72 -

    there might be different variations within the same “model”. in my case (source), i realized that there is a tab at the top of of the housing. i pulled upwards the top of the housing, and was able to slide the housing backwards. there were 2 pairs of tracks on the sides of the housing that i thought they might have latches, but they were only guides to slide the housing. i do not how to share pictures here to show my steps

    Salam Gabran -

    This step was a real bugger. What helped was sliding a medium putty knife between the top and inner piece. The plastic snap is very near the back. They are right above the small “point” in the centre of the mechanism below it. Takes patience and let the plastic give way in time. I thought for sure I was going to bust it, and then it finally slid out like magic.

    Scott -

    Didn’t work I think they glued it shut to keep us from prying.

    Janey Kim -

    This step is only useful if you need to retension the two springs that lift the head and releases the pressure so that you don't have to lift it manually to get the bottle out.

    till_vidar -

    There are definitely different model variations. The outer metal case on my 2013 is split at the bottom as in this guide. The plastic case on my 16/17 is different an has the catch at the top rear as discussed in this thread. A gentle push up with my thumbs was enough to release it.

    Darryl Marko -

    I gave up on this step after 5 mins, but I found for my model it could be skipped and just go to step 4. For step 5, with a flathead screwdriver it came off easily and exposed the battery for replacement. Worked fine afterwards.

    jwitt72 -

    There is no need for steps 1, 2 and 3. Start at 4, and just remove the two screws from the front square that you push down. Use a tool to firmly pull the cover off and go ahead and replace the battery. Put back the cover, the two screws and you are done!

    MarianaFre -

  4. dX5vjZPcmfluuwyU
  5. dgKEYRrRREAHZQl4
    dgKEYRrRREAHZQl4
    cbjZB4uQSsKKc2uJ
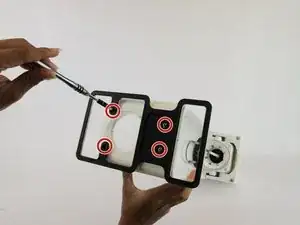
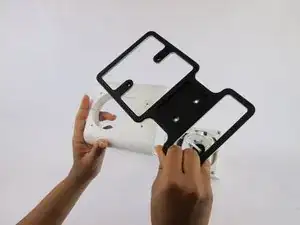
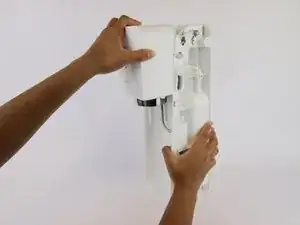
    • Firmly pull the front cover off.

    • This piece is difficult to remove and requires force. It may help to use a wide, thin object to pry it off (like a Jimmy).

    The plastic spudgers that are supplied for mobile phone or tablet screen removal are perfect for this job. Use 2 - 1 on each side.

    David Balfour -

    Once the 18.2 mm screws are removed, I just pulled the black plastic outer cover a couple mm away from the white plastic internal block on each side to release 4 of the 6 plastic catches, and then rotated upward to release the last 2 plastic catches.

    Tony Hartshorn -

  6. p6lDISxtKwLFQkHJ
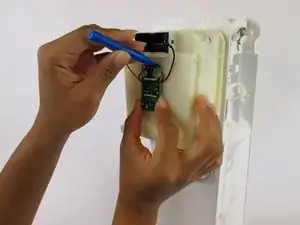
    • Remove the 9.1 mm screw from the microchip.

  7. t3ITyogXa5aNxJeV
    t3ITyogXa5aNxJeV
    FAwEqdRXhErMHO1I
    rawuiJJAKeTqmSNq
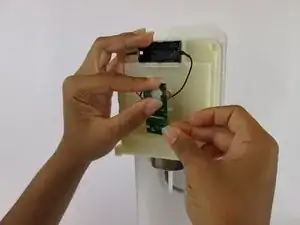
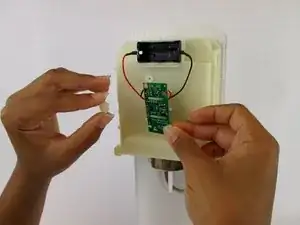
    • Wedge the plastic spudger between the microchip and the glue dot until the glue pops off.

  8. Pat5XV5tjxiH5LoI
    Pat5XV5tjxiH5LoI
    Tu2WHWecuMbrikEo
    Ouu4RpbqnJTjGU4v
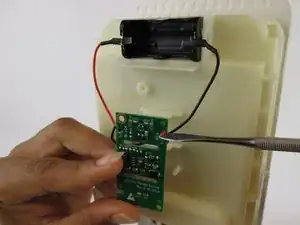
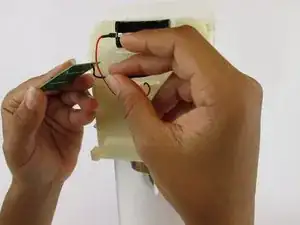
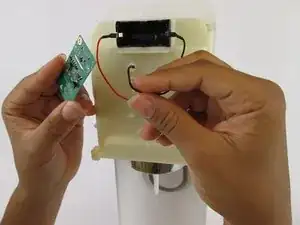
    • Use the spudger to lift the edge of the wire and pull the wire out of the microchip.

    • Use an ESD tool such as a nylon spudger when working with potentially dangerous electronics.

    • While reconnecting the wires, you will need a hot glue gun to reattach the wire ends to the new chip.

    "While reconnecting the wires, you will need a hot glue gun to reattach the wire ends to the new chip." NO: you will need a soldering iron to remove and re-solder the wires to the circuit board. Hot glue will just cover it up as well as melting the solder with no way of knowing if it has joined properly. More to the point - why remove the wires at all? The battery holder unclips from the unit.

    Also apart from the battery, the most likely reason the lights aren't working is that the rare-earth magnet that switches the circuit on has either corroded or been lost during disassembly.


    Malcolm Noble -

Abschluss

To reassemble your device, follow these instructions in reverse order.

Angela Mossgrove

Mitglied seit: 20/02/17

988 Reputation

Ein Kommentar

Great information, but is there someone out there offering this repair as a service, I’m not motivated enough to do this myself and happy to pay someone to do it for me
matteo barnett -