Einleitung
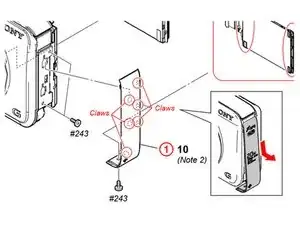
Replacing the LCD is relatively easy and can be done with a 26 Bit Driver Kit and a Prying tool. Consultation with the service manual is recommended (Device schematics start at page 25): https://docs.sony.com/release/mdsm/98346...
Werkzeuge
-
-
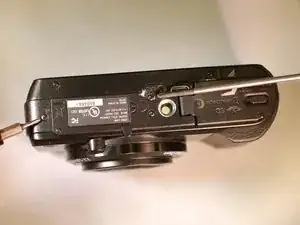
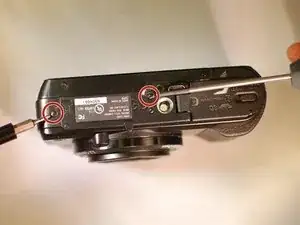
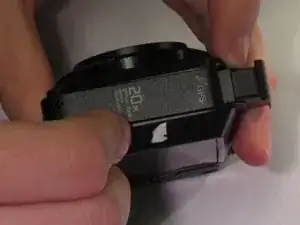
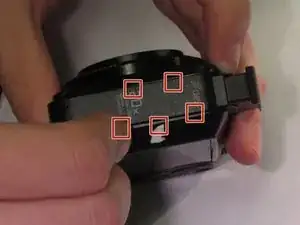
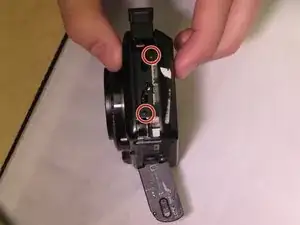
Remove these two black M1.4 X 3.5 Phillips head screws.
-
The third, unmarked screw does not need to be removed at this time.
-
-
-
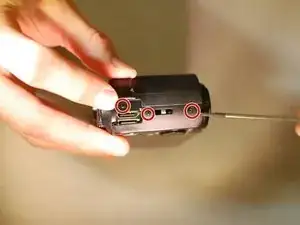
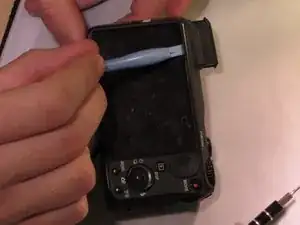
Orient the device so the LCD is facing you, and the hdmi cover is facing up ("left view).
-
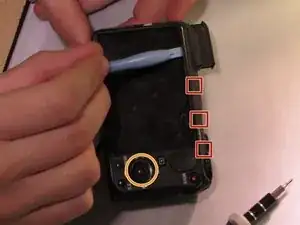
Remove these three black M1.4 X 3.5 Phillips head screws.
-
-
-
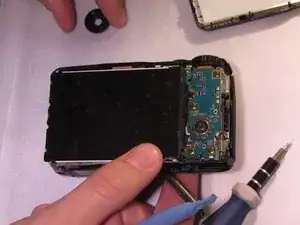
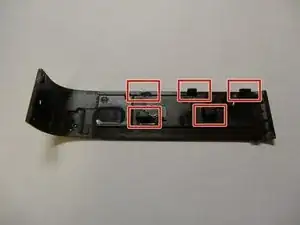
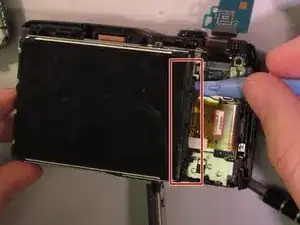
Use the plastic opening tool with a prying motion, going between the case and the LCD, from the middle of the LCD to the right of the device, undoing the claws retaining the back.
-
-
-
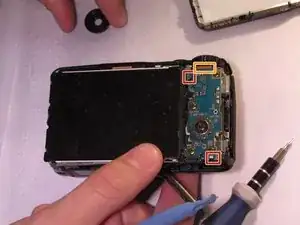
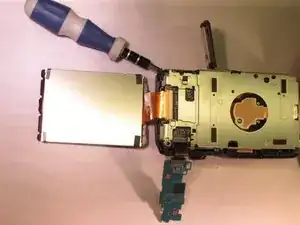
Unhook the small printed circuit board by gently pressing the board towards the top of the device and lifting up.
-
-
-
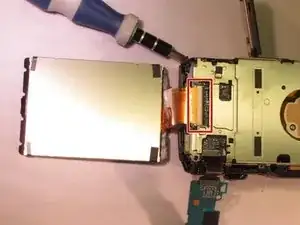
Using the plastic opening tool to lift the black retaining clip up to disengage the ribbon cable. Then gently pull the ribbon cable to remove.
-
To reassemble your device, follow these instructions in reverse order.
2 Kommentare
This tutorial is great, but I think it misses one fundamental part out. The LCD screen you are removing is actually clipped into a backlight panel. Some LCD screens that you can buy as replacements on eBay don't actually come with the backlight panel installed and it can be very difficult to remove the backlight panel from your old LCD screen to your new one if your new one didn't come with one.
To anyone who is reading this tutorial, when buying a replacement LCD for your camera, always make sure that it comes with a Backlight panel too. Mine didn't so I can't really use it and I've had to order one from China on eBay. The description of the LCD screen on eBay should include the fact that the screen comes with a backlight. Watch this video for more info on backlight panels: https://www.youtube.com/watch?v=pWirT0cK...
Thanks dude - You saved my device with this usefull tutorial
Daniel Evens
