Einleitung

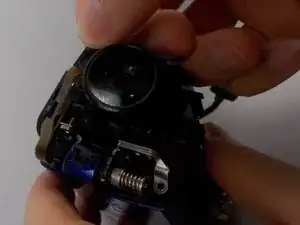
The replacement of the lens is needed if your videos are not coming out the way you want them to. If you notice that there are dirt or anything unusual on the lens it will ruin every video you take in the future, unless the lens is replaced.

  1. Qhhfjb2YwsCyGdle
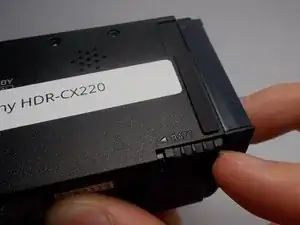
    • Push in the battery indicator.

  2. e4QQHHAZGTbgIhXY
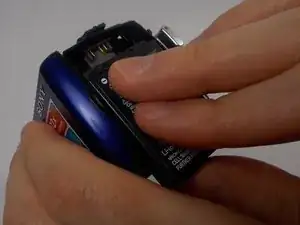
    • Slide the battery out of the slot.

    • To put the battery back in, line up the battery's metal part with the camera's and slide it in.

  3. yfFkAcWRscTf3J6s
    yfFkAcWRscTf3J6s
    pbAH5JIO5THqZedG
    DKW4eoFXihydQq1Q
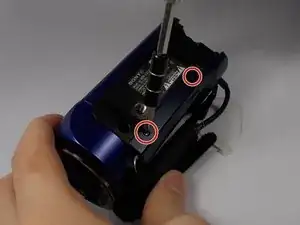
    • Use the Phillips #0 screwdriver to remove the two 5mm screws.

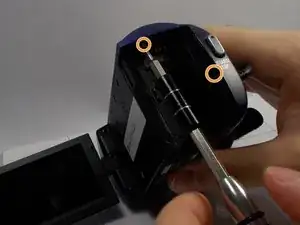
    • Use the Phillips #0 screwdriver to remove the two 5mm screws.

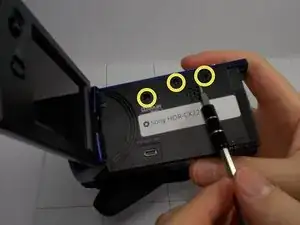
    • Use the Phillips #0 screwdriver to remove the three 5mm screws.

  4. UCJuFCHUBbwt1Muo
    UCJuFCHUBbwt1Muo
    dPBDOeXFO6gbrqIx
    GVVihTqFvIKRYcGw
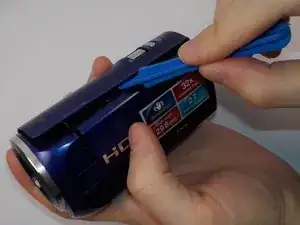
    • Use the plastic opening tool to loosen the plastic case of the camcorder.

  5. hWCtosvWZOAF455j
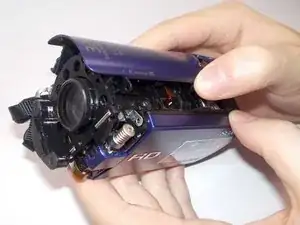
    • Use your hands to remove the plastic case.

    • Gently pull on the case not to damage anything internally.

  6. aOBHaA3DIhmdI4QJ
    aOBHaA3DIhmdI4QJ
    HJwJCaK5SwidsFvI
    pFHWcDVFKQZnrOMh
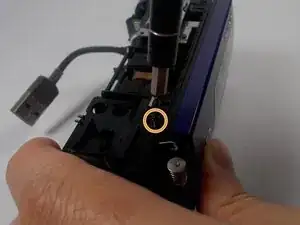
    • Use the Phillips #0 Screwdriver to remove the 5mm screw

    • Use the Phillips #0 Screwdriver to remove the 5mm screw

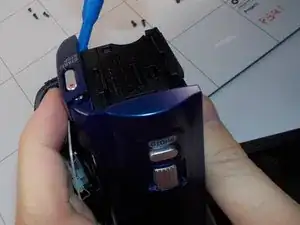
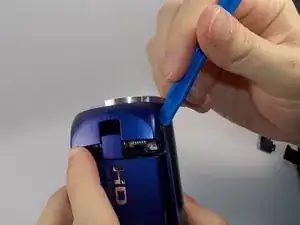
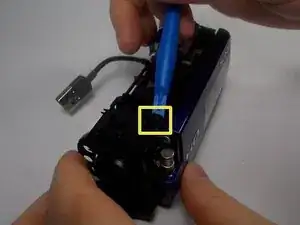
    • Use the Plastic Opening tools to unhook the highlighted area.

  7. jBSZstoCMVMZULPv
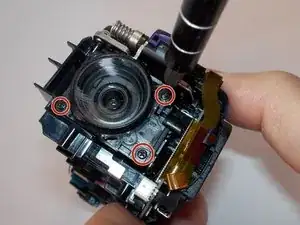
    • Remove the 3 (4mm) screws on the front of the lens using the Philips #0 Screwdriver.

  8. cLe65GCZpijP3OCN
    • Remove the lens and clean it if needed.

Abschluss

To reassemble your device, follow these instructions in reverse order.
Keven

Mitglied seit: 11/03/16

811 Reputation

0 Kommentare