Einleitung

In this guide you will work through the process of removing the lens from the camera. This involves removing many moving parts of the camera, as well as some wiring and large amount of casing. This will, however, allow you to clean the lens more directly.

  1. Iji2D2VEOH3PYuVM
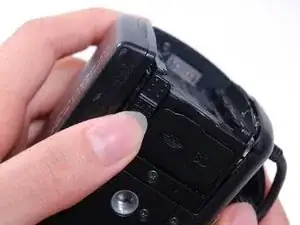
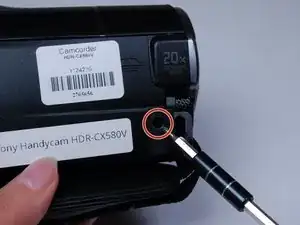
    • Locate the slider labeled "BATT" and pull it back from the battery with your thumb.

  2. rWLvfV1crFurZDRo
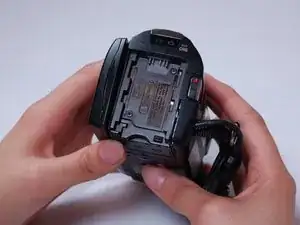
    • At this point, you should be able to remove the battery by simply lifting it from the camera.

    • The camera provided for guide-creation did not include a battery. However, the battery position should be the same.

  3. qxckaaRUZfUmS4Mc
    qxckaaRUZfUmS4Mc
    U4lIDbRw2aKuTXvR
    ER2nAkbDRy3qsAEq
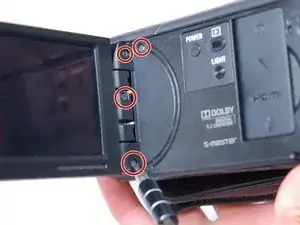
    • Use the Phillips #00 head to remove the following 5.5mm screws on the left-hand side.

  4. rVeFFeTjwCBiOqfb
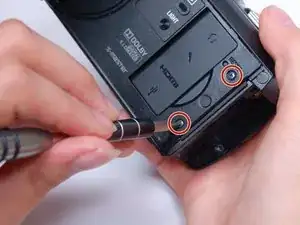
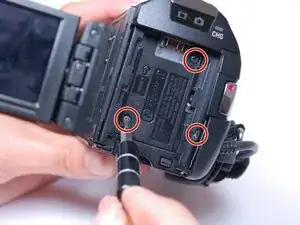
    • Use the Phillips #00 head to remove the following 5.5mm screws on the empty battery socket.

    In this Step 4, a fourth 5.5mm screw is under the lip near the battery contact

    MacGyverRick -

  5. uhtaPKBWtjERgoBe
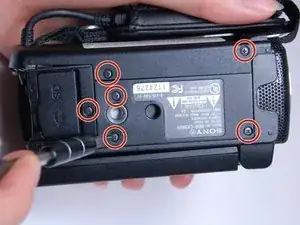
    • Use the Phillips #00 head to remove the following 5.5mm screws on the bottom.

  6. bkiAcmewOqH2XBiM
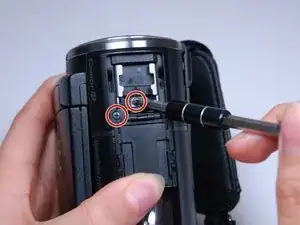
    • Fold back the hinging panel on the top of the camera located near the lens.

    • Use the Phillips #00 head to remove the following 5.5mm screws on the top under the hinging panel.

  7. gnScAAKy4DpfiwQy
    gnScAAKy4DpfiwQy
    lOi6eCNWr1N1QLwU
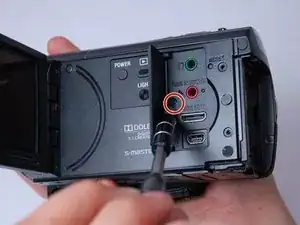
    • Slide back the cover for the DC and A/V ports on the right-hand side.

    • Use the Phillips #00 head to remove the following 5.5mm screws underneath the cover and on the right-hand side.

  8. IMK3ZRwABfnIumQ4
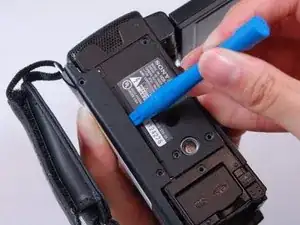
    • Use the plastic opener tool to loosen the casing on the bottom and the right-hand side.

    • At this point, the right-hand side should simply come off, although it will still be connected with internal wiring.

    • Be delicate with the wiring still attached to the side casing until you have access to removing them later.

  9. vaqvXSH5GalUUHev
    vaqvXSH5GalUUHev
    Jf2t6Mn1IDqOGKUd
    xUZdR2Yk1t3SDUMb
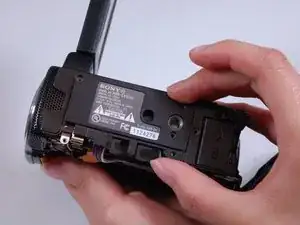
    • Carefully remove the bottom casing with your fingers.

    • Be careful not to loose the small metal stand-mount pieces that lay underneath the casing.

  10. 5nMwRSL1EtekYEpg
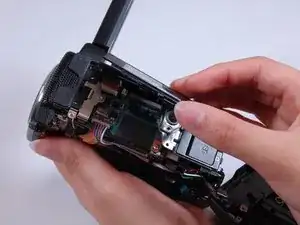
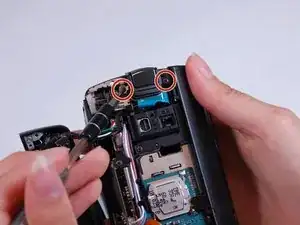
    • Look at the right side of the camera (the side with the recording button) while holding back the detached casing.

    • Use the Phillips #00 head to remove the following 5.5mm screws near the recording button.

  11. ZPNRpvdmIUkQBI2X
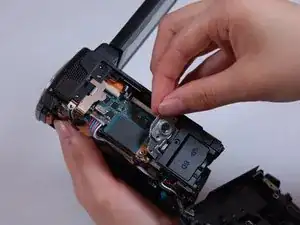
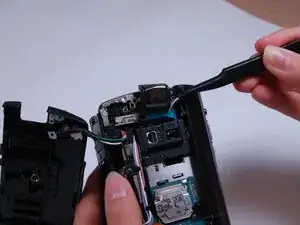
    • Use the curved tweezers to carefully detach the blue ribbon cable connector from the body of the camera.

    • The recording button and its blue ribbon cable connector should become detached from the body, but remain connected to the top casing.

  12. R6rNL3xXpwY1NJRY
    R6rNL3xXpwY1NJRY
    LNAVBVwrIfKWFSJT
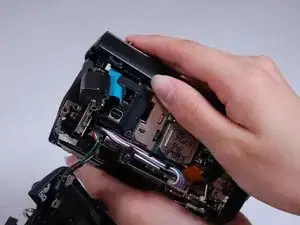
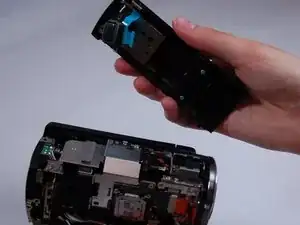
    • Pull off the top casing by lightly grabbing either side and pulling towards the back of the camera.

  13. IkVwUaCZiBDvUAjZ
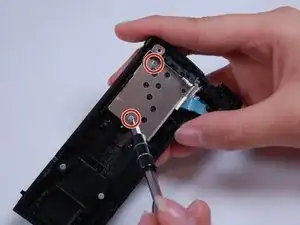
    • Use the Phillips #00 head to remove the following 5.5mm screws on the inside of the top casing.

  14. wOGMusPWK1KQbV1v
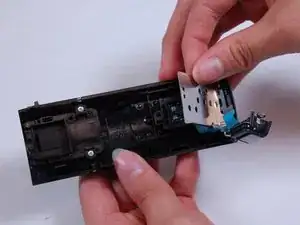
    • Carefully remove the metal frame from the top casing.

  15. cjguW4OkBxX33SSN
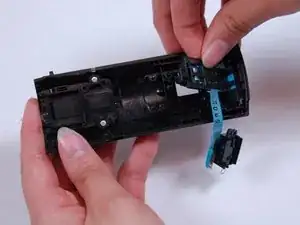
    • You are now free to remove the recording button, as well as its connection strip.

  16. k3SfWFE6RFgXFwOD
    • Use the Phillips #00 head to remove the following 5.5mm screws on the right-hand side near the lens.

  17. g5dPM35foM4nLopd
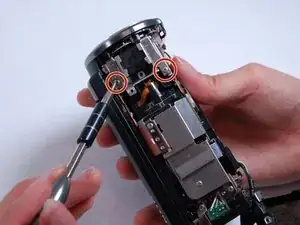
    • Use the Phillips #00 head to remove the following 5.5mm screws on the top near the lens.

  18. rKXQHpJCkgVlCBLB
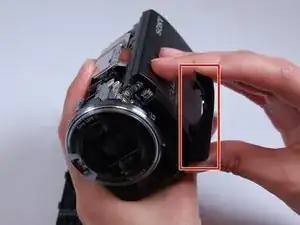
    • Carefully pop off the casing strip on the camera's left-hand side near the lens.

  19. jAqPpkSYiNCDCZKo
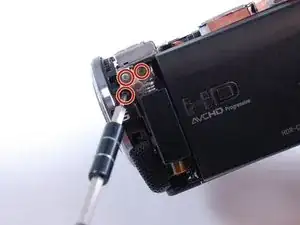
    • Use the Phillips #00 head to remove the following 5.5mm screws underneath the casing strip.

  20. eSMBR1OunUVDSVtU
    eSMBR1OunUVDSVtU
    T6VnOqfbtAmGnAFj
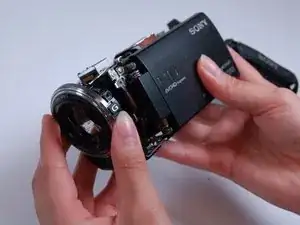
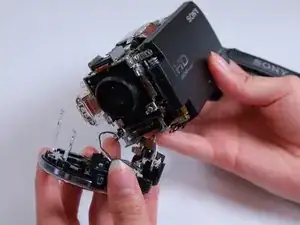
    • Carefully pull the lens cover and shutter assembly off of the front of the camera.

    • Do not pull the the wires out too strongly. Be sure to remove them from their base where they attach to the camera's body.

  21. mfVtNIJJN55nQeO4
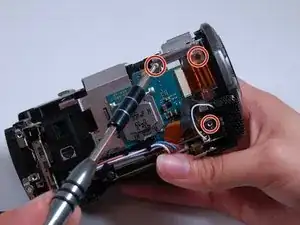
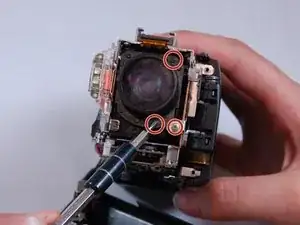
    • Use the Phillips #00 head to remove the following 5.5mm screws on the lens shell.

    In Step #21, a third lens-holding screw, seen in upper left is to be removed.

    MacGyverRick -

    Once lens is lifted up and away, three 5mm steel springs remain, held by gravity, on pins. Careful of rolling away, place aside each one, separated to avoid coils intertwining.

    MacGyverRick -

    The three lens screws seem slightly longer, perhaps at 6.5mm.

    MacGyverRick -

  22. KnXYxRGd2hKuPyQZ
    KnXYxRGd2hKuPyQZ
    S4Be16eZstQ2Zu13
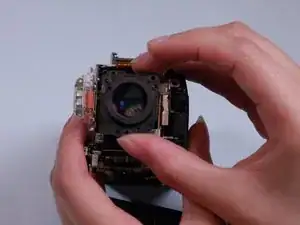
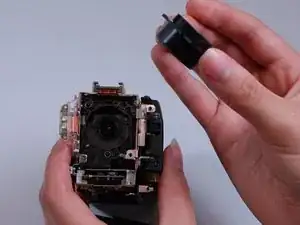
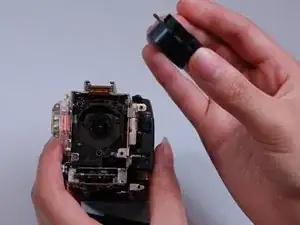
    • Carefully remove the lens from the body of the camera.

    • Make sure to avoid touching the lens itself directly in order to prevent scratches or dirtying.

    In Step #22, during reassembly, this photo shows the lens’ “back”. Flip to match Step #21 orientation.

    MacGyverRick -

Abschluss

To reassemble your device, follow these instructions in reverse order.
Derek Fritz

Mitglied seit: 21/03/17

378 Reputation

0 Kommentare