Einleitung

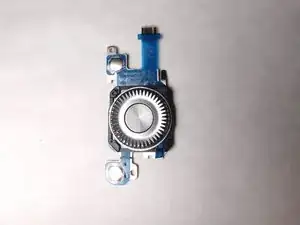
The removal of the main navigation button involves removing the rear casing and carefully prying off the button as to not damage the sensitive components.

  1. WscRpGKWn5mNIN1t
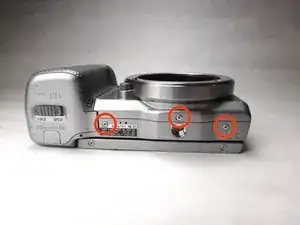
    • Remove the three (3.5 mm) screws from the bottom of the camera with the Phillips screwdriver.

  2. nDfBy5FVmVW1BRX3
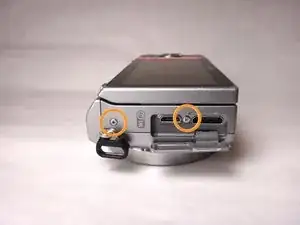
    • Open the HDMI port, and remove the the two (3.5 mm) Phillips screws exposed on that side.

  3. AWNMQMlFEXZvexWq
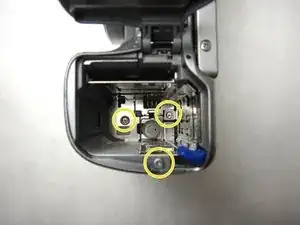
    • Remove the two 4mm screws from the interior of the battery pack, and one 3.5mm screw from beside it.

    We already removed the screw next to battery lock. The one close to blue plastic lock.

    Harbert Wolfstein -

  4. mANZrW3li6YfmLJE
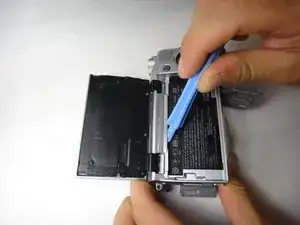
    • Looking at the bottom of the camera, use the spudger to lift the rear case away from the camera body.

  5. XL5jT6MFbEhFjHYX
    XL5jT6MFbEhFjHYX
    YauX3jYbtSM6Guda
    • Using the spudger again, carefully pry from the top of the camera to remove the back frame.

    • The back frame is fragile, so use the spudger gently.

    Pull the back pannel up starting at the bottom of the frame. There is a little hinge at inside the frame the top that will move up and make it much easier to remove the back panel (almost without effort)

    meertdavid -

    The most difficult part of this disassembly is this plastic part. Very thin, flimsy and tend to easily break. Pay extra attention when prying this frame, especially the top part, between the screen hinges.

    Harbert Wolfstein -

    Update to my previous comment:

    Remove the top case part where the shutter button, play button etc so that flimsy plastic frame can come out easily.

    Harbert Wolfstein -

  6. yXdLUvJs3kvxCNbr
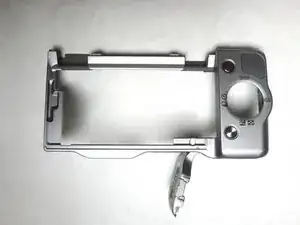
    • The back case should now be removed and look like this.

    Does this part contain battery stopper?

    Gennady -

    I guess not. battery stopper is on the body.

    Chau Jieying -

  7. wVZUwnNNaBKEyiwE
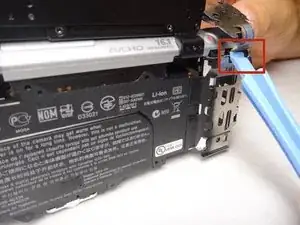
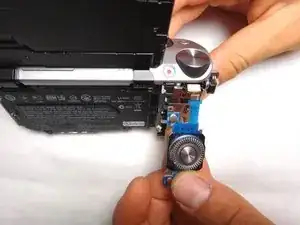
    • Use spudger to pull the lead out from its housing.

  8. 4yVHWDrDTjaYYBWv
    4yVHWDrDTjaYYBWv
    evOQbcTWvWHSV44v
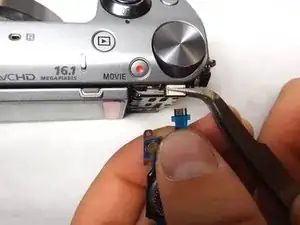
    • Squeeze the lead with the tweezers and hold the lead teeth tightly with your fingers. Pull straight out to disconnect.

  9. bWUtjDSQXKvbTiEZ
    bWUtjDSQXKvbTiEZ
    IUseoePpE5RJIvxv
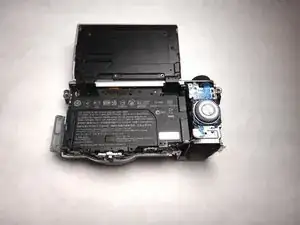
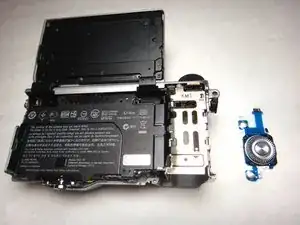
    • The navigation button component should now be separate and able to be replaced with new component. The camera and navigation button should appear as shown.

Abschluss

To reassemble your device, follow these instructions in reverse order.
Emily Trujillo

Mitglied seit: 08/04/14

1114 Reputation

0 Kommentare