Einleitung

Please try our Troubleshooting Guide before replacing your fan. This repair guide will outline how to remove and replace the fan assembly in your Sony Vaio VGN-SZ120P laptop.

Hazards

Keep out of reach of children and pets.

DO NOT attempt to teardown or repair your device under the influence of drugs or alcohol.

DO NOT ingest any parts of the system.

Use the correct tools as stated in the tools section.

DO NOT touch any gold connectors on interior or exterior of the system.

Make sure system is unplugged and turned off before performing any maintenance on the system.

  1. ZpQTUALkgsuxBXHW
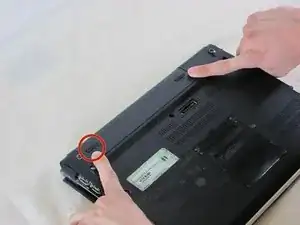
    • Set the computer display-side down.

    • Unlock the battery by sliding the port-side latch to the 'unlock' position.

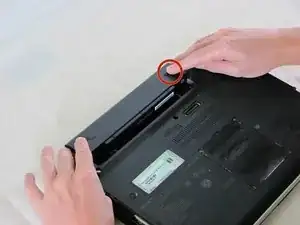
  2. 4lNyMBQ6T2ZZXKx5
    • On the opposite side of the battery, press the release latch and slide the battery away from the main body to remove.

  3. IOLNCNm2H2dLEI4h
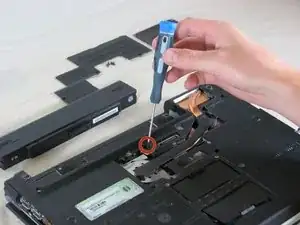
    • Ignore the removal of the heat sink and memory panels as depicted. They do not need to be removed for the completion of this guide.

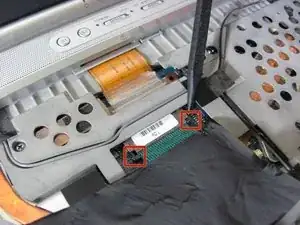
    • Remove the Torx security screw near the center of the battery-side edge.

  4. 2XX5Y4cBDb4ALT6H
    2XX5Y4cBDb4ALT6H
    gPnjeJUjMfU2nV66
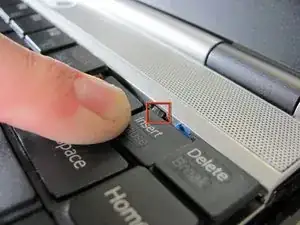
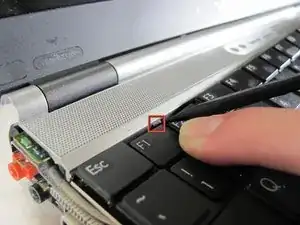
    • Press the tabs on each side of the display-side of the keyboard with the flat edge of a spudger.

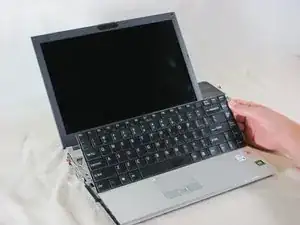
    • Pull the keyboard toward the mouse pad and gently lift up.

  5. TBVDnjS2TlqLmvMM
    TBVDnjS2TlqLmvMM
    fOlJtWfEoinxwAak
    • The keyboard is still attached by ribbon cable, don't try to remove the keyboard entirely yet.

    • Disconnect the ribbon cable by pressing the tabs on either side of the connector. Pull the cable out parallel to the connector.

    • Remove the keyboard.

  6. ikLxlMbi6lQbMPhT
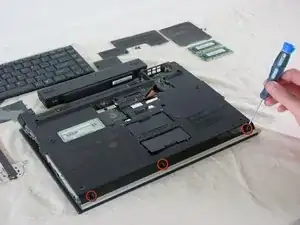
    • Turn the laptop upside down.

    • Remove the three screws from the front mouse panel located on the bottom of the laptop.

    • Carefully flip the laptop back over. Remove three more screws from the top securing the panel. A ribbon cable will still be attached to the panel when you remove it.

  7. GDKvsSZL51ZWreNx
    GDKvsSZL51ZWreNx
    tgkoGO1UUtoStq11
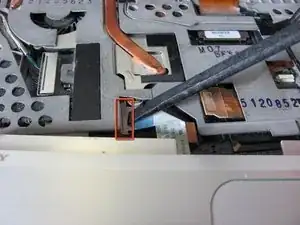
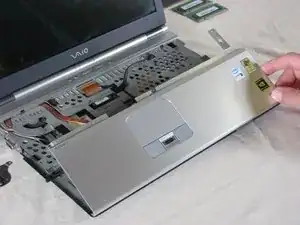
    • Lift the mouse assembly just enough to access the connecting ribbon cable.

    • Lift the ribbon cable lock to remove the cable.

    • Carefully remove the mouse panel assembly and set aside.

  8. sIERsE1JuysDXedw
    sIERsE1JuysDXedw
    QNfYWyFwkbGlwQMB
    LTEQcdxYZxkqRbGI
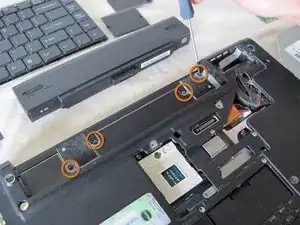
    • Remove the four screws from the underside of the computer. These screws are located underneath where the battery sits and secure the top keyboard panel.

    • To remove the panel below the screen, press up on the two tabs holding the panel in and lift up. The panel should pop off.

    • Before proceeding, remove all black tape holding down wires and other cabling.

  9. ZMif2JqUDsyssIAt
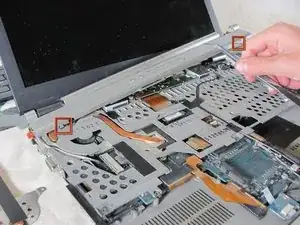
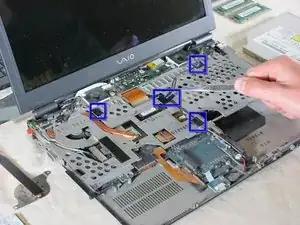
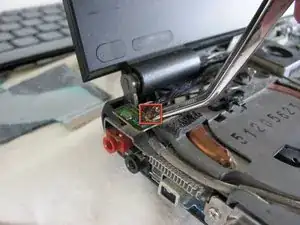
    • Pop off the antenna using a pair of tweezers.

  10. FKIW4UKamChBJQmf
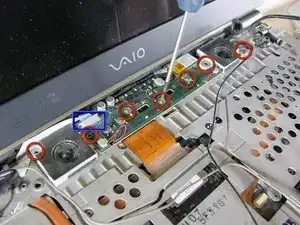
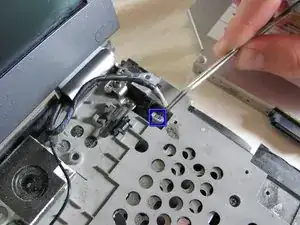
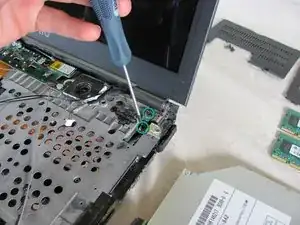
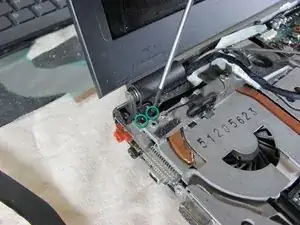
    • Remove the seven philips screws holding the speaker assembly in place.

    • Before removing the assembly, disconnect the ribbon cable located at the top left corner of the assembly.

    • The speaker assembly will come off with the display assembly.

    Definitely not 7 screws, could be 6 but I am guessing it was 2 like on the picture, the rest was removed before and the 3rd from the right is a push-button :P

    I still need to do the reassembly, I will try to pay attention to these details and take some pictures to improve the guide.

    oppermafkees -

  11. GDPC1isQknvLMKoB
    GDPC1isQknvLMKoB
    Wc1ULIUSpGgBTjT1
    • Caution: Be careful of snags when pulling up assembly and speakers.

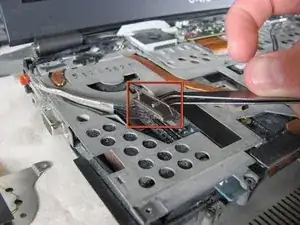
    • To remove the VGA cable, lift up on the metal bracket and gently lift the connector off the logic board.

    • To remove the webcam cable, lift up the connector from the logic board gently.

  12. JZ6lOi1q2rVYwXQS
    JZ6lOi1q2rVYwXQS
    66YZEptRb1tglFOP
    iYvYyJBOOYTTJmea
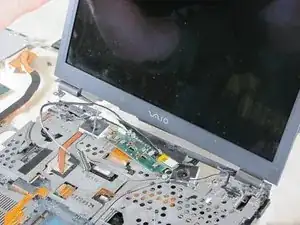
    • Unscrew the four securing screws, two on each side of the LCD.

    • Carefully remove the LCD. The speaker, bluetooth, and webcam assembly will come up with the display assembly.

    • Caution: Be careful of snags when pulling up display and speaker assemblies.

  13. 6PZy6cCJKNuY1FVf
    6PZy6cCJKNuY1FVf
    iBDRgLxIIhAMjFlK
    • Remove screws from keyboard tray

    • Remove keyboard tray

    Detach SD card slot cable from the motherboard by gently lifting. This will allow.

    Michal -

    Detach speaker card ribbon. This is very tricky. Connection on the motherboard side is solidly taped, but it looks like the easier part to detach.

    Michal -

    There are multiple keyboard tray screws.

    Michal -

    Side mouldings need to come off/be pulled outward in order to be able to lift off the keyboard tray.

    Michal -

  14. rMN6K1sqaGkIpEMl
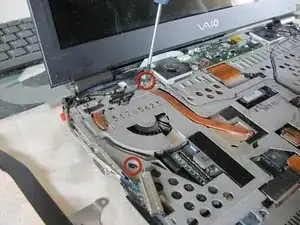
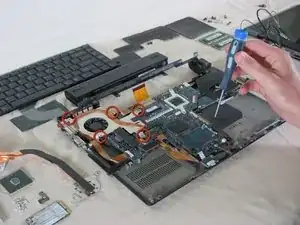
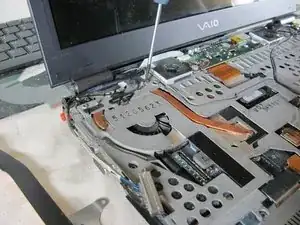
    • Caution: When removing the fan, be careful to not tear the attached ribbon cable.

    • Unscrew all five screws from the internal fan.

    • Gently remove the internal fan.

    Take heed!

    First remove the mainboard screws and take note of what goes where.

    The heatsinks will come off when you remove the screws securing the fan and you will have to clean them and reapply thermal compound.

    Far from done here..

    TAKE NOTE OF WHAT YOU REMOVE NEXT, you will need the notes when you put it together again.

    oppermafkees -

Abschluss

To reassemble your device, follow these instructions in reverse order.
Colin Glaves

Mitglied seit: 10/04/10

458 Reputation

0 Kommentare