Einleitung

You will need to use a source of heat. You may need to buy adhesive for the reassembly. Make sure the phone is completely powered off before opening the device.

  1. kIN5CoNHdTnkmVhv
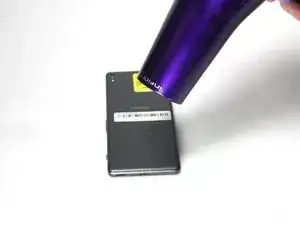
    • Apply heat on the back surface of the phone.

    • Continue to heat the device as needed throughout the replacement process.

    • The device can get very hot, so be careful when handling it.

  2. 2GTniACyHUITh6Yt
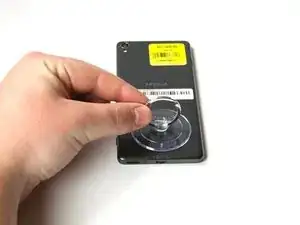
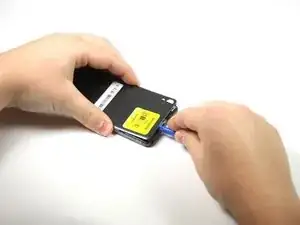
    • Stick the small suction cup on the bottom half of the back surface of the phone.

  3. yD4lHsbQDW2kHd3E
    yD4lHsbQDW2kHd3E
    VGU5Tf1JQYcj5s1d
    vgYDRsIHAifmGVpD
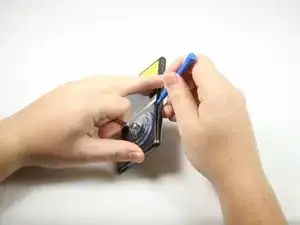
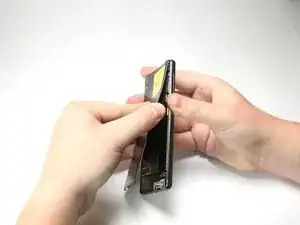
    • With the bottom of the device facing you, lift up on the suction cup handle.

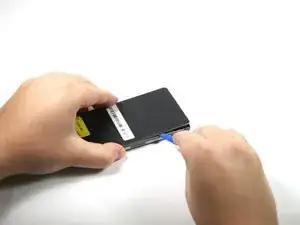
    • Use the plastic opening tool around all sides to pry off the back cover.

  4. ZMiJMIOBDMcZkA1Z
    ZMiJMIOBDMcZkA1Z
    pA3LNNHGfOpTEKXl
    MjbBvLZ1JAOYQ5H3
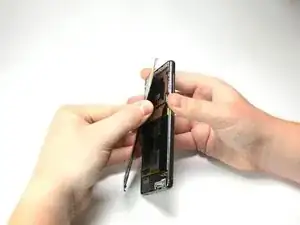
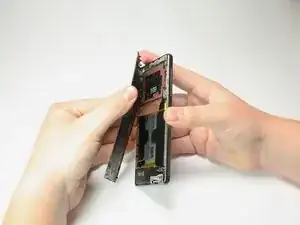
    • Pull the back of the phone case away from the device.

    • You will hear popping sounds of glue being ripped from the phone.

    • You will hear the sound of the back unlatching from the device.

    • You will need to apply adhesive or glue along the device to have maximum seal in reassembly.

    • RAF antenna may be attached to the back cover upon removal.

  5. ysUSW2uwbWScyBFW
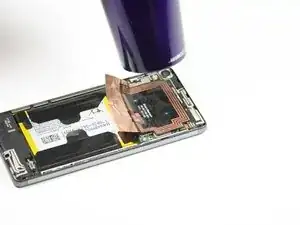
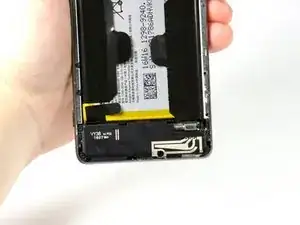
    • Apply heat to the copper RAF antenna.

    • This step and the following step only apply if the RAF antenna does not come off when taking the back cover off.

    Where can i buy this copper raf antenna

    mhel nival -

    I also need it for my phone I kinda ripped it apart oops ?

    Tiybah -

    Mike J - I found that simply raising the edge overlapping the battery connector gave sufficient room to disconnect the battery so no need to remove the antenna and risk tearing!

    Mike Jurkiewicz -

  6. pDCsBfXjVrTxRyaX
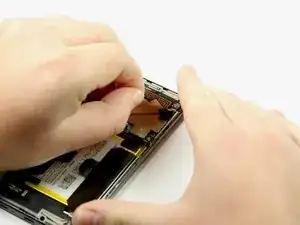
    • Peel back the RAF antenna.

    I’ve ripped the copper part of this would I be able to get a new part or will the phone not work with out it?

    Tiybah -

  7. duoIditeQkJTRDFf
    duoIditeQkJTRDFf
    vuDsvmDF11W3mxxJ
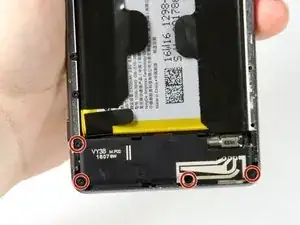
    • Remove the four 4mm screws holding the loudspeaker in place with a Phillips #00 screwdriver.

  8. UQPTqQlVjcve2tMZ
    UQPTqQlVjcve2tMZ
    UaYMx1rfCXRNccXp
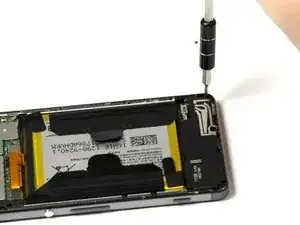
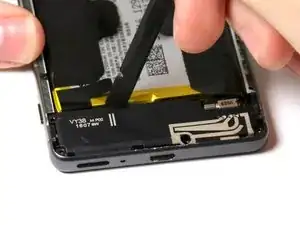
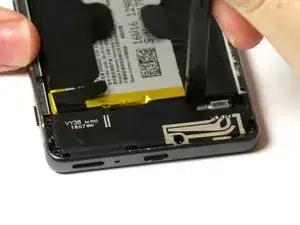
    • Push back the two retaining tabs on the top of the loudspeaker with the spudger.

  9. bjDaJHIXBVUvdNlK
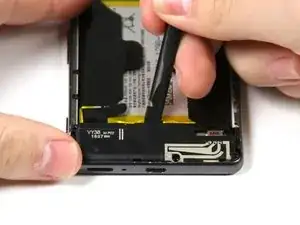
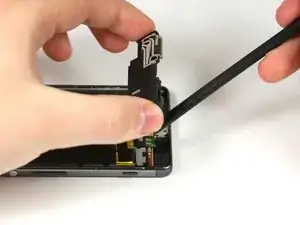
    • Pry the loudspeaker up with the spudger.

  10. jIe2RHDRwSvuOsGS
    • Remove the loudspeaker with your hands.

Abschluss

To reassemble your device, follow these instructions in reverse order.
Stephen Rock

Mitglied seit: 18/04/18

230 Reputation

0 Kommentare