Einleitung

Diese Anleitung hilft dir Schritt für Schritt durch den Prozess zum Akku wechseln für dein Sony Xperia Z3 Compact.

  1. QSvvMjjJIQdjjIQg
    QSvvMjjJIQdjjIQg
    L4RFHZ66iqAfr45s
    YptMYDDkKoJJvUXE
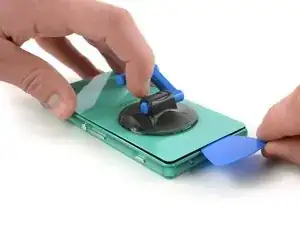
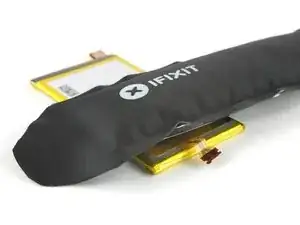
    • Erhitze die Rückabdeckung deines Geräts mit dem iOpener. Dadurch weicht der Kleber darunter auf.

    • Nutze den Saugnapf, um die Abdeckung anzuheben und stecke ein Plektrum in die entstandene Lücke.

    • Ziehe das Plektrum vorsichtig einmal um dein Gerät herum, um den Kleber zu lösen.

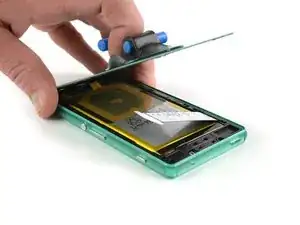
    • Mit dem Saugnapf solltest du nun in der Lage sein, die Abdeckung abzulösen.

  2. kYqurXC1QQqyYQ2D
    kYqurXC1QQqyYQ2D
    ZLEcQtvXAEWWKfFB
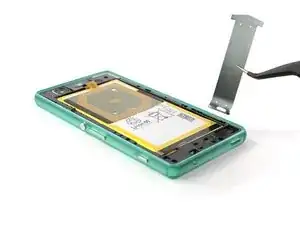
    • Mit einer Pinzette kannst du das Modelletikett entfernen, das rechts am Rahmen befestigt ist.

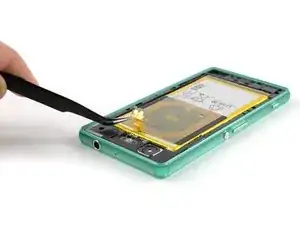
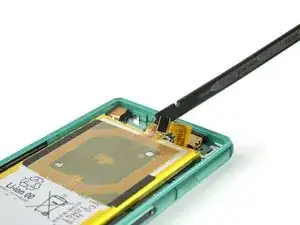
    • Das Kabel der NFC-Antenne kannst du ebenfalls mit einer Pinzette lösen.

  3. vdTDeTqjExdmpW1K
    vdTDeTqjExdmpW1K
    HFLTNQYb61D1ySem
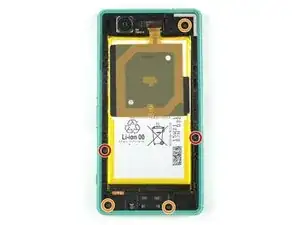
    • Löse die folgenden Schrauben, mit denen der Mittelrahmen im Gerät befestigt ist:

    • Zwei 2,7 mm Kreuzschlitzschrauben #000

    • Drei 2,5 mm Kreuzschlitzschrauben #000

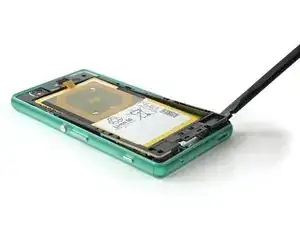
    • Hebe den Rahmen mit einem Spudger auf jeder Seite hoch.

    • Sei vorsichtig und geduldig, der Rahmen ist aus dünnem Kunststoff und kann brechen, wenn er zu sehr gebogen wird!

    Silver screws (2) belong to the side of the frame. Golden screws (3) for top and bottom.

    Joachim Burket -

  4. ZqSSUgbjGvuBRqj6
    ZqSSUgbjGvuBRqj6
    qqZGUTbcpbhcE1uJ
    5lWiV61l2esitwmx
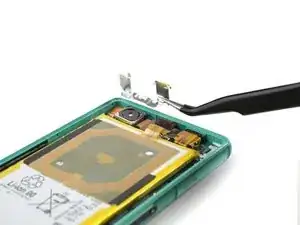
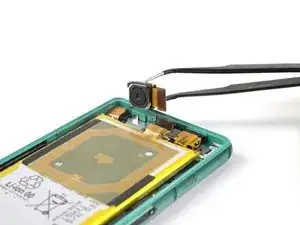
    • Entferne die Metallklammer, die den Stecker der Rückkamera fixiert.

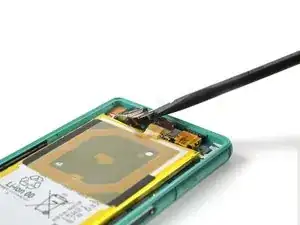
    • Löse den Stecker der Rückkamera und hebe sie aus dem Gerät heraus.

  5. RFNUQr1KKfchUHlB
    RFNUQr1KKfchUHlB
    ePX1c2vGtWZFUTQ1
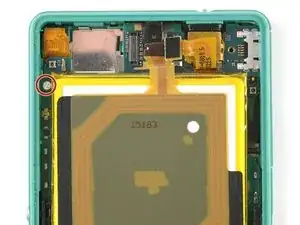
    • Löse nun mit einem Spudger den Stecker für die Kopfhörerbuchse-Sensor-Baugruppe.

    • Löse die einzelne 2,5 mm Kreuzschlitzschraube #000 oben links an der Hauptplatine.

  6. fyLgUHOSalZ6dgFY
    fyLgUHOSalZ6dgFY
    HxjjTHSRrIRlhA2F
    j3yYGOOayqZM1nrR
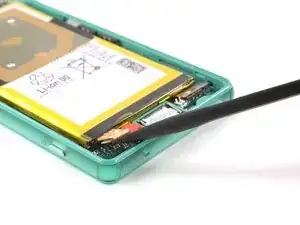
    • Löse den Stecker am Flexkabel vom Display und vom Akku.

    • Entferne die SIM-Karte und die Speicherkarte über die Zugangsklappen.

  7. ikkYQLAjYFXDExl5
    ikkYQLAjYFXDExl5
    iN6EJlwYL6mNDlSf
    2Ehu1dUQyipmVw52
    • Hebe die Hauptplatine leicht mit einem Spudger an.

    • Sei vorsichtig! Du musst das Displaykabel durch eine Lücke in der Hauptplatine fädeln, während du die Platine anhebst. Sie ist zudem mit dem Vibrationsmotor verbunden, der immer noch im Gerät befestigt ist.

    • Achte besonders auf die beiden schwarzen Stecker an der Seite des Akkus. Sie brechen leicht beim Entfernen der Hauptplatine heraus.

    • Hebe den Vibrationsmotor mit einer Pinzette heraus und entferne dann die Hauptplatine komplett.

  8. YOpbk5T4cqZ1Ytj2
    YOpbk5T4cqZ1Ytj2
    rLQZxpWyTAn2FTJK
    aPosxZhGUlrGLQIr
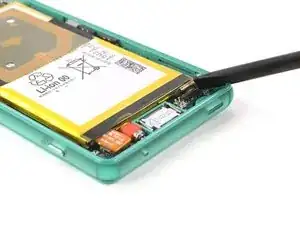
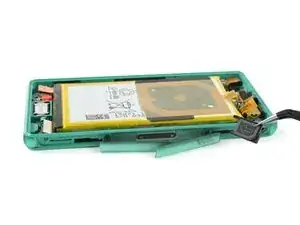
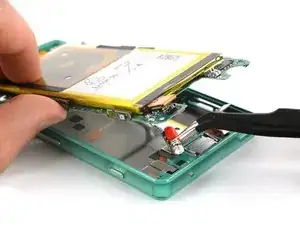
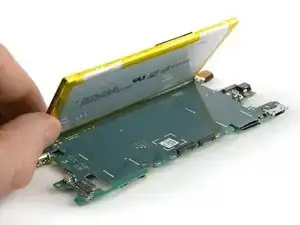
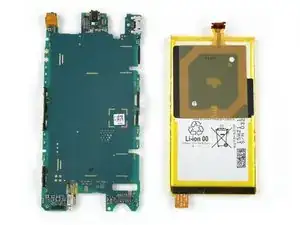
    • Ziehe vorsichtig die beiden schwarzen Laschen mit den Klebestreifen unter dem Akku heraus.

    • Achte darauf, dass du immer nur zur Seite hin ziehst, und niemals nach oben. Die Streifen reissen leicht. Sollte das passieren, nimm eine Plastikkarte, um den Akku vorsichtig abzulösen. Wenn es sein muss, kannst du die Stelle auch leicht erwärmen.

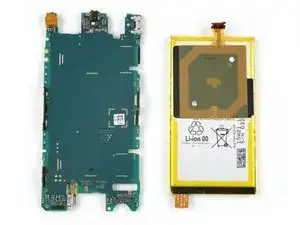
    • Nun kannst du den Akku von der Hauptplatine entfernen.

  9. NNbIFnOZKdPQSAKp
    NNbIFnOZKdPQSAKp
    ZPwXhstywUdqLSTj
    iQIJkLEu6xip6hTh
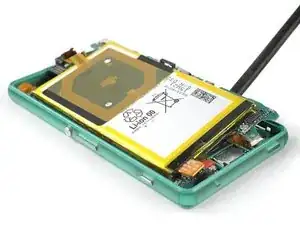
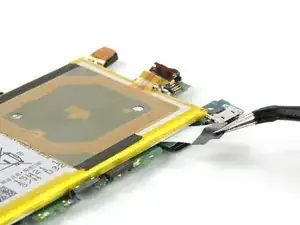
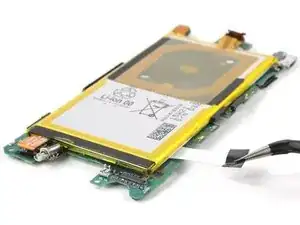
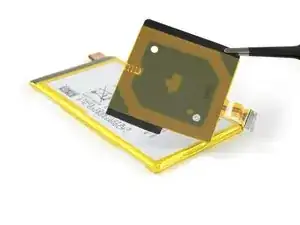
    • Erwärme die NFC-Antenne etwas, um den Kleber darunter aufzuweichen.

    • Löse sie vorsichtig vom Akku ab. Wenn der Kleber brüchig wird, nimm eine Plastikkarte zur Hilfe.

Abschluss

Um dein Gerät wieder zusammenzubauen, folge der Anleitung in umgekehrter Reihenfolge.

Tobias Isakeit

Mitglied seit: 31/03/14

108043 Reputation

10 Kommentare

Thank you Tobias !

My Z3 compact starts now his second life :)

Guy Hard -

Thank you for repairing your phone and giving it a second chance.

:)

Tobias Isakeit -

Where do I need the Back Cover Adhesive Strips for?

Visser -

The guide doesn’t mention that one needs new adhesive for the battery (the one I bought isn’t sold with it). It would therefore be wise to mention what kind of adhesive (two-sided, what thckness, etc.)

axel -

Double sided tape is enough to keep it in place, as the back cover and midframe holds everything down for extra reinforcement. Sony sure makes their smartphones !&&* to repair, but that’s another rant.
William Nephew -

Nice tutorial, thanks.

CAVE: I broke off one of the connectors to the magnet-charger contacts on the very edge of the mainboard when lifting it off the case. The same seems to have happened to the author (Step 8 and 9 - the lower one of the two black bridges looks rather wonky)

Pitfall: When lifting the vibration motor (Step 7), make sure you check the cable running on the underside of the mainboard afterwards. It is the connector to the on/off switch. If you unplug it accidentially (like I did), you won’t be able to turn your phone back on after the work is done.

Max -

Thank you for the precise guide, I’ve followed it with no major problems and no damage done :)

Just a friendly notice to others that will try this, reversing steps order is not enough to reassemble the phone if you’re not careful. Some parts are tricky such as the need to put LCD tape back through motherboard hole or the need to watch out not to destroy jack/sensor tape when pushing motherboard back. Also, you’ll need a double sided tape to glue the battery back to the motherboard - original tapes are destroyed during disassembly. The camera clamp is tricky to remove without bending it. Also, it seems that it’s only kept in place by back plate pressure. Also, remember or take a picture of how the NFC connector is attached - I’ve had problems figuring it out when reassembling.

All in all, great guide and my phone will work for me for months or even years instead of going to a trash can because of a swollen battery. Thanks again!

Grzegorz Krugły -

Took a couple hours but I couldn’t have done it without this guide, thanks! Lets hope the new battery won’t be dying on me by lunchtime every day :)

red_carbon -

After replacing the battery and turning on the telephone my Xperia doesn’t see the SIM card.

I did everything very carefully and I don’t know what can be the reason for that.

It’s not like there’s no service, it just can’t read any other SIM card too.

Does anyone have an idea how to fix it?

zofia.bochnak -

Amazing - with Carbon Rom this phone is still a daily driver and the old battery needed replacement due to gases expanding the body. I used a bit of sugru for the adhesive parts, especially the back cover. Although it is not waterproof anymore I am really happy that I could repair it with your guide. Much appreciated!

Simon -