Einleitung

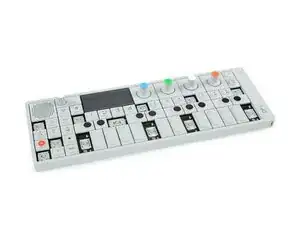
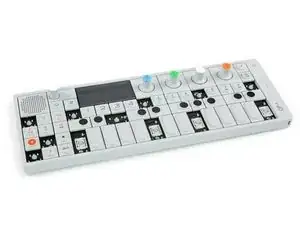
Das Display zeigt nicht nur nützliche Informationen an, es bietet auch hübsche Animationen während dem Musizieren. Sollte es mal nicht mehr funktionieren, zeigt dir diese Anleitung, wie du es austauschen kannst.

  1. vxoTLiJxFDPOji5X
    vxoTLiJxFDPOji5X
    ajlj12AYLBNXKv6o
    MSgrKiNeLFhWdEpd
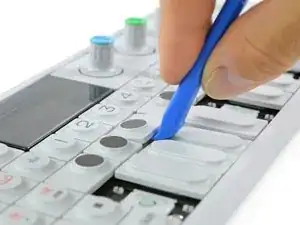
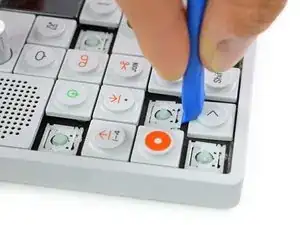
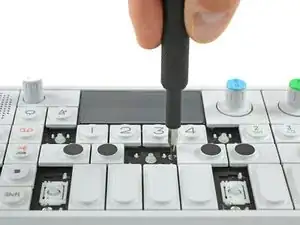
    • Um an die Schrauben unter dem Keyboard zu kommen, musst du einige Tasten entfernen. Dafür kannst du entweder ein Opening Tool oder ein Opening Pick verwenden. Das erste Bild zeigt, welche Tasten entfernt werden müssen (insgesamt zwölf Stück).

    • Die vier länglichen Tasten der Klaviatur kannst du von links her lösen.

    • Die acht kleineren Tasten löst du von unten.

  2. NKEIk4cFqiaAPIDr
    NKEIk4cFqiaAPIDr
    faMO21YfJAINC3yK
    • Der Scherenmechanismus der acht kleinen Tasten blockiert die darunter liegenden Schrauben.

    • Wieder mit einem Opening Tool oder einem Opening Pick kannst du diese einfach herausheben.

    • Achte beim Zusammenbauen darauf, dass die Scherenmechanismen in der richtigen Orientierung eingebaut werden.

  3. SLEyuvdxWjnDuCUg
    SLEyuvdxWjnDuCUg
    RCYV1CYSlXFdOVKE
    MpduwLQ5mTtWh4lM
    • Löse die zwölf Schrauben mit einem Phillips #00 Schraubendreher.

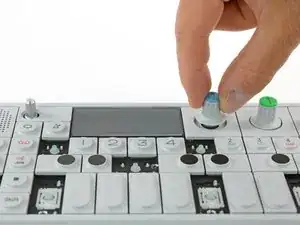
    • Dann ziehe einfach die vier Drehknöpfe und den Lautstärkeregler ab.

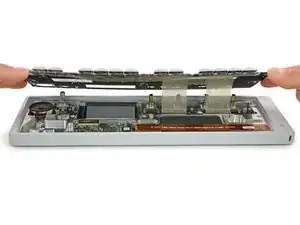
    • Jetzt kannst du das Keyboard leicht anheben und versetzt nach hinten ablegen.

    Your missing the ribbon decoupling step, unless you skipped it because it’s such a tight squeeze to get back in.

    William “Zoe” FitzGerald -

    The concept of removing the square panels that the knobs sit on was skipped.

    Station 2Station -

  4. qJg5uZO2UgNXEdkK
    qJg5uZO2UgNXEdkK
    UWtXrjdNVgKYTF2I
    bsTStZcjsFVSPaQa
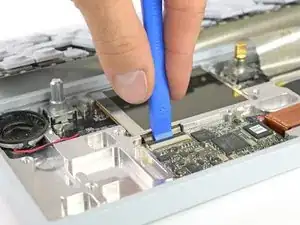
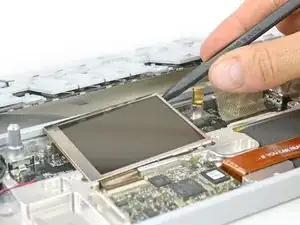
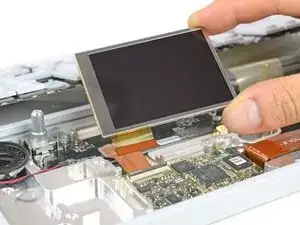
    • Öffne die Verbindung des Displaykabels mithilfe eines Plastic Opening Tools indem du die Lasche nach open klappst.

    • Das Display ist mit einem sanften Kleber befestigt. Ein Spudger hilft dir, es zu befreien.

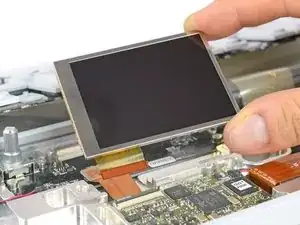
    • Jetzt kannst du das Kabel lösen und das ganze Display heraus nehmen.

    • Nach dem Zusammenbau solltest du die drei Funktionstests 0, 1 und 2 aus dem Spezialmenü des OP-1 durchführen. Das Menü kannst du aufrufen, indem du die COM-Taste gedrückt hältst, während du den OP-1 einschaltest.

Abschluss

Arbeite die Schritte in umgekehrter Reihenfolge ab, um dein Gerät wieder zusammenzubauen.

Tobias Isakeit

Mitglied seit: 31/03/14

108043 Reputation

10 Kommentare

It is really helping.

do you know where to get the screen?

thank you.

chefshin -

I see that the part # is AMS260CM61 ver 2 by Samsung. However, I have not been able to source it online.

Mike -

Hey guys,

Can someone from IFIXIT please let us know where we can buy the screen please.

my screen is cracked and i desperately need to replace it.

Thanks!

Jack -

Hi Jack, unfortunately we do not know where to get a replacement screen for the OP-1. You might want to get in contact with the guys from Teenage Engineering directly. Sorry

Tobias Isakeit -

Jack, look for “part number 74-x000045”, there are few of them out there. Cheers.

Peter O -
What about the new rev 2.0 op-1

Can you source those screens ?

Newer push in connection.

Or anyone got the specs or compatible part number ?

Yes, also messaged t.e

Gadget -

It appears there are three versions of the screen as of 2021-03-10; I cannot currently confirm if ver. 2 or ver. 3 are accurate, but will update in about a month when I receive a ver. 2 if they are not accurate:

ver. 1 : 74-x000045, can be currently found on eBay ; this version is the one is shown in the example

ver. 2 : AMDM001, will need to purchase from LCD-focused or bulk electronics sites such as enlcd; this one has a connector piece on the ribbon to snap onto the circuit board, and is smaller than 74-x000045; it is NOT interchangeable with ver. 1

ver. 3 : AMEJ006D, even worse scarcity than ver. 2, only found one listing on eBay, none from LCD-focused or bulk electronics sites; looks similar to ver. 2; it is also NOT interchangeable with ver. 1. However, it looks similar to ver. 2, so it MIGHT be interchangeable with ver. 2 — I haven’t been able to test.

Anonymous -

Update: the AMDM001 arrived from lcdperfect, and I can confirm it works correctly with version 2 of the OP-1 (the version with the smaller screen and higher circuit board that the screen connects to).

Anonymous -

This is some valuable information here. Thanks for sharing

Tobias Isakeit -

I just did this and it worked! Thank you for this tutorial.

The original problem for me was a progressive glitching. The screen was kind of readable for a few months but eventually went completely dark aside from a random pixel or two.

I ordered my replacement screen from from this seller on AliExpress. The first screen didn't work but thankfully they had free returns and all that was lost was a few months of slow shipping time. ;)

Of note: Your replacement screen might be flipped upside down. Don't worry. Restart your OP-1 while holding down the COM button and it will prompt you to flip the screen by hitting Shift-4.

One thing I noticed that might help people squeeze some new life out of an old screen: When I was replacing the screen I decided to carefully peel the sticker connector off the back of the old screen. I reconnected it one last time and... it started working again. Albeit with some slight ghosting. If your screen seems otherwise dead, maybe give that a try as a last resort.

Elling Lien -