Einleitung

The WIFI PCB is how your device is able to connect to the internet through an antenna. This may need replacement if your device refuses to connect to working WIFI when other devices can connect.

  1. tjAoNDvXqnRc52AI
    tjAoNDvXqnRc52AI
    P3hyiwkXjdqoBIYY
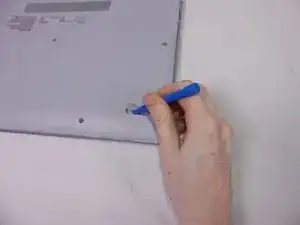
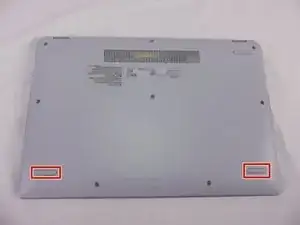
    • Remove the 2 rubber foot pads from the bottom (opposite the hinge) with the small Plastic Opening tool.

  2. MIWQRqhRwDyQWtxo
    MIWQRqhRwDyQWtxo
    WOfnMkYrT1nKAdCR
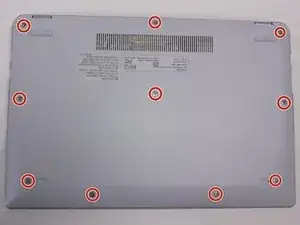
    • Remove the 10 7.1 mm screws using Phillips #1 screwdriver.

  3. TBsqDRe3AXDsiPTY
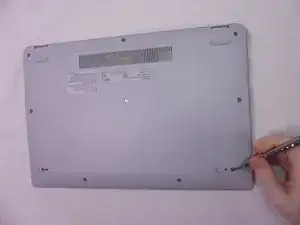
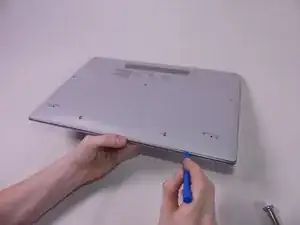
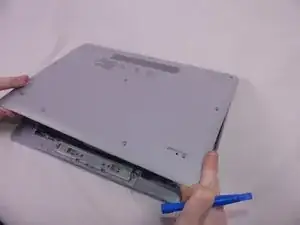
    • Loosen the back cover by using a plastic opening tool all the way around the device.

    • There are areas all along the sides of the device that help aid in this.

    • Be careful when prying, and go slow. The silver plastic frame around the dull gray plastic bottom is fragile and easily dented from prying pressure.

    I have the UK model and I found Fascinating Captain’s method for removing the back cover to be simplicity itself:

    https://www.youtube.com/watch?v=JcZ711cx...

    Rob Butler -

  4. Nv6SXDZGMOZMeOmT
    Nv6SXDZGMOZMeOmT
    NTMmKP62dOsTMqda
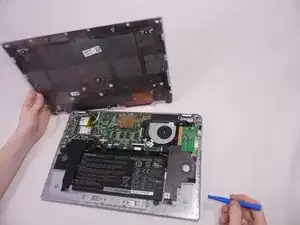
    • Remove the back cover by gently lifting up on one side of the device.

    • The easiest side to lift up on is the one with the removed rubber foot pads.

  5. c1aNTog1TTPqaHV6
    c1aNTog1TTPqaHV6
    NE1EA5VnTbURHjiI
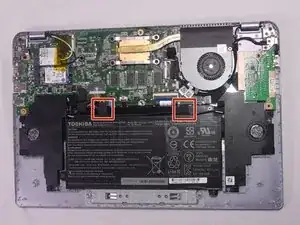
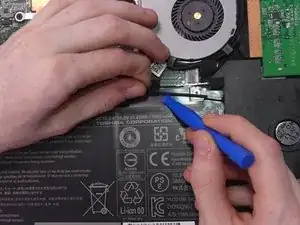
    • Remove the tape holding the speaker wire to the battery on both sides using a small opening tool.

  6. EJ3nLpTxP1EduDYg
    EJ3nLpTxP1EduDYg
    yerArPBI3oW1WLMc
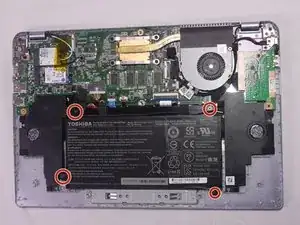
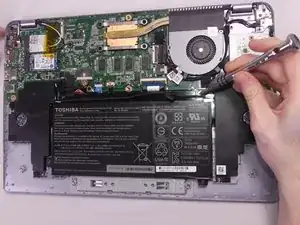
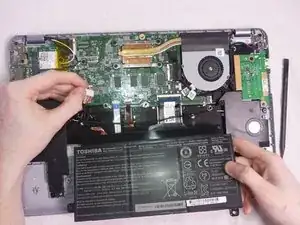
    • Remove the 4 Phillips 3.2 mm screws holding the battery in place, with the Phillips #1 screwdriver.

  7. BXsIMCap1ISPqDFL
    BXsIMCap1ISPqDFL
    tWOGfYSNurgWSZvk
    EEjPg2emg6uLOTeR
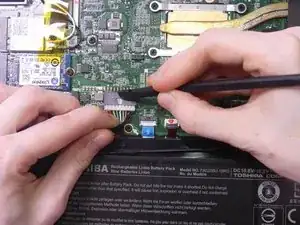
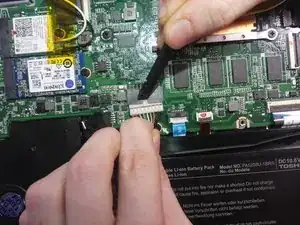
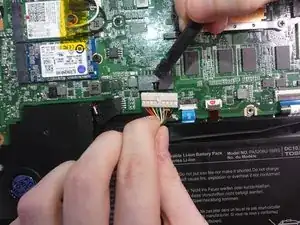
    • To disconnect the wire from the mother board, gently press down with the flat end of Spudger and pull on the wire.

    • Gently shaking the wire from left to right helps with the wire removal

  8. WpiUofQlG53BBxMb
    WpiUofQlG53BBxMb
    5rJX6JnJaYYeRMPE
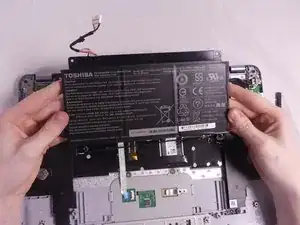
    • Remove the battery by gently pulling on the bottom corners.

    • Be careful to move the battery's wire under the speaker's wire.

    Thank you AGAIN for your perfect HOW-TO Guide on Toshiba Battery Replacement!! Can you help me find a Replacement Keyboard for an ASUS Model W203A? I cannot even find a SINGLE ARTICLE on the Internet on this Model (no reviews, Asus, nothing). Thanks . Guy Rogers Attorney Jackson MS 601.941.6689

    Guy Rogers -

  9. PiIe3MKLi2JqNyGV
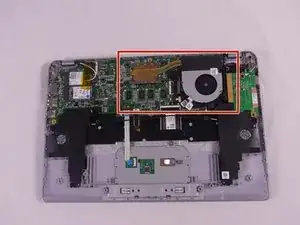
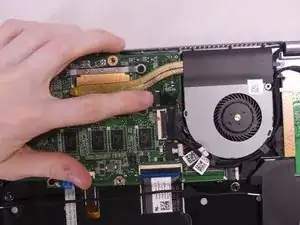
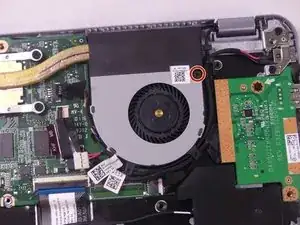
    • Locate the fan

  10. VOEMUlFbEJZOUMWQ
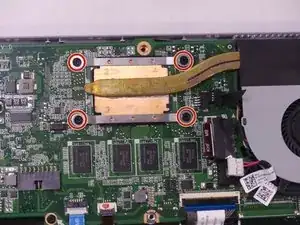
    • Unscrew the 4 Phillip screws using a Phillips # 1 Screwdriver.

    • These screws only loosen partially, they do not disconnect.

  11. OEZ3UhQVDdpWNMFa
    OEZ3UhQVDdpWNMFa
    eyKfKQH4HENcvnky
    d1POwEJqblw3gcnQ
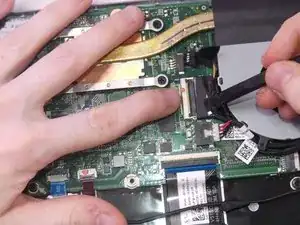
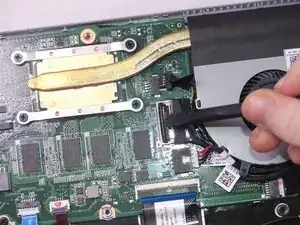
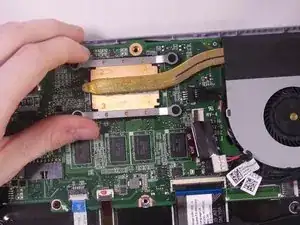
    • The top wire is the fan's wire. Remove it by pulling it from the motherboard.

  12. 2NBPLXpCXaYlNY3v
    2NBPLXpCXaYlNY3v
    MAbKbWOtjbPCaHWE
    YXHPIgrapx66BkOG
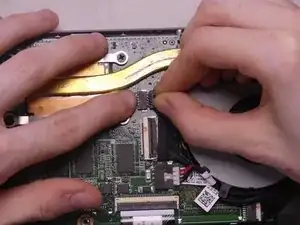
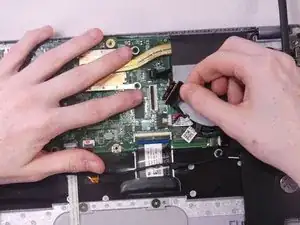
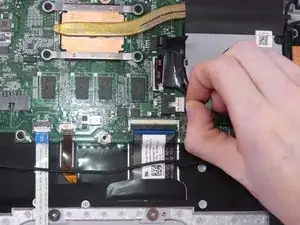
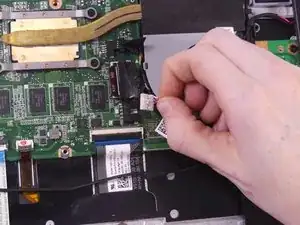
    • To remove the Wifi PCB wire lift up the hinged flap with your finger or with the aid of the spudger tool.

    • After the flap is lifted, pull the wire up out of the connector socket.

  13. piAwXTjfabJa2gJX
    piAwXTjfabJa2gJX
    NhxuWOXDKDTHBp3L
    • Remove the headphone jack wire by pulling it out of the connector socket.

  14. DQLqY32mBNJXjBCr
    • Remove the Phillip 3.6 mm screw from the fan using a Phillips #1 screwdriver.

  15. UXkaQFCBWCaOFcp6
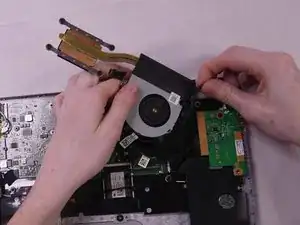
    • Lift up on the metal plate that hold the screws to start removing the fan.

  16. jFWE4ZUFkctOKkMH
    jFWE4ZUFkctOKkMH
    MhQXKRgAO2xFFNIR
    qqNXTJXCTBOJr3BB
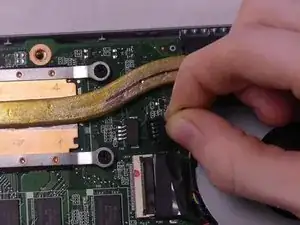
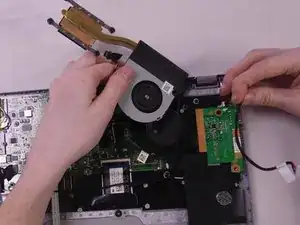
    • Once lifted, you will notice that there are two wires tucked under plastic tunnels on the right side of the fan. Remove these wires.

    • These wires require you to gently pull them out of there tunnel.

    • Once the wires are removed the fan should be removed entirely.

  17. EDbZXWvR3ZcPmn4K
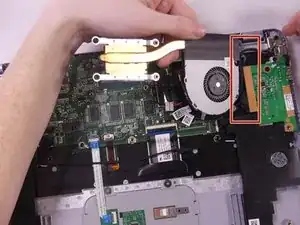
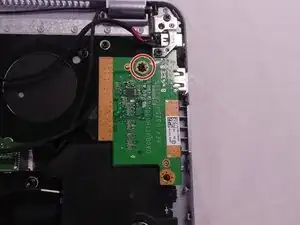
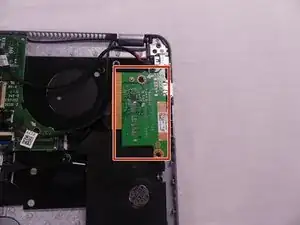
    • The WiFi PCB is located next to the fan.

  18. EtQLFQMRYSNxcyuE
    • Remove the Phillips 3.7 mm screw using a Phillips #1 screwdriver.

  19. 2VVPKVIogZTkdBqf
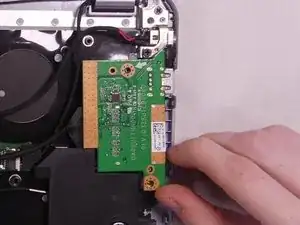
    • Gently remove the WiFi PCB by pulling upward.

Abschluss

To reassemble your device, follow these instructions in reverse order.

Jillian Thomas

Mitglied seit: 14/10/17

209 Reputation

Ein Kommentar

The article has some mistakes, namely, this isn’t the WiFi / WLAN, it is a USB port and card reader slot PCB. I came to iFixIt to double-check the part to upgrade to WiFi 6 (ax). Once you fix the part name, the article is good! The part number DA0BUITH8D0 is what to search for when trying to buy one. I didn’t need one, but looked it up just the same, there are not a ton of these out there and I would probably just resort to a USB reader.
Vic Lovan -