Einleitung

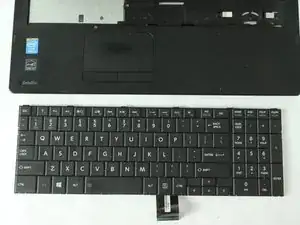
Standard Keyboard with 10-key and touchpad with multi-touch control

  1. lXqMhSMh1jsaDNu2
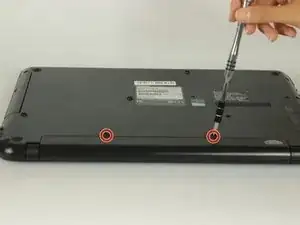
    • Turn the laptop off and remove all sources of power.

    • Flip the laptop over so that way the bottom is facing towards you.

    • Remove the two 6.6mm Phillips #0 screws from the battery.

  2. pGR2rHSmITOT5rWx
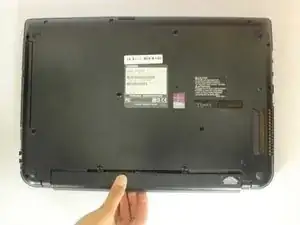
    • Pull the battery out of the laptop.

  3. OPO2lVxtLBondOOV
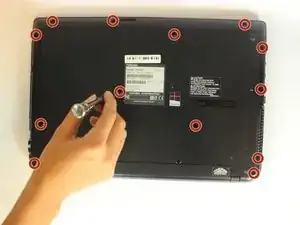
    • Remove the thirteen 6.6mm Phillips #0 screws on the back of the device.

  4. R5xWHPZY25daFgxX
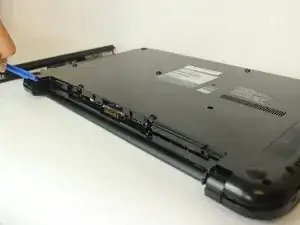
    • Use a plastic opening tool to lift and remove the bottom panel.

  5. YdxkdK6G2RtKgweQ
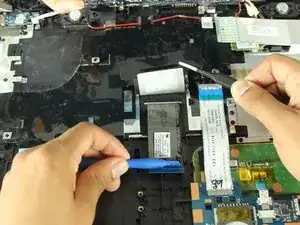
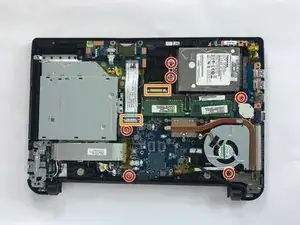
    • Remove the six 2.3mm Phillips #0 screws from the motherboard.

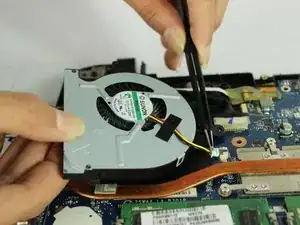
    • Use a pair of tweezers to lift up the tab on the ZIF connector and pull out the ribbon cable.

    You only need to remove ONE screw in this step not six since there are only two screws holding the bottom side of the keyboard in place. One of these screws is removed from the bottom case, and the other is inside just to the left of the motherboard in the middle. There is no need to remove the motherboard, hdd and heat sink in order to replace the keyboard in this laptop. Don't know what the author is trying to do here.

    Stallion K -

  6. JcXfQEsT5NSQNNTB
    JcXfQEsT5NSQNNTB
    2xaHgH42QxD2CStT
    K4VYmIHtjrD6tlPw
    • Disconnect the wires from the motherboard.

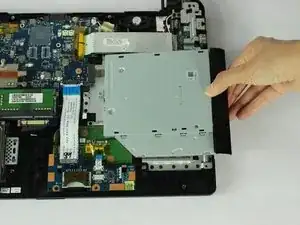
    • Lift and remove the disk drive.

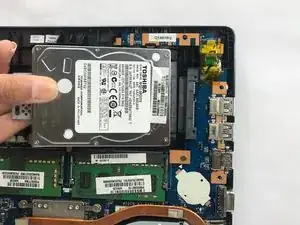
    • Lift and remove the hard drive.

  7. rq6o3b4u2eHtQEAg
    • Lift up the motherboard

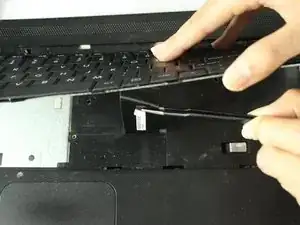
    • Use tweezers to carefully peel apart IDE ribbon cables connected from motherboard to keyboard

  8. 4wZOy6rDaJVrw6d2
    4wZOy6rDaJVrw6d2
    nMYbP6nCQNVEqqmZ
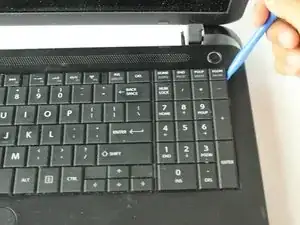
    • Use a plastic opening tool to unlatch the keyboard from the device

    • Lift the keyboard off the laptop, careful of the IDE ribbon cable

    This is absolutely NOT how you do this step. I've done several of these. You need to use a guitar pick or credit card and start at the bottom clip just to the left of the space bar trying to release that clip then work your way to the right and left releasing the clips. DON'T START AT THE TOP OR SIDES. YOU WILL ONLY BE WASTING YOUR TIME. The top part of this keyboard does not contain clips that can be released. Instead the top contains metal tabs that slide into slots. Each side has one clip, but it's easier to start where I said. Once you release all the plastic clips on the bottom then the one on each side, you can slide the top portion of the keyboard right out. You have to be patient with the plastic clips on the bottom and sides though. Make sure you use a non-marring tool like a plastic guitar pick or a credit card instead of something metal that will just scratch up everything and make it look terrible.

    Stallion K -

Abschluss

To reassemble your device, follow these instructions in reverse order.

Pablo Andrade

Mitglied seit: 14/02/18

1057 Reputation

Ein Kommentar

gracias por la guía
Mark Puga -