Einleitung

Is your computer getting too hot to handle? Overheating is a sign that your cooling fan may not be working properly, which may cause further damage to your computer. This guide will help you through the replacement of the cooling fan in your Toshiba Satellite C655D-S5084.

  1. QAJC2SXoOTbv4en1
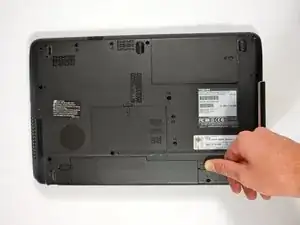
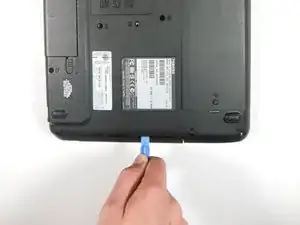
    • Turn the device bottom-side up. Make sure the batter compartment is nearest you.

    • Unlock the right side of the battery.

  2. BaJDUtYXXBdvLG11
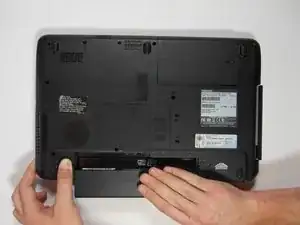
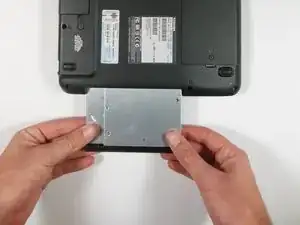
    • Unlock the left side of the battery compartment by pushing and holding the button.
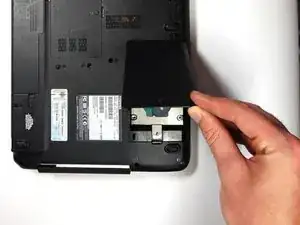
    • Remove the battery.

  3. KbiCMHdT4iQibFWm
    KbiCMHdT4iQibFWm
    CjsugVi4njMjSbgT
    • Remove the 5.5 mm (F5) screw using the Phillips #0 screwdriver.

    • Remove the plastic cover.

    • The screw may be connected to the cover. If so, loosen it, remove the cover and proceed to the next step.

  4. JuJu1VTeF3pGKbTY
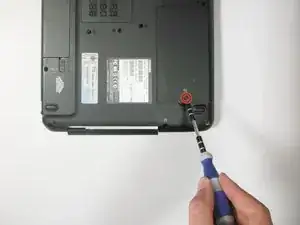
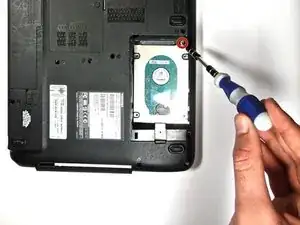
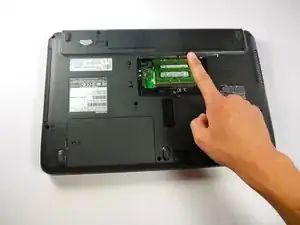
    • Remove the 2.5 mm screw (F3) inside the hard drive casing using the Phillips #1 screwdriver.

    • The screw is located on the small metal tab of the hard drive.

  5. qJSpb5FXlTUrEaaZ
    • Slide the large metal tab on the hard drive away from its attachment.

    • With the battery compartment on your left, use your thumb to slide the tab towards you.

  6. OgWToVBq2O5MpGjt
    • Lift the large metal tab on the hard drive to remove completely.

    • Do not lift until the hard drive is completely free from its base attachment, otherwise you may damage the base.

  7. GHKrKXOASxZA5FSX
    • Turn laptop over and remove the 2.5mm "F3" screw using a Phillips #1 screwdriver.

  8. Iqq14mItUGUDqLGE
    • This step is shown after rotating the device 90 degrees so that the CD drive is closest to you.

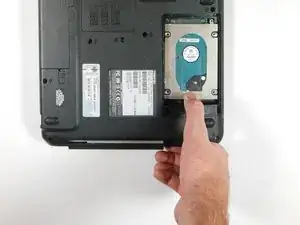
    • Wedge a plastic opening tool between the laptop and the CD drive.

    • Gently pull the CD drive out.

  9. rCtKHLME1Vyilx2u
    • Carefully remove the CD drive completely by pulling out with your hands.

    • The CD drive should come out easily with little force. If there is any resistance double check if 2.5mm "F3" screw is removed completely.

  10. YPI3nRfVnsDBXEXZ
    YPI3nRfVnsDBXEXZ
    XBFupQaK4RVCcZWK
    • Remove the 5.5 mm (F5) screw with the Phillips #1 screwdriver.

    • Remove the plastic cover.

  11. okiOImmOaByLqGHF
    • Remove the two 6.0 mm (F6) screws with the Phillips #1 screwdriver.

  12. lALxegLHhFtKC4eJ
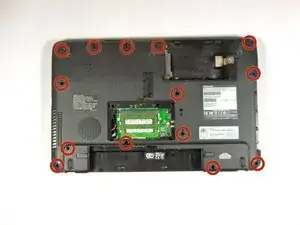
    • Remove the fourteen 6.0 mm (F6) screws from the back panel using the Phillips #1 screwdriver.

  13. mM1uhRH4ejJvCP6f
    • Remove the two 6.0 mm golden (F6) screws shown underneath the battery.

    Actually “F2" screws.

    Jason m -

  14. xVZaeMZnXUfwEbkX
    • Release the three tabs underneath the battery, using the prying tool.

  15. DCJGSCSvHK4Jrinl
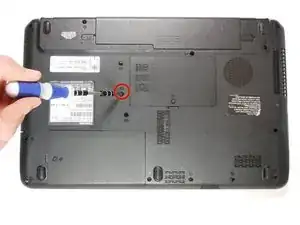
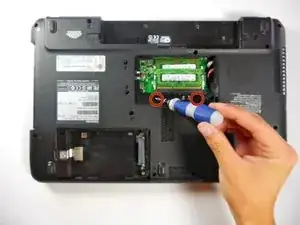
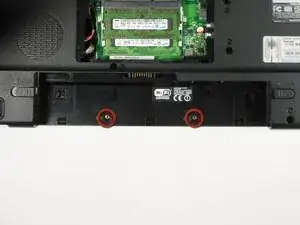
    • Remove the two 2.0 mm screws underneath the CD-Rom drive, using the Phillips #1 screwdriver

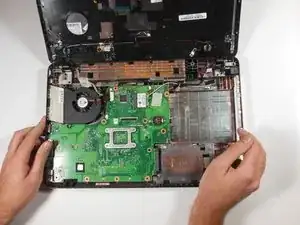
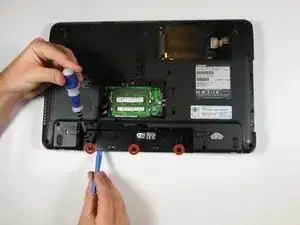
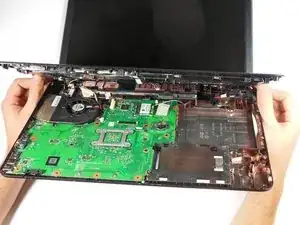
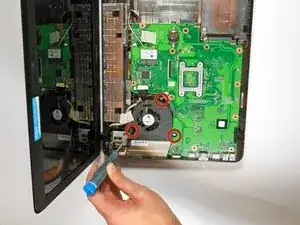
    • Release the two tabs using a Phillips #1 screwdriver and the plastic opener.

  16. jou6p4pegKMYDfqe
    • Release all internal latches by working the slack around the motherboard.

    This picture at step 16 shows the end result after all the cables that will be unplugged in steps 17-20 have been unplugged.

    Furthermore, removing the keyboard before this allows easy access to the connectors mentioned in steps 17-20. The screws for the keyboard assembly are hidden under the strip of plastic above the top row of keys, or it least it is this way in other C655 sub-models.

    A C655 Fixer -

  17. 5ivudScO2ZodjaAr
    • Remove the tabs holding the white ribbon in place.

    • A small tool may be required.

  18. c4YOrAhTENZS3DTp
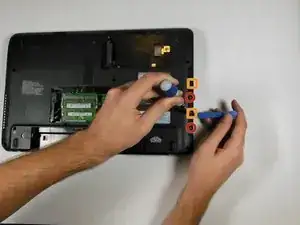
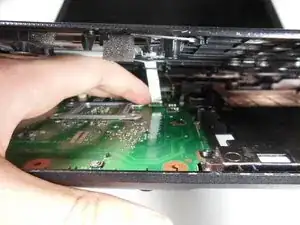
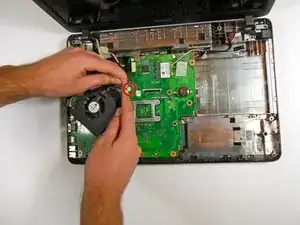
    • Remove the wide black ribbon in the same manner as the previous step.

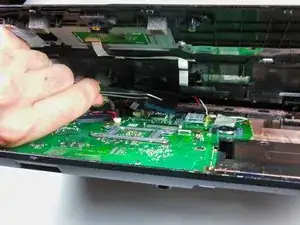
    • Release all other catches.

  19. njTkeQKHhDXVTNKw
    • Detach the white plug by firmly pulling it.

  20. ZCgNOjSQOl5WgHhd
    • Detach the other white plug in the same manner as the previous step.

  21. G6cVRgqauPGZKVOE
    • Remove the three 2.0 mm screws that are holding the fan in place.

  22. 2YV36kyECIwvNToa
    • Detach the white plug attached to the cooling fan.

    • Remove the fan and clean.

Abschluss

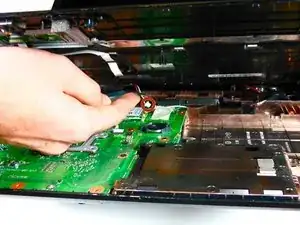
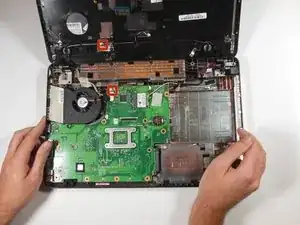
To reassemble your device, follow these instructions in reverse order.

Shelby Kunz

Mitglied seit: 19/04/13

57 Reputation

Ein Kommentar

Excellent description and very precise. I also upgraded to dual Wifi/ Bluetooth (easy to obtain now, lol). Thanks again!

Robert Mackey -