Einleitung

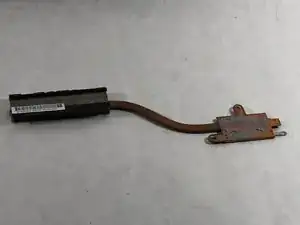
The heat sink, along with the fan, helps keep the laptop from overheating. If the heat sink is damaged through be clogged that can’t be removed by the fan or cleaning, then a replacement is necessary to prolong the life and durability of the laptop.

  1. vRAGMnpNrMauTScU
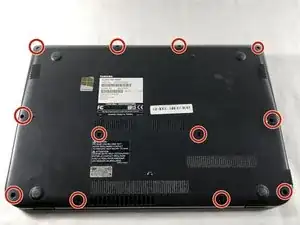
    • Remove the twelve 5 mm Phillips #1 screws from the back panel.

  2. QVsZLjGHZlpF64NT
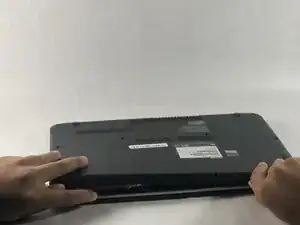
    • Pry the back panel open with the plastic spudger or fingernails.

    • Pry it gently so that the back panel does not crack.

  3. Vd4yrjt52NQNbuvs
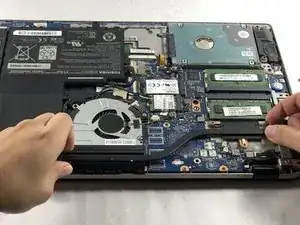
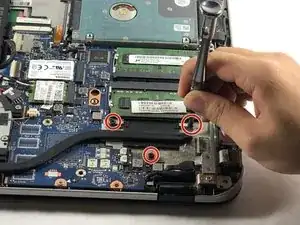
    • Remove the three 5 mm screws using a Phillips #1 screwdriver.

  4. URB6kCgWwM35OjNO
    URB6kCgWwM35OjNO
    w5fZJPAaDIWqdFbm
    FUtNesPgK1WUHWsM
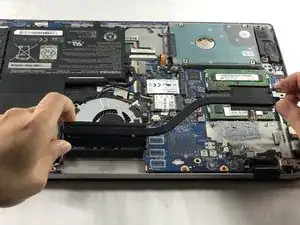
    • Pry the heat sink away from the laptop with two hands at both ends and remove it from the device.

    • The heat sink is glued to a gray paste called thermal paste. Do not touch the paste.

Abschluss

To reassemble your device, follow these instructions in reverse order.
James Nguyen

Mitglied seit: 23/10/18

564 Reputation

0 Kommentare