Einleitung

To replace the Satellite L755 motherboard you will need a Phillips (PH0) screwdriver. The motherboard is fragile and should not be bent or pried away from other parts or forced into place since it may break.

  1. Zb4alJkQfdEPePPs
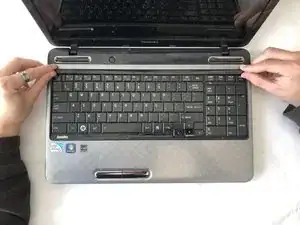
    • Unsnap and remove the bar above the keyboard.

  2. gOWaoCE2fRhP5WQX
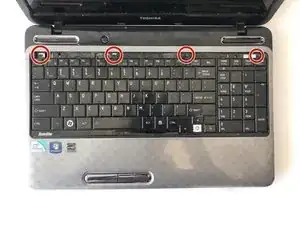
    • Unscrew the four 4mm Phillips #0 screws beneath the bar.

  3. pekRVR4yQiu6YsIN
    pekRVR4yQiu6YsIN
    ifJEuYnkLyrNWFvL
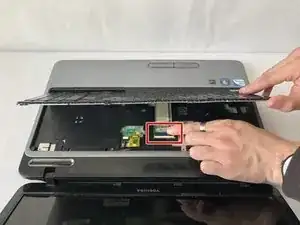
    • Pull keyboard up and partially out.

    • Detach conductor ribbon.

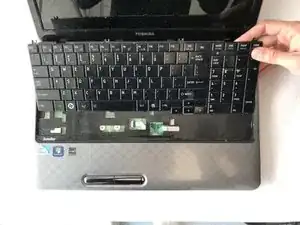
    • Slide keyboard out completely.

  4. RgdMN1fL4JVJXxWH
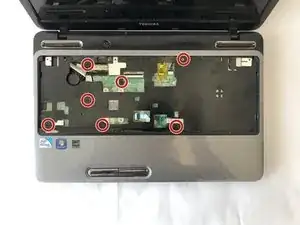
    • Remove the seven 4mm Phillips #0 screws beneath the keyboard.

    • After the screws are removed, remove the face plate to reveal the motherboard.

    You left out the fact that there are 12 screws on the bottom perimeter of this Laptop that attach to the Face Plate that must be removed before the Face Plate can be removed.

    Gary DeLoach -

    Another thing....you have to remove the CD/DVD drive there are two screw under the drive that hold the top part of the laptop together. I you don't, you will break the two screw holes on the back side of the top-plate.

    Nagisa Shiota -

  5. hRIBxgiqO6uYCbnD
    • Lift up the flap and there will be two 2 mm Phillips screws beneath that will need to be unscrewed to pull the disk drive out.

  6. yXExZHN1BVLacDfy
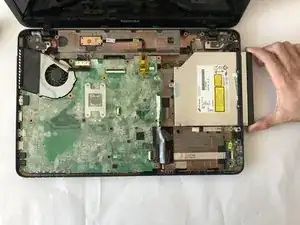
    • Now the disk drive will be able to be removed from the motherboard by sliding the drive to the right.

  7. RTeLy5UhJLNFEWfK
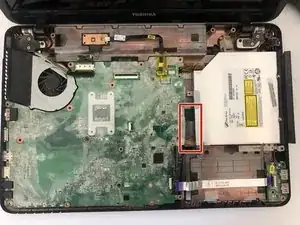
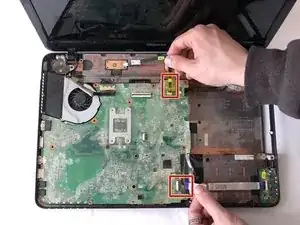
    • Carefully remove the 2 conductor ribbons.

    • Do not tear the yellow tape covering the upper conductor ribbon if possible.

    • The lower right ribbon may be removed at either the left or right ends by flipping up the black tab.

  8. ZyTVGjqApgIglAkJ
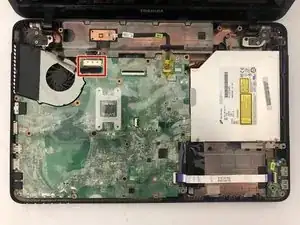
    • Remove the indicated conduit by gently pulling it away from the motherboard.

  9. YgMaANEnehbL4T32
    YgMaANEnehbL4T32
    ewRmJ4qTUuV3uWJN
    IDMeeRolMNnO2xi6
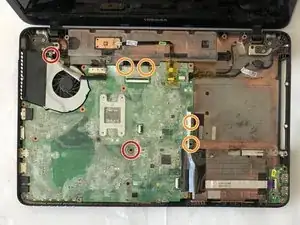
    • Remove the 5mm Phillips #0 screw in the middle of the motherboard, and the 4mm Phillips #0 screw on the upper left near the fan.

    • Remove the four 4mm Phillips #0 screws under the edge covering flaps.

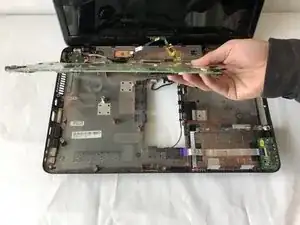
    • Carefully lift out the motherboard and fan.

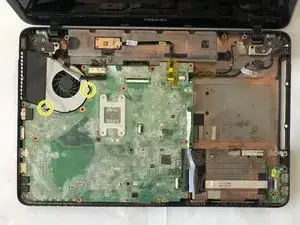
    • To detach the fan, remove the two 2mm Phillips #0 screws.

Abschluss

To reassemble your device, follow these instructions in reverse order.
Anthony Buschini

Mitglied seit: 05/04/19

277 Reputation

0 Kommentare