Einleitung
This guide aims to remove the UIM and in turn access the plastic cover attached.
Removing the UIM and plastic cover is discussed in service manual revision D:
- Chapter 4: Assembly and Disassembly, Pg 50-51
PLEASE NOTE: This repair guide was developed by a student iFixit team based on Viasys/CareFusion's own service manual. Neither iFixit nor this repair guide is endorsed by or affiliated with Viasys or CareFusion.
Werkzeuge
-
-
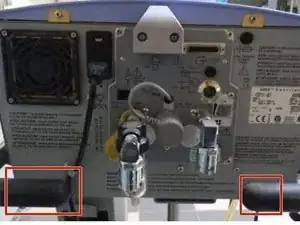
Remove the ‘rubber collar’ located at the UIM rear neck, by grasping one of the two rubber tabs at the bottom. Pull firmly in an “arcing” motion.
-
-
-
Pull UIM forward and look for the Phillips Screw on the front arm cover. Remove (1) Phillips screw from the front arm cover. Remove the front arm cover.
-
-
-
Remove the two mounting screws now visible inside the ‘back arm cover’. Tilt the UIM down and remove the ‘back arm cover’.
-
-
-
Remove the (4) 11/32 KEP nuts that secure the ‘plastic top cover’ opening onto the chassis.
-
Remove (2) Phillips screws that secure the ‘plastic top cover’ to the rear chassis.
-
Slide the top ‘plastic top cover’ upward and forward away from the chassis.
-
-
-
Remove the (2) Phillips screws and washers that secure the HSSC Cable on the GDE. Unplug the HSSC Cable.
-
Carefully feed the HSSC Cable through the ‘plastic top cover’ opening.
-
-
-
While continuously supporting the UIM, remove (4) 3/8 nuts that fasten the UIM support arm onto the pneumatics.
-
Lift UIM off of pneumatics and set aside.
-
Remove plastic cover and set aside.
-
To reassemble your device, follow these instructions in reverse order.


