Einleitung

  1. SOD2qkC3FvhsxyTC
    SOD2qkC3FvhsxyTC
    pIvdpXDVcEW3RVUv
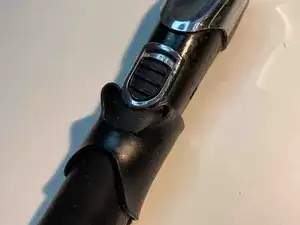
    • Begin by removing the rubber grip along the handle.

    How do you take rubber piece off handle

    Billy Joe Furr -

    It appears the friction of your skin against the rubber grip can pull it down from the top enough that you can see how to peel it off.

    Matt Benson -

    How do you remove the rubber grip??

    octavia197424 -

    I have no rubber piece to remove

    Charlie changed her kelly -

    Pardon the analogy,

    … but it's on there a little bit like a condom.

    Start at the Top of the trimmer.

    Use your fingernail to pry back the lip of the rubber.

    Then start rolling it down the handle.

    Toward the end you may just have to brute force - shove it off.

    Mark Wingerd -

    Check the model number. Mine looks exactly like the one pictured here.

    Again, my trimmer model 9854L has the battery soldered in place. So, unless you have a soldering gun and tools, or want to buy one and do this job, don’t bother with the rest of the steps here as this is required for battery replacement.

    Janek Kuchmistrz -

  2. SJABmifyA56C5UMn
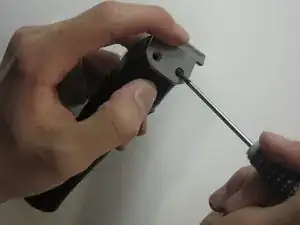
    • Remove the screws from the top to take the metal piece and plastic part off.

  3. jpQdmGgQjTcMbyGd
    jpQdmGgQjTcMbyGd
    oPkprg4Lh5SVRoIg
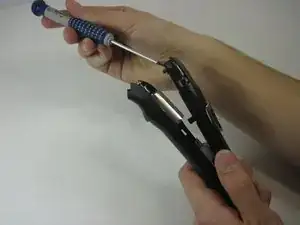
    • Pry open the plastic cover into two separate pieces. The plastic is very durable so don't worry about breaking it upon prying it open.

    it doesn’t show any detail like the spring location

    kglenhunter -

    Be careful- mine popped open suddenly and all interior parts fell out! Also, as mentioned above, be cautious to not push against the silver metal motor axle while opening- use the white plastic to the side as a spot.

    Janek Kuchmistrz -

  4. TValVx1VoAwKAbwu
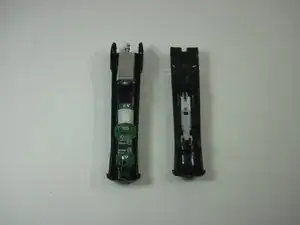
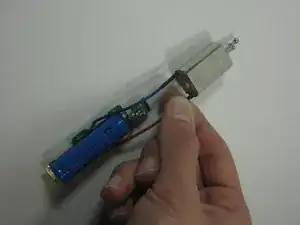
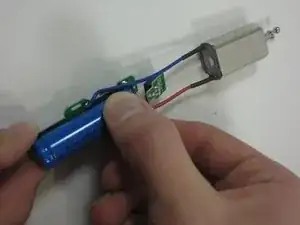
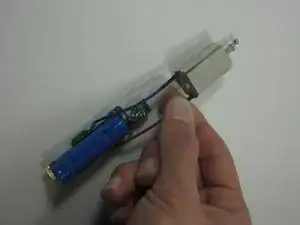
    • Remove the chip set, motor and battery from the plastic body. This photo shows the motor and wires connecting it to the battery.

  5. u15sd2cC1OAtHTyZ
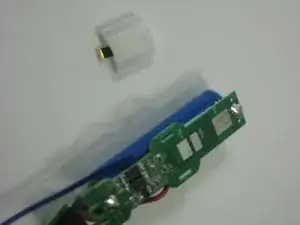
    • Remove the white plastic cover over the chip set allowing the battery to be taken off.

  6. 54kpoLPP2YaOkyZA
    • Remove the Lithium Ion Battery and replace it with the new one that you purchased.

    This battery has stamped terminals that are soldered to the PCB. Additional steps and tools need to be added to reflect the soldering work that needs to be done to replace this battery.

    bob.schwenkler -

    Agreed. The battery for my Wahl also has stamped terminals soldered to the PCB. I wish battery replacement for mine were as easy as the one reflected here.

    Poe Larity -

    Wifes Wahl Sterling trimmer (similar) got dropped and broke the negative tab In half which is also stamped to the battery as mentioned above. Easy resolder job.

    Sam Houston -

    I would like to know where you find the replacement battery ? I havent opened the trimmer as of yet so i have no idea plus after searching a whole entire day i found nothing and 1 battery seller mentioned to call Wahl then i found this site that mentions how easy it is to solder, well i wouldnt know cause so far the replacement battery must be a secret.

    Jetro Pepper -

    I have found a similar spec’d battery on a couple of websites. The battery is 3.7 V, 750 mA and coded W14500-750.

    https://www.onlybatteries.com/showitem.a...

    Again, my trimmer model 9854L has the battery soldered in place. So, unless you have a soldering gun and tools, don’t bother with the rest here.

    Janek Kuchmistrz -

Abschluss

To reassemble your device, follow these instructions in reverse order.

nathan

Mitglied seit: 22/10/13

1395 Reputation

18 Kommentare

Great guide but I made the mistake of buying just a standard 3.7v 750mAh battery to try and fit into the trimmer. The battery in the trimmer has metal terminals "stamped" to each end, so the terminals can't be unsoldered from the battery. I was hoping to just unsolder the existing battery and then solder in the new one but no such luck. New trimmer for me now lol

Dean Miller -

DM, I used a dremel tool with a thin grinding wheel to cut off the metal terminals just below the stamp point. After cutting off the metal terminals below the stamp point, approximately 1/4" inch of the terminals still remained which was just enough to connect the new battery to the remaining metal terminals with a small dab of solder. Little bit more work than I was anticipating but the trimmer works like new again. Found the 3.7v 750mAh battery at onlybatteries.com for $5 plus about $5.94 for shipping. Hope this helps for you DIYers!!

Dean Lamborn, 10/25/2015

Dean Lamborn -

Is it an 18650 size?

David Drasser -

Nope, it is a AA size 14500 lithium battery.

Adam Drews -

To Nathan, DM and DL, I was with Nathan until I read about soldering a dremel (which i I own) and cutting off the metal terminals below the stamp point. Can any of you fine 'fixers' show pictures along with the soldering, dremel, cutting, terminals description? I want my Chromado to work like new too! Thanks in advance, Ka

Ka -
I couldnt get the button section off, i didnt know the rubber button grommet comes out and there is a single screw holding this on, it comes off easy after that. then there are two screws hidden undernearth it and it comes apart nice and easy.

Chris Dowling -

Just to add - there was no need to remove or trim the existing battery tags. Use needle-nose pliers and gently pry them off. The welding joints should peel away leaving behind the tags which you can use against your existing battery :)

Yasin Abbas -

For those looking I think you can put your money on

http://www.batteryspace.com/lithium-ncm-...

Anon Amous -

I found AA size 3.7v 750mAh Lion battery with tabs, on onlybatteries.com for $5.29 but shipping was $7.50 which is a rip off, but I went ahead and ordered because I hate to toss out a perfectly good clipper with a bad battery when it seems to be fairly easy to replace.

Alan Nevermind -

Battery came today. It took me 20 minutes to change it. My clipper is a little newer, it has a rubber grip, slide the rubber grip off carefully as not to tear it, there are 3 tabs on each side, carefully pry with a screwdriver and the 2 halves come apart. The rest is exactly as above the battery came with tabs, use a solder iron and solder removal tool to in solder the old battery, and replace with the new one careful to mind the polarity. Bend the tabs and solder in place. Snap it back together, slip the rubber grip back on, and good as new.

Alan Nevermind -

what battery do you guys recommend? can’t wait to crack it open and fix it

jbutlerzx -

Does anyone have more pics of how the charging port is mounted on the boards? I want to replace my charging port with one of these.

https://beastdevices.com/?page_id=591

Then I can do away with the walwart and charge via USB.

I’m an engineer and minimalist backpacker. Every ounce counts.

CJ Gorrell -

As a minimalist, you might be interested in some small trimming scissors instead of this. About 1/5 the weight of the charger and about 1/10 the weight of the clipper. Plus, as an engineer, you can appreciate the additional skill required to get a good trim using scissors, resulting in more MacGyver points to you as well.

Geekstar -

The batteries are in a blue waterproof sleeve. How do I remove them, or what is the procedure after cutting at solder area?

Perri G -

Hi I am not able to open Wahl Beard Rechargeable Trimmer 09916-1724 . Please help

Madabhavi Chandrashekhar -

I first checked the current from the charger with a voltmeter. So the battery was suspect. Good instructions for disassembly. Before I faced the issue of the battery tabs I decided to also check the battery. It was at 4.2 V. Hmm. Apparently somehow the switch did not work. Perhaps some hair. After removing and reinserting the components the switch worked. Reassembled and works well.

Bruce Michel -

These directions seem wrong. This battery is clearly soldered to the PC board, from the back board image. The white plastic chip cover is actually the on/off switch. I don’t see any relationship between that plastic part and battery removal. Where do you buy a W14500-750 battery? Mine is soldered to the charger board, with spot-welded metal leads on each end of the battery. Unsoldering this is easy. Just need a new battery that will hold a charge.

John Drake -