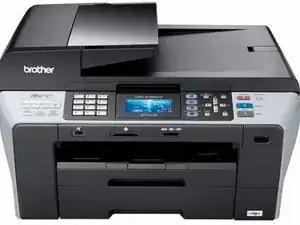
Einleitung

  1. whLUOjCFXoWtfJKG
    whLUOjCFXoWtfJKG
    MYX3iQwMONncQnnm
    • Klebe den oberen Teil des Druckers und den Scanner des Druckers zusammen (bspw. mitTesa).

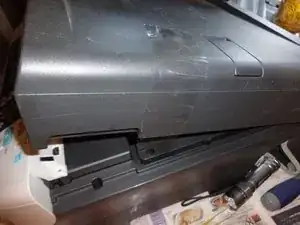
    • Hinweis: Ich hatte bereits das Papierfach ausgebaut.

    Thanks To Filipe Silva Comment below, if you only need to clean the print head you do not need to pull the hole printer apart. I needed to replace my printhead and there were no manuals on how to strip the printer down at the time.

    Filipe Silva - 02/01/2017

    Thanks for the guide. But I don't think you need to tear apart the printer to do that, just start a print cycle and when the printhead moves, plug the printer off. then you can freely move the print head and put the paper towel under it.

    crystalbic -

  2. lumfgRDBwMUY25j3
    lumfgRDBwMUY25j3
    ABjRUdS5F5dqJkUa
    MPlR4IPakD6ZvDXV
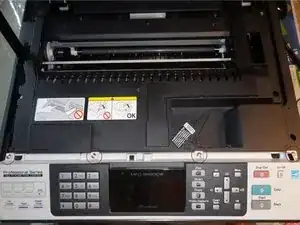
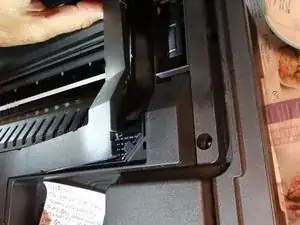
    • Entferne die vier Schrauben , mit denen das Display befestigt ist.

    • Hebe das Display an.

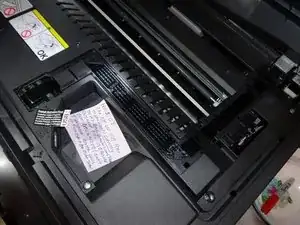
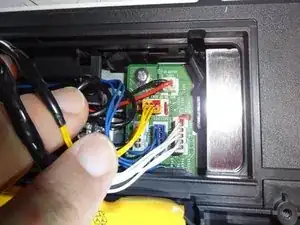
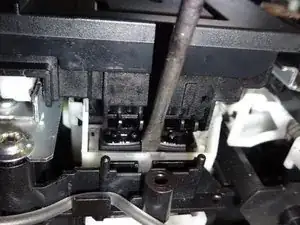
    • Entferne vorsichtig den blauen Stecker und das Flachbandkabel.

  3. 5gEtanQUVMAADAfH
    • Entferne die beiden Scharnierschrauben an der Rückseite des Druckers.

  4. 25RlCv1J5hCZCXGL
    25RlCv1J5hCZCXGL
    w5wlhmfqjQQoPisY
    fM2wXWBBGdMXEOYe
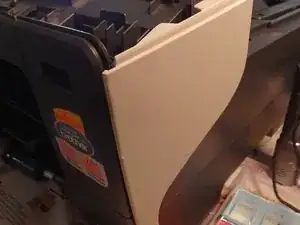
    • Den Support Träger entfernen.

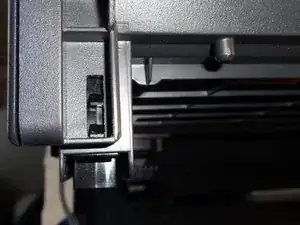
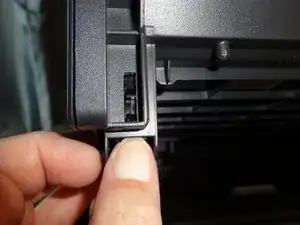
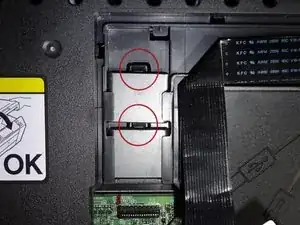
    • Drücke auf die Lasche, um die Clips zu lösen, und ziehe sie dann vorsichtig zu dir, um die Rückseite zu lösen.

  5. tc5gm4kxZtYJ3Rmb
    tc5gm4kxZtYJ3Rmb
    cCLD1QilT5kEAmSx
    Wnmy5R2wDEgqHG62
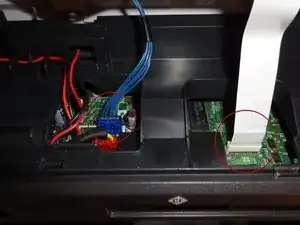
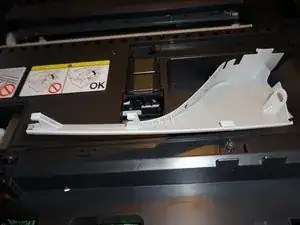
    • Entferne vorsichtig die Abdeckung auf der rechten Seite, die das Flachbandkabel frei gibt. Nutze dabei die Spangen am Halter, um sie zu lösen.

    • Löse den Stecker des Flachbandkabels und ziehe es heraus.

    • Bemerkung für den Wiederzusammenbau: Die Flachbandkabelhalter können entfernt werden, um das Wiedereinführen zu erleichtern, indem man die Halter leicht mit dem Spudger herunter drückt.

    how did you use the spudger to unplug the cable, you wouldn't think it is necessary to take a photo for this step to make our lives much easier!!!

    happylake -

  6. UF3NCfgW1L5uaWW6
    UF3NCfgW1L5uaWW6
    TJXdiEGsQ3KXCrvt
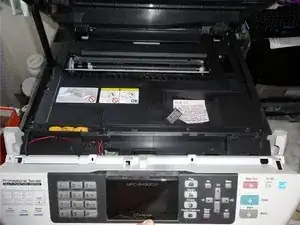
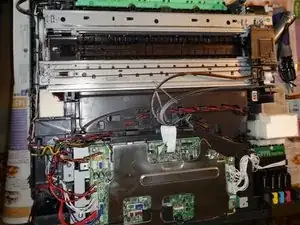
    • Entferne die Abdeckplatte auf der linken Seite, um die Verkabelung für den oberen Bereich des Druckers freizulegen.

    • Nachdem die Verbindungen gelöst wurden, kannst du die gesamte obere Abdeckung des Druckers entfernen und sicher beiseite legen.

    you forgot to mention that the black and red connector does not pull out.. stupid idiot who wrote this!

    happylake -

  7. rEkMHMLPXDDTpgqE
    rEkMHMLPXDDTpgqE
    l4whPXhUEVuwUtLI
    Ht24vSw4eBUYORXM
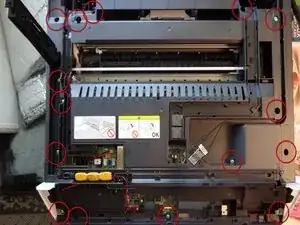
    • Entferne die 15 Schrauben der Abdeckung.

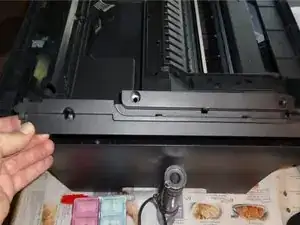
    • Entferne die linke und die rechte Seitenabdeckung.

  8. N1q6EWPoIDH2yIAA
    N1q6EWPoIDH2yIAA
    q6SrWsoRnAqq4YD3
    • Entferne die vorderen Ecken, indem du sie vorsichtig nach oben ziehst.

    • Öffne die hintere Papierstauabdeckung.

  9. bxAnTKWoNyETTQET
    bxAnTKWoNyETTQET
    QhNXPWXibIZWPU21
    • Hebe die Abdeckung ab und lege sie beiseite.

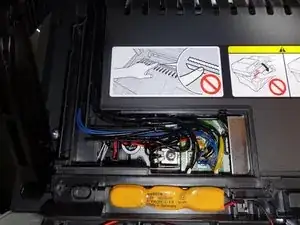
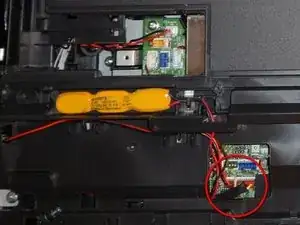
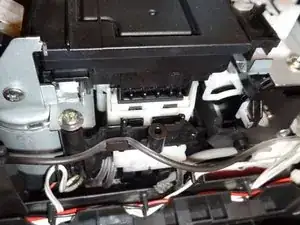
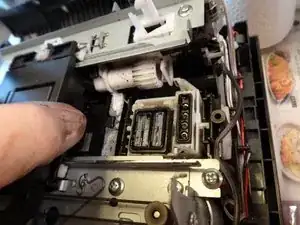
    • Entferne die roten Anschlüsse für die Batterie und den Lautsprecher.

  10. kuL2obnxHdaZHSgx
    kuL2obnxHdaZHSgx
    VRFJQ4WYZrctPgVJ
    xFsBXQoYtwYRFcoc
    • Ziehe den durchsichtigen Druckkopf-Führungsdraht von der Lasche auf der rechten Seite ab.

    • Ziehe Handschuhe an, wenn du es nicht schon getan hast. Es kann schmutzig werden.

  11. PCytZ1E34MlLZBZk
    PCytZ1E34MlLZBZk
    NjnLYxobyUSCvQyh
    15Ljvf1oPaIXWUGw
    • Drücke mit einem Spudger auf das Kunststoffgehäuse des Schlittens, auf dem der Druckkopf ruht.

    • Schiebe den Druckkopf nach links, damit er sich frei bewegen kann.

    This can also be done in very beginning by keeping the printer on. Open the panel and pressing the stop button for 5 seconds. The printer head should align itself to center.

    Anish -

  12. gBZUTy1VaSoJiD3Q
    gBZUTy1VaSoJiD3Q
    wIqMcPmSxkQLLZfj
    lGHqFJprdfjkej3V
    • Schiebe den Druckkopf nach links, bis er sich am Ende der Schiene befindet. Du kannst spüren, wie er sich löst (nach oben heben, wenn er mit der Aussparung übereinstimmt).

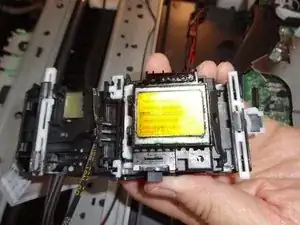
    • Schiebe die Druckkopfeinheit zur Rückseite des Geräts und hebe sie von der hinteren Schiene ab.

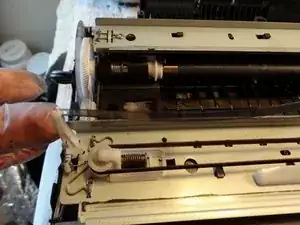
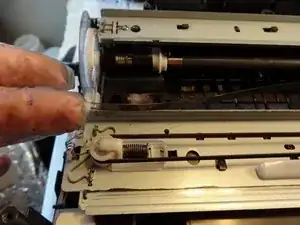
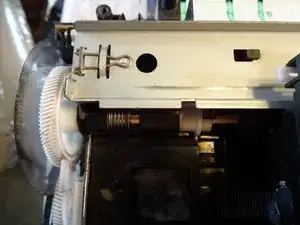
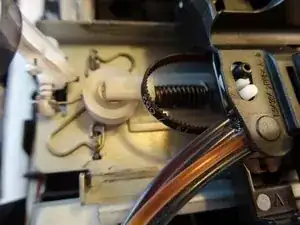
    • Drücke mit dem Spudger auf den Federteil der weißen Antriebsrolle.

    • Löse den Riemen von der Antriebsrolle, während die Feder noch zusammengedrückt ist.

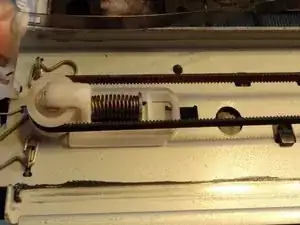
    • Entferne das Förderband aus dem Zahnrad auf der anderen Seite des Geräts.

    My advice? DON'T purchase a brother printer. In as little as a month after your warranty is up, BROTHER Customer Service WILL DO NOTHING TO HELP YOU. I repeat, they will DO NOTHING TO HELP YOU. Brother Pri nters ARE A MONEY PIT just to keep them maintained, and if you don't print some misc. color print pages on "off" days that you don't use it, the print nozzles start to build up with dried ink. Now I know this posting is old but maybe I'll get a response. Step 13- am I to assume that you put the drops of h2o on folded paper towel b4 you rest the print head assembly on it? What does the paper towel/print head assembly rest on? Does it rest on the "park position"? Also, I am opting to do the shorter step as stated by F. Silva, in you comments section. I am aware that his is not a guide, per-say, and I will take that into account. Thank you in advance for your time.

    Ell norris -

  13. lFDBXVBK3am2fQH1
    lFDBXVBK3am2fQH1
    HLs3rNTSLSErJuhM
    HGDwR2TumBlHXRcU
    • Reinigung mit Küchenpapier

    • Reiße ein einzelnes Blatt Küchenpapier in die Hälfte. Falte das Blatt mehrmals in der Hälfte, bis es etwa DIN A7 oder DIN A8 Größe hat.

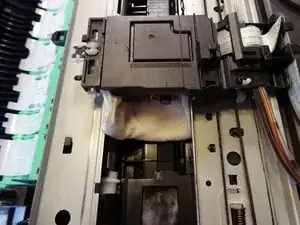
    • Gib ein paar Tropfen destilliertes Wasser auf das Küchenpapier und lege es in die Wanne unter dem Druckkopf.

    • Bringe die Druckkopfeinheit wieder in ihre Ruheposition. du wirst wahrscheinlich feststellen, dass sich auf dem Küchenpapier ein großer schwarzer Tintenklecks befindet.

    • Es befindet sich so viel überschüssige Tinte auf dem Druckkopf, dass sich alle Farben zu Schwarz vermischen.

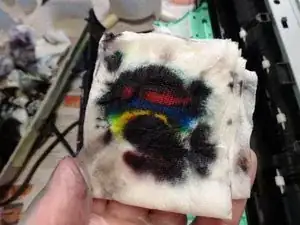
    • Wenn du die einzelnen Farben nicht klar erkennen kannst, befeuchte eine andere Stelle auf dem Küchenpapier und bewege den Druckkopf wieder über die neu befeuchtete Stelle auf dem Küchenpapier. Wiederhole diesen Vorgang, bis du alle einzelnen Farben sehen kannst.

    • Achte beim Zusammenbau darauf, den Druckkopf wieder in seine Ruheposition zu bringen (ganz rechts).

Abschluss

Um dien Gerät wieder zusammenzubauen, folge den Schritten dieser Anleitung in umgekehrter Reihenfolge.

crystalbic

Mitglied seit: 22/08/15

405 Reputation

22 Kommentare

Thanks for the guide. But I don't think you need to tear apart the printer to do that, just start a print cycle and when the printhead moves, plug the printer off. then you can freely move the printhead and put the paper towel under it.

Filipe Silva -

Thank you! Thank you! I was getting no magenta ink at all - I tried this, took me 2 minutes and viola! It works perfectly now! Thank you!!!!!

Kris Smith -

Yes! Best comment ever! Saved me so much work. Let it sit 15 mins, instant success did 1 Cleaning and perfect printing.

Sergio Camano-Valencia -

Hello Filipe,

I have a problem with my printer and I came across this page. I have a Brother MFC-240C printer.

How do I reach the printerhead to clean it? Do I need to take off the top cover to reach it?

Thank you for your help.

Patrik Der Ashodian -

Thanks Filipe for the extra advice :) I had already tried the paper towel method on my printer it did not work for me my print head was damaged and I had to replace it. I could not find any strip downs of my Printer at the time of posting this tutorial so I thought it was more useful for others in the future going this route

crystalbic -

Great post, @crystal_b, and best comment ever, @Filipe. With this, I won't have to buy a new printer! It prints like new again.

Carlos Ugaz -

Thank you Filipe Silva! You have saved two hours of futility in my life. This worked well to allow for printing again.

bbinbaltimore31 -

your idea is admirable I also do one of this particle with my printer head I made a vacume box on which printer head can be fix over with rubber bands to make airtight as when the air is sucked out from the box the the ink itself open the nozzles and after cleaning it with paper towel replace in its original position then the collected ink in the box should be clean for next use .... The box is 15x5x3.5 cm with side tube to suck air.

Vinod Kumar Sharma -

Wish I had read the comments before I removed the display cover! UGH!!!!!!!!!!!! However the method of cleaning described in step 16 of just putting the paper towel under the print head with distilled water did wonders for my problem! Thanks!

Linda Townsend -

sir mera printer t500 hai black ink print out nhi nikal raha hai help sir kya karun

www.786aamir@gmail.com

Aamir siddiqui -

I have Brother DCP-T700W whose color nozzles seem to have got clogged. Auto cleaning did not solve. I want to detach the print head and unclog the clogged nozzles. Could you please provide me the procedure to detach the print head?

khadgarai286 -

Thank you for such helpful post! I did something wrong and now I get Unable to clean 30 Error.

Do you happen to know the reason. I couldn’t any on internet.

Anish -

Is it OK to just use demineralised water or does it have to be distilled?

Ian Turnbull -

Saved me a $200 geeks quad plan and a $150 shop fee. 15 mins with a wet napkin. I still can't believe it!

Sergio Camano-Valencia -

I am so happy to have run into this article and Felipe Silva’s comment. I used warm (hot out of the faucet, but warm by the time I got it in there) tap water on a paper towel and it worked like magic. Despite many cleaning cycles I was getting only about half of the jets firing in the test print and after this method of cleaning all colors were firing 100%. I suppose if I had to do this every day I would use special water (distilled, demineralized, or de-ionized) to avoid scale buildup, but for a once a year process I have no concern using tap water.

David Coyle -

Possibly dumb question…how do you know when the print head has actually moved to get it off the home position when you remove power. I've used a syringe to push (gently) alcohol through individual colour nozzles and it only unclogged about 50% of them so I thought I'd try this. But that requires more teardown so I thought I'd try Filipes method.

Graeme Johnsen -

I figured out if I hold a pen in the cover open button, when I print a page I can see the head move to the left then unplug it b4 it starts to print

crystalbic -

I DID it!!! Thank you @crystalbic and @Filipe for this post! I used Filipe’s technique for getting the printer head element to be loose on the rails and crystalbic’s technique with the damp paper towel for cleaning the heads. It took about 8 paper towels but it absolutely WORKED with minimal effort! THANK YOU both for contributing your solutions!!!

Suzanne Branch -

I tried using the paper towel by sliding it under the print head, and it worked GREAT. To get the print head to the center of the printer, I pressed and held the red X on an MFC-J6935DW. Once the print head moved to the center position, I gently moved the print head across the paper towel that I had cut to fit. I then lifted both ends of the paper towel and slid it back and forth. I printed a test page and was amazed at the results. I was not missing anything on the page.

Carol Leach -

I had an error 44 "Unable to print" problem with a DCP-J552N printer.
It turned out that the head itself was fine but one of the 2 sensors mounted on the pcb that connects to the head were dirty.
There was no need to replace the head itself.
Somehow a little piece of dust can render this printer completely unusable.

Sjaak Spoiler -

Suspect that I may have the same problem - what is the pcb and any hints on how to recognize it? Thanks.

Terry Daniel -