Einleitung
Der Auftrag von Wärmeleitpaste ist essenziell, um den Prozessor kühl und zufrieden zu halten. Folge dieser allgemeinen Anleitung, um nach dem Entfernen eines Kühlkörpers oder CPUs während einer Reparatur Wärmeleitpaste neu aufzutragen. Für speziellere Anweisungen zu deiner CPU schau dir Auftragmethoden von Arctic Silver an.
Um Wärmeleitpaste bei Smartphones aufzutragen, benutze diese Anleitung.
Werkzeuge
-
-
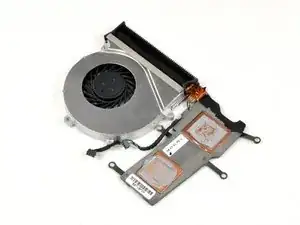
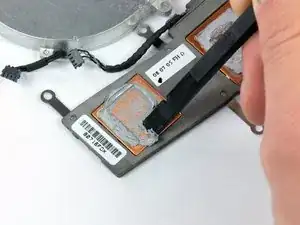
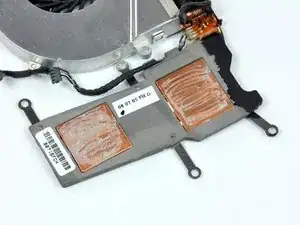
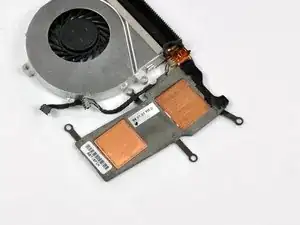
Verwende das flache Ende eines Spudgers, um so viel verhärtete Wärmeleitpaste wie möglich von den Kupferkernen der Kühlkörper zu entfernen.
-
-
-
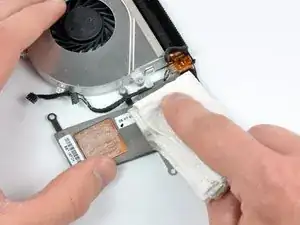
Verwende einen Kaffeefilter oder faserfreies Tuch mit etwas Isopropylalkohol (mindestens 90%ig), um die Rückstände der Wärmeleitpaste von den Kontakten des Kühlkörpers zu entfernen.
-
Sobald alle sichtbaren Rückstände von der Oberfläche entfernt sind, verwende einen neuen Kaffeefilter oder ein sauberes Tuch und Isopropylalkohol, um jegliche Fettrückstände zu entfernen und die Oberfläche vorzubereiten.
-
Berühre niemals den Chip oder den Kühlkörper, oder setze sie Staub und Dreck aus. Schon ein Fingerabdruck kann ein großes Hindernis für die Wärmeübertragung sein.
-
Lasse den Kühlkörper komplett trocknen.
-
-
-
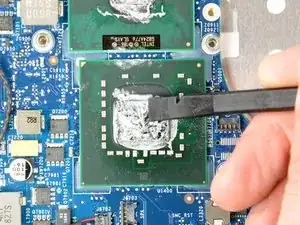
Verwende das flache Ende eines Spudgers, um so viel verhärtete Wärmeleitpaste wie möglich vom Prozessor zu entfernen.
-
-
-
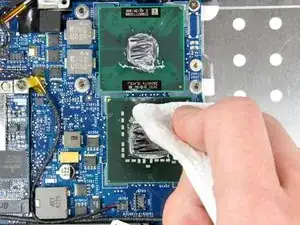
Verwende wieder einen Kaffeefilter oder fusselfreies Tuch mit etwas Isopropylalkohol oder ArctiClean Wärmeleitpasten-Entferner, um die Rückstände der Wärmeleitpaste von der Oberfläche des Prozessors zu entfernen.
-
Sobald alle sichtbaren Rückstände von der Oberfläche entfernt sind, verwende einen neuen Kaffeefilter oder ein sauberes Tuch und etwas Isopropylalkohol, um jegliche Fettrückstände zu entfernen und die Oberfläche vorzubereiten.
-
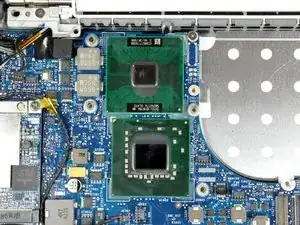
Lasse den Prozessor komplett trocknen.
-
-
-
Verwende beim Auftragen der neuen Wärmeleitpaste die für deinen Prozessortyp empfohlene Methode - senkrechte Linie (vertical line), waagrechte Linie (horizontal line), Punkt in der Mitte (middle dot) oder Verstreichmethode (surface spread). Beachte, dass sich bei der Verstreichmethode leicht Luftblasen bilden können.
-
Wenn du die Verstreichmethode benutzt:
-
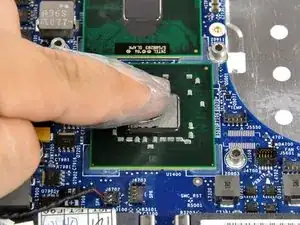
Umwickle die Spitze deines Zeigefingers mit einem Stück Plastik (zum Beispiel Frischhaltefolie).
-
Gebe eine kleine Menge Wärmeleitpaste auf den Prozessorkern.
-
Verstreiche die Paste vorsichtig auf der gesamten Oberfläche.
-
Der Prozessor ist nun fertig für die Installation des Kühlkörpers vorbereitet.
-
Um dein Gerät wieder zusammenzubauen, folge den Schritten für das jeweilige Gerät in umgekehrter Reihenfolge.
36 Kommentare
For heat sinks with a spring on the screws: Wonder why there are springs on the heat sink screws? Do not over tighten them, the springs are there to help you apply the correct amount of pressure on to the CPU and GPU. If you tighten them all the way, it may not be the correct pressure! Leave maybe 1 mm of space, just before the screw stops turning. iFixit forgot to mention this important part, and also in the heat paste guide!!
m3kw -
This is completely untrue. The holes bored in the heat sinks are in fact a larger diameter than both the threads and the shoulder of the heat sink screws. The screws should be fully tightened (as they were from the factory) to maintain correct pressure against the processors.
I have two green lights on my xbox slim ... Should I do all of this to get rid of them? I'm not sure if they are supposed to be green. I bought my wii and remotes from a refurbishing place. I don't have the red ring of death, but I think it is from over heating.
OMG Hi -
Thank you so much for this! Have been struggling for months with CPU diode sensor reporting 262F/128C and CPU dropping to 0.8 Ghz due to Speedstep. Loosened the screws a little and the sensor is back to normal. I cannot thank you enough for this!
It didn't help my crashing MBP, NVidia bug.
gustmoge -
Try reheating / reballing the gpu soldering. It worked for me more than 3 times.
mark -
See following link: Problem with NVIDIA GeForce GT 330M 256 MB?
Greg Key -
If it was a mid 2007/early 2008 Macbook Pro 15”/17”, it is actually a GPU defect. It needs to be replaced with a revised version. In fact, dosdude1 made a video about that. If it’s a late 2008-mid 2010 15”/17” Macbook Pro, it’s actually a problem with a capacitor on the GPU buck converter circuit, it is not a problem with the GPU in these machines (C7771 on the 2008 and 2009 models, C9560 on the 2010 models.) If it’s a early/late 2011 15”/17” Macbook Pro with AMD Radeon HD 6xxxM graphics, it’s a GPU issue that can be fixed using the technique described at dosdude1.com/gpudisable.
Rupertus -
Actually, Tom's Hardware's guide said not to spread the paste out, but to have a solid line of paste vertically across the longest part of the metal cap and let the heat sink spread it out as it gets tightened. This method supposedly reduces the risk of air bubbles. My only curiousity is with processors that have little resistors or some such things placed around the metal heat cap, should those be pasted as well or not? Dell's processor came completely covered with paste, onto the chips as well, but I'm wondering if I should re-apply to the chips or just to the cap.
Frank -
Note: This old thread still deserves a reminder: Those are capacitors and the type of paste used is CRITICAL. If it is non conductive (white, pink or any non metallic color) it's Ok if it gets on the capacitors. If the recommended paste is Arctic SILVER or any metal filled paste, do NOT let it get on the capacitors. Your best bet is to apply a slim line of paste along the longest length of the chip and use a credit card as a squeegee to spread the paste into a smooth film. Then apply a small drop to the center (optional). Wetting the surface helps.
airyu -


the best way to clean a CPU or a GPU is to use a spudger and ISOPROPYL its an alcohol that dries fast
USE WITH CAREFULLY DO NOT DRINK OR USE IT FOR ANY OTHER PURPOSE.
YOU CAN USE ISOPROPYL TO CLEAN WOUNDS OR CPU'S OR GPU'S
ISOPROPYL
What is isopropyl
Ronald -
Please don’t use isopropyl alcohol to clean wounds—it is actually detrimental to cellular healing. Rinsing copiously with normal saline or clean water is much better.
Yoron -
If you cam here from the PS 4 fan replacement page, I highly recommend the “pea” method instead.
Donovan Ray -