Einleitung

Diese Anleitung zeigt, wie das äußerse Gehäuse des Nintendo Wii U GamePad ausgetauscht werden kann.

  1. MVKVruSeZW3bD6SI
    MVKVruSeZW3bD6SI
    le1JAt3FQbf54yTp
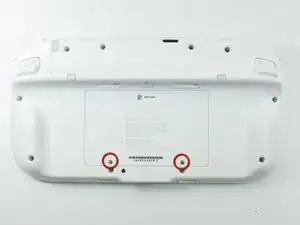
    • Lege das GamePad mit der Unterseite nach oben und drehe die beiden Kreuzschlitzschrauben #00 vom Akkufach heraus.

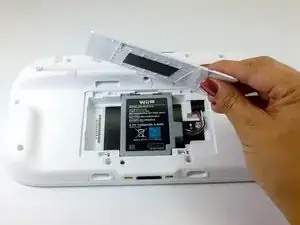
    • Hebe den Akkufachdeckel hoch und entferne ihn.

  2. fPDZ5cowSusmnpPm
    fPDZ5cowSusmnpPm
    Sq4UdmndJ3JCRDDj
    RCEoM1aRFKMg4XR6
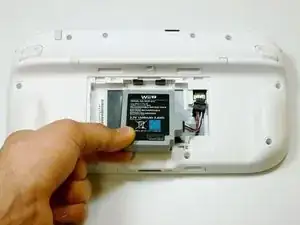
    • Lege deinen Finger auf den Akkustecker und schiebe ihn zur Unterkante des Geräts hin, so dass er sich ablöst.

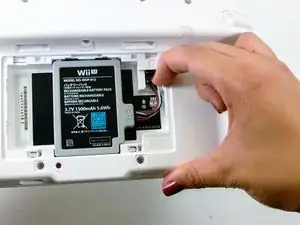
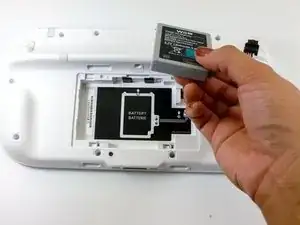
    • Ziehe den Akku an der Unterkante nach oben und löse ihn heraus.

  3. mqcXxTcpkCsUCEUC
    mqcXxTcpkCsUCEUC
    KouXoDYfgoKjGHim
    AckGF6GfFXbPSdJn
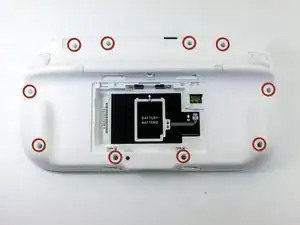
    • Entferne die zehn 8,9 mm Tri-Wing Y1 Schrauben unter den quadratischen Aufklebern.

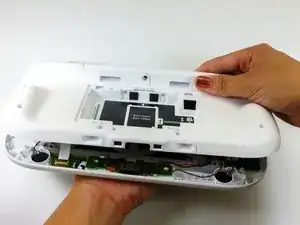
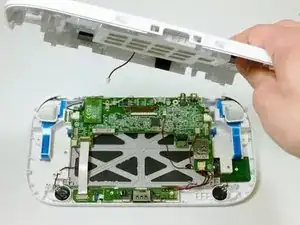
    • Hebe die Rückabdeckung an.

    • Die Rückabdeckung ist immer noch über ein Kabel mit der Hauptplatine verbunden.

    how do i replace the whole front and back casing?

    enbodylin -

    bruh the ifix it screwdriver dont reach down the whole way

    Michael -

    I feel like it’s important to mention how deep some of these holes are. Your screwdriver might not reach. Mine sure didn’t.

    greatshadowdude -

    I had to shove some tissue into the screwdriver bit holder to get it to reach

    Andrew Walker -

  4. RSCLrkAAAJfPYL2i
    RSCLrkAAAJfPYL2i
    MpWZHBviKJl1AWqN
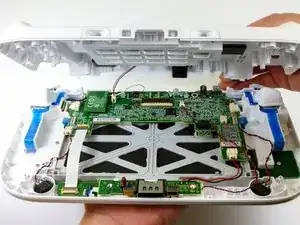
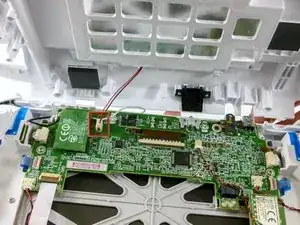
    • Löse den Stecker, der die Rückabdeckung mit der Hauptplatine verbindet.

    • Entferne die Rückabdeckung.

    You don't have to remove just be careful

    Heather Sheppard -

    I tried to remove like at least 6 times but I wasn’t able to. Using tweezer, my nails, long nose pliers. There could be a lock but I gave up since I’m afraid if I put more force I might accidentally pull the wires. I’m able to remove the left and right analog stick with the back plate plugged, as mentioned, just be careful.

    Royce Remulla -

    I was stuck on this step for a while - note that you’re only removing the little white plastic bit. The beige or yellowish plastic bit is attached to the board. I needed to use pliers to carefully grab just the white plastic bit and wiggle it side to side.

    Nova H -

Abschluss

Um dein Gerät wieder zusammenzubauen, folge den Schritten in umgekehrter Reihenfolge.

Kim Arre

Mitglied seit: 11/01/13

4544 Reputation

2 Kommentare

This is either incomplete or mistitled - it is a currently a back plate replacement guide.

At the conclusion of this how-to/walkthrough, most of the GamePad's hardware is still attached to the front plate, one half of the outer case.

Elijah -

and the front?

Raul Kim Diego -