Einleitung
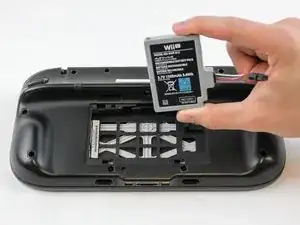
Um den Akku zu entfernen, brauchst du einen kleinen Kreuzschlitzschraubendreher PH0. In dieser Anleitung wird wird gezeigt, wie der Akku ausgebaut wird, damit das Gehäuse der Nintendo entfernt werden kann.
Werkzeuge
Ersatzteile
-
-
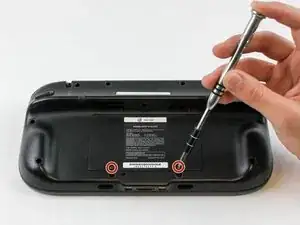
Drehe das GamePad um und entferne die beiden 4,7 mm Schrauben mit einem Kreuzschlitzschraubendreher #00.
-
-
-
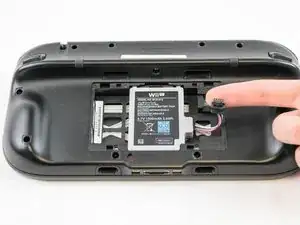
Drücke mit deinem Finger nach unten und ziehen sie Akkustecker heraus.
-
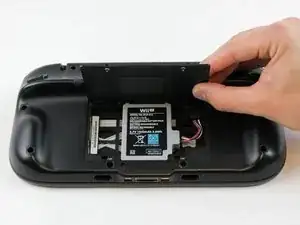
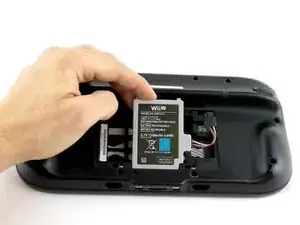
Entferne dann den Akku aus dem Akkufach.
-

Um dein Gerät wieder wieder zusammenzubauen, folge den Anweisungen in umgedrehter Reihenfolge.
2 Kommentare
I'm trying to put in the new battery, but the connector won't snap in even with larger amounts of force. The original battery, on the other hand, snaps right in.
I have the same issue. The connector on the new battery does not snap in. Does anyone know how to fix this issue and ger the connector to snap into place?
Encom -
tried to unscrew the 10 Tri-Wing size Y1 screw with my iFixIt toolkit
unfortunately the tool is too “fat” and short, it cannot reach 4 screws on the corners of the gamepad.
having the iFixIt toolkit and needing to purchase an additional slim screwdriver it’s a shame…
Antonello Iannone -