Einleitung

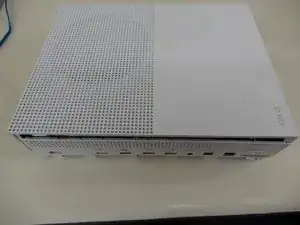
Wenn deine Xbox bei bestimmten Spielen nicht mehr auf Bewegungen reagiert, könnte die Infrarotplatine defekt sein. Hier wird gezeigt, wie du sie austauschen kannst. Achte darauf, dass eine direkte Sichtverbindung zwischen dir und der Xbox besteht und kein Hindernis die Infrarotstrahlung blockiert.

  1. AQtIBB1ZGqHTvNg4
    • Lege die Xbox mit der Bodenseite nach oben.

  2. cI432T5plYCpwsEg
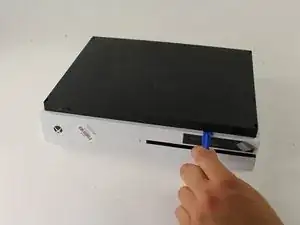
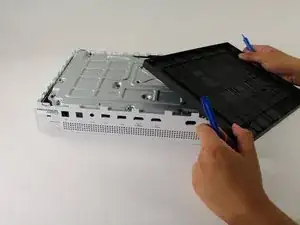
    • Fange auf der Rückseite des Gehäuses an, wo das Garantiesiegel klebt. Setze ein Plastiköffnungswerkzeug in den Spalt zwischen Boden und der Oberseite. Suche die Rasten, welche die Teile zusammenhalten.

    • Löse die Rasten mit dem Werkzeug. Am einfachsten geht es, wenn du das schwarze Gehäuse weg vom Boden hebelst.

    • Beim Öffnen hörst du klickende Geräusche. Es ist schon recht schwer den Boden abzunehmen.

    • Die Rasten können sogar abbrechen, sei vorsichtig.

    • Es ist empfehlenswert, auf der Rückseite zu beginnen, dort, wo das Garantiesiegel klebt. Löse die Clips auf der Rückseite. Arbeite dich dann an beiden Seiten nach vorne. Wenn die drei Seiten gelöst sind, fange auf der Vorderseite gegenüber des Sync-Buttons an. Sei vorsichtig und nimm dir Zeit, damit sich alles ohne Schäden löst.

    Be careful not to damage the pairing button on this part

    David -

    Important!!

    You've to start from the back corner where is the information label, because there is a main clip behind a warranty sticker

    Cristian Ramirez -

    They should add this to the guide! I didnt know that, and did some minor damage to the bottom piece where that main clip is.

    I dont mind because it's my own Xbox, but what if it belonged to a customer?

    Charles Jackson -

    They should add this to the guide! I didnt know that, and did some minor damage to the bottom piece where that main clip is.

    I dont mind because it's my own Xbox, but what if it belonged to a customer?

    💯% same opinion!

    profnussecke42o -

    This was hard! I tried using plastic pry tools, but they did not work. A metal tool did, but make sure to watch a video or two, to see what you actually are dealing with. After the videos it went quite smoothly.

    Peterdk -

    I legitimately cannot open the case where the warranty sticker is, ive tried everything, im resorting to a fork to try and open this

    Sohail ツShah -

  3. DGFtVxEdoZKRdLMd
    • Wenn alle Rasten frei sind kannst du den Boden vom Gehäuse lösen.

  4. GeIOPswgPOYsuGeJ
    GeIOPswgPOYsuGeJ
    uITOYPJDbxUgf4Lc
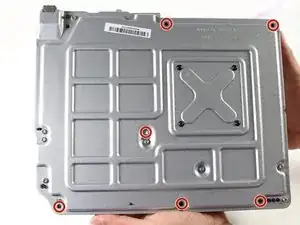
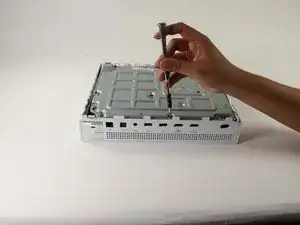
    • Drehe die sechs grünen 50 mm langen Torx T10 Schrauben vom Metallgehäuse heraus. Sie sind mit F1 bis F6 markiert.

  5. 3AbSAfsoTxUrMeTi
    3AbSAfsoTxUrMeTi
    wudY36aHJeyT6WjV
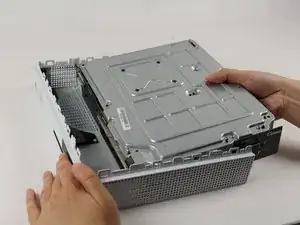
    • Trenne vorsichtig mit der geeigneten Methode das innere Gehäuse vom weißen Außengehäuse.

    • Drücke die weißen Seitenteile hinten nach außen, so dass sie sich vom I/O-Panel ablösen.

    Essential tip: be sure to slide the metal housing backward, away from the from of the case as pictured above, rather than upward. If not, you can easily break off the teeny momentary switches on the IR blaster board!

    Mark Ross -

    “appropriate method is not descriptive like Mr. Ross’s comment. The original poster should edit the description to ensure people do in fact remove the box from the case appropriately. I would also add arrows to the picture.

    Ryan A -

    ____________⬆️

    ↖️Yes! I see it the same way!↗️

    ⬅️Arrows are always a good thing!➡️

    ↙️Can't do anything wrong with them! ↘️

    ____________⬇️

    😅😅

    profnussecke42o -

  6. DvGTCQDMjlaiQ4UL
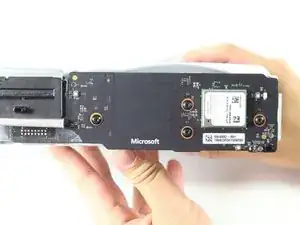
    • Die Infrarotplatine befindet sich an einer der Seiten des inneren Gehäuses in der Nähe des DVD Laufwerks und des Lüfters.

  7. CsUuXCSVUxuemELY
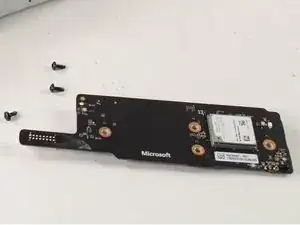
    • Entferne vier mit orangenen Kreisen markierte 15 mm Torx T8 Schrauben.

    • Ziehe die Infrarotplatine vorsichtig vom Gehäuse ab.

Abschluss

Um dein Gerät wieder zusammenzusetzen, folge den Schritten in umgekehrter Reihenfolge.

Christopher Chen

Mitglied seit: 26/04/17

585 Reputation

2 Kommentare

When the board gets replaced does the power light still function normally? I just replaced one because a power button failed and while the new switches work the indicator lights will not power on

Brandon Shrader -

Question. What's size and type of button does this board use? I have one with the eject and sync button sheered off.
Frank urmom -