Einleitung

Replacing the battery is a quick and easy fix if your robot exhibits the symptoms shown in the accompanying troubleshooting section.

  1. HIQGDGbINJ3sVVZo
    HIQGDGbINJ3sVVZo
    oYf1QmpCRfbLxuhE
    xQClJOkR3X2XMpXr
    • Locate and unscrew the two 15mm screws with a Phillips #2 screwdriver.

  2. IUtXyeh16r5SmFa6
    IUtXyeh16r5SmFa6
    haRAiDDULnPBRkWy
    AYV1fKhABIPERbKc
    • Remove both screws shown by rotating them counter-clockwise.

  3. ZQClZnjAc21RFJIV
    • Remove the battery compartment's lid.

  4. WfNlpghB2bSCnhDx
    WfNlpghB2bSCnhDx
    RkqX3r5LylPvmEQk
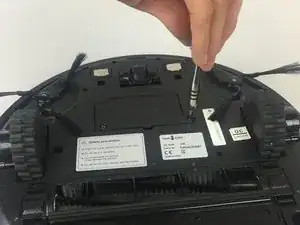
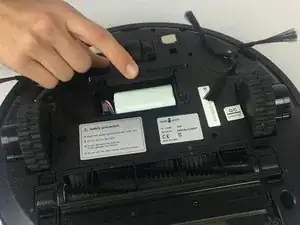
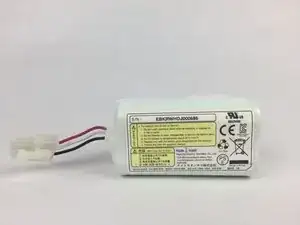
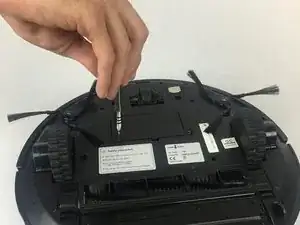
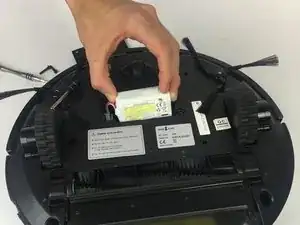
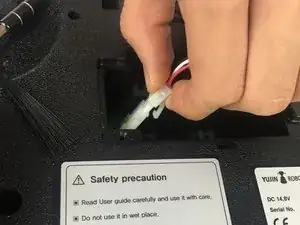
    • Slide the battery out, and disconnect it from the robot by squeezing the tab on the power cable.

    • If you pull too hard on the connector without properly squeezing the tab, something will break.

Abschluss

To reassemble your device, follow these instructions in reverse order.

Trent Bingel

Mitglied seit: 28/02/17

428 Reputation

Ein Kommentar

Tried 2 different new batteries and still won’t charge

desrn55 -