Einleitung
Eine zweite Festplatte im Laptop bietet viele Vorteile, wie höhere Geschwindigkeit, mehr Speicherplatz und weniger Aufregung beim Installieren neuer Software. Diese Anleitung zeigt dir, wie du die zweite Festplatte anstelle des optischen Laufwerks einbauen kannst.
Werkzeuge
Ersatzteile
-
-
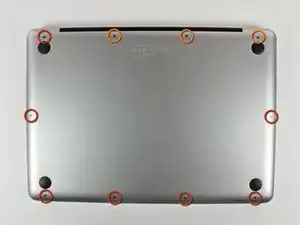
Entferne die folgenden 10 Kreuzschlitz-Schrauben, die die Gehäuse-Unterseite des MacBook Pro 13" Unibody befestigen:
-
Sieben 3 mm Schrauben.
-
Drei 13,5 mm Schrauben.
-
-
-
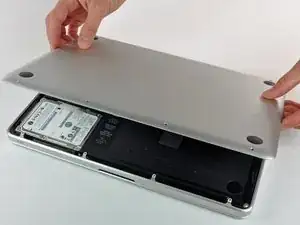
Hebe die Unterseite vorsichtig an und drücke sie Richtung Rückseite des Laptops, um die Halterungsclips zu lösen.
-
-
-
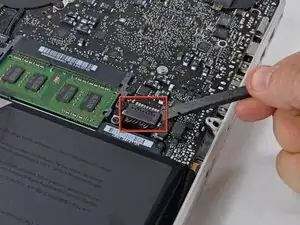
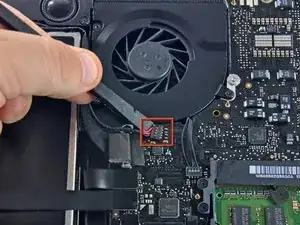
Löse mit der Kante eines Spudgers den Akkuanschluss nach oben, weg vom Sockel auf dem Logic Board.
-
-
-
Eventuell befindet sich eine weiche Abdeckung über dem Verbinder, die du dann entfernen musst. Ziehe dann vorsichtig den Verbinder aus seinem Sockel auf dem Logic Board.
-
-
-
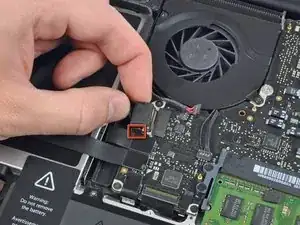
Ziehe den Verbinder des Kamerakabels in Richtung des optischen Laufwerks, um es vom Logic Board zu lösen.
-
-
-
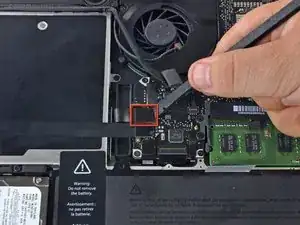
Ziehe den Verbinder des optischen Laufwerks mit dem flachen Ende eines Spudgers senkrecht aus seinem Sockel.
-
-
-
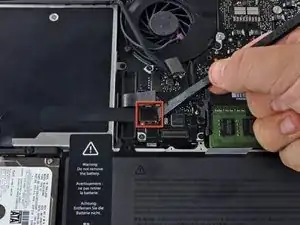
Ziehe den Verbinder der Festplatte mit dem flachen Ende eines Spudgers senkrecht aus seinem Sockel.
-
-
-
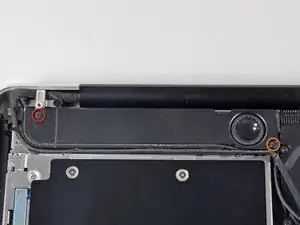
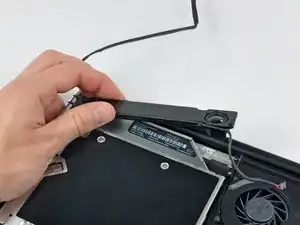
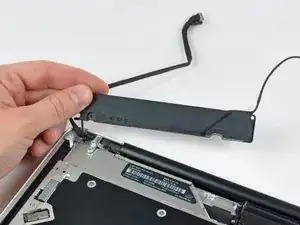
Der Subwoofer ist mit Kreuzschlitzschrauben am oberen Gehäuse befestigt. Drehe folgende Schrauben heraus:
-
Eine 3,8 mm
-
Eine 5 mm
-
-
-
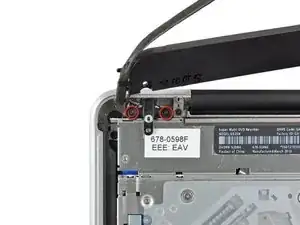
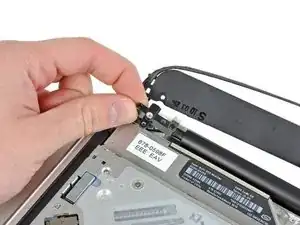
Entferne die beiden 10 mm Kreuzschlitzschrauben, die die Halterung für das Kamerakabel am oberen Gehäuse festhalten.
-
Hebe die Halterung für das Kamerakabel aus dem Gehäuse.
-
-
-
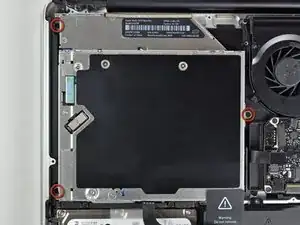
Entferne die drei 2,5 mm Kreuzschlitzschrauben, die das optische Laufwerk am Gehäuse befestigen.
-
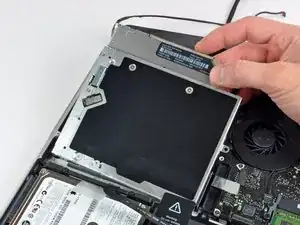
Hebe das optische Laufwerk an der rechten Kante hoch und ziehe es aus dem Computer.
-
-
-
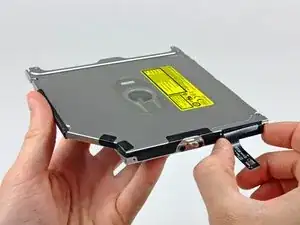
Ziehe das Kabel zum optischen Laufwerk gerade vom optischen Laufwerk weg und entferne es.
-
-
-
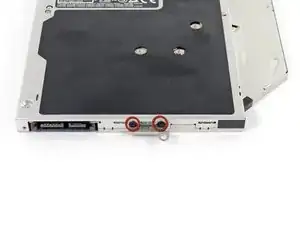
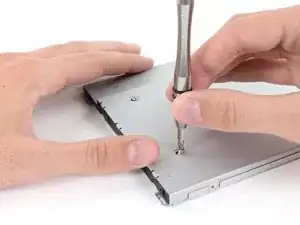
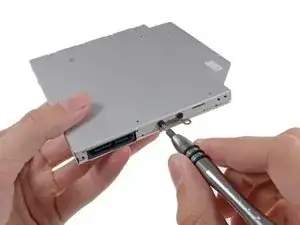
Entferne die beiden schwarzen Kreuzschlitzschrauben #0, mit denen die die kleine Metallhalterung befestigt ist. Übertrage diese Halterung auf dein neues optisches Laufwerk oder den Festplatteneinschub.
-
-
-
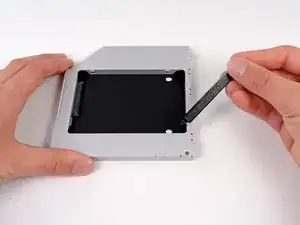
Entferne den Abstandhalter aus Plastik aus dem Gehäuse des DVD-Laufwerks, indem du auf einer der beiden Seiten die Plastiklasche eindrückst und den Abstandhalter nach oben herausnimmst.
-
-
-
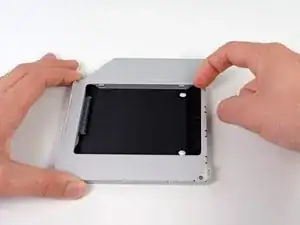
Achte darauf, dass die Anschlüsse für die Festplatte nach unten zeigen, bevor du die Festplatte in das Gehäuse setzt.
-
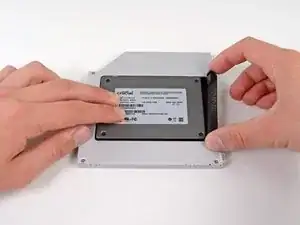
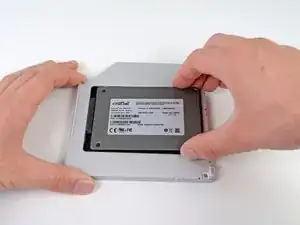
Setze die Festplatte vorsichtig in den dafür vorgesehenen Platz in dem Gehäuse.
-
Halte das Gehäuse mit einer Hand fest und drücke die Festplatte mit der anderen Hand in die Anschlüsse im Gehäuse.
-
-
-
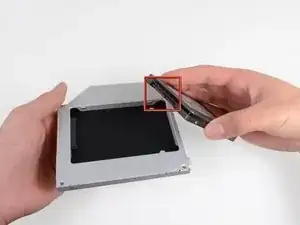
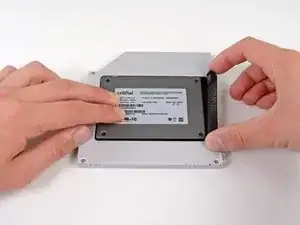
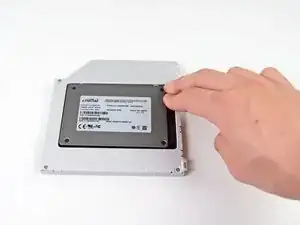
Wenn die Festplatte im Gehäuse sitzt, halte sie mit einer Hand fest und setze den Abstandhalter wieder in das Gehäuse ein.
-
-
-
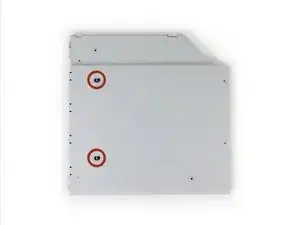
Befestige die Öse vom DVD-Laufwerk mit zwei #0 Kreuzschlitzschrauben am neuen Gehäuse.
-
Verbinde alle Kabel, die du vom originalen DVD-Laufwerk entfernt hattest, mit dem neuen Gehäuse.
-
-
-
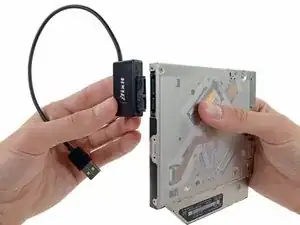
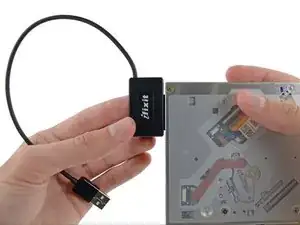
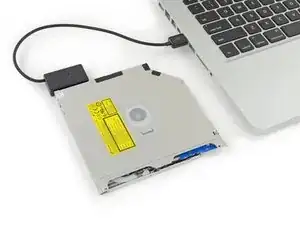
Richte den SATA Anschluss des Kabels mit dem Anschluss am Laufwerk aus und stecke ihn ein.
-
Stecke den USB Anschluss in deinen Laptop und das Laufwerk ist bereit zur Verwendung.
-
Um dein Gerät wieder zusammenbauen, folge den Schritten in umgekehrter Reihenfolge.es
4 Kommentare
I bought a 1TB SSD/hybrid drive from Ifixit.com to upgrade the 256GB HDD that came with MBP 2010. Disk Utility could not see the new drive on the original HDD cable but saw the old one just fine. New replacement cable was not the correct size for the MBP 2010 but worked just fine in my other MBP 2012. Put the stock HDD back in with the original HDD cable, removed the optical drive and replaced with the 1TB dual drive per instructions without problems. I have read online that the SATA HDD cable in MBP 2009 and early 2010 was too slow to read modern high-speed SATA drives.
Only glitch I found is DVD/CDs will not mount in the optical drive using the external USB cable that came with the dual disk kit purchased here. Will eventually have to find time to try swapping the optical drive with my other laptop to test internally as well as the external cable. At this point I don't care, didn't use the optical, love the two working internal disk drives. Thanks guys!
Bob -
I replaced Primary HDD with SSD and moved HDD to optical slot with caddy, and it seems works, but HDD in optical slot is incredibly slow now. Macbook 7.1. Sierra. SSD Savage 250Gb.
Smoooooth, like butta. Thanks for another great guide and parts. My 2010 macbook pro now has an ssd running fast w sierra, and my conventional drive for lots of storage. About $200 for ssd and the parts, and my computer will be in good shape for a few more years!


Compare the short screws carefully before reinstalling them. The shouldered screws go in the holes on the front edge.
David Kilbridge -
Before I started removing any screws I took a piece of paper and drew the bottom of the laptop and put a piece of double-sided tape in the spot where each screw goes. That way when I took out the screws, I could put them on the tape so I knew exactly which screw went in which spot. I did the same thing for dismantling the inside on another sheet of paper, then a third sheet for the screen after getting the front glass off.
mastover -
I use a similar technique: I print out the iFixit manual for the job, and Scotch-tape down the screws/brackets/cables I remove at each step next to the component descriptions. That way, when I'm reassembling, the bits are taped right next to the photo of where they came from.
adlerpe -
That's exactly what I do for all my repairs! It's the best way to keep track of all of the parts ' original location and to make sure that you don't miss any parts during reassembly.
joyitsjennie -
Great idea and one I use often
Thomas Overstreet -
Excellent idea! Thanks for sharing it here.
Laura Sharkey -
I used a 00 that fit but the screws were very tight so I used a tiny paintbrush with some wd40 on it and put it around the edges of the screws. Worked like a charm
valentinedhdh -
I use a magnetic mat and place the screws in order on that :)
Cary B -