Einleitung

You can install hard drives up to 9mm thick.

  1. SFNXXLIPAVtTfoBc
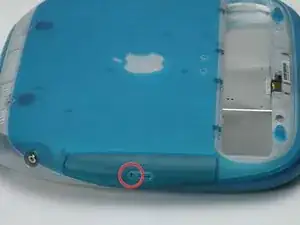
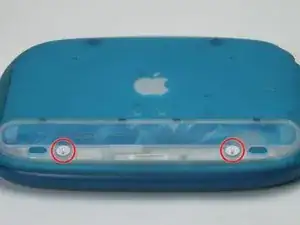
    • Use a coin to turn both battery locking screws 90 degrees to the left.

    • Remove the battery cover.

    • Remove the battery from the computer by pulling up on the plastic tab.

  2. TuAR6NdLjFJF2J1Z
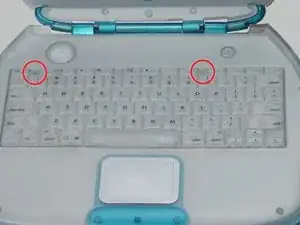
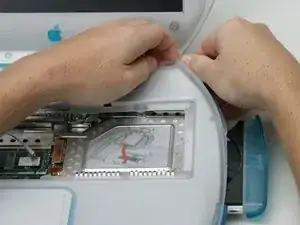
    • Pull the keyboard release tabs toward you and lift up on the keyboard until it pops free. Note that the keyboard ribbon is still attached to the logic board, so you cannot completely remove the keyboard yet.

    • If the keyboard does not come free, use a small flathead screwdriver to turn the keyboard locking screw (between F4 and F5 key) 180 degrees in either direction and try again.

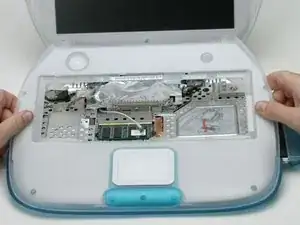
    • Rotate the keyboard away from the screen and rest it face-down on the trackpad area.

  3. SIQqrMrKvDoiSMhV
    • If your computer does not have an airport card, you can skip the next two steps.

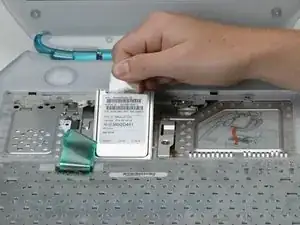
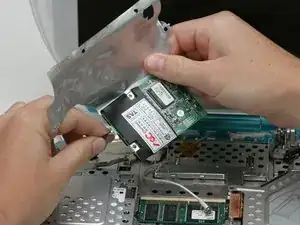
    • Grasp the clear plastic tab on the airport card and pull up and toward the display.

  4. 2Y2lllKp2lFKaSNY
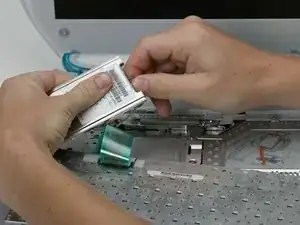
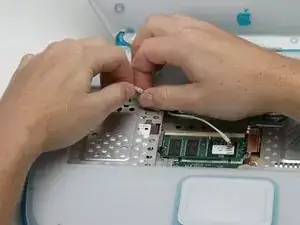
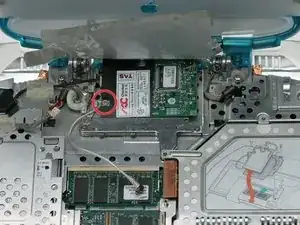
    • Hold the airport card in one hand and use your other hand to remove the antenna cable.

  5. 6RAaAVZHGeW3NNev
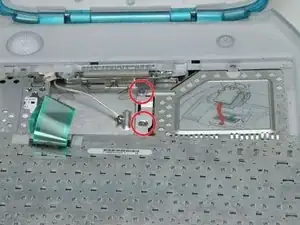
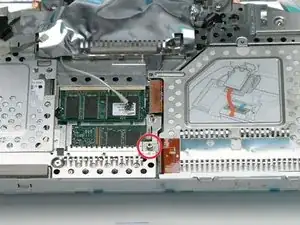
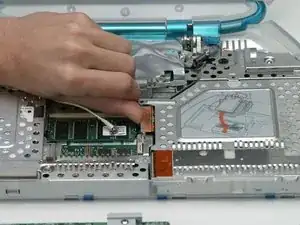
    • Remove the two Phillips screws that secure the RAM shield.

  6. Fe5LCpxRuUPtSnqK
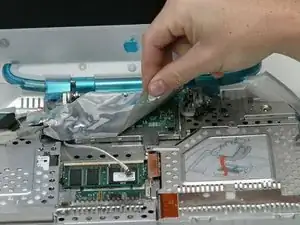
    • Grasp the wire metal bracket on top of the RAM shield and pull upward to remove the shield.

  7. do5IHyWKVDowdd5J
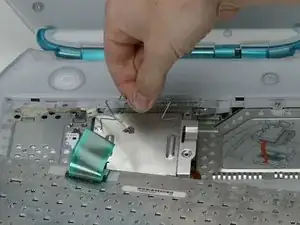
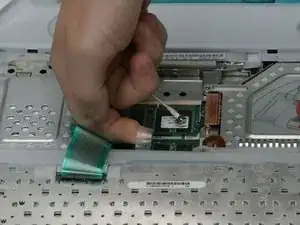
    • Pull up the keyboard connector cable by its clear plastic loop.

  8. nTBQIEFJsJtuPElA
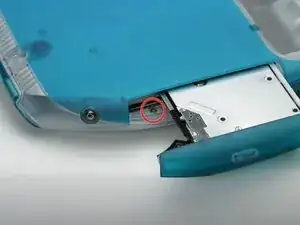
    • Use a straightened paperclip to manually eject the CD-ROM tray.

  9. yuTbi3hjKL4IOfBe
    • Turn the computer over so that the bottom is facing up.

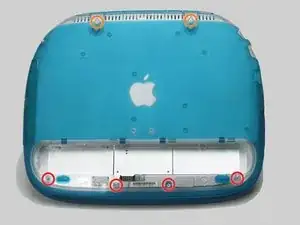
    • Remove the following Torx screws:

    • Four short T8 Torx near the battery compartment.

    • Two long T8 Torx near the hinges.

  10. ReHeVXVjQHhWbur4
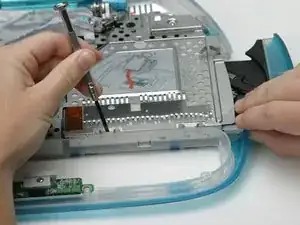
    • Pull the CD-ROM drive tray partly out.

    • Remove the silver Phillips screw from the plastic casing.

  11. Ffn2ljYU6fYY2Ntb
    • Turn the computer over.

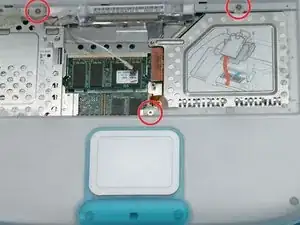
    • Remove the three Phillips screws.

    Please note: these screws can (and may!) strip easily, so take extra care in removing them!

    LambdaCalculus -

  12. Oixgd5TxvmTwglvW
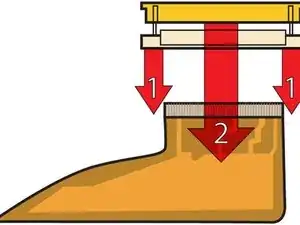
    • This is a diagram of the trackpad ribbon clamp connector you will disconnect in the next step.

    • 1) With your fingernails, grasp the locking bar on either side and pull up a small amount (about 1/16" or 2 mm).

    • 2) After disengaging the locking bar, slide the cable out of the connector.

    In part 1, you can use a small flat-blade screwdriver to lift the locking bar. This will not put pressure on the cable itself. Each end of the locking bar will click when it has been lifted sufficiently.

    Don Solomon -

  13. EkeUv5alLkHAvfFL
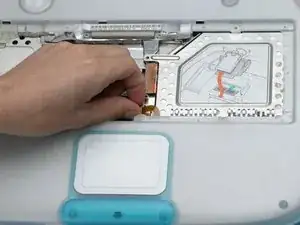
    • Loosen the trackpad clamp by pulling the top piece up slightly, freeing the trackpad ribbon.

    • Slide the orange trackpad ribbon out of the clamp.

    Before going to the next step, remove 4 T8 screws from bottom of case.

    gestler -

  14. ChLaXi5AH4qvCkP1
    • Do not lift the upper case too far without first disconnecting the audio cable.

    • Push out the rim of the lower case and pull up on the upper case, grasping it just to the left of the optical drive.

    • Repeat the above step on the upper left corner of the upper case, grasping the bottom left corner of the upper case.

  15. JpG2EAGhD1BYUTit
    • Disconnect the audio cable.

  16. wiDKXAnQGILNAuir
    • Grasp the upper case on either side of the keyboard space and rotate up and away from the screen.

    • You may be thinking you're about to break your upper case. Not to worry - the tabs holding the upper and lower cases together are very strong. Simply apply even pressure and continue to rotate the upper case up and away from the screen until it comes free.

    When replacing the upper case, test the trackpad button to make sure it clicks before proceeding. If it does not operate properly, remove the upper case and reattach it.

    Don Solomon -

    Once you free the back half, pull the the case forward, not up so much, or you’ll break the tabs on the sides by the optical drive on the right, and about the same place on the left.

    Rick Karrer -

    I second this.

    DistroHopper39F -

  17. tokelDucGFyIcSky
    • If the optical drive is not open, use a straightened paperclip to open it now.

    • Remove the 5 mm standoff.

  18. l1uhHTYFewVBJMSt
    • Disconnect the optical drive cable from the logic board.

  19. kwVFtaZtF1t2gh3E
    • Lift up on the optical drive while sequentially pushing the small plastic tabs one after another toward the screen to free one side of the drive.

    • Lift up the side of the optical drive you just freed and slide the drive out and away from the screen.

    • When reinstalling the optical drive, be sure that the drive tray is out far enough to slide under the lower casing rim.

    • If you have a CD or any other object jammed in your optical drive, we have an optical drive repair guide.

  20. EIZIStM4fNiiSyCK
    • Remove the following Phillips screws:

    • Remove the longer Phillips screw from the middle-rear of the modem shield.

    • Remove the three identical Phillips screws, two on either side of the EMI fingers, and the remaining one on the right side of the modem shield.

    • Remove the larger Phillips screw that secures the EMI fingers to the modem board.

    • Remove the EMI fingers.

  21. rg3woaomfJ2wyPE1
    • Peel the modem shield away from the metal framework below, working from the right front and moving to the left.

  22. BmRpSdpZeZ3UY3ce
    • Remove the Phillips screw from the left side of the modem.

    • Pry up the right side of the modem.

  23. DV1DB4VET1YiK2by
    • Lift the modem partially out and disconnect the cable on the left side.

  24. heOGooxXqxMQORpC
    • Remove the Phillips screw from the left hinge.

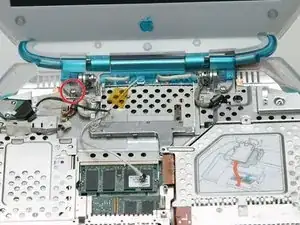
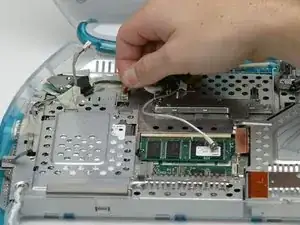
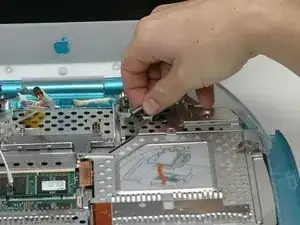
    • Peel up the airport cable from beneath the yellow tape.

  25. UP2DPNlCdgCSVQV3
    • Disconnect the large display data cable from the logic board and deroute it from the plastic and metal tabs.

  26. UQhvtsgwNYM2puKo
    • Disconnect the backlight cable from the logic board and deroute it.

  27. stMPPxCUMl1KcTW6
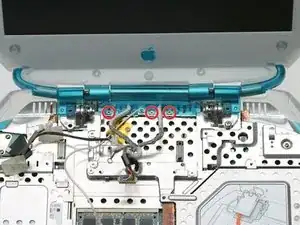
    • Remove the three small Phillips screws from the clutch cover.

    When reinstalling, hold the display so the clutch cover is flush with the panel below. Make sure no wires are caught before tightening the screws.

    Don Solomon -

    Note that there are small hooks that hold the clutch cover down. When reinstalling, be sure to hook the cover to them from the back, or you will have problems with the cover catching on the lid as you close it.

    Brandon Dusseau -

  28. xuvyXL6l1HXIuUKH
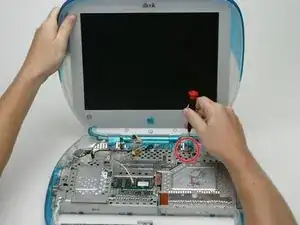
    • Finally, support the display with one hand while unscrewing the last Phillips screw from the right hinge (push the display gently down to avoid putting pressure on the screw).

    • Remove the display assembly.

    • When re-installing the display assembly, make sure that the clutch cover goes over the white plastic tabs protruding from the rear underside of the laptop.

  29. AHtDvcGMwTAw1Rl5
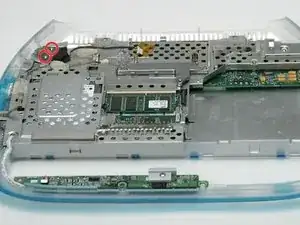
    • Remove the two small Phillips screws from the RJ-11 board.

  30. u5e2uHBABdvBC3PN
    • Push out the lower case rim and pull the RJ-11 board out of the computer.

  31. QYvk5ajCA2cFebyI
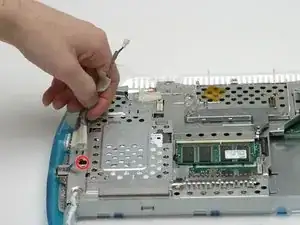
    • Deroute the speaker cable from the metal framework and disconnect it from the logic board.

    I don’t believe you need to deroute the speaker cable; just disconnect it from the logic board and leave it taped on where it is.

    John Hagan -

    I second this.

    Maxime Abbey -

  32. HWQFgeyNJl4XAwSp
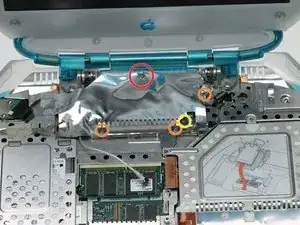
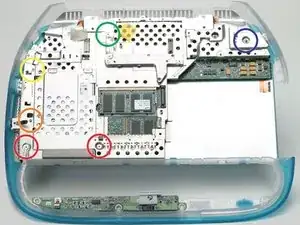
    • There are six screws to remove (if you have an iBook without Firewire the screw circled in orange will not be present):

    • Two short, flat-headed Phillips screws near the battery compartment.

    • One short, round-headed Phillips near the speaker cable connector. (This is present on some models, but not others - especially the older ones)

    • One short, flat-headed Phillips between the ethernet and USB ports.

    • One short, flat-headed Phillips to the left of the hole-y (polite laughter) area.

    • One long, round-headed Phillips screw near the power receptacle.

  33. CeKGLMpVEc5SFsId
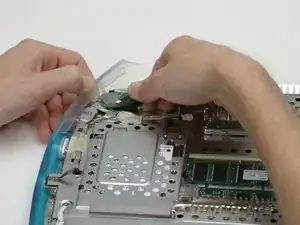
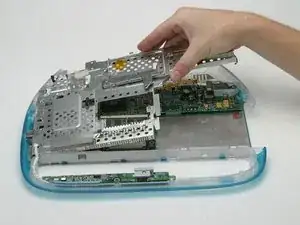
    • Lift the right side of the EMI shield up and pull it out of the computer.

  34. M6VQGJwFxqS14W5F
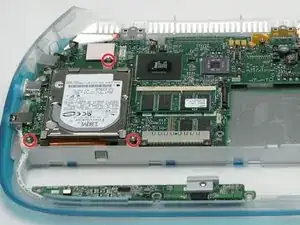
    • Remove the three 5 mm standoffs securing the hard drive to the logic board.

  35. PSqEtHtwLH6RraNN
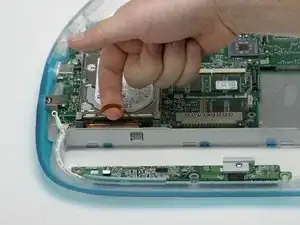
    • Pull the hard drive cable up from the logic board, using the plastic loop.

    • Lift the hard drive, with metal bracket attached, from the logic board.

  36. dRGJBUohEcyCx6rh
    • Take the metal bracket away from the hard drive.

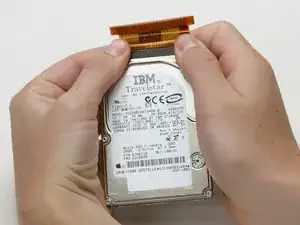
    • Disconnect the hard drive cable from the hard drive by applying even pressure on both sides while maintaining a firm grip on the drive itself.

    • This is a bit tricky. Try holding the drive against your body while pushing the cable away from you, or rocking the cable gently from side to side while applying even pressure, or both. If you bend the pins, do your best to straighten them, using the hard drive cable as a guide.

    This is far from being tricky, nothing more than removing a bare classic IDE cable from any old PC. Just have to pull the ribbon gently and it comes free easily…

    Compared to all the junk we had to remove in all f***ing previous 35 steps to access a stupid hard drive (which should be the FIRST most accessible part after RAM and battery!), trust me, this is NOTHING!

    Moreover, you don't have to remove all the standoffs from the bracket to get the HDD: only untighten them a little bit so you can slightly move the bracket from the HDD in order to lift it.

    Maxime Abbey -

Abschluss

To reassemble your device, follow these instructions in reverse order.

iRobot

Mitglied seit: 25/09/09

0 Reputation

6 Kommentare

after several assembly and disassemblies I found an SSD solution that works - essentially a PATA/EID to SD card adaptor from ebay (china source) for a few bucks and then I used carbon copy cloner to image and clone the active 6GB disk. My failed attempts involved 32GB SSD from Kingspan - would not boot (with any Jumper setting - very frustrating with a 30min each assemble/disassemble to test!)

James Field -

Hi, thanks for the SD card adapter suggestion. Super helpful. Are you able to provide a link or item name please for the adapter? Thank you.

Dale Sorenson -

James Field, I really wonder how fast an SSD actually is (compared to the initial setup) when using MacOS X 10.1 or so, with a G3 processor.

freed -

Great guide, I followed to the end. I swapped out my drive for a compact flash adapter and a 16GB card. My Clamshell runs absolutely silently. I’m hoping this will extend the battery life, too.

One thing I noticed when putting the display back on is the segment between the joints had to fit on to some hooks on the lower part of the case. That allowed the tiny screw holes between the joints to line up nicely.

Mr Poofy -

Made the mistake of not fitting these hooks on the lower part of the case before finishing disassembly - I was wondering why the clutch cover was so difficult to re-attach, and this was the culprit. Thanks for this comment
Shalen Bennett -

Oh my gosh this was a stressful disassembly. I really didn’t want to take it apart again. Especially around the screen attachments. I worked up a sweat just doing that and getting frustrated. But I did it. And my back and neck hate me for it. LOL

Ryan Martinez -