Einleitung

Folge dieser Anleitung, um bei deinem iMac die Festplatte durch eine SSD aufzurüsten. Dabei wird auch der Temperatursensor der SSD eingebaut, so dass der Lüfter mit der richtigen Drehzahl arbeiten kann.

Grundständige Anleitung zum Umrüsten eines 2009-2010 iMac mit einer SSD.

  1. yw5L1XBSIoaFP2lJ
    yw5L1XBSIoaFP2lJ
    IfEYLXa1PVVgeHNR
    EGASiwaQRDU6G5sH
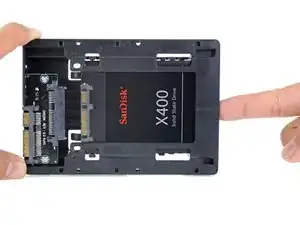
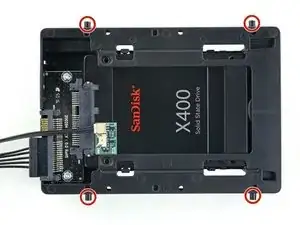
    • Folge den nächsten zehn Schritten nur, wenn du deine Festplatte durch ein SSD Kit austauschen willst.

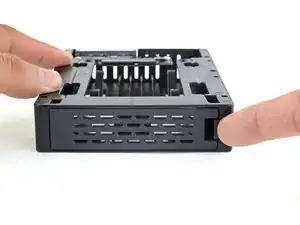
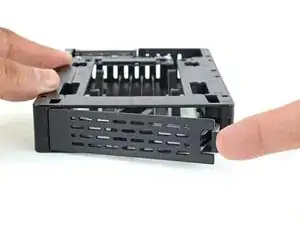
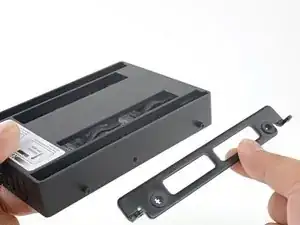
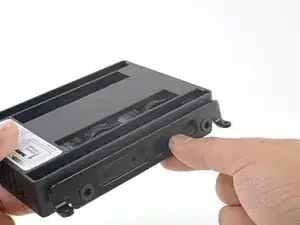
    • Drücke die Raste an der Frontplatte des Käfigs mit dem Finger herunter. Halte sie gedrückt und klappe die Frontplatte heraus.

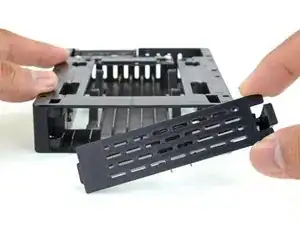
    • Entferne die Frontplatte.

    Quick and dirty hack : drill a hole in the bracket in the right place so you can screw the SSD to it (measure twice, drill once !) Move the rubber bit from the unused hole to the new one. As the SSD is very light and it’ll be hanging down from the bracket I think this is pretty safe. You’ll also need to find the right screws (M3?) with the proper length. Use mbpfan under linux (https://ineed.coffee/post/a-beginners-tu...) or whatever tool is available in OSX to control fan speed without a temp sensor.

    Christophe Nagel -

    There are several alternative mounts out there. I used this one:

    https://www.amazon.co.uk/Sabrent-Desktop...

    It worked excellently and seems less complicated than the one above.

    Ian Richardson -

  2. pUBuOR5jObRKcgTb
    pUBuOR5jObRKcgTb
    UOsa4yARWVQWPRf3
    wh1n1HnGSGhYLwfL
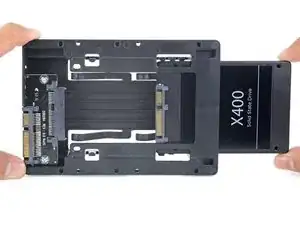
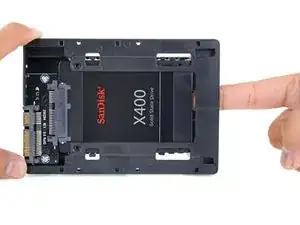
    • Richte den kleinen SATA Stecker so aus, dass die kurze Seite des SSD Steckers auf die kurze Seite am Stecker des Käfigs passt.

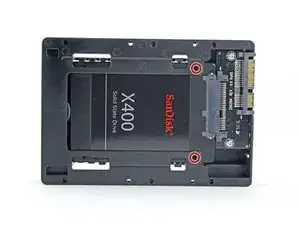
    • Schiebe das Laufwerk durch die Vorderseite des Käfigs ein, bis der SATA Stecker richtig verbunden ist.

    • Die SSD passt nur auf eine einzige Art in den Käfig. Wenn der Stecker nicht korrekt hinein geht, dann drehe die SSD um und versuche es noch einmal.

  3. JZJDQW2yqV5NdNB1
    • Wenn du willst, kannst du die SSD mit den beiden im Kit mitgelieferten Kreuzschlitzschrauben #1 im Käfig festschrauben.

  4. SDBAUhNKT3OSAyfF
    SDBAUhNKT3OSAyfF
    3HUjNBmicf1qPBYx
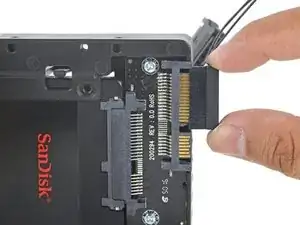
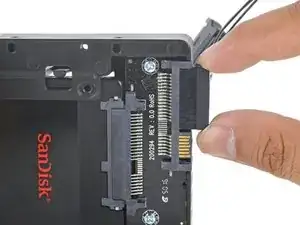
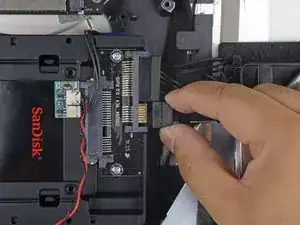
    • Stecke das mitgelieferte, für den Sensor vorbereitete SATA Versorgungskabel in den entsprechenden breiten Anschluss am Käfig.

    • Der Stecker passt nur auf eine Art. Wenn der Stecker nicht passt, dann drehe ihn um 180° und versuche es noch einmal.

  5. Ru3qyqBMjGB6UWVZ
    Ru3qyqBMjGB6UWVZ
    IS51nDDgPwe4d6RK
    HUMtqZgnMp3JBSHb
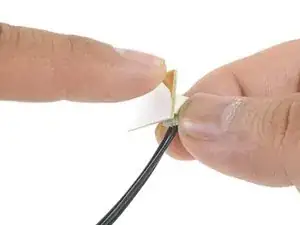
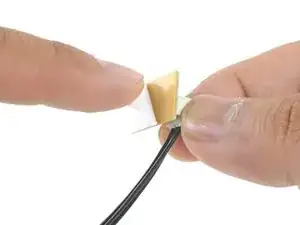
    • Ziehe den Schutzstreifen von der Rückseite der kleinen Platine des Temperatursensors ab.

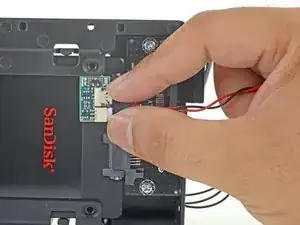
    • Klebe die Platine des Temperatursensors so nahe wie möglich am SATA Stecker an eine gut zugängliche Stelle auf der Metalloberfläche der SSD.

    • Falte die überschüssigen Kabel zum Temperatursensor aus dem Weg, so dass du den Käfig gut einbauen kannst.

    Where do you get one of these sensor boards?

    guywoodland -

    I brought a cable on Amazon, all comes together! https://www.amazon.co.uk/gp/product/B017...

    dwright78 -

    I can use the thermal sensor of cd-rom ?

    I want to remove out the cd-rom .

    NT Gabi -

  6. 41WaKvAjeolJ4Glh
    • Übertrage die Einschraubstifte der alten Festplatte auf die Seiten des Käfigs.

    • Es kann sein, dass für die Stifte noch kein Gewinde geschnitten ist. Sie lassen sich dann nur schwer eindrehen. Lasse dir beim Einschrauben Zeit und drehe sie langsam ein, so dass sie anschließend gerade sitzen.

  7. Rir2QSOxxJMEIvYX
    Rir2QSOxxJMEIvYX
    hrBxeqIODcNNfoob
    • Bringe jegliche Halterungen, die von der alten Festplatte entfernt wurden, am Käfig an.

  8. 3XaugpxxfC6gXUmK
    3XaugpxxfC6gXUmK
    RSjTC1aPMqGrYbd5
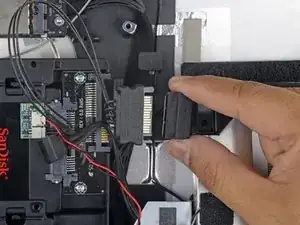
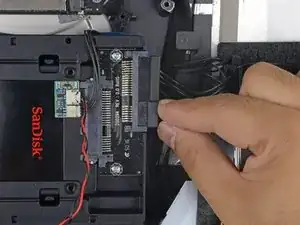
    • Verbinde das SATA Versorgungskabel des iMac mit dem neuen Temperatursensor-geeigneten SATA Versorgungskabel.

    • Verlege die SATA Kabel so, dass sie nicht mit anderen Bauteilen ins Gehege kommen.

  9. uxUSWVSKOkpIIlhJ
    uxUSWVSKOkpIIlhJ
    IED16xrjpBiVOHof
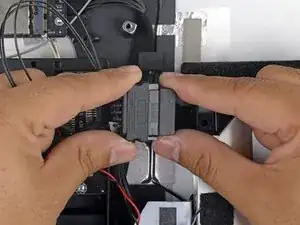
    • Verbinde das SATA Datenkabel des iMacs mit dem SATA Datenanschluss des Käfigs.

  10. eUabvnGF3JVdIqLK
    eUabvnGF3JVdIqLK
    xyk1Zy4eGUUtdGEp
    iLUBLDpP3MyXGek4
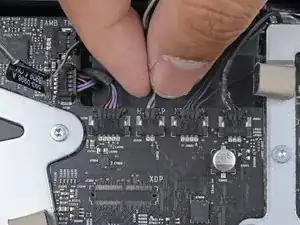
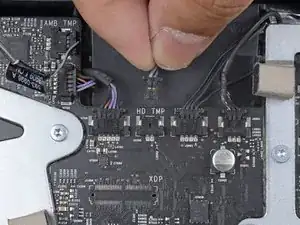
    • Suche auf der Hauptplatine einen Anschluss, der mit HD TMP oder HDD TEMP beschriftet ist.

    • Wenn du dabei Schwierigkeiten hast, dann folge dem zweiadrigen Temperatursensorkabel, welches du von der alten Festplatte abgelöst hast.

    • Wenn das eben erwähnte Kabel noch mit der Hauptplatine verbunden ist, dann musst du es jetzt ablösen und entfernen. Es wird nicht mehr gebraucht.

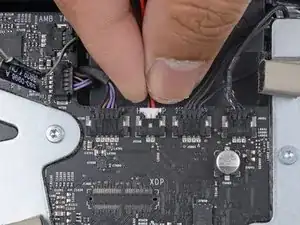
    • Verbinde das schwarz-rote zweiadrige Kabel des Temperatursensors mit dem Anschluss auf der Hauptplatine, der mit HD TMP oder HDD TEMP beschriftet ist.

    • Der Stecker passt nur auf eine Art in den Anschluss. Wenn er nicht hineinzupassen scheint, dann drehe ihn um 180° und versuche es erneut.

    • Führe das überschüssige Kabel so, dass es nicht mit den anderen Bauteilen ins Gehege kommt.

    Amazing guide, thanks for making it!

    I replaced my HDD with an SSD and am very happy with the result. Used an aluminium 2.5 to 3.5” adapter to properly locate the SSD in the machine. Using SSD Fan control app (free) and all is good.

    The video connector (flat delicate cable) was quite difficult to put back but otherwise the install was not difficult.

    Tim Biddulph -

    In step 10 you mention that when re-installing the temperature sensor cable when using an SSD just remember to “flip” the cable so it’s installed reversed from when you unplugged it. This will make the fan run properly and not in high speed mode. So if this is all it takes then why bother with a temperature sensor board? Do SSD’s generate enough heat to warrant a temp sensor?

    Great guide though; I plan on using this to swap out my HDD with a SSD soon. Will a third party migration program of HDD system to SSD work with the iMAC like it did for my HP computer?

    Thanks!

    Ken Short -

    Hi Ken,

    I’m not sure which part you are referencing in terms of flipping the cable to make the fan run properly. Step 10 only points out that the connector is keyed in a way such that you can only connect it in one orientation.

    Without the temperature sensor board, the fans will run at full speed. There are some hardware hacks that may keep that from happening, but I would suggest getting software fan control instead to dial your fan speed down.

    Third party migration software (such as Super Duper) should work. You may want to ask on the Answers forum to be sure.

    Arthur Shi -

    The problem (and solutions) are in reference to Apple using proprietary HDD connections. And incidentally, flipping the sensor connector is not a guaranteed fix, it is HDD dependant. Read:

    https://blog.macsales.com/27918-owc-in-l...

    And 3rd party Fan Controller software works fine, just be aware that Apple can effectively make 3rd party Apps non usable at any point, so what works fine today may not work at all tomorrow. Hardwired DOES overcome this possibility.

    Rob Pellew -

    I’m using Carbon Copy Cloning for all my HDD to SSD replacement and it’s working nice. Can take some time if there is much data on the HDD.

    Mikael Bjorkgren -

Abschluss

Um dein Gerät wieder zusammenzusetzen, folge den Schritten in umgekehrter Reihenfolge.
Arthur Shi

Mitglied seit: 03/01/18

218620 Reputation

0 Kommentare