Einleitung

Diese Anleitung zeigt dir, wie du die Festplatte eines iMac durch eine SSD aufrüsten kannst. Es wird insbesondere gezeigt, wie du den Temperatursensor an der SSD einbauen kannst, so dass der Lüfter mit der richtigen Drehzahl läuft.

Dies ist nur eine grundständige Anleitung. Aufrüsten mit einer SSD inklusive Temperatursensor für iMacs Mitte 2011.

  1. yw5L1XBSIoaFP2lJ
    yw5L1XBSIoaFP2lJ
    IfEYLXa1PVVgeHNR
    EGASiwaQRDU6G5sH
    • Folge den nächsten neun Schritten nur, wenn du deine Festplatte durch ein SSD Kit austauschen willst.

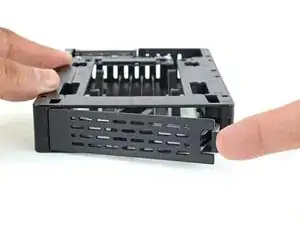
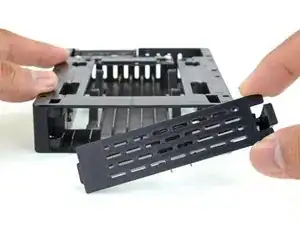
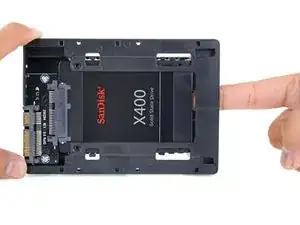
    • Drücke die Raste an der Frontplatte des Käfigs mit dem Finger herunter. Halte sie gedrückt und klappe die Frontplatte heraus.

    • Entferne die Frontplatte.

  2. pUBuOR5jObRKcgTb
    pUBuOR5jObRKcgTb
    UOsa4yARWVQWPRf3
    wh1n1HnGSGhYLwfL
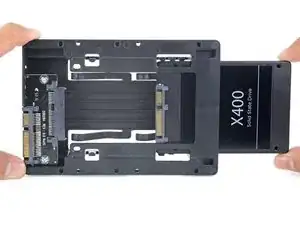
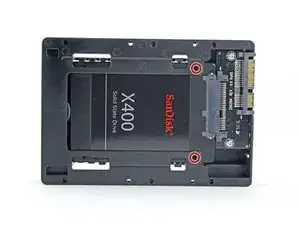
    • Richte den kleinen SATA Stecker so aus, dass die kurze Seite des SSD Steckers auf die kurze Seite am Stecker des Käfigs passt.

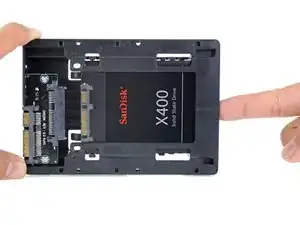
    • Schiebe das Laufwerk durch die Vorderseite des Käfigs ein, bis der SATA Stecker richtig verbunden ist.

    • Die SSD passt nur auf eine einzige Art in den Käfig. Wenn die Stecker nicht korrekt hineingehen, dann drehe die SSD um und versuche es noch einmal.

  3. JZJDQW2yqV5NdNB1
    • Wenn du willst, kannst du die SSD mit den beiden im Kit mitgelieferten Kreuzschlitzschrauben #1 im Käfig festschrauben.

  4. SDBAUhNKT3OSAyfF
    SDBAUhNKT3OSAyfF
    3HUjNBmicf1qPBYx
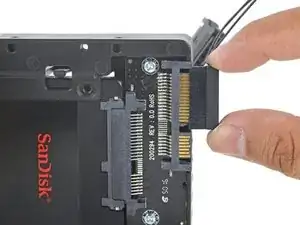
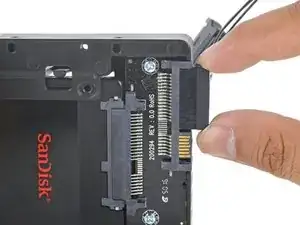
    • Stecke das mitgelieferte, für den Sensor vorbereitete SATA Versorgungskabel in den entsprechenden breiten Anschluss am Käfig.

    • Der Stecker passt nur auf eine Art. Wenn der Stecker nicht passt, dann drehe ihn um 180° und versuche es noch einmal.

  5. Ru3qyqBMjGB6UWVZ
    Ru3qyqBMjGB6UWVZ
    IS51nDDgPwe4d6RK
    SCrDWXZHLJ2ByScQ
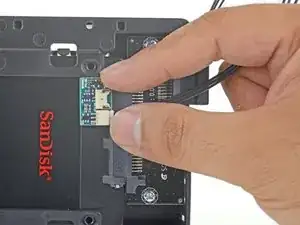
    • Ziehe den Schutzstreifen von der Rückseite der kleinen Platine des Temperatursensors ab.

    • Klebe die Platine des Temperatursensors so nahe wie möglich am SATA Stecker an eine gut zugängliche Stelle auf der Metalloberfläche der SSD.

    • Falte die überschüssigen Kabel zum Temperatursensor aus dem Weg, so dass du den Käfig gut einbauen kannst.

  6. MieR2EENoSvidD3M
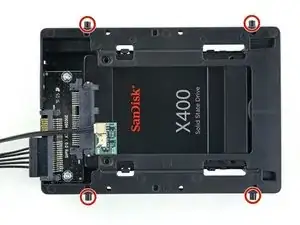
    • Übertrage die Einschraubstifte der alten Festplatte auf die Seiten des Käfigs.

    • Es kann sein, dass für die Stifte noch kein Gewinde geschnitten ist. Sie lassen sich dann nur schwer eindrehen. Lasse dir beim Einschrauben Zeit und drehe sie langsam ein, so dass sie anschließend gerade sitzen.

    The technique used when tapping holes with a thread tap can make this much easier:

    After getting about one and a half threads started back the pin or screw out about 1/4 turn, then turn in again 1-1/2 or 2 turns then back 1/4 turn again. Repeat this three steps in -one step back until its all the way in. This technique lets the “chips” clear from in front of the first thread making it much easier to cut the new threads.

    John -

    The photo shows 4 of these, but to original hard drive only had 2…what to do now?

    jinnifer douglass -

    Go ahead and transfer the two posts to the new drive.

    Arthur Shi -

  7. yW2yna6Htkhbyux2
    yW2yna6Htkhbyux2
    fIVXoXRcYu1GZcOV
    • Bringe jegliche Halterungen, die von der alten Festplatte entfernt wurden, am Käfig an.

  8. r2tu3rVXPuRJdTUX
    r2tu3rVXPuRJdTUX
    NHlPykOInaa66Zdx
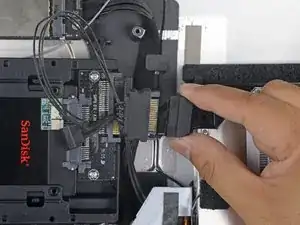
    • Verbinde das SATA Versorgungskabel des iMac mit dem neuen Temperatursensor-geeigneten SATA Versorgungskabel.

    • Verlege die SATA Kabel so, dass sie nicht mit anderen Bauteilen ins Gehege kommen.

  9. rKBoMCVNbvKPlEgt
    rKBoMCVNbvKPlEgt
    tMgaCqaMgUTZVFgY
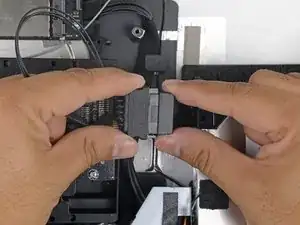
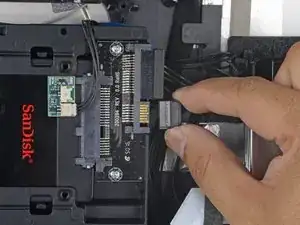
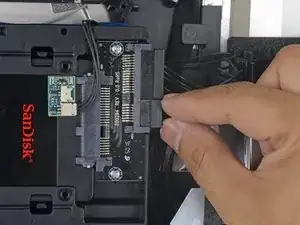
    • Verbinde das SATA Datenkabel des iMacs mit dem SATA Datenanschluss des Käfigs.

    Do you have a photo of how you arranged the wires? The hand in the photo is the way. I’m having trouble making space for the Sata cable

    Silvia Llopis -

    Unfortunately I don’t have additional photos. I understand your issue; the cabling was hard to fit. I ended up bending and carefully folding it so that it didn’t catch anything. Try to find room where it won’t be pinched.

    Arthur Shi -

    i thought everything was good, but i just turned on my imac to install the OS and it’s not seeing my new ssd. i’m trying to install the os using a bootable usb and the dialogue asking me to select a drive pops up, but my new ssd wasn’t on the list! Do you think my SATA cables are pinched? What can it be? i guess i’ll just have to open it and inspect all connections?

    Silvia Llopis -

    lol nevermind i just didn’t realize I had to format the new drive *face palm*

    Silvia Llopis -

    Anyone faced the problem of the “Grey Blinking Question Mark Folder” after this upgrade? I followed all the steps:

    - Tried to reset SMC and NVRAM

    - Formatted the SSD using Disk Utility

    - Tried to reinstall MacOS High Sierra from scratch via recovery mode

    The problem usually comes when the computer goes to sleep, and never comes back alive. When I shut it down and start it up again, the blinking folder came back. Can’t seem to find any other solutions.

    Raynor GAN -

    Mine does not reconize the new SSD - what did I do wrong?

    bennie9922 -

    I was not able to organize the wires in a way to get enclosure to screw into bracket. So basically its just sitting in there, i was able to attach all the wires and everyting, i just didnt screw it back in.

    I was actually able to screw in box to the bracket, but when i tried to put the computer screen back on, it was not able to flatten out so i couldnt put case back on. So i just left it unscrewed and didnt use the bracket…

    Computers still working after a month or so.

    jacob d -

    The internal SATA cable housing is configured with an "L" shaped form used to orient the proper insertion of the cable connector pins. The SATA cable installed in the 2011 iMAC 27" is blocky a pin placed at in the position for the "L". The pin will not allow coupling of a replacement SSD thermal cable adapter unless it is removed.

    Can it be removed without damage, allowing for operation of the drive? Or should it be replaced by a new internal SATA cable?

    JB-Nov 2022

    Jerome Boyd -

Abschluss

Um dein Gerät wieder zusammenzusetzen, folge den Schritten in umgekehrter Reihenfolge.
Arthur Shi

Mitglied seit: 03/01/18

218620 Reputation

0 Kommentare