Einleitung

Keep those electrons flowing by replacing your broken power supply!

  1. ZmbcJOeMcMf6nt5J
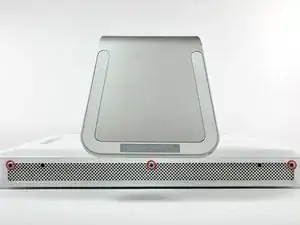
    • Lay the iMac display-side down on a flat surface.

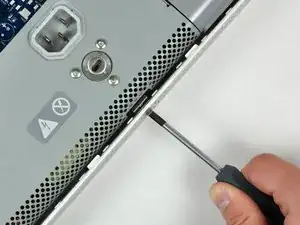
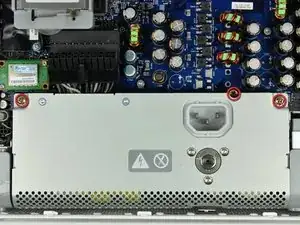
    • Loosen the three Phillips screws securing the rear panel to the iMac.

    • These screws are captive in the iMac. The center screw will stop turning after about 3.5 turns and the outer screws will stop turning after about 5.5 turns. Do not try to remove these screws from your iMac.

    My iMac has only ONE catch, the central one, so the two outer screws are not to be touched.

    In fact, I tried so hard to unscrew them, with a good screwdriver, that my hand hurt. Knowing that some times captive things (like these screws or a faucet) can be already at the end of their travel and we only lock them further into that position, I tried both screwing and unscrewing to no avail.

    paulfrancoeur -

    The two outer screws each drive a locking bar that engage tabs on the rear panel.

    They definitely need to be unscrewed.

    Dale Stanbrough -

    That chick MJ is sexy!!!!!

    djmadcracker -

    Looks like one of these screws is not like the others... a security Philips?! Never seen one of those before.

    Terry Mullane -

    Please Note: If your iMac has an antenna for the airport extreme and not the bluetooth card. Don't buy the bluetooth get the airport extreme instead. Also, some newer devices may not work with these units.

    James Janota -

    Just want to say thank you to ifixit! You guys are amazing and so helpful! This was so easy to do and I ordered the part I needed as well! We are up and running over here and my 7 year old son could not be any happier! Thank you!

    mary nicolazzo -

    These are the easiest way to resolve the Wireless connectivity at my home. Thanks ifixit for sharing this.

    Geek Squad -

  2. CXXvGbeo2PYwhMNV
    CXXvGbeo2PYwhMNV
    qvDGtVsUUxTXMTvI
    Hs3JDgtjpSPjgMqC
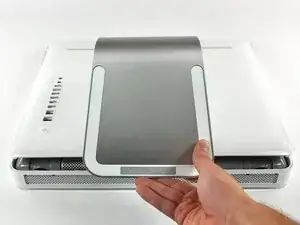
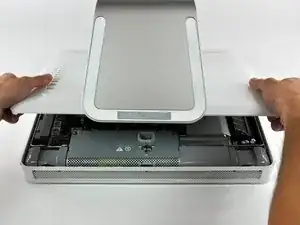
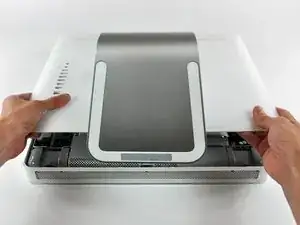
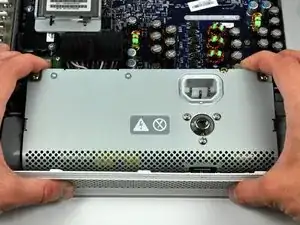
    • Lift the rear panel slightly from the bottom edge of the iMac.

    • Pull the rear panel toward yourself and remove it from the iMac.

  3. YSmYCGSDSIsHURWO
    YSmYCGSDSIsHURWO
    DKAuBnVJIACiQYOe
    • Rotate the center Phillips screw on the bottom of the iMac clockwise until the rear panel clamp contacts the edge of the case.

    • On our specific machine, the threaded portion of the clamp broke off the clamp body causing the center screw to turn without moving the bracket. If your machine is broken like ours, skip to the next step.

  4. A2fALIDQCdqJG2ue
    A2fALIDQCdqJG2ue
    GMqmv3P2Z2fsSKop
    AL3O6WFnxmHr1vuU
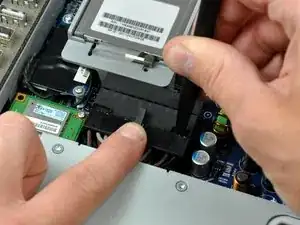
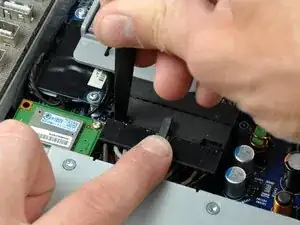
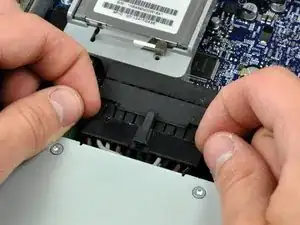
    • While depressing the connector lock, insert the flat end of a heavy duty spudger into the gap between the power supply connector and its socket.

    • Twist the heavy duty spudger to slightly separate the connector from its socket.

    • It will be necessary to work from alternate sides until the connector is free.

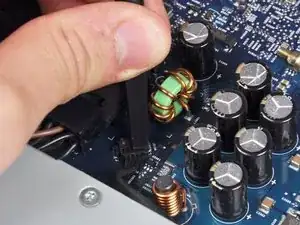
    • Your power supply may have an ambient light sensor cable attached from the power supply to the logic board. If so, carefully use a spudger to push out the cable towards you using the sides of the cable alternatively to help you slide it out.

  5. TvPwYcMO6H3JJ2eh
    • Pull the power supply connector straight away from its socket on the logic board.

    • This step is very simple if you remove the power supply first.

  6. RHMXUZQTsrPeroXL
    • Remove the three Phillips screws securing the power supply to the chassis.

    • All three screws are captive in the power supply.

    • To aid in removal, it may be helpful to lift the center screw slightly away from the midplane.

  7. dKZHm3QT2bJmeNJq
    dKZHm3QT2bJmeNJq
    WwD4kAkVARuDpvfy
    • There are several capacitors mounted to the logic board in close proximity to the power supply. Try not to disturb them, as they are delicate and may break off the board.

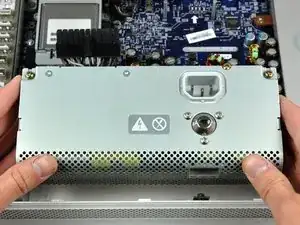
    • Grab the power supply from each side and rotate its top edge toward yourself until it clears the logic board.

    • Lift the power supply out of the midplane.

    • The power supply requires a large amount of force to remove. You may need to slightly bend the edge of the front case toward yourself for enough clearance to remove the power supply.

    Bend the case at the rear panel clamp enough to clear the panel clamp while lifting out the power supply using the two captive screws as handles.

    timothychilders -

    Rolling the power supply towards you while lifting using the captive screws helps get it past the captive back cover screw from step 4.

    themackey -

    My replacement power supply did not come with an Ambient Light Sensor. I thought I had gotten the wrong one, but in fact the ALS comes easily off the old power supply (using a small flathead screwdriver to pry it off) and attaches to the new one.

    Calion -

Abschluss

To reassemble your device, follow these instructions in reverse order.

Walter Galan

685540 Reputation

Ein Kommentar

very clear instructions... will replace my ps and then repair the faulty one.

do you have an idea what components usually fail or is it a mix of things?

Thanks

r@boarman.net

Irene1545 -