Einleitung

Werkzeuge

  1. VxOwpyxUrEorvQOL
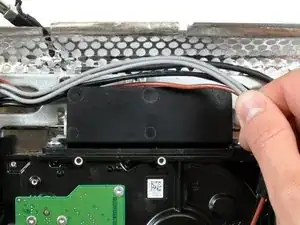
    • De-route the bundle of power supply cables from behind the hard drive bracket.

    Didn’t seem any reason for the fiddly de-routing of the cables so I just left them which caused no problems.

    nijafe -

  2. UnvWIAWmwrph3vQU
    UnvWIAWmwrph3vQU
    DM21QkjNXSAL6AmR
    MrTHDNNUaZVeirsu
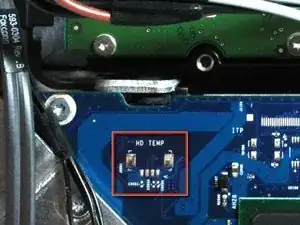
    • A hard drive thermal sensor may be present on some models. If your logic board is missing the hard drive thermal sensor socket highlighted in red in the first picture, skip this step.

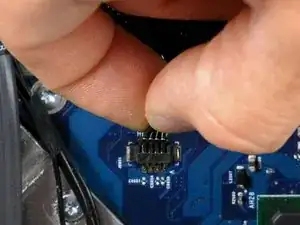
    • Pull the hard drive thermal sensor connector away from its socket on the logic board.

    • Pull this connector parallel to the face of the logic board toward the top edge of the iMac.

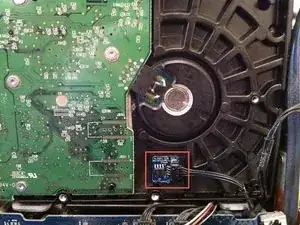
    • Use a spudger to pry the thermal sensor and adhesive off the hard drive and install it in the same location on the replacement drive.

    There was a thermal sensor attached to the HD. You can peel it off and glue it on the new HD and attach the connector back again.

    map -

    I think there is no need to mess whit the connector. just peel it off and glue it on. the connector is very week.

    thanks for ever ifixit!

    sebalancea -

    My thermal sensor was magnetised. I just pulled it off my old HD and put it on my new one. It sticks perfectly to the metal casing.

    Cloudsurfer -

    There was a thermal sensor attached to my previous HD but not to the new one. But without this sensor, the iMac was down :-( (logic board ?)

    I was forced to re-install the old HD with the temp sensor on.

    Except this point, related to my iMac, thanks ifixit for this great manual

    Jerome -

    I found it easier to take the sensor off the Hard Drive, not the logic board. The stickiness holding it place on the old drive was sticky enough to hold it in place on the new drive.

    Leif -

  3. 2dVFIrEmGGnSNU6b
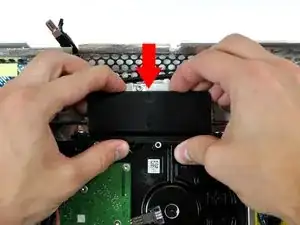
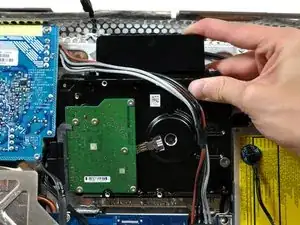
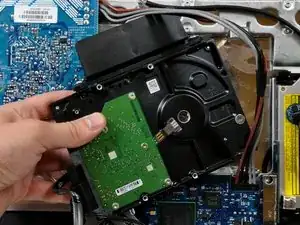
    • Press the hard drive bracket down to free it from the rear case, then rotate the top of the drive toward yourself.

    • Pressing the top of the hard drive bracket down to release it from the rear case requires a substantial amount of force, so we recommend laying your iMac stand-side down on a table to avoid knocking it over.

    • If you have trouble releasing the hard drive bracket, it can be removed from the hard drive, by removing the two T8 or T10 Torx screws securing the bracket to the drive.

    I was applying a considerable amount of force and was not getting anywhere and I was afraid it was going to suddenly release and the resulting jerk would break something else. I noticed that all I was trying to do is get a plastic tap to go past a metal plate. There was plenty of room with no other components around so I stuck a medium screw driver behind the plastic latch and applied a small amount of pressure and it unlatched very nicely. I pried on one side and then the other to release it on both sides. For me this method worked a lot better.

    flyingmonkey1 -

    When I was trying to remove this bracket, it broke right off!! do you think i could super glue it back together, or order a new one? or does it even need one?

    danielle -

    The drive bracket wasn't moving until i placed my fingers exactly as shown in the picture and firmly applied force. Then it moved easily.

    Clinton -

    I also struggled trying to get the bracket loose by pressing down. I finally took FlyingMonkey's suggestion about the screwdriver and it came right off.

    Rachael Whitaker -

    I too was afraid I would break the bracket. I removed the screws that held the bracket to the hard drive. This allowed the hard drive and bracket to come right out.

    Roscoville -

    Never managed to get it off. But Lucky to have a screwdriver with a pull out flexible end which made unscrewing the T8 screws on the bracket the easiest option.

    Then lift drive up at bracket side, leaving bracket in place.

    nijafe -

  4. RH6fCALZWrjeJLHo
    RH6fCALZWrjeJLHo
    Ym5gvcGmFqu6F1WH
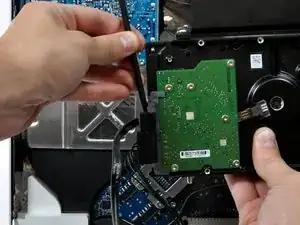
    • Lift the hard drive off its lower pins and pull it out of the rear case, minding the power supply cables that may get caught.

    • When reinstalling your hard drive, be careful not to push the two rubber grommets through their holes in the chassis. Retrieving them would require removing the logic board.

  5. 1oSbjVHP3qWsSrbP
    1oSbjVHP3qWsSrbP
    TDdN5WegEA2mPmcm
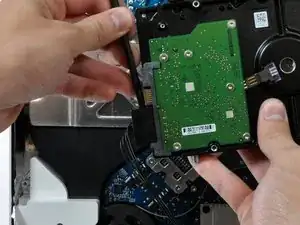
    • Insert a spudger between the SATA connectors and twist it to separate the connector from the hard drive.

    • Disconnect both SATA connectors.

    I really didn't need a spudger to pull the cables off.

    Cloudsurfer -

Abschluss

To reassemble your device, follow these instructions in reverse order.
Walter Galan

685540 Reputation

0 Kommentare