Einleitung

  1. uyFjWn1qHiv6tcZX
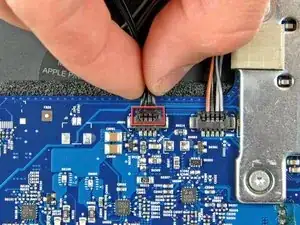
    • Disconnect the hard drive thermal sensor from the top edge of the logic board.

    • Pull the connector parallel to the face of the logic board.

    On my iMac (20" intel core duo Model A1207) this was not a "connector" rather it was four separate (loose) wires! So I did not remove them for fear of reconnecting them in the wrong order. Instead I first loosened the drive bracket and removed its cables, then I pryed the thermal sensor from the side of the drive.

    sanjaygovindjee -

    Zitat von sanjaygovindjee:

    On my iMac (20" intel core duo Model A1207) this was not a "connector" rather it was four separate (loose) wires! So I did not remove them for fear of reconnecting them in the wrong order. Instead I first loosened the drive bracket and removed its cables, then I pryed the thermal sensor from the side of the drive.

    I agree!! LEAVE them attached, it simplifies things greatly!

    smitty7x -

    I did remove the cables, but I think I have a wrong order now, the fans are on full power when switching on. What is the right order?

    post -

    I have tried it. The cables should have the same order than on the other plug. No. 1 to No. 1, No. 2 to No. 2 and so on.

    The fans are quiet again now. :-)

    post -

    Yep just done the power board on this imac and I say leave the thermal cable connected because its 50% sure to break up! ,just undo the harddrive, carefully move it downwards towards the speaker housing on the logicboad(tape it to the speaker housing).

    you will still be able to access the power board cable under the logic board

    Supadupa -

  2. VtZ2jsbKAUPMvpao
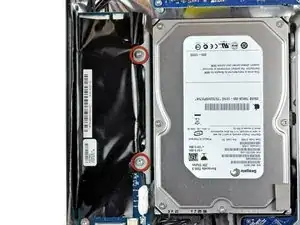
    • Remove the two 9.2 mm T10 Torx screws securing the hard drive bracket to the rear case.

    The HDD in the 17" model has a slightly different mount. It is actually a black plastic spring pressure mount, and just slips out when you push down on the plastic spring mount.

    robino -

  3. L2h1VtCVYBJLkmBw
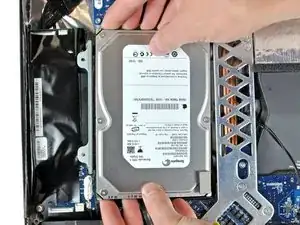
    • Lift the hard drive from its left edge enough to clear the inverter and pull it toward the left edge of your iMac to unseat the mounting pins from the chassis.

    • During installation, do not push the rubber grommets through the chassis with the hard drive mounting pins as retrieving them will require removing the logic board.

    The 17" model's mount is the reverse of this. Sorry I have no pictures. The mounting pins on the 17" model are on the opposite side of the drive, and the drive itself is turned over so that the drive's circuit board is showing.

    robino -

    Great guide. I followed it all and my iMac has gone from no power up at all to powering up...of sorts.

    Now when I power up I get a chime and a brief blue screen with a window mentioning wireless mouse then all is blank. if I touch the power button I will get the blue screen briefly again.

    Therefore could something else be wrong.

    Any help appreciated.

    Chris -

  4. TXsnFLmDcsSR62Vj
    TXsnFLmDcsSR62Vj
    Bsq6UCKwh32nA4dK
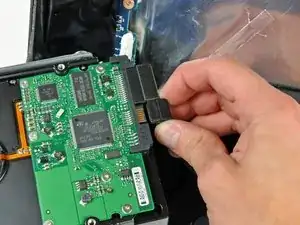
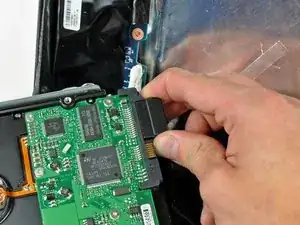
    • Pull both the SATA power and data cable connectors away from the hard drive.

    • Be careful when de-routing the hard drive thermal sensor cable from under the heat sink framework.

Abschluss

To reassemble your device, follow these instructions in reverse order.
Walter Galan

685540 Reputation

0 Kommentare