Einleitung
Benutze diese Anleitung, um deine Festplatte auszutauschen oder aufzurüsten.
Bei dieser Reparatur wird in einigen Schritten beschrieben, wie du die Festplatte durch eine SSD aufrüsten kannst. Insbesondere wird gezeigt, wie der Temperatursensor der SSD installiert wird, so dass der Lüfter des iMac mit der richtigen Drehzahl arbeitet.
Bevor du am iMac arbeitest: Ziehe den Netzstecker und drücke den Einschaltknopf mindestens 10 sec lang, um die Kondensatoren des Netzteils zu entladen.
Sei sehr vorsichtig und berühre keine Anschlüsse der Kondensatoren und auch keine der offenliegenden Lötstellen auf der Netzplatine.
Werkzeuge
Ersatzteile
-
-
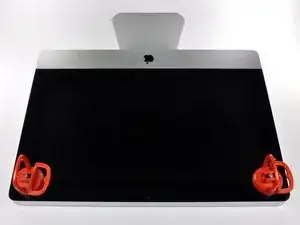
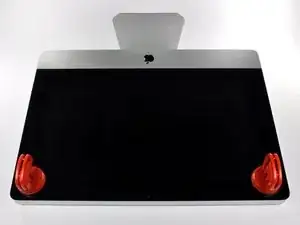
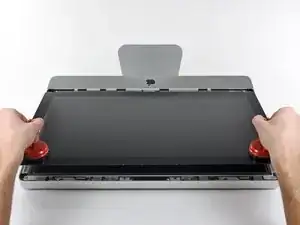
Befestige einen Saugnapf in jeder der oberen Ecken der Scheibe.
-
Wenn der Saugnapf sich nicht festsaugt, dann versuche die Scheibe und den Saugnapf mit einem milden Reinigungsmittel zu säubern.
-
-
-
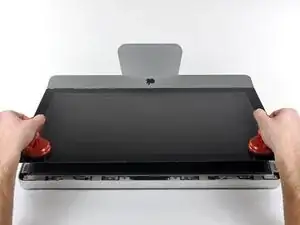
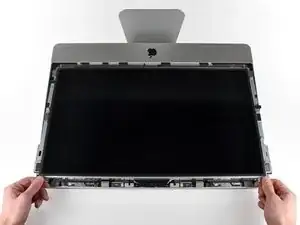
Hebe die Scheibe vorsichtig senkrecht zum LCD an, gerade soweit um die Metallstifte, die oben an der Unterseite der Scheibe angebracht sind zu befreien.
-
Ziehe die Scheibe von der Unterkante des iMac weg und lege sie sorgfältig zur Seite.
-
-
-
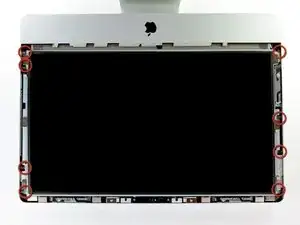
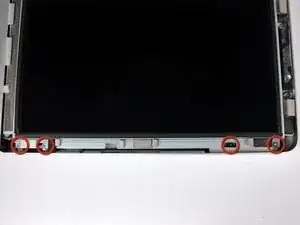
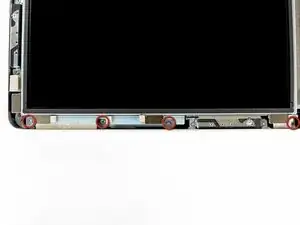
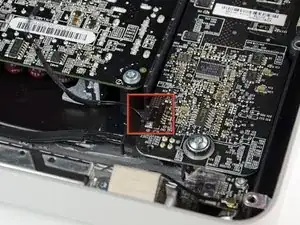
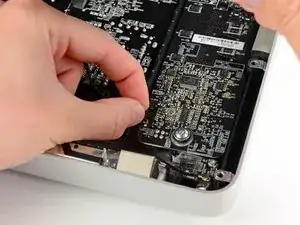
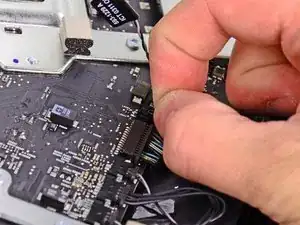
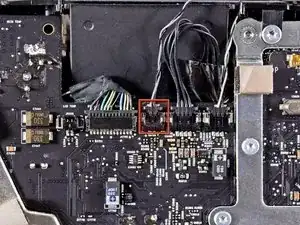
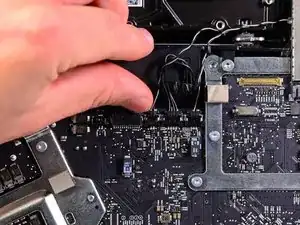
Ziehe den Verbinder am Kabel der Vertikalsynchronisation aus seinem Sockel auf der Platine der LED Versorgung in der Nähe der oberen linken Ecke des iMac.
-
-
-
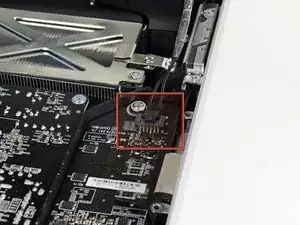
Drehe das Display soweit aus dem Gehäuse heraus, dass du das Versorgungskabel der LED Rückbeleuchtung von der LED Versorgungsplatine lösen kannst.
-
-
-
Ziehe das Display vorsichtig in Richtung Oberkante des iMac und hebe es aus dem Gehäuse. Achte darauf, dass sich keine Kabel verfangen.
-
-
-
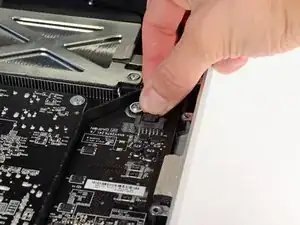
Ziehe den Stecker des Temperatursensors der Festplatte in Richtung Oberkante des iMac und löse ihn vom Sockel auf dem Logic Board.
-
-
-
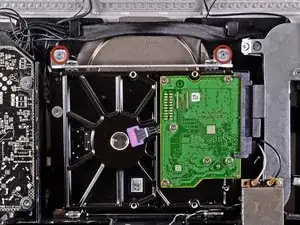
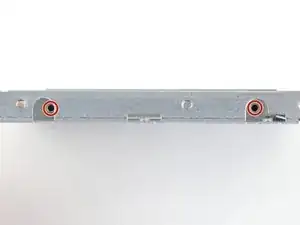
Entferne die beiden 9 mm Torx T10 Schrauben, die die obere Halteklammer der Festplatte am Gehäuse befestigen.
-
-
-
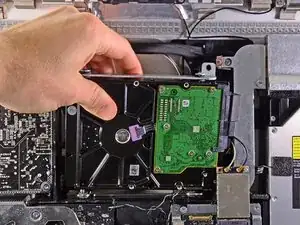
Drehe die Festplatte aus dem Gehäuse und hebe sie aus den Haltestiften in Richtung Oberkante des iMac.
-
-
-
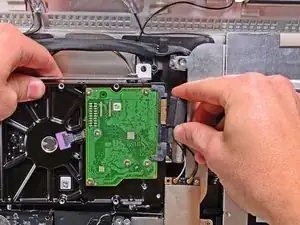
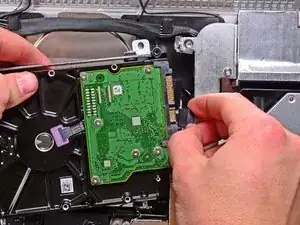
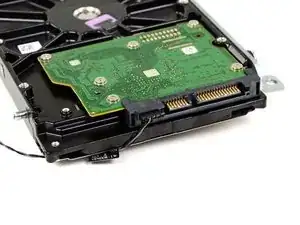
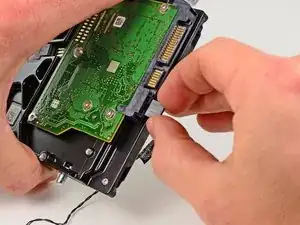
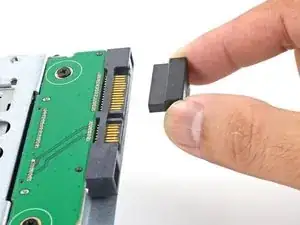
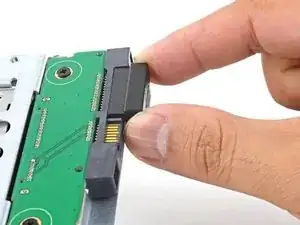
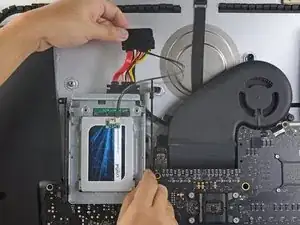
Löse das SATA Datenkabel und die SATA Versorgung, indem du die jeweiligen Stecker von der Festplatte abziehst.
-
-
-
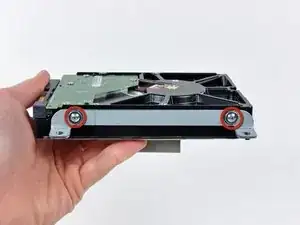
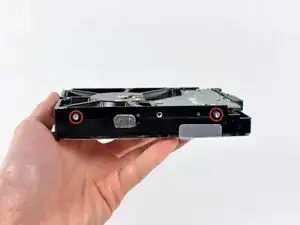
Entferne die beiden Torx T8 Schrauben, welche die obere Halterung an der Festplatte befestigen.
-
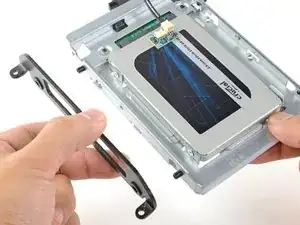
Entferne die obere Halterung von der Festplatte.
-
-
-
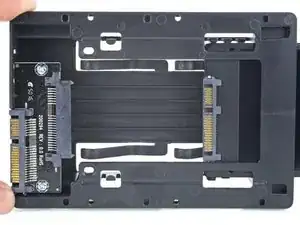
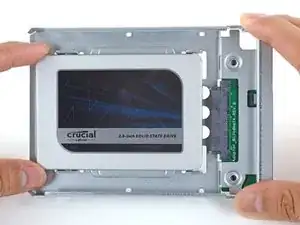
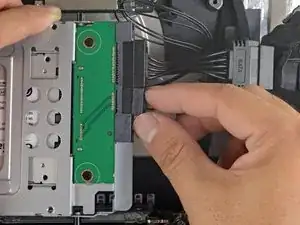
Richte die SSD-Stecker mit den Anschlüssen des Metalleinschubs aus.
-
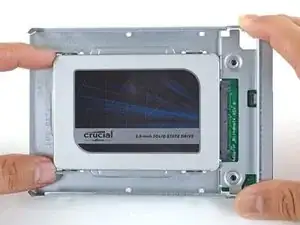
Drücke das Laufwerk gegen die Anschlüsse des Einschubs bis die SSD gut sitzt.
-
-
-
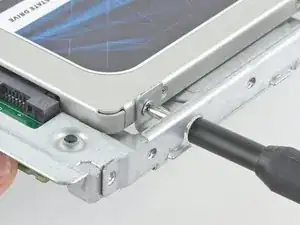
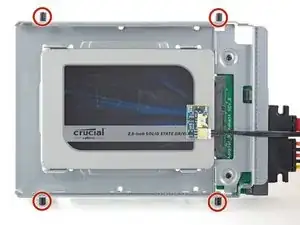
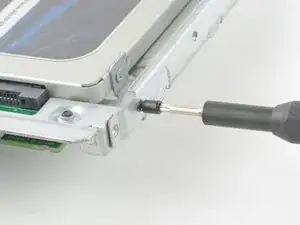
Benutze einen Kreuzschlitzschraubendreher, um die vier silbernen Schrauben (zwei auf jeder Seite) an den Kanten der SSD einzusetzen, um sie am Einschub zu befestigen.
-
-
-
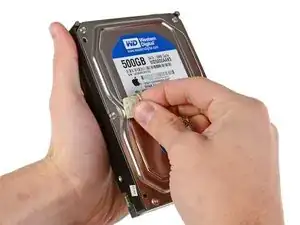
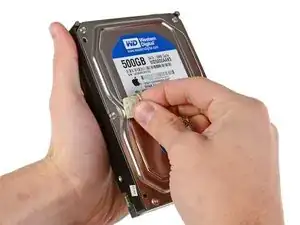
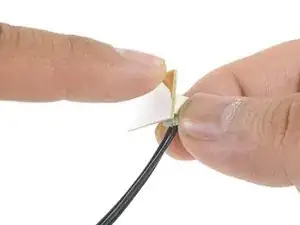
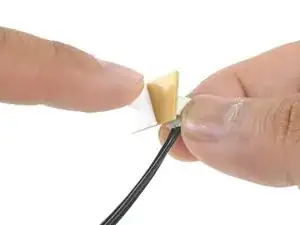
Ziehe die weiße Schutzfolie von der Rückseite der kleinen Temperatursensor-Platine ab, um den Kleber frei zu legen.
-
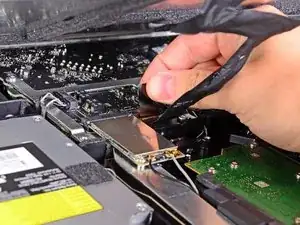
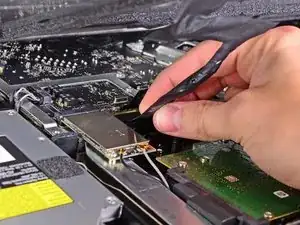
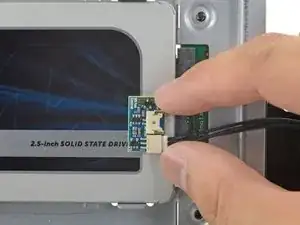
Klebe die Temperatursensor-Platine auf die freilegende Metalloberfläche der SSD nahe am SATA-Stecker.
-
Biege die überstehenden Drähte des Temperatursensors so weg, dass sie beim Einbau des Einschubs nicht im Weg sind.
-
-
-
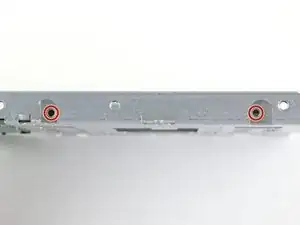
Montiere die Haltestifte der alten Festplatte mithilfe eines T8 Schraubendrehers auf die Seiten des Einschub.
-
-
-
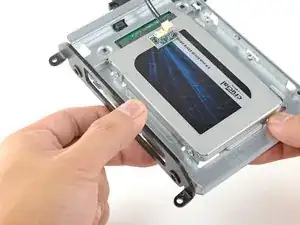
Befestige alle Halterungen, die von der alten Festplatte abmontiert wurden, auf dem Einschub.
-
-
-
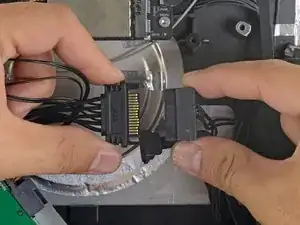
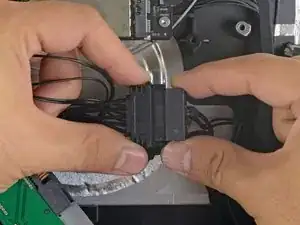
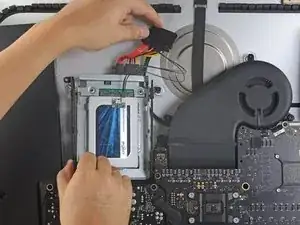
Verbinde das SATA-Netzkabel des iMacs mit dem anderen Ende des neuen sensoraktiven SATA-Kabels.
-
-
-
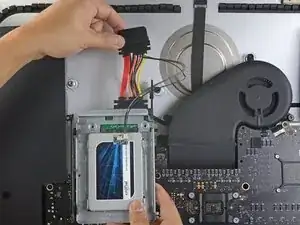
Schiebe den SSD-Einschub in den Platz, der vorher von der Festplatte eingenommen wurde.
-
Verlege die SATA-Kabel so, dass sie anderen Komponenten nicht in die Quere kommen.
-
-
-
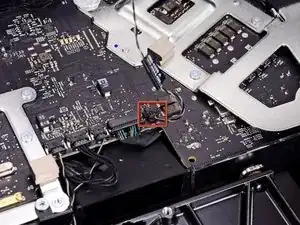
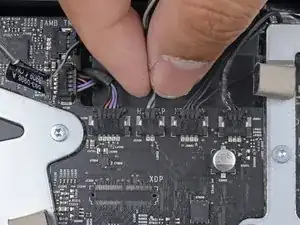
Finde den Stecker auf dem Motherboard, der als HD TEMP oder HDD TEMP ausgezeichnet ist.
-
Falls das vorherige Temperatur-Kabel noch mit der Platine verbunden ist, trenne es ab und entferne es. Du brauchst es nicht mehr.
-
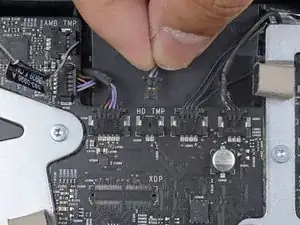
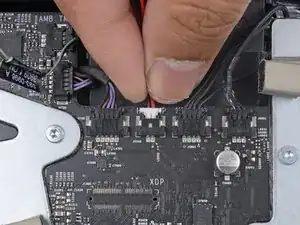
Verbinde das zwei-drähtige rot-schwarze Kabel des Temperatursensors mit dem Stecker auf dem Motherboard, der als HD TMP oder HDD TEMP ausgezeichnet ist.
-
Verlege das überschüssige Kabel so, dass es anderen Komponenten nicht in die Quere kommt.
-
Folge der Anleitung in umgekehrter Reihenfolge, um dein Gerät wieder zusammenzubauen.
44 Kommentare
I went through all the steps and now when I attempt to boot, I hear the apple chime, but I get nothing on screen.
I thought this might have to do with a loose cord, but when I reattached the suspect cord (the display data cable) it did not resolve the problem.
Anyone have any ideas as to what could be causing the display to malfunction?
Monty -
I had this problem as well, caused by a small cable coming from the display. It is a Sync Cable with a small 2 Pin Molex connector, and it popped up and got hidden when I removed the display, which caused me to forget to re-attach it during reassembly.
capone99 -
Question for capone99: where did this cable come from? Was it one of the five specified for unplugging in this guide? Or are you saying it came loose by itself during installation?
Did anyone ever solve this? Having the same issue.
In step 14, the Apple connector for the hard drive has a locking mechanise that doesn't fit most replacement hard drives. I got an identical hard drive that doesn't have a provision for the connector. A little bit of shaving or filing of the plastic connector did the trick.
I want to use a (WD20EARX) 2TB hard drive which does NOT have a socket matching the old hard drive for the thermal sensor plug, but rather 8 jumper pins. Can I use this drive as a replacement, and if so what do I do about the thermal sensor?
Robert -
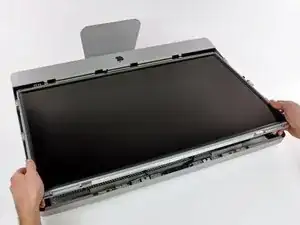


Very easy to lift the glass out. Don't jerk too hard.
kctipton -
Another comment on DATA & LCD Temp. Sensor cables: I had to remove the vertical sync, and the backlight cable, however, if you have an assistant or/can carefully rotate the screen clockwise/and then have it held up about 5" to 6" at a slight angle, you do not need to remove LCD data cable or LCD thermal cable, however - IMPORTANT: you must have a second pair of hands/or way to securely prop up the LCD. Also, don't rotate too much, since then you will pull out LCD data cable, and it renders the whole exercise moot, or can damage the cable or connector.
MaximBorzov -
You don't need suction cups. The screen, held by magnets, can simply be pried off using a very thin blade such as a screw driver and fingers.
Deepsurvival -
That's a bad idea. using a metal tool to pry off glass is likely to end with an expensive broken front glass.
Suction cups are common. Find a couple and do it the safe way. I use some cheap ones that came with iPhone repair kit.
max damage -
No need for suction cups, I just stuck my nails (short like guys usually have) between the top part of the screen and body, and it came off easily. I've never done it before, so it seems to be very easy.
Nikolas Lintulaakso -
Nails worked for me too
Rob Dale -
Just completed the replacement of the optical drive with an SSD using an OWC Data Doubler kit. Attempted to remove the optical drive without disconnecting any cables but found it a bit fiddly to orient the screen for good access. I bit the bullet and disconnected them and found the process less daunting than I imagined. Reconnecting them was similarly straightforward if you're careful.
Tip: you can skip the step for removing the optical drive thermal sensor connector from the motherboard. Still need to remove the sensor from the optical drive but you can leave that hanging and reattach it to the SSD later.
osienna -
I use Garmin GPS suction cup. Work very well
jc3Dcx -
I’ve just successfully installed a 1TB SSD in place of my optical drive thanks to the information here- thank you to everyone who has contributed!
3 comments- the procedure described here seems to vary between HD replacement and dual HD/optical drive replacement. This can be confusing at times.
Expect there to be minor differences between the layout described and what you find when you open up your iMac. There are also, surprisingly, differences between the HD enclosure description, and the article provided by ifixit.
I was able to replace the DVD/HD enclosure single-handedly without fully removing the LCD, or deconnecting any of the cables (steps 5-11). It’s a bit cramped, and fiddly, but I was not happy removing any of the cables despite watching videos, etc., since they all seemed to involve applying more force than I was comfortable with. A more detailed description of how to release them might have helped, but even here, there may be minor variations even within the 2389 model.
Good luck!
ivan birks -
I did it several times with one suction cup at the end of a kitchen brush. Once with the blade of a swiss army knive, also ok. And i’m pretty sure it works with fingernails too
Tai -
Fingernails are all you need to free the glass from its magnetic hold. If you don’t have them, slip something thin and plastic, like a spudger, at a top corner.
Max Powers -
Minha dúvida é a seguinte: após o técnico trocar o HD do meu iMac de 21,5 polegadas, a câmera parou de funcionar. Seria por causa da troca do HD? Tem solução?
Claudio -
Creio que o cabo da camera não foi plugado ou deu mau contato… ou até danificado.
glecyo@gmail.com
glecyo medeiros -
I can’t get my glass to budge. I’m replacing a cracked one and now it’s about to shatter.
jamboxmitchell -
I know that I'm replying really late but I advise to use clear tape over any cracks so the cracks don't get bigger
Jace Holmes -
Check for chips in the glass BEFORE you do this step. If there is a chip when you pull up with the suction cups you will wind up with a jagged mess. If you do have a chip I would advise covering the screen near the chip with clear tape of some kind before lifting out. Mine shattered right at the chip and the resulting glass dust cloud got all over. My solution was buying a new glass screen.
BCam -