Einleitung

Nur grundständige Anleitung.

  1. 1MlcYZV5nCLr264K
    • Es wird einfacher, wenn du ab jetzt dein Gerät herumdrehst, so dass der Boden zu dir zeigt.

    • Entferne die folgenden vier Torx Schrauben:

    • Eine 9,3 mm T10 Schraube mit breitem Kopf

    • Drei 9,3 mm Schrauben mit normalem Kopf

    In my case the red screw was on the lower left side near the power-data cable!

    sefw4t2efwef -

    Same here. There are different versions delivered

    Tai -

    Same for me.

    davidevismara -

  2. NrlVDiD4WEMZqEUh
    NrlVDiD4WEMZqEUh
    ANsIDp5OYAQRLAkJ
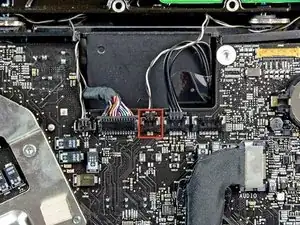
    • Ziehe den Stecker des Thermosensors vom optischen Laufwerk gerade aus dem Sockel auf dem Logic Board heraus. Ziehe parallel zur Platine.

    No need to remove the thermal sensor connector from the motherboard - refer to Step 17 to remove the sensor from the optical drive instead

    osienna -

    The thermal sensor connector shown in the red box is the one for the hard drive, not the optical drive. The optical drive sensor attaches to motherboard near bottom left of optical drive fan.

    Reiner Friedel -

    The guide was correct in my case that this is the Optical Drive sensor. The board has “ODD Temp” written on it. Original HD has it’s own built in temperature sensor without a separate cable to the Motherboard, which is why OWC sells a special “In-line Thermal Sensor” SATA cable with a Temp. sensor that attaches to any new hard drive itself.

    amiller770 -

    When I was removing the optical drive cable sensor the connector came loose from the board. Is there any way to repair this?

    Paula McCaulla -

  3. OUOqmArdw3JCHpHY
    OUOqmArdw3JCHpHY
    eRYpgV2Q3dj6tAFh
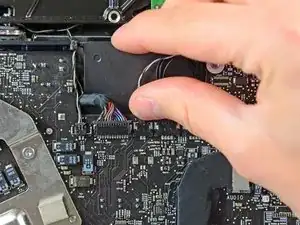
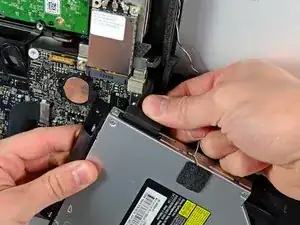
    • Hebe die innere Kante des optischen Laufwerks etwas an und manövriere den Stecker durch den GPU Rahmen am Logic Board.

    • Ziehe das optische Laufwerk vorsichtig aus den Befestigungsstiften auf der rechten Seite des Gehäuses. Du schaffst dadurch Platz, um das Kabel des optischen Laufwerks zu lösen.

    • Lasse das optische Laufwerk hängen und führe den Stecker des Thermosensors vom optischen Laufwerk hinter dem Kühlkörper der GPU heraus.

    On the reassembly, I found threading the optical drive cable back under the GPU frame trying. Here’s some advice: Take some dental floss, form a loop, and feed that loop under the GPU frame. Put the cable into the loop of floss, tighten the loop, and pull the loop back through. This is much easier, faster, and far less frustrating.

    Albert Einsrein -

  4. kP2lxo3pOV4F4Bxg
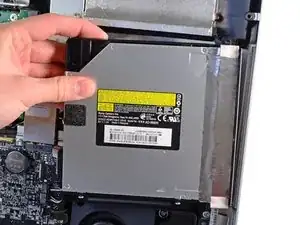
    • Löse das Kabel zum optischen Laufwerk, indem du den Stecker weg vom optischen Laufwerk ziehst.

    • Entferne das optische Laufwerk vom iMac.

    I have already installed the second SSD drive, but due to the size of the drive I need to change it with another SSHD 1 TB drive. Am I right that I have to follow the instructions up to Step 18? Because The SSD is already behind the optical drive, so what I need to do is remove it and install the new SSHD drive and put everything back again. Please confirm.

    Mohamed Kamal -

    This was my only error on reassembly. The SATA cable must be under the black plastic prong. I did not want to pull to logic board again. I managed to bend the black plastic bits and get the cable in the right place.

    Terry Creasy -

Abschluss

Arbeite die Schritte in umgekehrter Reihenfolge ab, um dein Gerät wieder zusammenzubauen.
Walter Galan

685541 Reputation

0 Kommentare