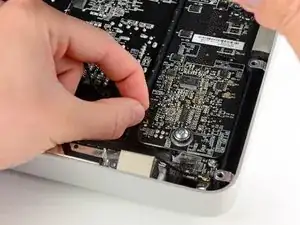
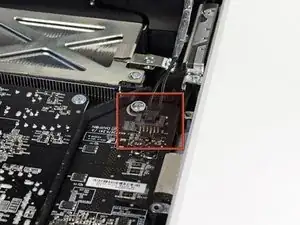
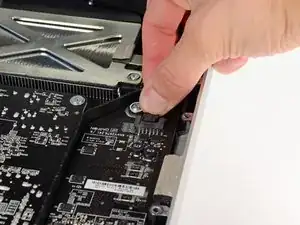
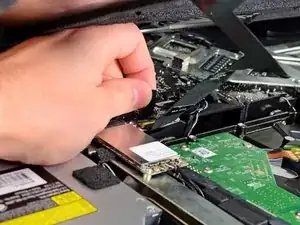
Einleitung

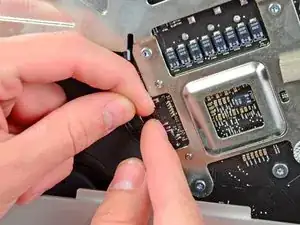
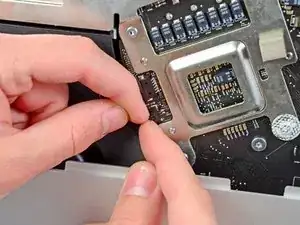
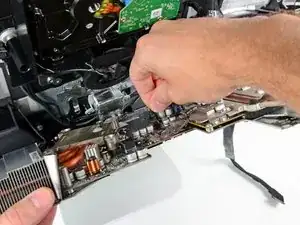
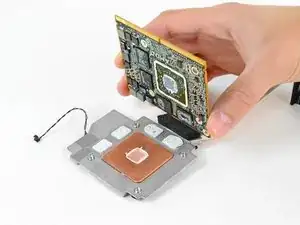
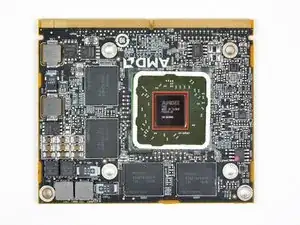
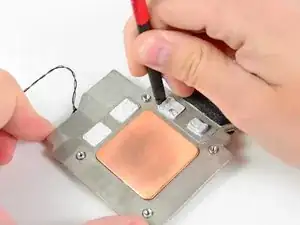
Diese Anleitung zeigt dir, wie du den GPU Kühlkörper austauschen kannst.

  1. T2LC3fppSadG5TQm
    T2LC3fppSadG5TQm
    1TINlTUGUAWyyTQH
    • Ziehe den Netzstecker am iMac und allen sonstigen Peripheriegeräten.

    • Lege deinen iMac mit der Scheibe nach unten auf eine saubere weiche Oberfläche.

    • Achte darauf, dass keinerlei Verunreinigungen auf der Oberfläche sind, die die Scheibe verkratzen oder beschädigen können. Am besten legst du ein sauberes weiches Tuch auf die Oberfläche.

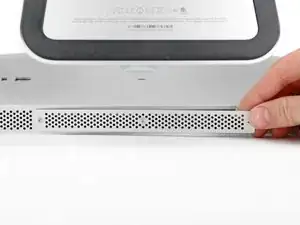
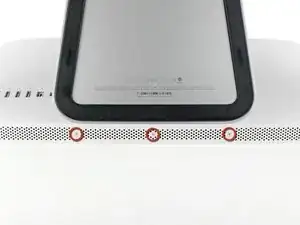
    • Die Klappe ist mit drei Kreuzschlitzschrauben an der Unterseite des iMac befestigt. Drehe sie heraus.

    • Die Schrauben bleiben in der Klappe hängen.

    • Entferne die Klappe.

    Before beginning unplug your iMac.

    Henry Barnett -

    The screws are not phillips #1 as implied above. My phillips#2 bit fit.

    John McWilliams -

    Yes phillips #2 is the correct Bit

    Heath -

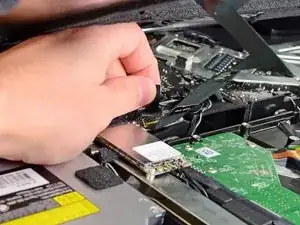
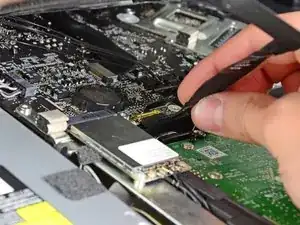
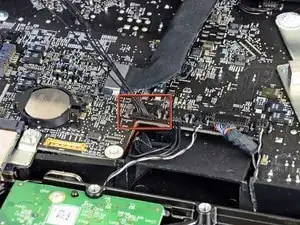
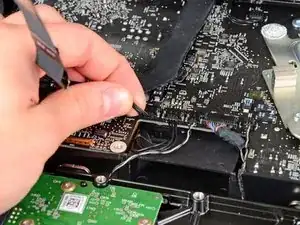
    Whenever I go this “deep” into any computer that has a motherboard battery, like the CR2032 for this iMac, I’ll add a new battery to my workflow. I’m in the “neighborhood” anyway.

    The battery is in a spring-loaded compartment, which requires patience and persistence.

    I make sure to test the new battery before installation. (The “3-2-1 Rule” applies: 3 of something means 2, 2 means 1, and 1 means none - I keep spare batteries on hand.)

    When I took part in my dual-drive adventure, I also added a thorough dusting (outside/outdoors) - phew!

    Carrick -

  2. 6Q2NEUXKZVcfN1XK
    6Q2NEUXKZVcfN1XK
    TqcocHbsKGnfFujG
    MMy23aIONs454MXJ
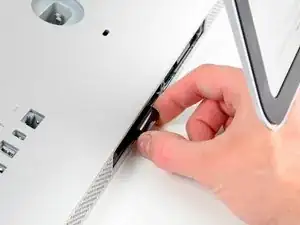
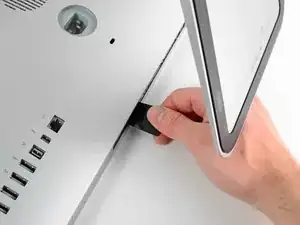
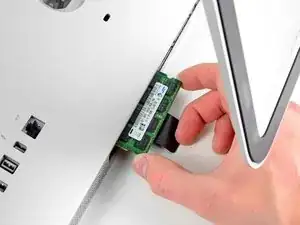
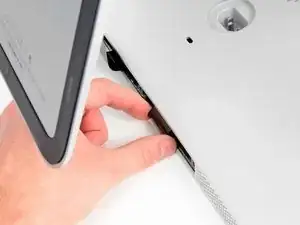
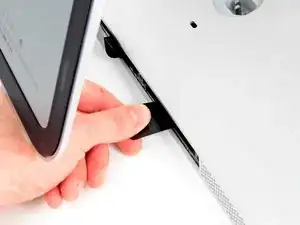
    • Ziehe vorsichtig die schwarze Plastiklasche zum Entfernen der RAM aus dem RAM-Slot.

    • Zieh die schwarze Plastiklasche von der unteren Kante des iMacs weg, um so das Modul/die Module auf dieser Seite des Ram-Gehäuses auszuwerfen.

    • Womöglich ist etwas Kraftanwendung erforderlich.

    It is far harder than I thought you have to pull REALLY hard and then there will be a little click and than you can gently pull out the RAM.

    Alison Newton -

    Press really hard, to the point you think you’ll cut your thumb, you’ll hear a slight ‘click’. If it’s not properly installed, the iMac will ‘beep, beep, beep’ In protest upon booting…

    Brian -

    I found it best to make use of the factory ‘pull tabs’. Much much easier than trying to pull the ram out by hand. It may seem like a good idea but, don’t be tempted to use pliers.

    Brian -

    Just FYI you can install 32GB’s of RAM in this machine. I have been using it this way for over 2 years now.

    Heath -

    Thanks for your Useful guide …. iMac Intel 21.5" EMC 2428 RAM Replacement was performed step by step on my Imac and every thing is perfect right now.

    Jaime Salazar -

    I was able to remove one side of the ram, but the other side would not budge. I was afraid that I was going to rip the plastic tab out of the computer. Any suggestions?

    Paula McCaulla -

    Do you know if 3 ram modules installed would work ? or if it should only be 1, 2 or 4 ?

    I currently have 2x2gb installed, but I only want to add 1x4gb to have 8gb in total.

    Thanks!

    Nikokow -

    Only install 1, 2, or 4. And preferably with the same gb for each module.

    Snuf Box -

  3. ausPCmV1yGbZA5L2
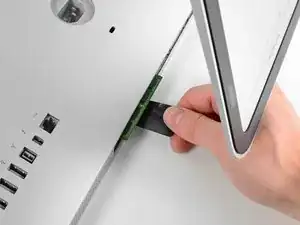
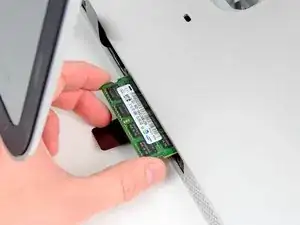
    • Zieh die alten RAM-Module aus den Slots im RAM-Gehäuse und leg sie auf die Seite.

    would this be a good time to increase the size of the RAM too? Would it be as simple as slipping the new RAM in when redoing the steps? Thanks

    timreespt -

  4. OJCMcKYpmsPkSQDx
    OJCMcKYpmsPkSQDx
    eRZJmkuNntfCKEXl
    4FoCqcHqfs4KLHTK
    • Wiederhole die vorherigen Schritte, um das/die RAM-Module von der anderen Seite des RAM-Gehäuses zu entfernen.

  5. dpCmaoqiUSpL1UDy
    dpCmaoqiUSpL1UDy
    MSEtvJqANxwgZxVB
    jrh5rWHixF6uDJyJ
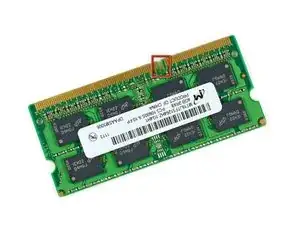
    • Beim Installieren eines neues RAM-Moduls, ist wichtig, auf die richtige Einsetzrichtung zu achten.

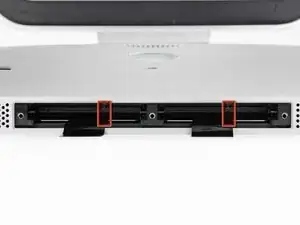
    • Achte darauf, dass die kleine Kerbe in jedem RAM-Modul (siehe erstes Bild) auf die Erhebung im RAM-Slot (siehe zweites Bild) trifft.

    • Dein iMac hat vier RAM-Slots. Achte darauf, jedes RAM-Modul horizontal in seinen Slot zu schieben. Das verhindert, dass sich die Module zwischen zwei Slots verklemmen.

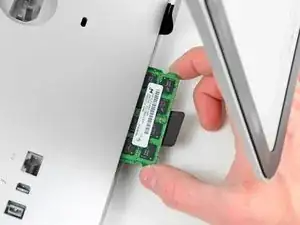
    • Nachdem du die neuen RAM-Module in die richtige Richtung ausgerichtet hast, schiebe sie vorsichtig ganz in den iMac und benutze deine Daumen, um sie sicher in ihren Platz zu fixieren.

    When reinstalling RAM in this machine or any iMac with upgradable RAM slots push hard to get them to go in (Apple really did make this one harder than it needed to be). If you don't push hard it won't go in and your computer won't work. (trust me on this learned the hard way)

    Robert Wacker -

    I am having trouble with bottom 2 slots. As I get beeping sounds when using them. When removed it boots properly. I tried & tried to push the 2 , 2GB ram modules into the bottom slots BUT all get is beeping. Guess I have to settle for 4GB Rather than 8 unless someone has a suggestion.

    Doug -

    Try swapping the to the other slots & don’t forget to press really hard until you hear the ‘click’.

    Brian -

    Is there an expirience to settle 1600 MgH Ram instead 1333 MgH manual required?

    Mikhail B. Bryanskiy -

    The Memory Maxxer RAM upgrade kit for the iMac 12,1 EMC 2428 suggests the machine can run 32 gb but Apple’s website says it can run a maximum of 16 gb.

    Are we sure 32 gb can run on this machine?

    Paul

    steedz -

    Added 16GB for a total of 20GB, runs great, do make sure of the “click”, the beep is disturbing

    Butt Muffins -

    2x2 GB 1333 MHz RAM were installed as delivered. I couldn’t manage to get those two out of their slots. I don’t want to damage anything. So, I put 2x8 GB RAM 1333 MHz RAM bars in the other two empty spare slots to have 20 GB RAM in total. The iMac runs fine with it. As described above, make sure to push RAM until they ‘click’ in completely.

    Matthias Brandl -

    Why are we taking out the RAM modules just to put them back in on the next step ?

    Jesse Fenton -

    Why do we need the spudger?

    Ross -

  6. S6gQ2HIHlQuHu5Sy
    S6gQ2HIHlQuHu5Sy
    EucNhvfCJRsBRgOY
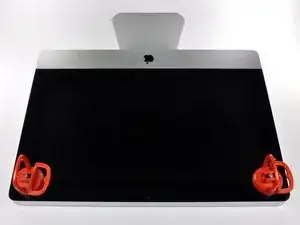
    • Ziehe den Stecker, bevor du anfängst. Lege den iMac auf eine weiche Oberfläche, so wie gezeigt.

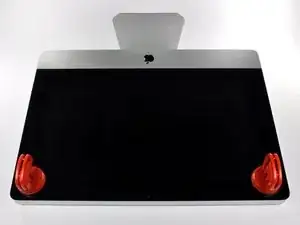
    • Befestige einen Saugnapf in jeder der oberen Ecken der Scheibe.

    • Um die Saugnäpfe, die wir verkaufen, anzubringen, musst du erst den Saugnapf mit dem beweglichen Griff parallel zur Scheibe aufsetzen. Halte den Saugnapf gegen die Scheibe und klappe den Griff hoch, bis er parallel mit dem anderen ist.

    • Wenn der Saugnapf sich nicht festsaugt, dann versuche die Scheibe und den Saugnapf mit einem milden Reinigungsmittel zu säubern.

    Very easy to lift the glass out. Don't jerk too hard.

    kctipton -

    Another comment on DATA & LCD Temp. Sensor cables: I had to remove the vertical sync, and the backlight cable, however, if you have an assistant or/can carefully rotate the screen clockwise/and then have it held up about 5" to 6" at a slight angle, you do not need to remove LCD data cable or LCD thermal cable, however - IMPORTANT: you must have a second pair of hands/or way to securely prop up the LCD. Also, don't rotate too much, since then you will pull out LCD data cable, and it renders the whole exercise moot, or can damage the cable or connector.

    MaximBorzov -

    You don't need suction cups. The screen, held by magnets, can simply be pried off using a very thin blade such as a screw driver and fingers.

    Deepsurvival -

    That's a bad idea. using a metal tool to pry off glass is likely to end with an expensive broken front glass.

    Suction cups are common. Find a couple and do it the safe way. I use some cheap ones that came with iPhone repair kit.

    max damage -

    No need for suction cups, I just stuck my nails (short like guys usually have) between the top part of the screen and body, and it came off easily. I've never done it before, so it seems to be very easy.

    Nikolas Lintulaakso -

    Nails worked for me too

    Rob Dale -

    Just completed the replacement of the optical drive with an SSD using an OWC Data Doubler kit. Attempted to remove the optical drive without disconnecting any cables but found it a bit fiddly to orient the screen for good access. I bit the bullet and disconnected them and found the process less daunting than I imagined. Reconnecting them was similarly straightforward if you're careful.

    Tip: you can skip the step for removing the optical drive thermal sensor connector from the motherboard. Still need to remove the sensor from the optical drive but you can leave that hanging and reattach it to the SSD later.

    osienna -

    I use Garmin GPS suction cup. Work very well

    jc3Dcx -

    I’ve just successfully installed a 1TB SSD in place of my optical drive thanks to the information here- thank you to everyone who has contributed!

    3 comments- the procedure described here seems to vary between HD replacement and dual HD/optical drive replacement. This can be confusing at times.

    Expect there to be minor differences between the layout described and what you find when you open up your iMac. There are also, surprisingly, differences between the HD enclosure description, and the article provided by ifixit.

    I was able to replace the DVD/HD enclosure single-handedly without fully removing the LCD, or deconnecting any of the cables (steps 5-11). It’s a bit cramped, and fiddly, but I was not happy removing any of the cables despite watching videos, etc., since they all seemed to involve applying more force than I was comfortable with. A more detailed description of how to release them might have helped, but even here, there may be minor variations even within the 2389 model.

    Good luck!

    ivan birks -

    I did it several times with one suction cup at the end of a kitchen brush. Once with the blade of a swiss army knive, also ok. And i’m pretty sure it works with fingernails too

    Tai -

    Fingernails are all you need to free the glass from its magnetic hold. If you don’t have them, slip something thin and plastic, like a spudger, at a top corner.

    Max Powers -

    Minha dúvida é a seguinte: após o técnico trocar o HD do meu iMac de 21,5 polegadas, a câmera parou de funcionar. Seria por causa da troca do HD? Tem solução?

    Claudio -

    Creio que o cabo da camera não foi plugado ou deu mau contato… ou até danificado.

    glecyo@gmail.com

    glecyo medeiros -

    I can’t get my glass to budge. I’m replacing a cracked one and now it’s about to shatter.

    jamboxmitchell -

    I know that I'm replying really late but I advise to use clear tape over any cracks so the cracks don't get bigger

    Jace Holmes -

    Check for chips in the glass BEFORE you do this step. If there is a chip when you pull up with the suction cups you will wind up with a jagged mess. If you do have a chip I would advise covering the screen near the chip with clear tape of some kind before lifting out. Mine shattered right at the chip and the resulting glass dust cloud got all over. My solution was buying a new glass screen.

    BCam -

  7. dEfYFtAGakgNBgPI
    dEfYFtAGakgNBgPI
    TRYClBF1GnTXMyiU
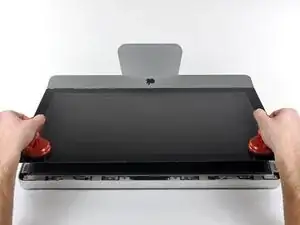
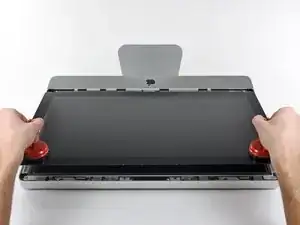
    • Hebe die Scheibe vorsichtig senkrecht zum LCD an, gerade soweit um die Metallstifte, die oben an der Unterseite der Scheibe angebracht sind zu befreien.

    • Ziehe die Scheibe von der Unterkante des iMac weg und lege sie sorgfältig zur Seite.

    • Achte beim Zusammenbau darauf, die Innenseite der Scheibe und das LCD peinlich genau zu reinigen. Jeglicher Staub und Fingerabdrücke werden sichtbar, sobald die Maschine eingeschaltet ist.

    What's the best product to clean the face of the LCD?

    Steve Speirs -

    Microfiber Cloth

    Leonardo Fournier -

    Try your best not touch it in the first place

    Brian -

    Wearing Nitrile or regular surgical gloves helps prevent finger prints if you accidentally touch the glass.

    amiller770 -

  8. Bix4VhiaYBKCt2rZ
    Bix4VhiaYBKCt2rZ
    6JGKWgUCXFHLEUs2
    WGCGZ5OtZPSXnERV
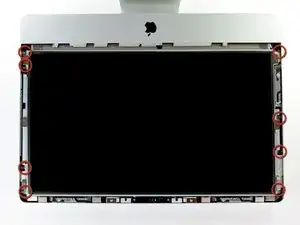
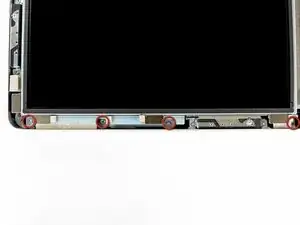
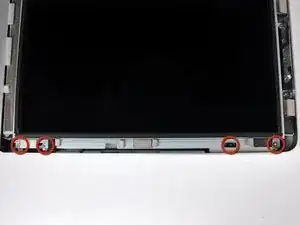
    • Entferne die acht 8mm Torx T10 Schrauben, die das Display am Gehäuse befestigen.

    • Die beiden letzten Bilder sind Detailaufnahmen von beiden Seiten des Displays.

    The metal near the screws is VERY magnetic. Honestly, the hardest and by far most frustrating step was trying to put these screws back in.

    seancourtney -

    I ran into the same problem - easily the most frustrating part of this process. To help deal with it, I took a drinking straw, cut it to be about 2 inches long, and used it as a chute to guide the screw to the hole. Dropping the screw down the straw, it'd still stick to the side due to the magnets, but using my screwdriver, it was easy to push the screw down to where it needed to go, and the straw kept the screw from being pulled out of place by the magnets.

    josh -

    +1 for the straw tip. Worked a treat!

    osienna -

    Hmm… yes, the magnets sucks - literally. But if you use a normal screwdriver or a bit, the screwdriver tip or the bit can be “loaded” by the magnets too. Just move the screwdriver (or bit) over one of the magnets and then “plug” the screw onto the screwdriver’s tip (or bit). It will be held by magnetic force. Just enough to move the screw vertically and very slowly into the whole.

    There are some special screwdriver on the market with “claws” to hold screws, but they are hard to find/to buy and expensive. I sometimes use superglue (a LITTLE) to temporary fasten the screw at the screwdrivers tip. This technique can be used with destroyed screw heads too to optimize adhesion.

    Udo -

    Les vis sont inévitablement aimantées

    Gui -

    Replacing these screws was like playing the most difficult game of “Operation” imaginable. I wish I’d seen the tip about using a straw before I started playing!

    Bret Mogilefsky -

  9. sHKTUAJPVrAGfLvG
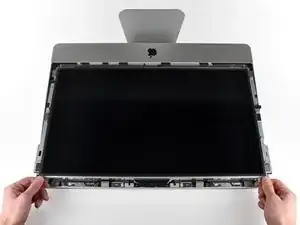
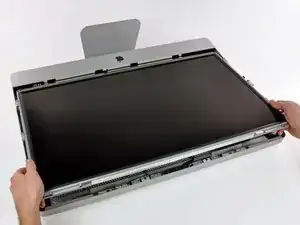
    • Hebe den oberen Rand des Displays leicht aus dem äußeren Gehäuse.

    • Hebe es nicht zu weit hoch. Mehrere Kabel verbinden das Display noch mit dem Logic Board. Wenn du am Display mit angeschlossenen Kabeln drehst oder ziehst, kann dein iMac beschädigt werden.

    You can use one hand to hold the edge up while reaching with the other hand to disconnect cables. You may want to have a prop handy (like a small book) or an extra person to hold the edge up while you disconnect cables.

    kctipton -

    Use the teardown guide for your iMac to familiarise yourself with the layout of everything before you dive in. I was able to get an idea of how much clearance there was once the display is unfixed from the frame, where the optical drive was relative to the base etc

    osienna -

    The harddisk can be removed WITHOUT the next steps. The opening angle of the partially lifted LCD display gives enough room to untighten the two Torx T9 screws of the hard disk bracket, to unplug the two SATA connectors and to carefully lift out the harddisk. There is absolutely no need to dismantle the whole thing.

    All you need is a screwdriver which fits into the room. I’ve used the “Pro Tech Toolkit” from iFixit. The screwdriver with Torx T9 bit fits perfectly.

    The other “tool” you need is either someone who holds the LCD plate or the inner leftover of a kitchenroll, a scrunched paper, a small towel or similar which has to be stuffed between the logic boards and the LCD plate to keep the LCD at its lifted place (careful! don’t unplug any of the cables).

    I’ve opened and changed the harddisks of those 21,5 iMacs a dozen times with the help of the “Pro Tech Toolkit” and a kitchen roll.

    Udo -

    If i want to replace the HD with a SSD, can i still skip the next steps? I think i can’t because i need to change the termal censor, but i would like an other opinion please.

    Danois -

    “Kitchen Roll” - paper towel core.

    kyoder11 -

    Hia,

    thx to IFIXIT and 20+ years of computer repair and building experience (all PC) there was no problem at all to remove a 500 Gb HDD from a mid 2011 iMac and replace it with an 500 Gb SSD Drive (with help from Comtec EDV, where i bought the upgrade kit).

    Skip the steps where people are advised to remove the display. Due to my experience it is def better to leave cables and plugs where they are. I lifted the display 12 cm and fixed this position w/ one pencil in each front corner of the case where the other end of the pencil sticked in ascrew hole of the display-frame. Very easy to operate afterwards! No probs w/ the screws of the hdd-frame.

    Some care-taking of static electricity is advised - wear a wrist cable. And don’t forget to press start button after having removed power chord. I had an Android Tablet on the right side, where i could watch these ifixit pages :-)

    thx to IFIXIT!

    w/ regards from cantbtroo from Berlin

    Hans- Peter -

    Thank you ifixit for the guide. Like so many others I jumped from step 4 to step 10 and left all the cables intact. Felt much safer doing so. Papertowel cores secured the LCD to higher position. There was enough room to remove the old HDD and replace it with a SSD drive.

    Cheers!

    Aapo Kaivosoja -

    I also was able to proceed with rest of instructions, after skillping steps 4-10, just have to be very gentle, i think it would help to have a second set of hands to hold screen above while other hands are uninstalling and installing hard drive, but i was able to do it on my own

    jacob d -

    If you have trouble lifting the LCD or accessing the connectors, check if you have removed the right screws. There are a lot of identical Torx screws that are accessible without removing the LCD that have nothing to do with the screen, I learnt that by nearly breaking mine xD

    Luther -

  10. uYfTvPHNlllVQJ2x
    uYfTvPHNlllVQJ2x
    DcxbvwtDtSCKTL4x
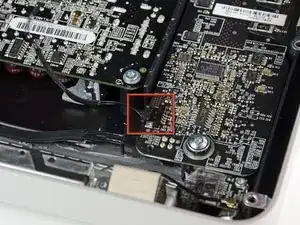
    • Ziehe den Verbinder des Vertikalsynchronisationskabel aus seinem Sockel auf der LED Treiberplatine nahe der linken oberen Ecke deines iMac.

    Tried doing this on my iMac, but this cable would not come out for love or money. No matter what I did, I could not unplug this cable. My iMac is the same 21inch 2011 as this one. Any advice would be greatly appreciated.

    louis.barr -

    use a little poker type thing in your right hand to push on the 2 holes that are on top of the plug and wiggle it out with your other hand,

    Nicholas -

    I was tempted to forgo steps 4-10 but found the inside of the case to be very dusty and decided to do the full disassemble. I struggled getting this vertical sync cable connector out. The trick that worked for me was to prop the display up using a pair of toilet paper tubes then using the fingernails of both thumbs, one on each side of the connector and it came out easily.

    Anthony Zimmerman -

    Great idea of using toilet paper tubes to prop up the LCD! Thanks.

    jim -

  11. Z6oLICdOpXOqb5Sv
    Z6oLICdOpXOqb5Sv
    PXYUsRPelGyf1fRl
    • Drehe das Display soweit aus dem Gehäuse heraus, dass du das Stromversorgungskabel der LED Rückbeleuchtung von der LED Treiberplatine ablösen kannst.

    • Löse das Kabel ab, indem du den Verschlussmechanismus des Steckers hineindrückst während du ihn gleichzeitig aus seinem Sockel ziehst. (in Richtung Unterkante des iMac).

    Slip a thumbnail under the “front” (toward the top of the iMac) of the connector to release its clamp from the retaining ridge. Then push toward the “back” (bottom of iMac).

    Anthony Zimmerman -

  12. npaWnsJX6JZjJGpj
    npaWnsJX6JZjJGpj
    YHJ6aB23ZhsTnt4v
    ynXVQEyhSx2XU5Bw
    • Fasse die Zuglasche am Sicherungsbügel des Displaydatenkabels an und drehe ihn nach oben.

    • Ziehe das Displaydatenkabel aus seinem Sockel auf dem Logic Board.

    • Ziehe das Kabel nicht nach oben, sein Sockel ist sehr empfindlich. Ziehe es parallel zur Oberfläche des Logic Boards.

    I am having a difficult time reattaching the LCD cable. A better description or any tips would be useful here.

    Ben Bauermeister -

    Me too — ditto that.

    Roger Buttermore -

    https://eshop.macsales.com/item/OWC/DIDI... —> abt. 5:30 into the vid. Handle up to slide in, then flip it down to lock the connector in place.

    Roger Buttermore -

    The connector needs to be carefully pushed in parallel to the board with a surprising amount of pressure and the pull tab must be folded back. Not super fragile, but not strong either.

    Isaac Vande Zande -

    I really wish that the fagility of this connector was mentioned in Step 10 or 11.. When i rotated the screen on step 11.. It pulled this connector out and now I can't get it back in.. I hate computers.. HA!

    Philip Nelson -

    This is the most painful part of the whole event. Replacing this cable took me around 30 minutes !

    K. Efe Egilmez -

    I have tried and tried to get this cable back in. How do I know if I have messed it up?

    Christopher Teer -

    Mine seems to be…upside down? Looks like the little flappy lock thing is on the bottom as opposed to it being in top as pictured?

    jinnifer douglass -

    I agree with everybody that this is the critical step in this fix. Removing it is not that difficult, the description is quite accurate, but I would highlight that the “rotate” part of the step could be detailed: the black plastic tab is attached to the metal lock (golden colored) , which should rotate into the direction of the cable almost 180 degrees to unlock the connector. After doing this you can pull the cable out of the connector, PARALLEL to the board and away from the connector. It travels a very short distance to disconnect. After going through the rest of the steps to remove the display, take some time to examine closely the connector and understand what you have to do to reconnect it on assembly. It helps to fully visualize beforehand, since on reassembly it is difficult to see properly.

    Fernando Walker -

    Magnifying glasses are needed for this step. Carefully study the cable and how it attaches to the connector. Take a few pictures to help. This is the most difficult step.

    Norman Staples -

  13. JlRYIragda3eBSWX
    JlRYIragda3eBSWX
    h4kYqkOVNshYIPZn
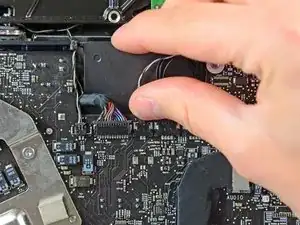
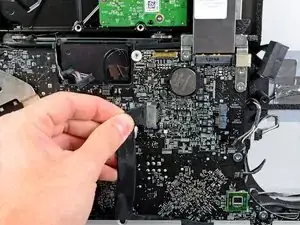
    • Löse den Verbinder des Kabels zum Thermosensor des LCD aus seinem Sockel auf dem Logic Board.

    When putting the display down on the table, be careful not to kink the flat ribbon cable.

    frank -

    The replacement hard drive I used doesn't even appear to spin up and the Time Capsule restore process doesn't show it as available. It just stays at Searching for disks and never finds it.

    JRBv3 -

    I had to use Disk Utility to partition the drive and then it showed fine. Rookie mistake.

    JRBv3 -

    I managed to damage the LCD thermal sensor socket in the logic board. Now the connector won’t stay in place. I know the missing thermal sensor should cause the fans to spin up (they do spin up after a while), but the screen is blank.

    I connected an external monitor and it works fine, so it doesn’t seem to be a graphics or logic board issue. I also replaced the LED driver board with one from a working iMac, to no effect.

    Can the missing thermal sensor be causing this?

    Rodrigo da Rosa Cesconeto -

    Having the same problem. Black screen, works fine with external display.

    Passerby -

  14. X4PMZJwCtrbQ4ALo
    • Ziehe das Display sorgfältig in Richtung Oberkante deines iMac und hebe es aus dem Gehäuse. Achte darauf, dass sich keine Kabel verfangen.

    Btw, I was pretty safe (& content) with two suction cups - i bought 3 for less than 7 Euros. They were a good help for a glass that hasn’t been removed since 2011. But i am sure fingernails will do a good job, too (of course not mine, cos i have short ones).

    At the end of the job it was even possoible to clean the fan that sucks cool air into the iMac (w/ a paintbrush and a controllable vaccuum cleaner). After that, it’s also a good opportunity to clean the air inlet that is part of the aluminium case (behind the stand - it’s always dusty).

    w/ regards from cantbtroo, Berlin

    Hans- Peter -

  15. 1MlcYZV5nCLr264K
    • Es wird einfacher, wenn du ab jetzt dein Gerät herumdrehst, so dass der Boden zu dir zeigt.

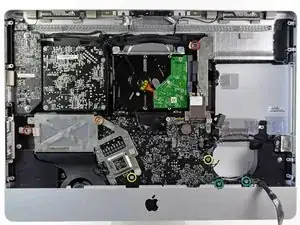
    • Entferne die folgenden vier Torx Schrauben:

    • Eine 9,3 mm T10 Schraube mit breitem Kopf

    • Drei 9,3 mm Schrauben mit normalem Kopf

    In my case the red screw was on the lower left side near the power-data cable!

    sefw4t2efwef -

    Same here. There are different versions delivered

    Tai -

    Same for me.

    davidevismara -

  16. NrlVDiD4WEMZqEUh
    NrlVDiD4WEMZqEUh
    ANsIDp5OYAQRLAkJ
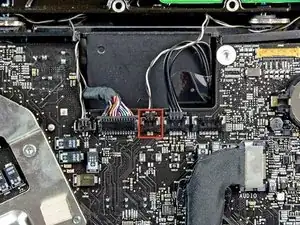
    • Ziehe den Stecker des Thermosensors vom optischen Laufwerk gerade aus dem Sockel auf dem Logic Board heraus. Ziehe parallel zur Platine.

    No need to remove the thermal sensor connector from the motherboard - refer to Step 17 to remove the sensor from the optical drive instead

    osienna -

    The thermal sensor connector shown in the red box is the one for the hard drive, not the optical drive. The optical drive sensor attaches to motherboard near bottom left of optical drive fan.

    Reiner Friedel -

    The guide was correct in my case that this is the Optical Drive sensor. The board has “ODD Temp” written on it. Original HD has it’s own built in temperature sensor without a separate cable to the Motherboard, which is why OWC sells a special “In-line Thermal Sensor” SATA cable with a Temp. sensor that attaches to any new hard drive itself.

    amiller770 -

    When I was removing the optical drive cable sensor the connector came loose from the board. Is there any way to repair this?

    Paula McCaulla -

  17. OUOqmArdw3JCHpHY
    OUOqmArdw3JCHpHY
    eRYpgV2Q3dj6tAFh
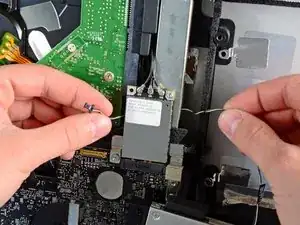
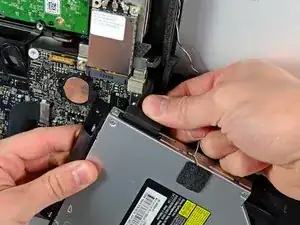
    • Hebe die innere Kante des optischen Laufwerks etwas an und manövriere den Stecker durch den GPU Rahmen am Logic Board.

    • Ziehe das optische Laufwerk vorsichtig aus den Befestigungsstiften auf der rechten Seite des Gehäuses. Du schaffst dadurch Platz, um das Kabel des optischen Laufwerks zu lösen.

    • Lasse das optische Laufwerk hängen und führe den Stecker des Thermosensors vom optischen Laufwerk hinter dem Kühlkörper der GPU heraus.

    On the reassembly, I found threading the optical drive cable back under the GPU frame trying. Here’s some advice: Take some dental floss, form a loop, and feed that loop under the GPU frame. Put the cable into the loop of floss, tighten the loop, and pull the loop back through. This is much easier, faster, and far less frustrating.

    Albert Einsrein -

  18. kP2lxo3pOV4F4Bxg
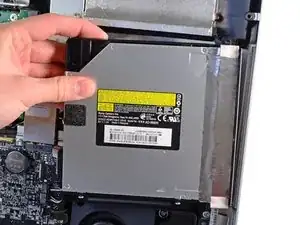
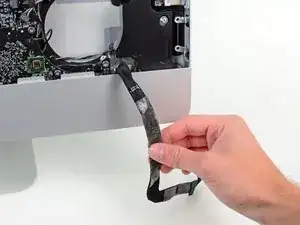
    • Löse das Kabel zum optischen Laufwerk, indem du den Stecker weg vom optischen Laufwerk ziehst.

    • Entferne das optische Laufwerk vom iMac.

    I have already installed the second SSD drive, but due to the size of the drive I need to change it with another SSHD 1 TB drive. Am I right that I have to follow the instructions up to Step 18? Because The SSD is already behind the optical drive, so what I need to do is remove it and install the new SSHD drive and put everything back again. Please confirm.

    Mohamed Kamal -

    This was my only error on reassembly. The SATA cable must be under the black plastic prong. I did not want to pull to logic board again. I managed to bend the black plastic bits and get the cable in the right place.

    Terry Creasy -

  19. PDQmCwlo3bjBIZ4S
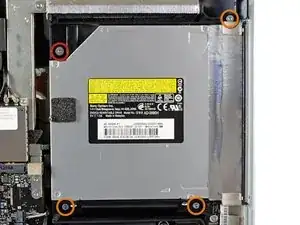
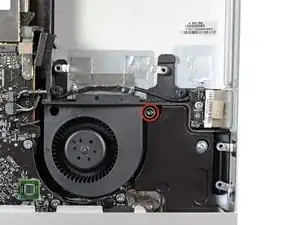
    • Entferne die 13 mm Torx T10 Schraube, mit der der Lüfter des optischen Laufwerks am Gehäuse befestigt ist.

  20. aPEQJP2XlDh2etuG
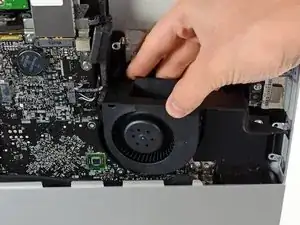
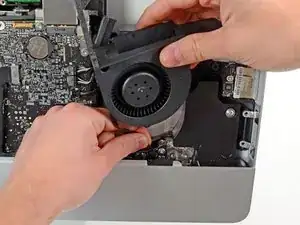
    • Ziehe den Lüfter des optischen Laufwerks aus den Haltestiften im Gehäuse.

  21. DccMAViTiFL2yq2I
    • Ziehe den Stecker des Lüfters vom optischen Laufwerk aus seiner Buchse auf dem Logic Board.

    • Entferne den Lüfter des optischen Laufwerks vom iMac.

    If you happen to forget to plug the fan in before you re-install the fan, instead of trying to plug it in while it's in there just take the fan back out...I've heard from a friend who did that... :-D

    LeBarron Durant -

  22. MBDNWPC4hEYeYUxl
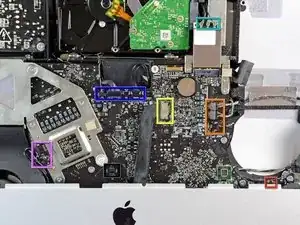
    • In den folgenden Schritten wirst du nacheinander diese Kabel trennen:

    • SD Karte

    • Linker/Rechter Lautsprecher und Mikrofon

    • Audiobuchse

    • WLan-Antenne

    • Rechter Temperatursensor, Bluetooth/Helligkeitssensor/ Kamera/ Linker Temperatursensor und Lüfter der Festplatte.

    • CPU Lüfter / Umgebungstemperatur- und Einschalttaste

    • Infrarot-Sensor

    The cable in the yellow box pulls out parallel to board. The connector looks as if it might be different, but grasp the black tabs and pull parallel to the board

    Alex Grayson -

    The power button cable is super easy to break, use a small tipped plyer, same goes for the right temperature sensor. I broke both on my imac 2011 20.5 model.

    Vardek Petrovic -

  23. LnIvIawxoFE5W4Fr
    • Ziehe das SD Kartenkabel aus seiner Buchse auf dem Logic Board.

  24. JkDWL6OQqFegGL1G
    JkDWL6OQqFegGL1G
    Xgd1sNysAobKYCOE
    1cpr1L2FQfhLWhQp
    • Löse die Mikrofon- und Lautsprecherkabel, indem du ihre Stecker zur rechten Seite des iMac ziehst.

  25. I6YiYeF1CnWlp4Mf
    I6YiYeF1CnWlp4Mf
    NeYd1TGPJfTSf6Uq
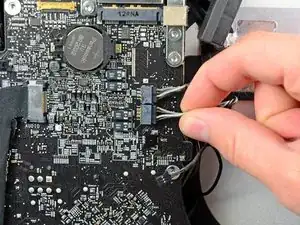
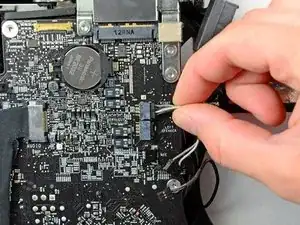
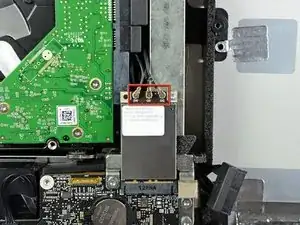
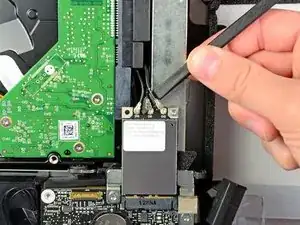
    • Heble alle drei Stecker der AirPort Antennenkabel mit dem flachen Ende eines Spudgers aus ihren Buchsen auf der AirPort Karte.

    • Beim Wiederzusammenbau musst du das Kabel ohne Streifen in die Buchse stecken, auf der CH0 steht, das mit einem Streifen in CH1 und das mit zwei Streifen in CH2.

    Mine has these cables exactly opposite what is shown here. (?)

    Danno -

    same with mine

    andriivarko -

    Same on mine

    Leon Mertvoy -

    Mine is:

    2 bands = CH0

    1 bands = CH1

    0 bands = CH2

    Model: AR5BXB112

    Victor -

    what does this cables mean?

    mine is:

    2 bands = CH0

    1 bands = CH1

    0 bands = CH2

    Johnny Macedo -

    Actually I have just unplugged the whole airport board from its socket (where it is written 12RNA on the photo), why bothering with a spudger? You only need to remove one small screw that its holding it in place (torx T6)

    Viktor -

    I think my cables were in the opposite order—but I put them in the instruction order and everything is working.

    Terry Creasy -

    All the 21,5” Mid 2011 that I had repaired (12) had all these cable in the inverse order. I suppose that is correct

    dariomella -

  26. NlXxiGkJhYF2F3b1
    • Ziehe den Stecker vom Lüfter der Festplatte in Richtung der Oberkante des iMac und löse ihn so aus seiner Buchse auf dem Logic Board.

  27. q2VHEp13xa34sIEG
    • Fasse den Stecker des Kabels mit dem Bluetooth / Helligkeitssensor / Kamera / Linker Temperatursensor auf beiden Seiten mit deinen Daumennägeln an und drücke ihn in Richtung Oberkante des iMac weg von seiner Buchse auf dem Logic Board.

  28. yRwBOkGUBc55bIRn
    • Drücke mit den Daumennägeln den Stecker des rechten Temperatursensors in Richtung Oberkante des iMac aus seiner Buchse heraus.

    I broke that cable and I would like to know where to buy the right temperature sensor cable. Thanks.

    Fernando -

  29. xrtmhI6GAIcslWQk
    • Ziehe den Stecker vom CPU Lüfter /Umgebungstemperatur-Sensor in Richtung der linken Unterkante des iMac und aus seiner Buchse auf dem Logic Board.

  30. YXLBNsOK4OGxFCAf
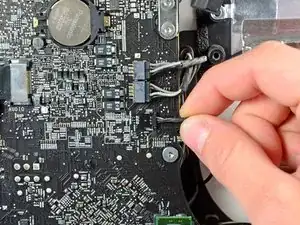
    • Ziehe den Stecker des Einschaltknopfs in Richtung der unteren linken Ecke des iMac, um ihn von seiner Buchse auf dem Logic Board zu trennen.

    Please be careful with this step on the power button. Mine disintegrated when I pulled it out and I had to put it back in the socket pieced together and tape it. Just be careful.

    LeBarron Durant -

  31. iINlfyWyPMUYyPiK
    iINlfyWyPMUYyPiK
    Dm2aX6aUfFR4UAYx
    • Drücke den Stecker des Infrarot-Sensors mit den Daumen in Richtung Oberkante des iMac und aus seiner Buchse auf dem Logic Board heraus.

    • Ziehe die Infrarotsensorplatine hinter der Vorderseite des Gehäuses hoch.

    • Entferne den Infrarot-Sensor und lege ihn beiseite.

    NOTE: Be aware that (especially refurbished iMac’s) may have adhesive that may increase difficulty removing sensor. Possible recommendation; Use your iFixit Jimmy Tool or spudger to assist you in reaching the adhesive strip.

    John Gonsalves -

    I tried using my thumbnails as shown to push the connector out of its socket, but the individual wires came out instead. Spudger didn’t help. I had to remove the connector after all 4 wires came loose. I don’t know if this is worth the trouble to fix.

    James Webber -

    had the same experience as James. Will not replace it and see what happens

    Cornel Barth -

  32. sFoWQGrLJfWYJF3x
    sFoWQGrLJfWYJF3x
    csyHVX6rqYgUDr21
    • Ziehe den Kabelstecker der Audiobuchse in Richtung der linken Seite des iMac und löse ihn vom Logic Board.

    • Ziehe dabei nicht zu dir (also von der Vorderseite des Logic Boards weg).

    • Ziehe das Audioanschlusskabel von der Vorderseite des Logic Boards ab und lasse es herunter hängen, wie im zweiten Bild.

  33. pKSGw5ndjkv3E2iG
    • Entferne folgende sieben Torx Schrauben:

    • Zwei 7 mm T10 Schrauben

    • Eine 30 mm T10 Schraube

    • Zwei 25 mm T10 Schrauben

    • Zwei 21 mm T10 Schrauben

    On reassembly:

    Be sure to route the BT/camera multicolor cable (step 27) and the temperature sensor cable (step 28) into the gap next to the logic board. The correct location is seen well in step 32, just above the person’s index finger.

    Robert -

    ALSO on reassembly, check between the board and metal post under the right-hand yellow dot in this picture. Be absolutely sure that the left speaker wire, the SD board cable or the right fan cable aren’t between the board and the post. I shorted out my left speaker by getting it caught in there. Easy fix, but if they’re bent just right they just seem to want to fall between the board and post. Make sure they’re outa’ there!

    Robert -

  34. 6rNZDdtBBkTbkaXr
    6rNZDdtBBkTbkaXr
    SYYRSfDBrnIAtpNS
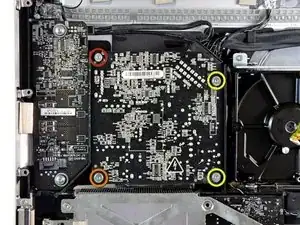
    • Entferne folgende vier Schrauben:

    • Eine 9,3 mm T10 Schraube mit Grobgewinde

    • Eine 25 mm T10 Schraube mit Grobgewinde

    • Zwei 22 mm Schrauben mit Feingewinde

    • Ziehe die rechte obere und linke untere Ecke des Netzteils vom Rückgehäuse weg, um die Befestigungsstützen in den Ecken des Netzteils zu lösen.

    SAFETY NOTE: Remember ANY high voltage power supply can cause SERIOUS INJURY and may still hold charge LONG AFTER the device has been unplugged, EVEN IF PROPERLY DISCHARGED!!!

    John Gonsalves -

    Amen. Having been jolted twice from 2 different spots on the power supply, I would recommend covering the power supply with a small microfiber cloth, handling it by the edges and keeping the cloth in place. Cheap insurance. It will also protect the power supply if it touches something conductive on the hard disc when you flip it over to remove the DC-out cable (next step).

    Robert -

  35. vCcvSbXFkOY4qMGA
    vCcvSbXFkOY4qMGA
    V2gJPWNEShhuPF3q
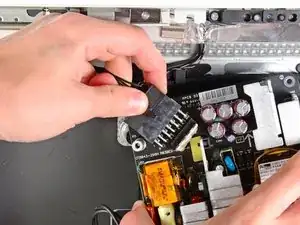
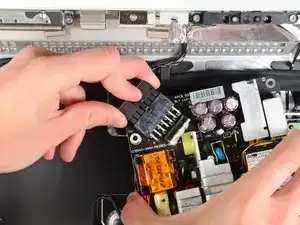
    • Hebe das Netzteil vorsichtig aus dem Gehäuse und drehe es so, dass du an die Sicherungsrasten des Kabels gelangst, so wie im Bild zu sehen. Denke dabei daran, dass Gleich- und Wechselspannungskabel immer noch angeschlossen sind.

    • Trenne das Gleichstromausgangskabel, indem du die Sicherungsraste am Stecker gedrückt hälst und ihn gleichzeitig von der Buchse auf dem Netzteil wegziehst.

    • Sobald die Verriegelung des Steckers gelöst wurde, kannst du auch das Gleichstromeingangskabel vom Netzteil abziehen.

  36. Lh5KCbyJexUeexyH
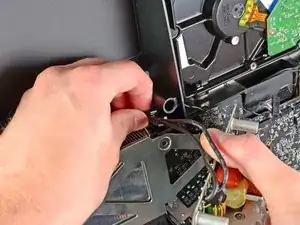
    • Trenne das Wechselstromkabel indem du die Sicherungsraste eindrückst und gleichzeitig den Stecker aus der Buchse ziehst.

    • Entferne das Netzteil vom Gehäuse.

  37. iRUgTo4lPVjn3EUB
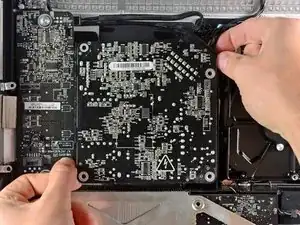
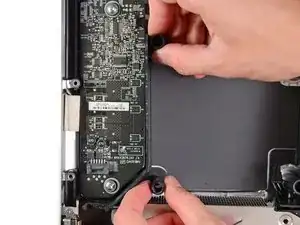
    • Entferne die Plastikwand an der rechten Seite der LED-Versorgungsplatine.

  38. leHYNURIpT1UkCuI
    leHYNURIpT1UkCuI
    ryUpS5GrjBpiO61v
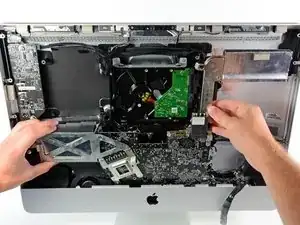
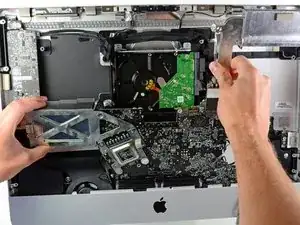
    • Ziehe das Logic Board leicht von der Rückseite des Gehäuses weg, hebe es dann etwas nach oben, so dass die untere Frontblende des Gehäuses frei wird.

    At this point on reassembly, make sure the optical drive SATA cable is under the black plastic wall prong. The connector must be low to reach the optical drive.

    Terry Creasy -

    YES to Terry above. The optical drive cable actually pretty much floats loose when the connectors are pulled off. It needs to stay below the transverse wall which is right under the person’s right hand in the photo above.

    Additionally, it would help to take a picture here to remember where the cables all go. You will have some open sockets at the end and it’s a little confusing. There is a good diagram of their locations here: Screenshot #1 at ++https://drive.google.com/drive/folders... Thanks to Timothy in comment for step 41 for this link. Basically don’t get sockets for SSD and HDD confused!

    Robert -

  39. PAShNw2NePv1BVyQ
    • Löse das Kabel des LCD Temperatursensors, indem du den entsprechenden Stecker aus der Buchse auf dem Logic Board hebelst.

    But thats the CPU temp sensor, not LCD

    Sam -

  40. CICcfiS5DQESnPGW
    CICcfiS5DQESnPGW
    xhMWxdA2VrbYKJGJ
    • Drücke den Verriegelungsmechanimus und löse vorsichtig das DC-In Kabel aus der Buchse auf der Rückseite des Logic Board.

    HI,

    I just replace the dead GPU Card on an Imac 21.5 Mid 2011,

    Got 2x2Gb 1333 sodim in the top of slot.

    When i finish the repair, the mac start normally but except the right memory slot ,When looking at the front of the Imac , (The top and bottom Right Slot memory ) (Dimm Ch B )

    I search on the net and found that i properly knocked the motherboard when I put it back in.

    I think the power Filter, behind the motherboard ,is what cause that.(Because when you fight to put back cable behind the motherboard)

    You need to mention that, next time.

    I’m not sure about that but I think the part C3230. (I do not disasembly it again to verify (It’s so Fragile)

    Can someone confirm that,( And what do i need to do to repair it.??

    Or Do someone have the same problem, (Right slot (Top & Bottom ) Not working.??

    Mr Desvaux

    Gilles Desvaux de Marigny -

  41. hqpRGAILImXZnQvF
    • Pass gut auf, dass du die Buchse auf dem Logic Board nicht beschädigst, wenn du das SATA Datenkabel gerade aus der Buchse herausziehst.

    You forgot after this step to pull out the optical drive cable from the mlb, also make it very clear that its crucial to put those cables back in the right socket not to cause bigger damage to the logicboard.

    davis 12 -

    I searched all over the internet for photos or diagrams of the back side of the logic board to understand where to connect SATA 1 and 2 data cables. This is a pain to reopen and go back to where you can fix the SATA connection.

    James Webber -

    I located the schematic for the area. I hope this of use to someone https://drive.google.com/drive/folders/1...

    timothy handy -

    I'm replacing the HDD with an SSD - not sure if I should use the HDD SATA-0 channel or the SSD SATA-1 channel.

    Richard Holmes -

  42. hk1w2iYUavsksZDZ
    • Ziehe den Stecker der Stromversorgung der Festplatte aus seiner Buchse auf dem Logic Board.

  43. hdIFQM2CrqyOPtuV
    • Entferne das Logic Board aus dem Gehäuse und achte dabei darauf, dass sich keine Kabel verfangen.

    • Beim Wiederzusammenbau musst du zuerst ein Thunderbolt Kabel und ein USB Kabel in den USB-Anschluss einstecken, der der Mikrofon-/Kopfhörerbuchse am nächsten liegt, bevor du die Schrauben am Logic Board anziehst. Du stellst so sicher, dass alles gut passt.

  44. I2t5PWifpDIP4OFm
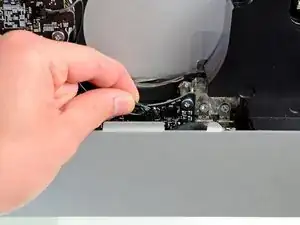
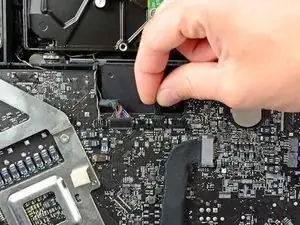
    • Entferne das Stück Klebeband, welches das Kabel zum GPU Thermosensor am Logic Board befestigt.

    The GPU thermal sensor is connected to the LCD TEMP connector on the main board.

    Richard Holmes -

  45. bFDkOYhVZndwj2gO
    • Entferne folgende drei Schrauben:

    • Eine 4,2 mm Torx T10 Schraube

    • Zwei 5 mm Torx T8 Schrauben

  46. oNPKZZ66AueC2FUE
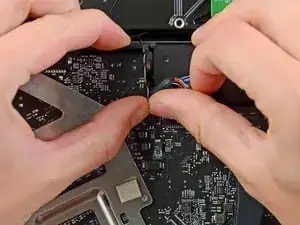
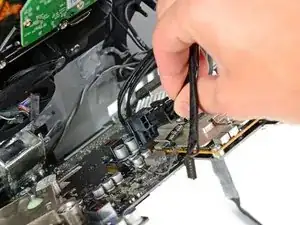
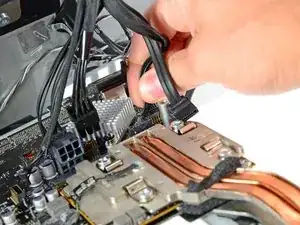
    • Fasse den Stecker am Kabel des GPU Thermosensors und ziehe ihn gerade aus seinem Anschluss auf dem Logic Board heraus.

    • Ziehe den Stecker nicht an seinen Kabeln heraus.

  47. R2lG3qtLAjKbHj1y
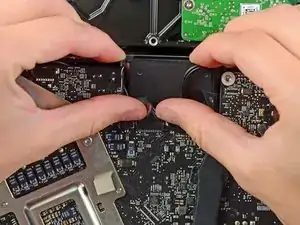
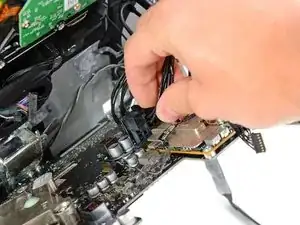
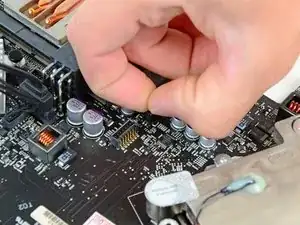
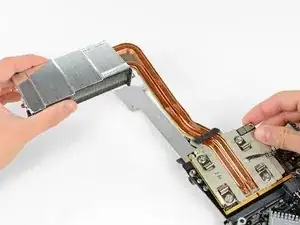
    • Hebe den Kühlkörper an der GPU leicht an und ziehe die GPU Karte aus ihrem Anschluss auf dem Logic Board heraus.

    Can you show how the metal bar that the GPU heat sink was connected to is connected to the motherboard? It's the silver bar in the bottom of the picture under the GPU assembly.

    mcbritt -

  48. odnA3W1Nhv12UIQP
    odnA3W1Nhv12UIQP
    EnNRFqNPxPeq1pnL
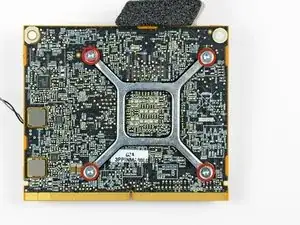
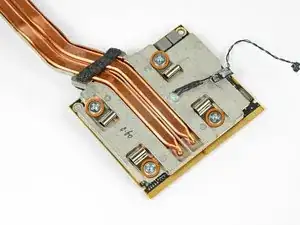
    • Entferne die vier 6,5 mm Torx T8 Schrauben, mit denen der Kühlkörper der GPU an der GPU befestigt ist.

    • Es kann sein, dass du die Anschlüsse auf dem GPU Kühlkörpers mit einem Kreuzschlitzschraubendreher #1 festhalten musst, während du die Torx T8 Schrauben löst.

    I think this are also 6.5 mm T10 (!) Torx screws.

    Max -

    Yes, T10 for sure.

    William Boyles -

    My replacement card had a clamping bracket with small bushings in the holes which required a smaller screw! Oh fun! I used a T6 screwdriver to carefully and gently push them up from underneath to get the bracket off. It’s lightly glued on, don’t worry about that; you won’t peel off any traces or board. But DO NOT let the card flex when you do this. Then I reused the old bracket and screws. I suppose you could also drill out the bushings. Curtis Gross talks about this in his nice YouTube video.

    Robert -

    I didn't have to remove these screws at all and skipped this step entirely.

    LeBarron Durant -

  49. tCoXZq2mMnTpVGYH
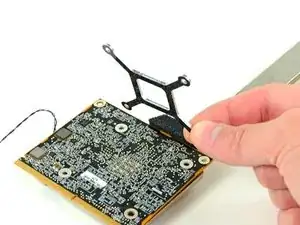
    • Entferne die Halteklammer auf der Rückseite der GPU.

  50. d3WjvmOtDGQxPQlN
    d3WjvmOtDGQxPQlN
    JvSDhr1BDI5USQBB
    TTQpkPoxetwSDeWZ
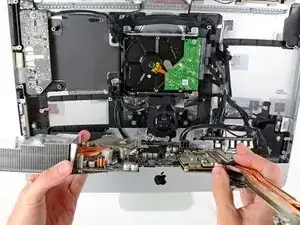
    • Entferne die GPU vom GPU Kühlkörper.

    • Bevor du den Kühlkörper wieder an der Oberfläche der GPU (im Bild rot markiert) anbringst, musst du erst eine Schicht Wärmeleitpaste auftragen. Unsere Anleitung für Wärmeleitpaste erleichtert diese Arbeit.

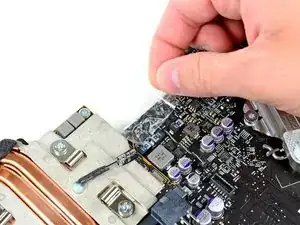
    • Bevor du neue Wärmeleitpaste aufträgst und eine neue GPU auf dem GPU Kühlkörper befestigst, benutze das flache Ende des Spudgers, um den Klacks Wärmeleitpaste am VRAM stärker zusammenzudrücken, so dass er besseren Kontakt zum VRAM hat, wenn die GPU eingebaut ist.

    • Verwende keine Wärmeleitpaste an VRAM-Chips (die schwarzen Kästchen um die GPU). Die VRAM-Chips sind etwas flacher als die GPU, deswegen benötigen sie Wärmeleitpads, um den Kontakt zum Kühlelement herzustellen. Wenn die Wärmeleitpads durch Wärmeleitpaste ersetzt werden, wird sich die Karte überhitzen und eventuell zerstört werden.

    Make sure you use Thermal pads not paste on the VRAM chips!

    Apple did use a gapping thermal paste but experience has shown the pads are better here. They did this to cut down the amount of time during assembly as pads do take a bit more time to put on.

    Dan -

    Too late.

    This image is very misleading : (

    Please make this a warning, tell about the pads in the description and/or use a better picture!

    My card is probably gone.

    Joerian Lazaroms -

    I used K4 and K5 pro with mine. K4 for the gpu and K5 for the RAM chips.

    K5 is a lot thicker and works just like thermal pads.

    Cary B -

    Does anybody know the thickness of the thermal pads? 0.5 mm? 1 mm? 1.5 mm?

    Rabauke -

    Did you find the thickness?

    Erik Endresen -

    I am using pads with a 1.5mm thickness made by Arctic (color blue).

    Dan Packard -

    anyone has measure the gap? for me is 1mm, so the thickness of the pad. I have not tryed yet

    Alejandro Siskos -

    Finally I used 1mm thermal pads. they worked well. First I bought 2mm pads and they definitly doesn´t fit, they don´t let the GPU micro not reach the heat sink (very bad). As Dan Packard suggest, I did not test 1.5mm pads, they are very expensive here in Argentina.

    Alejandro Siskos -

  51. UuZNXiRKkplUDcRX
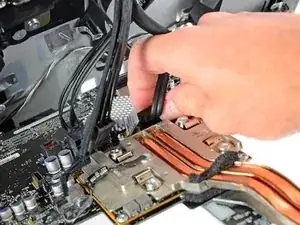
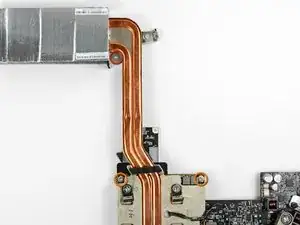
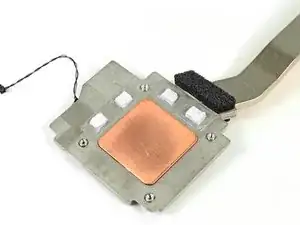
    • Der GPU Kühlkörper bleibt übrig.

Abschluss

Um dein Gerät wieder zusammenzusetzen, folge den Schritten in umgekehrter Reihenfolge.

Andrew Bookholt

578335 Reputation

2 Kommentare

I have already completed this guide twice. The first "Bake", we were in quarantine due to the Covid-19 Pandemic. But after performing the repair, my computer worked perfectly for 2 years and 7 months. Usually they say it lasts 2 and a half years. I got lucky. Last week, it happened again. I followed the guide again, this time with more security and knowledge, but I came across defective parts due to time. Two of them caused me problems and more work. First a cable from the Airport antenna, the one with the single stripe, broke right at the connector and I had to solder the connector to the cable to try to fix it. I managed, but I confess that I would have liked to change this cable. The second thing, and here I would like some advice, was that the socket where the fan cable fits to cool the ODD (in my case I removed it and put an SSD HD) is defective and now this fan is not working and this worries me.

Fredy Schw -

I installed the "Macs Fan Control" App. And 15 minutes ago, it showed the temperature in the "Optical Drive" of 70º C, as well as in the "Platform Controller Hub Die", everything working in "Auto" mode. I changed it to "Full Blast" and it dropped to 45º C, but this way the fans work desperately and make a lot of noise, however it doesn't heat up the iMac very much. I switched to 3000 RPM (a little less noisy) and the temp stayed at 55 RPM. As the ODD fan is defective, it marks 0 RPM.
Fredy Schw -