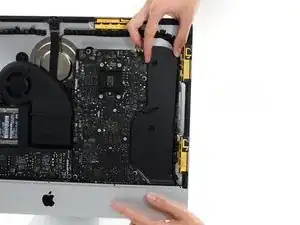
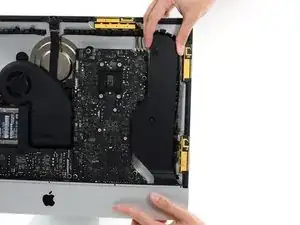
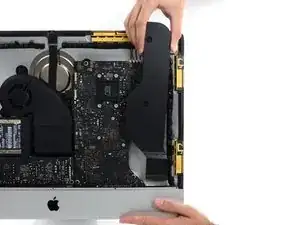
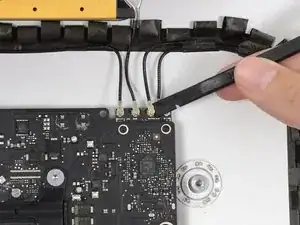
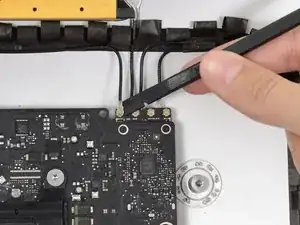
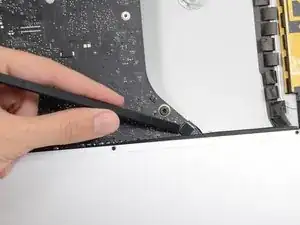
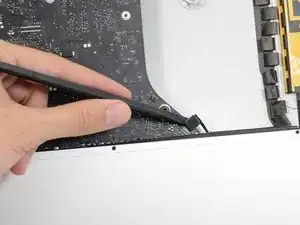
Einleitung

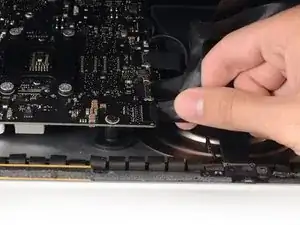
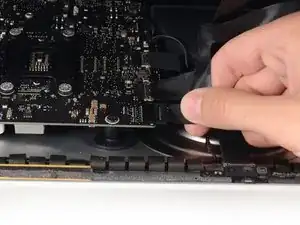
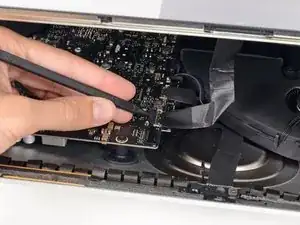
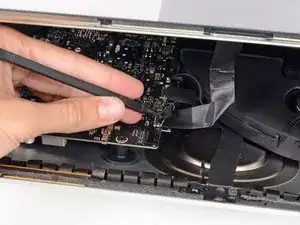
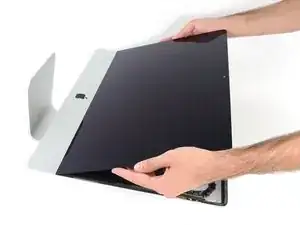
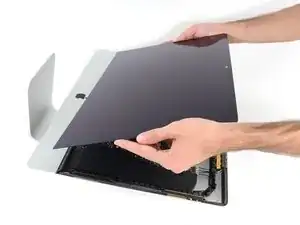
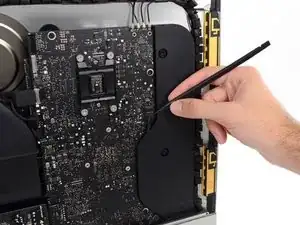
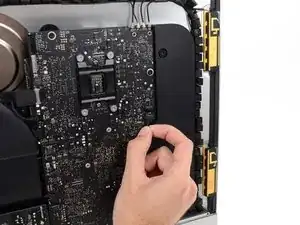
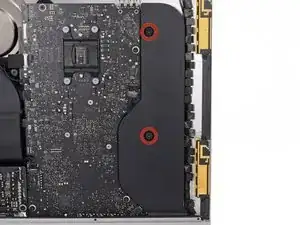
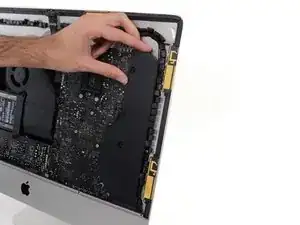
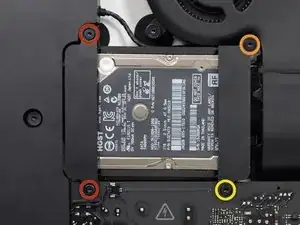
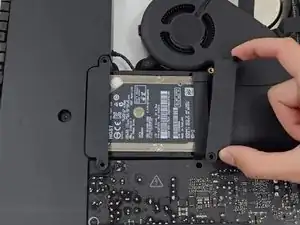
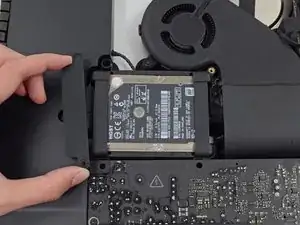
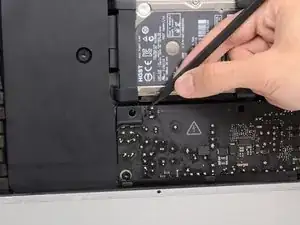
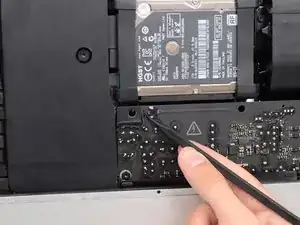
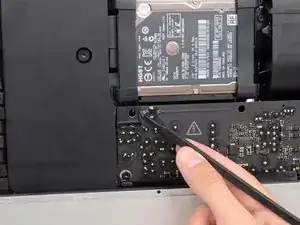
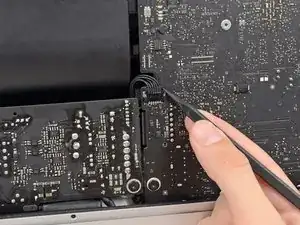
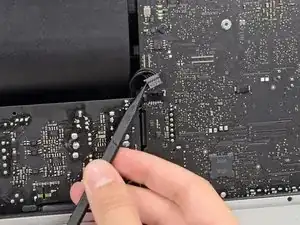
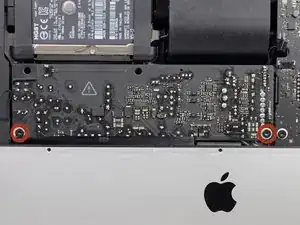
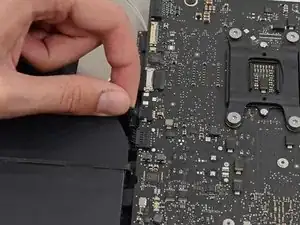
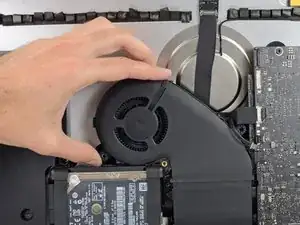
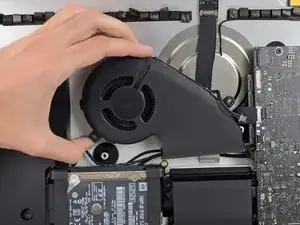
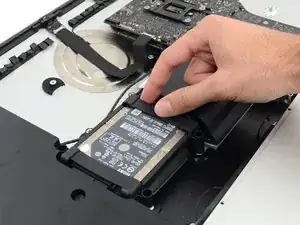
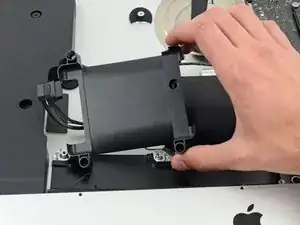
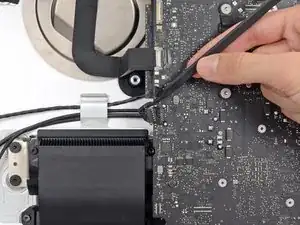
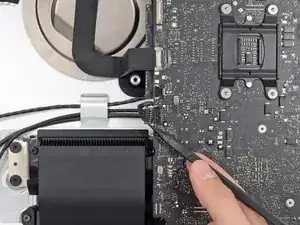
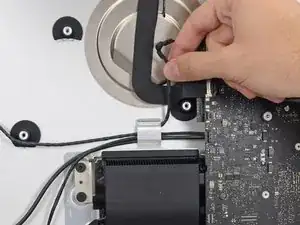
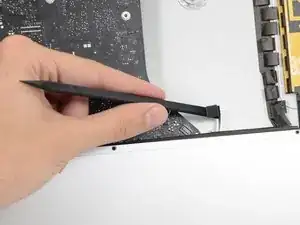
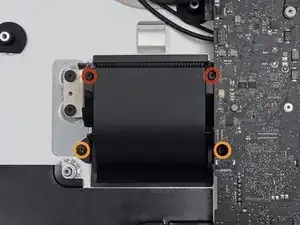
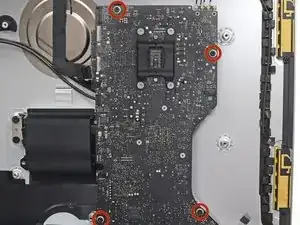
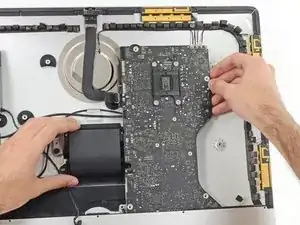
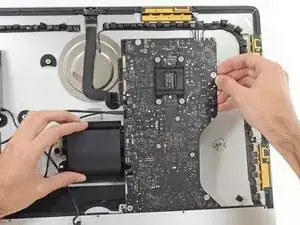
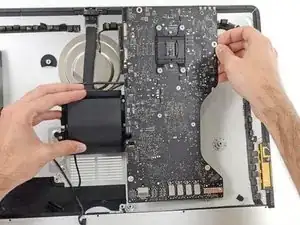
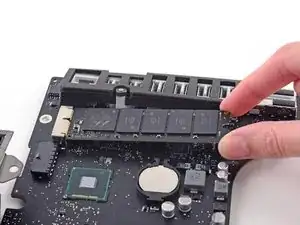
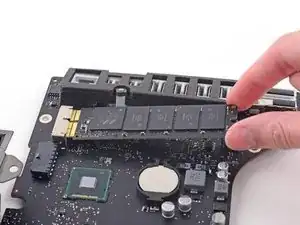
Benutze diese Anleitung, um die Apple eigene Blade SSD (NVMe/PCIe x4) auszutauschen.

Die Anleitung gilt für iMac Intel 21,5" EMC 2545 Modelle mit SSD (Fusion Drive oder Blade SSD Konfigurationen).

Wenn bei deinem System noch keine SSD eingebaut ist, dann kannst du das nicht später einfach nachholen. Der Anschluss und weitere unterstützende Bauteile sind auf dem Logic Board nicht vorhanden.

  1. bKJMGPZdOUDLNefO
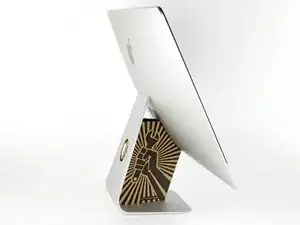
    • Wenn sich beim Reparieren das Gelenk des Fußes frei bewegen kann, ist es schwierig am iMac zu arbeiten. Mit Hilfe unserer iMac Reparaturhilfe geht es leichter und schneller.

    • Wenn du die Reparaturhilfe aus Karton von iFixit hast, dann baue sie erst mit Hilfe dieser Anleitung zusammen.

    • Bevor du anfängst am iMac zu reparieren: Ziehe den Netzstecker. Drücke den Einschaltknopf und halte ihn 10 Sekunden lang gedrückt. Du entlädtst dadurch die Kondensatoren im Netzteil.

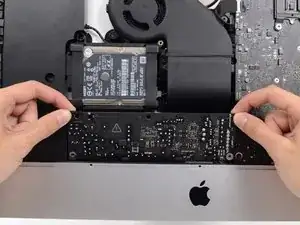
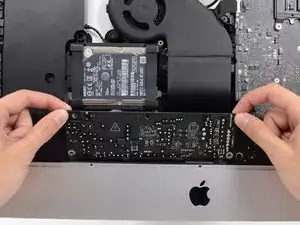
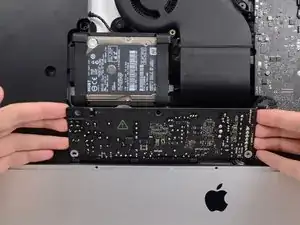
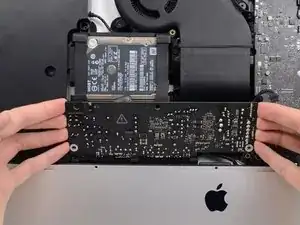
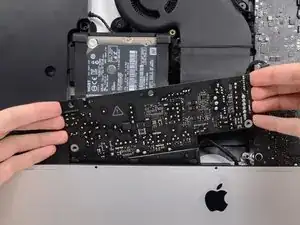
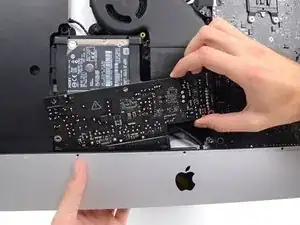
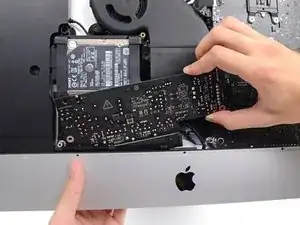
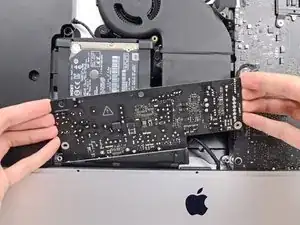
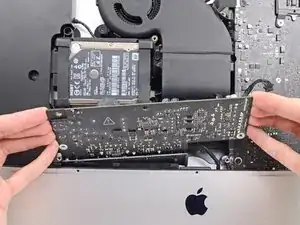
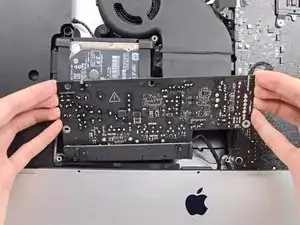
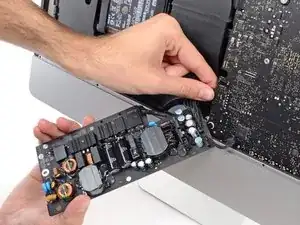
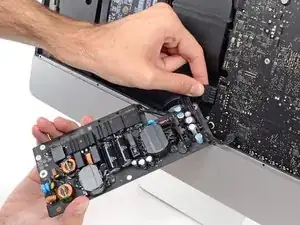
    • Sei sehr vorsichtig und greife keine Leitungen oder Lötstellen auf der Rückseite der Netzteilplatine an. Fasse die Platine nur an den Kanten an.

    I have (21.5 inch, mid 2017, 2.3 ghz) base model same as this but not 4k. How much max ram can I install in my iMac??

    Narendra Verma -

    This guide contains many extra steps for what should be a straight forward, simple parts replacement without disturbing more than the display, left hand speaker and removal of 4 logic board screws for play. Nothing else except for the left hand speaker wire & iSight cable from logic board, the lower support bracket and loosening the speaker so as to move it around a bit.

    For the ram, I bent a pair of cheap tweezers long ago supplied with these replacement kits to the perfect angle for holding, locating and inserting the ram into the slots under the logic bd after moving each retainer w/spudger and popping out the old. Pay attention to the orientation of the ram when removing/inserting the ram! An automotive mirror is handy along with a small flashlight for closeups. Once the ram is aligned properly substitute your fingers for the tweezers, ease it into the slot, push up & engage! Reinstall screws and all else. I have done this job successfully this way countless times. For a tweezers pic contact me!

    Ross Elkins -

    Additionally, if a blade is present, I install the OSx system on the blade and everything else, apps and home folders on the new SSD. You get the very fast boot off of the blade and the full ssd for all else!

    Ross Elkins -

  2. lLXyIR2flmAoZYtJ
    lLXyIR2flmAoZYtJ
    1VjZxwDRxkZGHBei
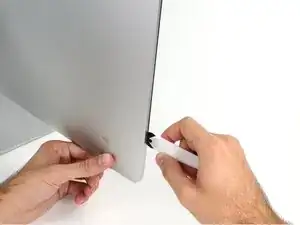
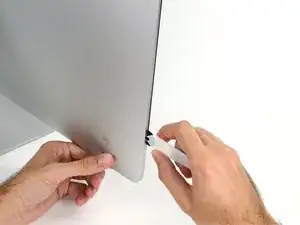
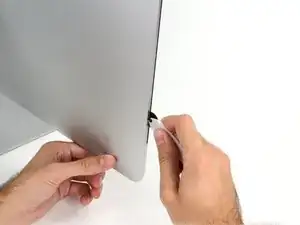
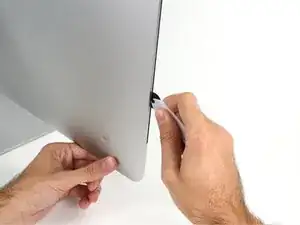
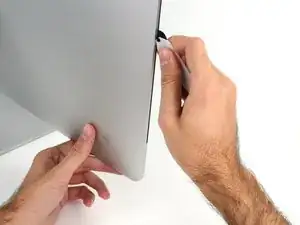
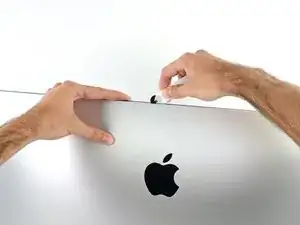
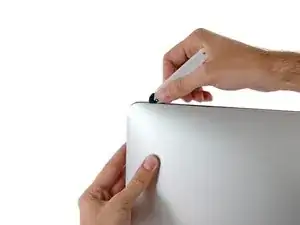
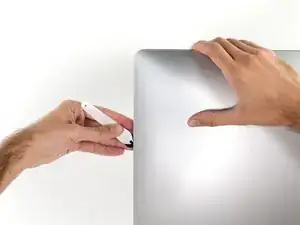
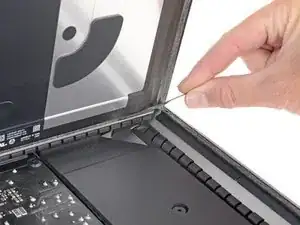
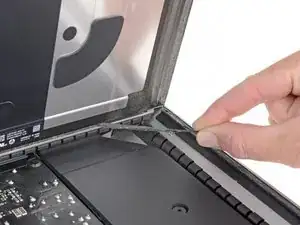
    • Beginne an der linken Seite des Displays, auf der Seite der Ein-/Aus-Taste, und schiebe das iMac Opening Tool zwischen Das Glaspanel und das Rückgehäuse.

    • Das iMac Opening Tool verhindert, dass es zu tief in das Gerät gesteckt wird. Solltest du jedoch ein anderes Werkzeug benutzen, stelle sicher, dass du es nicht weiter als 0,95cm in den iMac steckst. Es besteht sonst die Gefahr, Antennenkabel zu durchtrennen und großen Schaden anzurichten.

    • Arbeite vorsichtig! Das Glas bricht leicht, wenn es zu stark belastet wird. Erwärme die Kanten mit einem Haartrockner und löse das Klebeband ab, wenn die Raumtemperaturen niedrig sind.

    Always use a hairdryer!! I cracked my glass

    8bit !!! -

  3. q3DRspiqEjuFxgCN
    q3DRspiqEjuFxgCN
    iCIN52QoBl3OSb6Z
    XxXjXdcFgFKcwebo
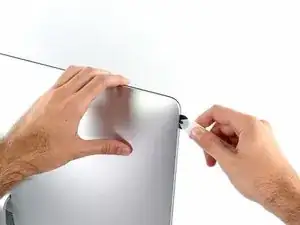
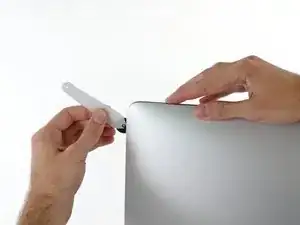
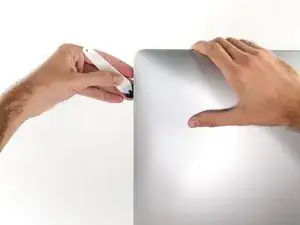
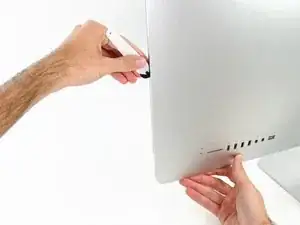
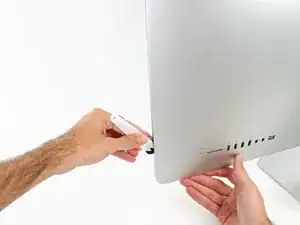
    • Benutze das Werkzeug wie einen Pizzaschneider - rolle es entlang des Schlitzes und es wird den Schaumkleber in der Mitte durchschneiden.

    • Stelle sicher, dass du den Griff immer hinter dem Rad hinterher schiebst. Ansonsten könnte das Rad aus dem Griff herausrutschen.

    • Fahre mit dem Werkzeug entlang der linken Displayseite.

  4. vxDgcmqUtQlSsP2J
    vxDgcmqUtQlSsP2J
    DclVW5XnhQLHXKLH
    yEeTWsNVKZWwY4wC
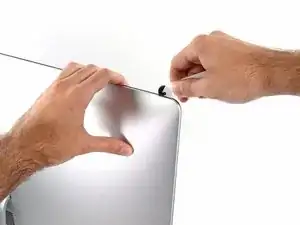
    • Fahre mit dem Werkzeug um die obere linke Ecke.

  5. IGjiVeV2qMlPFjxo
    IGjiVeV2qMlPFjxo
    q2QGyKWGiqL4KJI1
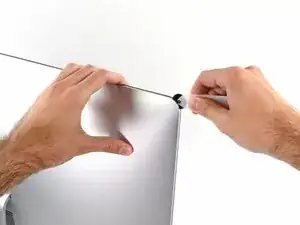
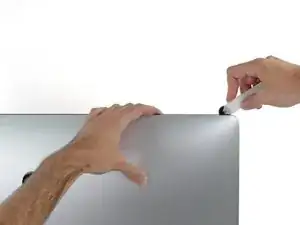
    • Schneide den Kleber entlang der oberen linken Displayseite durch.

  6. XADEwykRUWgZNaKi
    XADEwykRUWgZNaKi
    Gy2L2NEQNABHTJKk
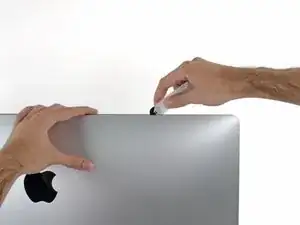
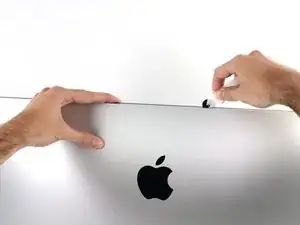
    • Schneide den Kleber entlang der oberen Displayseite durch.

    • Du solltest mit dem Gerät immer etwas durch den Teil vor- und zurückrollen, den du bereits durchgeschnitten hast, um so viel wie möglich von dem Kleber zu lösen.

  7. VIOSQOTIDCMkBXCd
    VIOSQOTIDCMkBXCd
    G6WL6LwKnmU4iroY
    QYGjK5rCFLbXb3Qg
    • Fahre nun mit dem Werkzeug um die obere rechte Ecke des Displays.

  8. sbN34h2LCe1hAMgV
    sbN34h2LCe1hAMgV
    4jyREp3qpSKjKIIg
    • Fahre mit dem Werkzeug entlang der rechten Displayseite abwärts.

  9. sTI1wGwtH1grQmgO
    sTI1wGwtH1grQmgO
    HS5XEQmVYcECrOaG
    • Schneide den Rest des Klebers an der rechten Seite des Gehäuses bis ganz nach unten durch.

    • Jetzt solltest du das Werkzeug noch einmal zurück um das Gerät schieben, um so viel wie möglich von dem Kleber zu lösen.

  10. RTJ4GtGmMD5uIEJh
    RTJ4GtGmMD5uIEJh
    kt1O3uj3QfiSMPoV
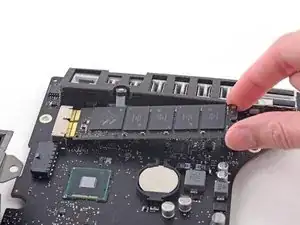
    3LsFsjkUGlXdNkXp
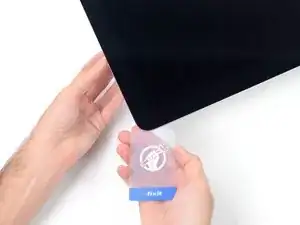
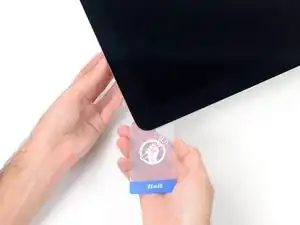
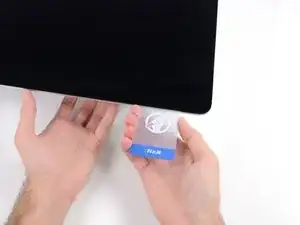
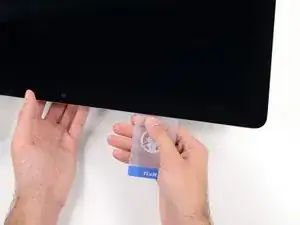
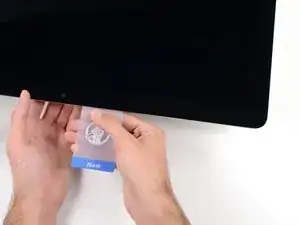
    • Das Opening Tool hat schon den größten Teil der Arbeit erledigt, jedoch klebt das Display immer noch etwas am Rahmen. Eine Plastikkarte ist nötig, um noch den letzten Rest an Kleber zu lösen.

    • Lege den iMac mit dem Display nach oben auf einen Tisch.

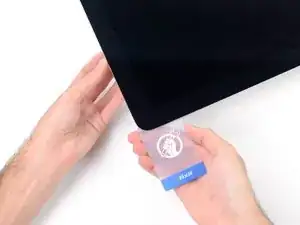
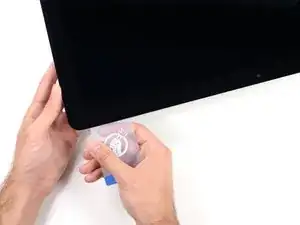
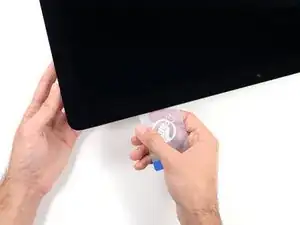
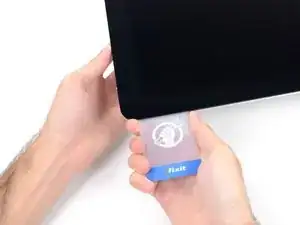
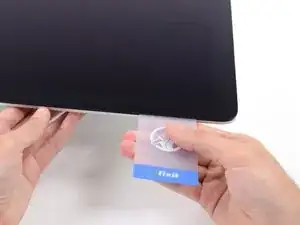
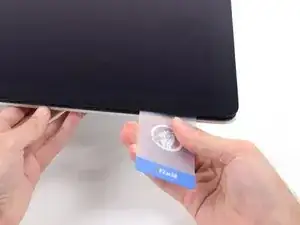
    • Beginne an der oberen rechten Ecke des iMacs und schiebe eine Plastikkarte zwischen Display und Rahmen.

    • Achte darauf, dass du die Karten nicht weiter als 0,95cm in den iMac steckst. Es besteht sonst die Gefahr, dass Komponenten im Inneren beschädigt werden.

    Don't forget to place the mac face up on the table. Unlike older models, there is no more flap at the bottom holding the display in place. If you do these steps with the Mac upright, the screen will pop out, hit your table, and shatter :( Don't ask me how I know.

    John M -

    So sorry. Thanks for that caution.

    Ted Horodynsky -

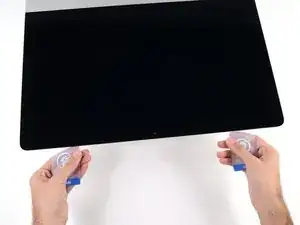
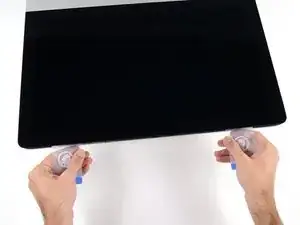
    Using suction cups (the ones that were made for removing the magnetic front glass on the 2011 and earlier iMacs) work well too. Place one in each top corner, while the Mac is lying face up on a table, and gently pull and it will separate the display from the main body. You might need to do a little more slicing around the edges if you did not get all the way through the first time with the roller. Then you can lift the display up at an angle to disconnect the cables.

    Peter Hillman -

    This was a great idea, worked well for me. Thanks!

    Florin -

  11. CAOhMNI4p5JGUSxH
    CAOhMNI4p5JGUSxH
    DcZsndbhPJvQEXcN
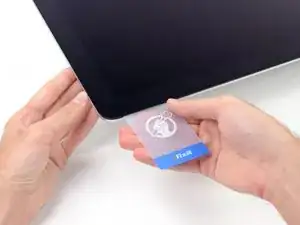
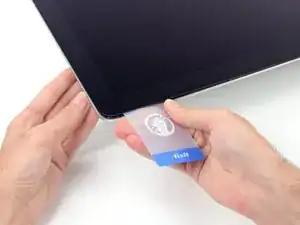
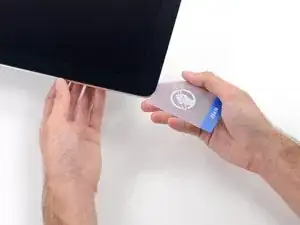
    • Drehe die Plastikkarte leicht, um den Abstand zwischen Display und Rahmen zu vergrößern.

    • Bewege die Karte vorsichtig und langsam, und beanspruche das DIsplayglas nicht übermäßig. Eine Lücke von einem halben Zentimeter ist ausreichend.

  12. 2i6VCJEZEQJjRAe4
    2i6VCJEZEQJjRAe4
    EKq3qJ4K11BdEByb
    T3tacDNMqHrTGNWg
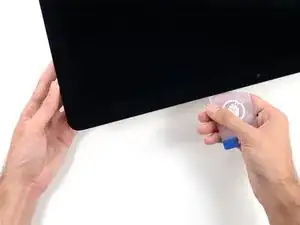
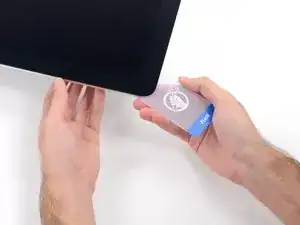
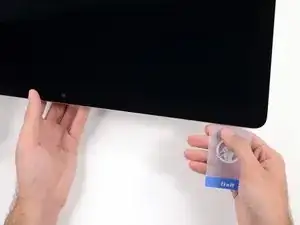
    • Schiebe die Karte in Richtung der Mitte des Displays, um den Rest des Klebers an der oberen rechten Ecke durchzutrennen.

    • Höre vor der iSight Kamera auf, den Kleber durchzutrennen. Ansonsten besteht die Gefahr, sie zu beschädigen.

  13. wQERHWdpfWs1XOgE
    wQERHWdpfWs1XOgE
    5UWkeELY6pQH3NFW
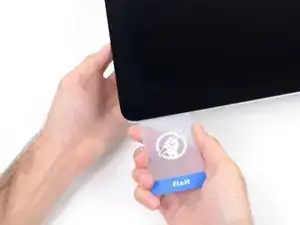
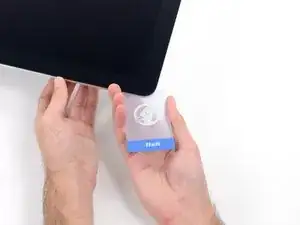
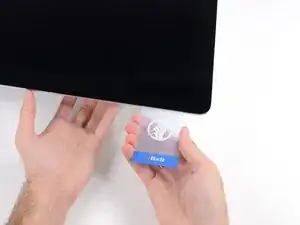
    • Schiebe die Karte wieder in die obere rechte Ecke und lasse sie dort stecken, um zu verhindern, dass der Kleber das Display wieder festklebt.

  14. EZXvkfwJOBpSYIGk
    EZXvkfwJOBpSYIGk
    GSZKR1lbwrWhLwOU
    dOKjiA5VvyekxdI2
    • Schiebe eine zweite Karte in den Spalt zwischen Display und Rahmen an der oberen linken Ecke des iMacs.

  15. qX1qFvFNr6TFKwG4
    qX1qFvFNr6TFKwG4
    FXVtoJOGxtCAlVoQ
    • Drehe die Karte vorsichtig nach oben, um den Abstand zwischen Display und Rahmen leicht zu vergrößern.

    • Genau wie an der anderen Seite, bewege die Karte nur langsam, damit der Kleber genügend Zeit hat, um sich zu lösen, und das Displayglas nicht überbeansprucht wird.

  16. c6X1bJH5UoyVj3JX
    c6X1bJH5UoyVj3JX
    LoDCrDsP2qvnxNSA
    iI6qGV3hZ5mfJmfY
    • Schiebe die Plastikkarte in Richtung Mitte und höre wieder vor der iSight Kamera auf.

  17. NtIc2CuYM4tYdfVl
    NtIc2CuYM4tYdfVl
    DYKiZ46YtHUNBJpB
    • Schiebe die Karte wieder an die obere, linke Ecke.

  18. mabnnjap5BGBwNCw
    mabnnjap5BGBwNCw
    2iYBEleZtKBCSqD4
    I2ivlTNZbwtjcNNT
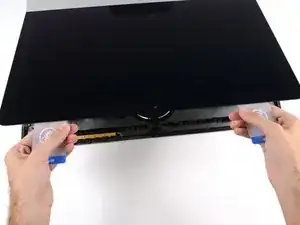
    • Schiebe beide Plastikkarten zwischen Display und Gehäuse und fange an, sie leicht zu drehen, um den Abstand zwischen Gehäuse und Display zu vergrößern.

    • Wenn Teile des Displays sich nicht zu lösen scheinen, höre auf zu drehen und nimm eine der Karten, um in diesen Bereichen den Kleber ein weiteres Mal durchzutrennen.

    • Beginne, die obere Seite des Displays vom Rahmen hochzuheben.

    • Hebe das Display nur einige Zentimeter an. Es ist immer noch durch das Display-Datenkabel und das Stromversorgungskabel mit dem Logic Board des iMacs verbunden.

    Ne forcez surtout pas et soulevez l’écran par les deux extrémités ! Il faut que tous les adhésifs soient bien découpés pour que l’écran se dégage du boitier sans effort. Toute torsion de l’écran peut entraîner une superbe fissure sur le verre :-/

    mf -

  19. Lq3NWNyJjC6ivpoe
    Lq3NWNyJjC6ivpoe
    YW6sgdgvnCF2BTt6
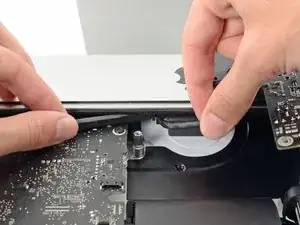
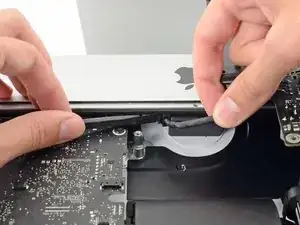
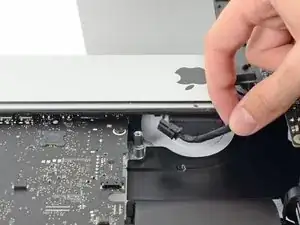
    • Während du das Display mit einer Hand nach oben hältst, trenne mit der anderen Hand das Stromkabel des Displays. Achte darauf, dass du das Kabel nur an der Plastiklasche herausziehst, und nicht an den farbigen Drähten.

    • Hebe den Display nur so weit an, dass du genug Platz hast, um an den Anschluss zu kommen, jedoch nicht so weit, dass du das Kabel dehnst und den Anschluss beanspruchst (~20cm).

    As seen in photo:

    bottom cable pulls up

    top cable cable pulls right, after safety clip opened

    airshack -

  20. PDABAgqTKP5Sfm6D
    PDABAgqTKP5Sfm6D
    R6ouHGmTXkOGDImj
    LntmZHgb1OOmYq3s
    • Klappe die Metalllasche am Anschluss des Display-Datenkabels mit einem Spudger hoch.

    • Ziehe das Display-Datenkabel vorsichtig aus seinem Sockel auf dem Logic Board.

    • Achte darauf, dass du das Display-Datenkabel gerade aus dem Sockel herausziehst.

  21. 22yPwf2Vt6ac6vgN
    22yPwf2Vt6ac6vgN
    hiCUZB1J4KJDVbed
    • Hebe den Bildschirm an, bis er fast senkrecht ist.

    • Es gibt immer noch einen Klebestreifen an der unteren Kante des Bildschirms, der den Bildschirm wie eine Art Scharnier mit dem Gehäuse verbindet. Klappe den Bildschirm einige Male auf und zu, um den Kleber zu lösen.

    There are pull tabs at each side off the bottom edge to allow easy release of the tape

    DarrenG -

    DarrenG’s observation about the pull tabs saved me a ton of time trying to pry the display as per the original instructions. Thanks!

    lesfam5 -

  22. 6A4EHvapeoMdolHS
    6A4EHvapeoMdolHS
    U2m5h1GFWVElYlqZ
    MbYvBcby3LvdmdUa
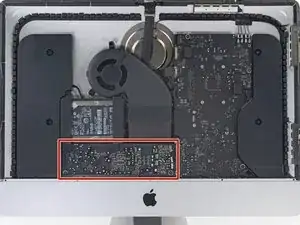
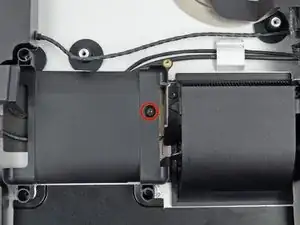
    • Berühre keinesfalls die Leitungen oder Lötstellen der Kondensatoren auf der Rückseite des Netzteils. (rot markiert)

    • Fasse die kleine Lasche am Ende einer der Klebestreifen an der Unterkante des Displays, ziehe sie zur Oberkante des iMacs hin und entferne sie.

    • Wiederhole das Ganze für den anderen Klebestreifen.

    • Wenn einer der beiden Klebestreifen abreißt, bevor er ganz entfernt werden kann, dann trenne den restlichen Kleber mit einer Plastikkarte auf

    The roller tool for slicing open the display works great for this step. Get in there like using the card and roll across the bottom to slice through the remaining adhesive.

    Peter Hillman -

  23. NZoUcXcRjHHrjqib
    NZoUcXcRjHHrjqib
    GyD3PrjUqBoNiCEp
    lU5PpvNXQBkB1Oyk
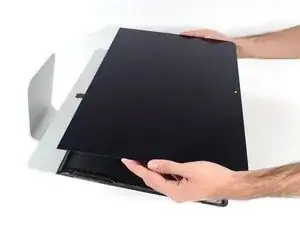
    • Hebe den Bildschirm nach oben aus dem Rahmen heraus und entferne ihn aus dem iMac .

    • Möglicherweise musst du an einer Seite den Bildschirm anheben, damit sich der Rest des Klebebandes ablösen lässt.

    • Sei vorsichtig bei der Handhabung des Bildschirms. Er ist groß, schwer und aus Glas.

    • Klebe beim Zusammenbau das Display mit Hilfe unserer Display-Klebeanleitung wieder fest.

    After removing the display, I also removed the 3 screws for the processor fan, disconnected the power connector for it and set the fan shroud aside. Disconnecting the remaining cable (similar style to 1 of the cables for the display) that is in the way of the RAM chips is all that's left to do. I was then able to access and quickly remove the two Apple-provided RAM chips, and replace them with 3rd party RAM. Turning the iMac on its side, so that it's in a position where you're physically putting the RAM chips DOWNWARD into their respective slots is the best way to go about uninstalling and reinstalling the chips. Using a narrow but long'ish plastic spudger tool is the best way to defeat the spring-tabs which hold the RAM chips in place. After removing the LCD display, changing the RAM is about a 10 minute process!! And I'd SURE prefer not to remove all the parts and risk damage to the iMac via the standard procedure listed. As per usual, take your time and work gently :-)

    Mitch K -

    Teardown the whole machine just to change RAM? While preparing to comment on this procedure I just noticed the comment made by Mitch K above. I ran pretty much the same procedure that he describes this afternoon (steps 1-23, 43-45, and step 55). Then I swapped out the original 2x4GB RAM chips for 2x8GB chips by reaching behind the logic board, releasing the spring retaining clips one chip at a time (starting with the chip further away from the logic board), pivoting the RAM towards the back of the machine, and then carefully sliding it out of the slot. I easily slid in the new chips and then pivoted them to lock them down. No hassle, no time lost. As Mitch K states above, not only is this “shortcut” method much quicker and easier, but it provides less risk of damaging cables, sockets and other delicate components during a total teardown. Why mess with the power supply board just to change RAM? I do not advise to follow the current iFixit.com procedure written by Sam Lionheart, regardless of user skill-level.

    nycsandor -

    THAT sounds one !&&* of a lot easier than the full tear down. I wonder if there’s a video of the process described by Mitch K? Adding that to these verbal instructions would really help relieve the apprehension and anxiety around the process! I do sometimes find the additional warnings, though appreciated from a “safety first” perspective, are somewhat overstated. It’s been a very long time since I shorted out RAM, or fried a PCB, or broke a connector, regardless of how finicky, fragile or awkwardly designed and positioned. I may have WANTED to break something, and the air might be blue for a few seconds, but inevitably, things go back together, the start button gets pressed, the startup chime sounds, and we’re in business. Practice DOES make as close to perfect we are likely to get.

    bruce -

    Mitch has the exact method that works a treat. You don’t need to follow steps 24-37 and also 40-63. Step 51 is the step to remove the camera cable and is needed. Steps 38 and 39 are for the Fan. That is all that is needed. Done quite a few like this.

    Be careful not to drop the RAM down the back of the logic board!

    By NOT removing all the other stuff you can avoid either damaging it or forgetting to plug in a cable.

    Charlie Nancarrow -

    I just trued this shortcut and it was not successful. I was not able to seat both RAM chips with this shortcut, and managed to slightly damage one of the retainer clips. I simply could not manipulate the chips into and out of the slots effectively without taking everything apart as described in the full set of steps.. I ended up retracing my steps and following the entire procedure, carefully, and that worked without incident. So, bottomline, it is definitely more work to follow all the steps but from my experience, it is decidedly safer. Your mileage may, of course, vary. It was successful in the end, and I swapped out the hard drive with an ssd during the same procedure and my machine is very, very much faster.

    jan -

    I have completed by following the Mitch K post and it is much easier than stripping down the whole thing, just be aware that to remove and replace the ram chips means working in a tight space, you need slim fingers and don’t be tempted to use force, take your time.

    Barrie Price -

    Well, I have slim fingers, but they are 60 years old, and they don’t work like they used to! LOL.

    Jan Hogle -

    Agree with Mitch K’s procedure. The only added tip I would throw in is to use two 45 degree tweezers with their plastic covers still installed to easily pop loose the RAM. I couldn’t get the plastic spudger tool to work myself, but the tweezers easily reach the RAM clips. Just make sure the plastic covers are installed and you won’t be in danger of scratching or shorting anything out.

    charlesnick -

    So thankful I discovered these comments. Saved me a TON of time! Thank you!!

    Adam Roberts -

  24. QMqfyRTWUxyD6PaN
    QMqfyRTWUxyD6PaN
    mphdji2lKIR3CwWS
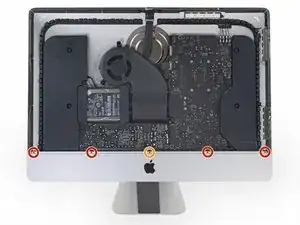
    • Entferne folgende fünf Kreuzschlitzschrauben, welche die untere Displayhalterung befestigen:

    • Vier 3,2 mm Schrauben

    • Eine 1,7 mm Schraube

    • Es gibt aber auch EMC2544-Geräte, bei denen alle fünf Schrauben gleich sind.

    • Du musst eventuell die Verklebung am unteren Rand der Gehäuseöffnung ablösen, um an alle Schrauben zu gelangen.

    I used the CR-V 4.0 standard screwdriver head to help peel away the adhesive lining. My fingers were too big to grab it, and my fingernails too short to get the removal started. This 4 screw head worked perfectly.

    airshack -

  25. NUQ4YmOm2RlEEAAO
    • Entferne die untere Displayhalterung von der Gehäuseöffnung.

    Of all the parts of this entire procedure, replacing this one piece is the hardest part! The screws are tiny and they just don’t seem to want to grab the support piece. Also it seems to perform no function which is also annoying.

    John M -

    I left mine out. LOL

    jerrid_foiles -

    Line up the screw holes and press on the bracket from the back to help the screws grab. If your fingers are too big, press with the flat side of your spudger. As long as there’s no gap between the bracket and the iMac’s frame, the screws should grab easily.

    Jeff Suovanen -

    I put it in at a slight angle lining up the right hand side holes, screwed in the two screws and gently pressed my finger behind it on the rest

    jmorphett5 -

    If you only want to replace the HD and RAM, take a big shortcut and leave the logic board in, as well as all the parts needed to remove it (speaker, power supply etc). Once the display is removed, just take out the fan and the top two logic board screw. There is than sufficient space to gently remove and insert the two ram modules. HD can easily be replaced with an SSD by just removing the HD mounting brackets...

    diddl14 -

  26. bpB3vigPkDEJaODx
    bpB3vigPkDEJaODx
    UHTtExuT2rlyLtDU
    • Löse den Stecker am Kabel des rechten Lautsprechers von seinem Sockel auf dem Logic Board.

    • Es geht leichter, wenn du auf beiden kurzen Seiten des Steckers nach unten drückst, um ihn so aus seinem Sockel "herauswandern" zu lassen. Sei vorsichtig mit den Ecken des Steckers, sie brechen leicht ab.

    • Ziehe den Stecker nach unten, um ihn aus dem Sockel zu lösen.

    I highly recommend doing steps 27 and 28 first and then pull out the cable. It will give you more room on the right side of the cable to work with making this step that much easier.

    Eddie de la Rosa -

    The two corners of the connector are latches that need to be pushed toward the center of the connector to release. This is easily done with the pointed end of the spudger. Once the two corner latches are released, the connector comes apart easily.

    Fred Heineman -

  27. eCECFTFAxFIpXI2B
    • Entferne die beiden 10,0 mm T10 Torx Schrauben, welche den rechten Lautsprecher am Rückgehäuse befestigen.

  28. ZZqU2JxJYESWeUCM
    ZZqU2JxJYESWeUCM
    VVVam54h3KT1T4jP
    • Ziehe den rechten Lautsprecher oben etwas mehr als einen Zentimeter weg vom Rückgehäuse. Dadurch wird das Antennenkabel an seiner rechten Seite sichtbar.

  29. 6QcZ5VEKCJgmeRCT
    6QcZ5VEKCJgmeRCT
    ZaV2LVgFyHTlDiiE
    5EQPXsfOcYVgq1pW
    • Setze eine Spudgerspitze zwischen den rechten Lautsprecher und das Antennenkabel, welches entlang der rechten Seite des Lautsprechers verläuft.

    • Lasse den Spudger entlang der rechten Seite des Lautsprechers nach unten laufen, um das Antennenkabel so aus seinem Kanal herauszuholen.

  30. SUeeAI2YcIEFbu5C
    SUeeAI2YcIEFbu5C
    EIiSYybDS5fUSvRq
    VTDXemYXPxyIVaBw
    • Ziehe den rechten Lautsprecher etwa 2,5 cm zur Oberkante des iMac.

    • Hebe den rechten Lautsprecher gerade nach oben und entferne ihn vom iMac. Das braucht wahrscheinlich etwas Kraft und beide Hände. Ruckle dabei den Lautsprecher nach links und rechts.

    Th HP is VERY HARD to take off in this thin place

    bruno -

  31. eJkD4BRQM4pFSEkg
    • Entferne folgende Torx T10 Schrauben, welche die Festplattenhalterung am Rückgehäuse befestigen:

    • Zwei 21 mm Schrauben an der linksseitigen Festplattenhalterung

    • Eine 9 mm Schraube

    • Eine 27 mm Schraube

    Pay attention to this photo and where the fan is. It is 180° from where the previous step shows it is oriented to you.

    Max Romano -

  32. jjmgaJBQQ3GCBXAJ
    jjmgaJBQQ3GCBXAJ
    OYaQKvCeXcNJ5pXZ
    • Entferne die links- und rechtsseitige Festplattenhalterung vom iMac.

  33. ZUXdAYsboViNN3LP
    ZUXdAYsboViNN3LP
    2B4ULK3qyBRHyCjA
    rjaYEgxfA6XedhVp
    • Die nächsten Schritte bringen deine Hände in die Nähe der offenen Oberfläche der Netzteilplatine. Fasse diese nicht an , um einen Stromschlag von den vielen großen Kondensatoren auf der Platine zu vermeiden.

    • Drücke mit der Spudgerspitze abwechselnd auf jeder Seite des Steckers am Kabel zum Netzschalter und lasse ihn vorsichtig aus dem Sockel "herauswandern".

    Accomplished with spudger on top and thumbnail on bottom. Otherwise couldn’t rock it loose.

    airshack -

  34. nDL1ZXuaLdV51GA5
    nDL1ZXuaLdV51GA5
    6hAjlFateirPRtNq
    • Drücke vorsichtig mit der Spudgerspitze abwechselnd an jeder Seite des Steckers der Netzteilsteuerung nach oben, um ihn aus seinem Sockel "herauswandern" zu lassen.

    Doing this with spudger on right and thumbnail on left seemed easier and safer.

    airshack -

  35. 6SRtDZMjfIshtcEC
    • Entferne die beiden 7,2 mm Torx T10 Schrauben, welche das Netzteil am Rückgehäuse befestigen.

    What if these are too tight to remove?

    Rafael Garcia -

    Hi Rafael,

    Be very careful not to strip these screws. Use a new, accurate T10 bit and a driver with good leverage to loosen these screws.

    Arthur Shi -

  36. DZGfKeTNNZRF5rIY
    DZGfKeTNNZRF5rIY
    XZToZZtKeCxR24Or
    • Wenn du am Netzteil arbeitest, musst du sehr vorsichtig sein: berühre keine Kondensatoranschlüsse oder auch Lötstellen auf der Rückseite. Fasse die Platine nur an den Kanten an.

    • Kippe das Netzteil nach vorne.

  37. PnVpN4P5Q41LIcjX
    PnVpN4P5Q41LIcjX
    KYXTDvFWXOOKGo4w
    KotmGxZn3Tbp5oDl
    • Ziehe das Netzteil leicht hoch und aus dem Rückgehäuse heraus.

    • Drehe das Netzteil gegen den Uhrzeigersinn, so dass die rechte Seite etwa 2,5 cm höher als die linke ist.

  38. dWkMC3KPAiJZ2BYA
    dWkMC3KPAiJZ2BYA
    VdKRfPUme1WjaaxJ
    • Schiebe das Netzteil nach rechts um es von den Schraubenpfosten am Rückgehäuse zu befreien.

  39. atXqqTlMIcRfaLqZ
    atXqqTlMIcRfaLqZ
    pCEqH332pgmfCpr1
    hgPesfBdCbjpNkCx
    • Rücke das Netzteil nach vorne und entferne es aus seinem Sitz im Rückgehäuse.

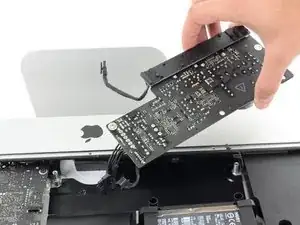
    • Versuche noch nicht, das Netzteil ganz vom iMac zu entfernen, es ist immer noch mit dem Logic Board verbunden.

  40. wNJxtUCC3jTRJDMO
    wNJxtUCC3jTRJDMO
    NQOgcUB1WXOVvdIi
    • Sei ganz vorsichtig und berühre keine Lötstellen oder Kondensatorkabel auf der Rückseite der Versorgungsplatine. Fasse nur die Kanten an.

    • Drehe das obere Teil des Netzteils zu dir, um an den Stecker der Gleichstromversorgung hinter dem Logic Board zu kommen.

    • Drücke die Lasche am Stecker der Gleichstromversorgung zusammen und ziehe ihn gerade aus seinem Sockel auf der Rückseite des Logic Boards.

    what happens if you damage the power socket on the logic board?

    Racheal Major -

    The tab is on the bottom of the connector. You can’t see it. Squeeze the bottom of the connector close to the cables to properly release tab. Pulling straight out is important.

    Eddie de la Rosa -

    This step might be easier if you do the next step first (step 41) and then come back to this step.

    Eddie de la Rosa -

    I loosened the logic board attached to the power supply board. I then could easily remove the 2 power cables.

    Gerard Stoffels -

    A photo of the disconnected power connector would be helpful in seeing how the tab release works here.

    airshack -

    In the photo above, the index finger is shown squeezing the connector locking tab. Do this while using the flat end of a spudger to release the latch. Once the connector is moved about an eigth of an inch the latch is released and the connector should come out freely.

    Fred Heineman -

    The photo you added is of the wrong side of the power cable connector? Please add a photo of the rear facing side so the clip mechanism so disconnection can be clearly understood.

    airshack -

    The key is to squeeze the tab in the part near the cables. You won’t feel like the tab is moving, but squeezing it there is necessary to get it out.

    Adrià -

  41. EyLJWWk2OFr5HCye
    EyLJWWk2OFr5HCye
    AlMArQO33R1TWQ6T
    DMjNbUXoMgsocggq
    • Es ist wahrscheinlich hilfreich, wenn du für die nächsten Schritte den den iMac mit der Rückseite auf den Tisch legst.

    • Drücke die Raste an der Seite des Steckers des Wechselstromkabels mit dem flachen Ende des Spudgers nach innen.

    • Halte die Raste mit dem Spudger gedrückt, fasse das Wechselstromkabel an und ziehe den Verbinder aus seinem Sockel.

  42. WBIpQxLH3fEByo23
    • Entferne das Netzteil vom iMac.

  43. KceINyPjQiQDjfoZ
    KceINyPjQiQDjfoZ
    ngKJySbkFQwLlq6w
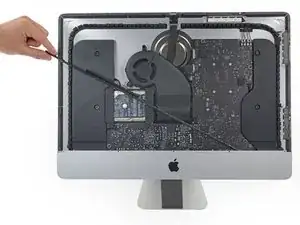
    • Ziehe vorsichtig den Stecker des Lüfterkabels gerade aus seinem Sockel auf dem Logic Board.

    I don’t like to pull on wires as shown in the photos above. I used my index fingernail on the top corner of the connector and the pointed end of a spudger on the bottom corner to pull the connector straight out of its socket.

    Fred Heineman -

  44. 1PLJEbleesQUVGR3
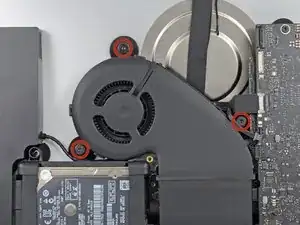
    • Entferne die drei 12,3 mm Torx T10 Schulterschrauben, mit denen der Lüfter am Rückgehäuse befestigt ist.

  45. 4tLv2VGQeJSNgTP1
    4tLv2VGQeJSNgTP1
    vNhgCQACpS5UShZl
    • Entferne den Lüfter vom iMac.

  46. 36DsTBiHTPsP5aVU
    36DsTBiHTPsP5aVU
    gTU24uLBYOIv4Mhy
    KNinFGbODGTjoQq1
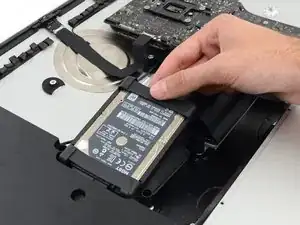
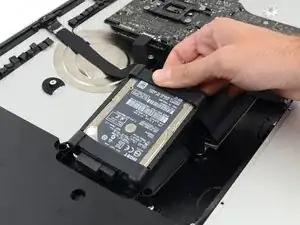
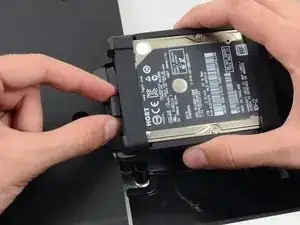
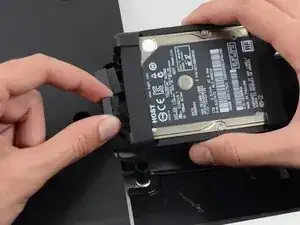
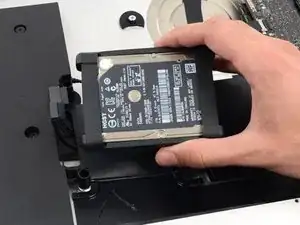
    • Hebe die Festplatte am Rand, der am nächsten vom Logic Board ist, hoch und ziehe sie leicht aus ihrem Sitz.

    • Die Festplatte ist noch mit zwei Kabeln angeschlossen, versuche nicht, sie ganz zu entfernen.

  47. ZxnqxTBEoc4w2LRN
    ZxnqxTBEoc4w2LRN
    ZlayYFLKmfxikbiA
    • Löse das SATA Stromversorgungskabel.

  48. W1BnV1ZiStMgG441
    W1BnV1ZiStMgG441
    QSE3SSpfyUcdRarK
    • Löse das SATA Datenkabel von der Festplatte.

  49. JCpSSKHxwDXCIdI2
    • Entferne die Festplatte vom iMac.

  50. KhMofSoJJlhXl1jA
    • Entferne die einzelne 7,2 mm Torx T10 Schraube, welche den Festplatteneinschub am Rückgehäuse befestigt.

  51. NwKSthHKJNo4gHC3
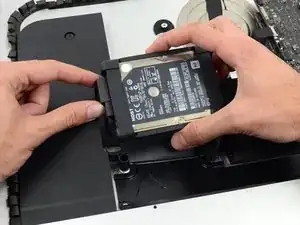
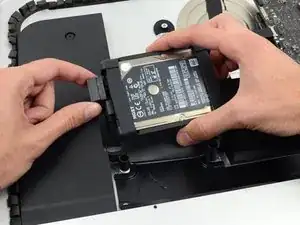
    • Entferne den Festplatteneinschub vom Rückgehäuse.

    Cables are routed through the backside of the tray. Take a picture for reassembly.

    Mitchell Scheffler -

  52. bpUJduIptxtCQTrJ
    bpUJduIptxtCQTrJ
    NY3U2MjTCPHSNjfv
    • Drücke abwechselnd mit der Spudgerspitze an jeder Seite des Steckers vom linken Lautsprecherkabel und lasse so den Stecker "herauswandern".

    As noted in the right speaker cable section, the two corners of the connector are latches that need to be pushed toward the center of the connector to release. This is easily done with the pointed end of the spudger. Once the two corner latches are released, the connector comes apart easily.

    Fred Heineman -

  53. nIBOyJbEX5Sl4Or2
    nIBOyJbEX5Sl4Or2
    pAPeO3l2vihSiYDM
    • Fädle das linke Lautsprecherkabel aus, indem du es direkt aus seiner Halteklammer hinten am Rückgehäuse herausziehst.

  54. aPduYkOrm1ijEuIm
    aPduYkOrm1ijEuIm
    J3l5W2gyvQbjlT4W
    nPMIkqvYZHIUCEXb
    • Löse in gleicher Weise wie im vorigen Schritt die SATA Datenkabel und Versorgungskabel aus der Halteklammer.

  55. Oi1uPFeAgU4d4B1V
    Oi1uPFeAgU4d4B1V
    UQYT31FILKH2XlFo
    deVi3sgpTG6ko3ev
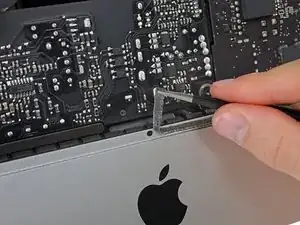
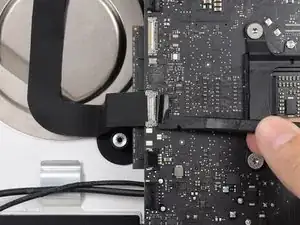
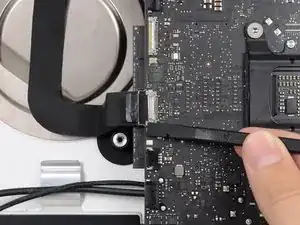
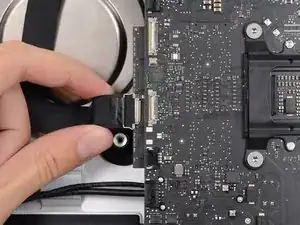
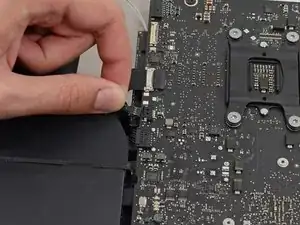
    • Klappe den metallenen Sicherungsbügel am Stecker des Kabels zur iSight Kamera mit dem flachen Ende des Spudgers hoch.

    • Ziehe das Kabel zur iSight Kamera gerade aus seinem Sockel auf dem Logic Board.

    • Das ist ein sehr empfindlicher Stecker, der leicht beschädigt werden kann.

    As seen in the photo this clip clearly has a pull tab. Forget the spudger and just open the clip with the pull tab.

    airshack -

  56. ChWlT2nybGpoDtrw
    ChWlT2nybGpoDtrw
    2LQdOvIdwuPacACY
    52lBdh3y1pIxgFri
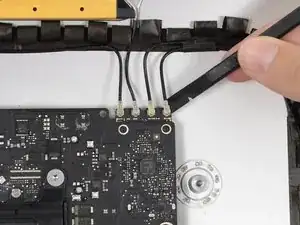
    • Löse die vier Antennenstecker mit der flachen Kante des Spudgers von der AirPort /Bluetooth Karte.

    • Merke dir die richtigen Position der einzelnen Stecker für den Zusammenbau.

    I broke off one of the antenna connectors when I took off the antenna wires, but the new 802.11ac card is working:) I seems the way to take off the wires is lifting it up from the wire side. In hindsight I just wasn´t careful enough.

    Runar Vaernes -

    how do I check a working logic board

    Navneet Garg -

    I labeled mine with label printer labels prior to disconnection.

    airshack -

    I labeled mine with label printer labels prior to disconnection. The label/tabs made reinstalling easier as I held onto the label/tabs while pressing down on the connectors. Much easier than holding onto the physical wires.

    airshack -

    If you have a pair of angled tweezers, they work well for grabbing under the connector so that you aren’t pulling on the wire. The head of the T10 screwdriver works well for pressing them back on.

    Mitchell Scheffler -

  57. PVF2eFHOcWUlH6ov
    PVF2eFHOcWUlH6ov
    qbxXCqIthxynZ525
    tjH4h6FyAyucQGqX
    • Hebele den Verbinder des Kabels zur Kopfhörerbuchse mit dem flachen Ende des Spudgers aus seinem Sockel auf dem Logic Board.

    • Schiebe das Kabel leicht nach rechts.

    Unlike the rest of the connectors on the logic board, this one lifts up away from the board rather than to the side. That “Push the cable slightly to the right.” notation is after the connector is free.

    Fred Heineman -

  58. QJIoRvsnlHELAikU
    • Entferne folgende Torx T8 Schrauben, welche den Lüfterkanal am Rückgehäuse befestigen:

    • Zwei 6,3 mm Schrauben

    • Zwei 4,7 mm Schrauben

    Weirdly, these screws didn’t work with my T8 driver. Not with T6 or T10.

    Every other screw (to this point) has been fine. Hmm.

    Jake Lodwick -

    ??? The T8 worked fine for me. Not sure what the difference would be.

    Fred Heineman -

    Fare molta attenzione alla vite in fondo a destra, è facile (soprattutto se la punta del proprio cacciavite non è magnetizzata) che la vite si perda sotto alla Logic board. Se la punta del cacciavite non è magnetizzata consiglio o di utilizzare un magnete esterno o di utilizzare delle pinze mentre si svita la vite in modo da non incorrere in questo problema.

    Carlo Molta -

  59. vTFjxoQJVL1LjsGU
    • Entferne die vier 7,2 mm Torx T10 Schrauben, welche das Logic Board am Rückgehäuse befestigen.

    When reinstalling the logic board, install four screws loose. Insert thumb drives into the back in all slots to ensure alignment. Once aligned, then tighten screws.

    Gary Kelch -

  60. CbhcbTbVVbCDOdVR
    CbhcbTbVVbCDOdVR
    3ZWTvdymBERwUaSS
    kWgY5CCYya3SJRcj
    • Kippe die Oberkante des Logic Boards weg vom Rückgehäuse.

    • Hebe das Logic Board gerade hoch und aus dem iMac heraus.

    • Achte darauf, dass sich das Logic Board nicht an einem der Schraubenpfosten verhakt.

    • Die I/O-Platinen unten am Logic Board sind dabei die größte Herausforderung. Sei sehr vorsichtig, um jegliche Schäden zu vermeiden.

    • Achte beim Wiedereinbau des Logic Boards auf die Position der Anschlüsse. Wenn das Board an seinem Platz ist, stecke ein USB- oder Thunderboltkabel in einen der Anschlüsse, um es perfekt auszurichten.

    When inserting the logic board back, pay attention of the position of the I/O connectors. When it is back in place, put a USB / Thunderbolt cable into the connectors to ensure the perfect alignment.

    Peter -

    This is fantastic advice. I used a combination of USB and display port plugs to ensure proper alignment and help keep the logic board steady while i screwed it back in. Thank you!!

    kazoodac -

    Great technique. I plugged a cable into every port before tightening logic board screws.

    airshack -

    ive gotten this far and i still have one question, i’m replacing my HDD With A SSD should i also remove the original Blade drive ? and run exclusively off the ssd, ? i wasn’t 100 on whether or not i was getting the fusion set up so i’m not in possession of a upgraded blade, so i though this was a good question id hadn’t seen asked.

    Eliasar -

  61. jvt5qFIeQtALTwRY
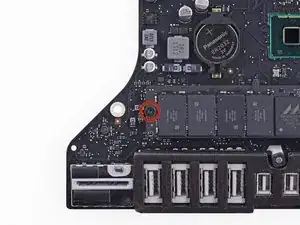
    • Entferne die einzelne Torx Schraube, welche die SSD am Logic Board befestigt.

    My wife’s iMac Late 2013 21.5” did not originally have a blade SSD installed, so there was no existing Torx T8 screw available to use on the Aura 6G I was installing. Had to use one of the 4 T8 screws from the Exhaust Duct to get the job done.

    Philip Meadows -

    Read somewhere that a certain type of adapter is needed to use a "Samsung 970 EVO Plus NVMe M.2" in either a 21.5" or 27" 2017 iMac. Does anyone (most likely @danj ) know if it will work?

    Long term goal...have both sizes of 2017 iMacs. Plan is to install a faster i7 cpu in 27" and migrate 3.4 GHz i5 to 21.5" to replace 3.0 GHz i5 in 21.5". While inside 27", will replace fusion drive with the EVO plus and perhaps had a larger 7200 rpm HD or perhaps a 2.5" SSD.

    While inside 21.5", i plan to upsize SSD from 500 Gb to 1 or 2 Tb. Not sure which ssd form factor is currently inside but i believe it is a 2.5". Does anyone know if there is a drive cavity in a 2017 21.5" iMac to fit a full size HD (to possibly use a stacked pair of notebook size SSDs?

    Thanks to all in advance!

    mbed -

    I really don’t recommend using M.2 SSDs in iMacs as they are a bear to open up to get to the SSD socket and many adapters/SSD sets are flaky!

    If this is a system which has important work I would stick with either an Apple or OWC bade SSD. Yes, I know! You want something with more performance. Sometimes it doesn’t pay 😖I had wished Apple would have gone with the standards based M.2 SSD’s their greed set the course! The rub is Apple has other lines in their SSD’s these adapters and M.2 SSD’s don’t offer which will bite you when your drive gets full as the wear-leveling and housekeep functions use these lines.

    As far as Samsung 970 EVO Plus drives you will need to update its firmware as they did have a few interoperability issues with macOS when used in MacBook Pro’s

    Dan -

    @danj I did get this blade SSD from OWC and it is working fine. My wife only uses this for non mission critical work now since she has a 16" MBP, but it sure beats the pants off of the old HD that shipped with the system. :-)

    Philip Meadows -

    Sorry I grabbed the wrong text to reply. Even still you wouldn’t want to loose your stuff 😢

    Dan -

  62. NZJAWxn1JCKpKDOd
    NZJAWxn1JCKpKDOd
    rXQYrqG3JSQCh6P5
    YquXbZ4t1M4vphMg
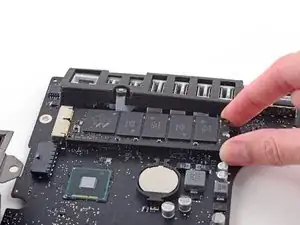
    • Hebe die SSD an der Kante ganz rechts etwas an und ziehe sie recht kräftig gerade aus ihrem Sockel auf dem Logic Board heraus.

Abschluss

Um dein Gerät wieder zusammenzusetzen, folge den Schritten in umgekehrter Reihenfolge.

Dan

Mitglied seit: 02/02/12

461476 Reputation

42 Kommentare

Many thanks for the tutorial? Very detailed and helpful. Now, my question is, can I replace the existing SSD PCIe blade by ANY PCIe blade?

I mean, the 2017 4K iMacs have a PCIe v3 with 4 channels. Will it admit an older PCIe version (such as v2)?

Aleix -

Apple uses a different interface than the M.2 blades as such you ned to use theirs or either of the two 3rd party drive makers OWC or Transcend

- BeetsTech - The Ultimate Guide to Apple’s Proprietary SSD’s (Apples SSD’s)

- OWC - Aura Pro SSD

- Transcend - JetDrive 820

Dan -

Hello Dan! Many thanks for your answer, but none of the webpages you mention has a blade PCIe SSD compatible with the iMac 4K 2017… :(

Aleix -

I’ve put in few of the BeetsTech blades in with no issues. Are you trying to install the SATA drive?

Dan -

Hi Dan! The initial intention was to replace the current 28GB blade PCIe SSD by a bigger one, 225 or 500GB, and keep the current sATA 1TB drive. This way, I could have a decent and fast FusionDrive, as the current configuration is pretty slow…

Finally, I’ve decided to replace the current 1TB sATA 5400rpm drive by a 1TB sATA SSD, as the total cost is arround the same as replacing the blade PCIe drive. In adittion, I am not 100% sure which blade PCIe drive will work on my iMac… the support guys from OWC say that they don’t have a compatible drive yet :(

Aleix -
Can I use that original SSD from my rMBP 2012 (256gb) to this iMac 4k? Thanks!

RD Rubio -
RD Rubio - Review the BeetsTech guide above (Blue URL Link) find your MacBook Pro and compare it to your iMac you have.
Dan -
Hi Dan, how can I be sure that my imac’s logic board has a socket for a blade ssd? As I’ve found on web some of 21.5 imacs doesn’t have it.

Gleb Aksenov -
Apple sold the 21’5 models in three configs HDD only (no SSD connecter), SSD only or a Fusion drive which has both HDD & SSD (has SSD connector).

Dan -

Hi Dan, are you positive the JetDrive 820 (https://us.transcend-info.com/Products/N...) will work with the 21.5 4K iMac that's the 3.4Ghz 1TB Fusion Drive model? What about the Aura Pro X2 (https://eshop.macsales.com/item/OWC/S3DA...)?

g.nobre -

The difference in price between these and the used original parts from beetstech is pretty beefy in my opinion.

g.nobre -

OWC & Transcend offer s few different drives for the different series Apple has produced. Here’s a good reference on the Apple custom SSD’s: The Ultimate Guide to Apple’s Proprietary SSDs. Cody has it updated it with the newest models but they are using the same drives as the last listed.

Dan -

hi if the logic board has the slot for ssd does that mean it's the 2017 model?

also great tutorial thank you

steve

steve daniels -

The SSD blade slot in the 21.5” 2017 model is not consistently present! Apple did not populate some of the logic boards when the system was only a SATA drive’d system. The Fusion Drive’d and blade SSD models both have the connector.

Best to look up your system here: EveryMac - Index of all iMac’s

Dan -

Please can you confirm where I can order a 2TB blade SSD compatible with 2017 4K iMac model identifier iMac18,2 ?

Please can you confirm the pin layout used on the SSD ?

Many thanks.

Darrell Haslam -

Your systems specs: 21.5” iMac 4K Retina (Mid-2017)

As noted: This model has a Serial ATA (6 Gb/s) connector for a 2.5" hard drive. If configured with a "Fusion" Drive or an SSD at the initial time of system purchase, it also has a PCIe connector, but this connector is not present if the system only is configured with a hard drive. >> Your system may not have the needed connector! <<

You need a custom Apple SSD or either an OWC or Transcend 3rd party SSD’s

Dan -

Does anyone know if anybody ever upgraded the “none-ssd-board” by soldering the connector to the board? Is there anything else missing than the connector? Is there a special efi-version on the “none-blade” board to prevent to do so? Would be an interesting project…..

7of99 -

There’s more to it than the connector, there is a bit of logic also needed.

Dan -

como saber si mi iMac tiene el puerto para ssd sin desarmarlo

wilder_tools -

Si tiene un modelo solo HDD, entonces no tiene el conector blade SSD y su lógica de soporte.

Una unidad Fusion o un sistema con un SSD instalado de fábrica lo tendrá

Dan -

if i have the standard hdd of my mac 21.5, 4k 2017. Can i add with an ssd name m2 of 500 gb ?.. it’s my doubt

Matteo Cozzolino -

Sorry It is not M.2, the custom Apple blade SSD connector is not present.

Dan -

Hi, if i clone my HDD, all my Files, pictures, documents will be copyed to the New ssd? What about Windows partition? It will be clone too? I have a Fusion drive in thia moment.Thanks

Florin Ferezan -

No you do’t want to use cloning software what was possible years ago it not possible with Apples new APFS file system. If you drive is not clean (unfragmented) or has any errors even Mac cloning won’t work reliably! Because of this I haven’t used it in over 15 years now I only use Apples Migration Assistant tool as well as TimeMachine.

When you have a Windows partition you need to use the proper backup and restore tools under it.

Dan -

Let me reformulate. I have an imac 21.5 inch (4k) 2017 with 1 TB fusiondrive and I want to upgrade to 32 gb ram and a new ssd (samsung Evo 860 Sata3 1 tb) and I don't know how to keep all my documents and pictures. I have read that i can make a copy (clone) with the TimeMachine. The problem is that I also have a windows partition that I would like to keep. The question was whether the windows partition should be reinstalled again after copying the old hdd or it will be done automatic with TimeMachine. Will the new ssd automatically be recognize as part of the fusiondrive or should something extra be done? Or what is your recommendation for this move? Thank you so much.

Florin Ferezan -

Very easy! Get a big enough external drive for your mac partition and just plug it in! Magically macOS will ask you what to do. tell it you want to use it as a TimeMachine backup and let it rip! It will asked you a few questions and backup your macOS partition.

Now you’ll need to get a backup program for your Windows partition and a second drive for it. Depending on what you get you’ll follow the instructions it offers.

Done!

Now setup a USB thumb drive as a bootable OS installer (make sure it works)

Next install your new drive. Restart your system off of the USB thumb drive to install a fresh copy of your macOS. Now restore your stuff from the TimeMachine backup again magically when you connect it macOS will ask you if you want to restore! Again answer the questions as needed and let it go. Enjoy your coffee come back in a hour or so depending how much you have.

Now re-setup BootCamp and your Windows partition. run the restore function of your Windows backup, done!

Again don’t use cloning software!

Dan -

If I use a 2 TB for instance the Samsung EVO 970 plus, can I remove the SATA drive? Does the system work without the sata HD?

Horst Messerschmidt -

There is no requirement to use one drive interface than another. So yes, you can swtichout your SATA drive with a faster PCI/NVMe SSD drive.

But you may not be able to! Apple only shipped the PCIe/NVMe SSD drive’d and Fusion Drive models with the needed blade connector on the logic board. The bottom line here is you may not have the option to use the PCIe/NVMe blade SSD drive if you got a straight SATA HDD model.

Last important point is Apple did their own thing! The connector is custom! So a M.2 SSD will not directly fit and I don’t recommend using them. Here’s more on the Apple SSD’s The Ultimate Guide to Apple’s Proprietary SSDs

Dan -

Hello. I have the 2017 21.5” iMac, 16GB, 512GB SSD, 3.6 GHz i7. I am almost out of room on the SSD. Can I just add a SATA 1TB or 2TB SSD where a SATA HDD would have been if I had a Fusion drive, or, do I need to replace the NVMExpress blade SSD?

Don Zvareck -

Sure you can add in a second SATA drive if your system already has a blade PCIe/NVMe SSD. It won’t be as fast as your 512GB blade SSD. So to maximize your blade SSD after you install your second drive and format the drive to GUID with a journaled file system (not APFS) copy off your media and data files to the new drive. Ideally, you’ll want at least a 1/4 of the blade SSD free (if you can free up more than do that) The reason is your boot drive (blade SSD) uses the space for virtual RAM, caching and depending on your apps scratch space. So other than your OS and Apps keep your content on the slower SATA drive.

If you are doing music or video work you can use the blade drive to speed things up but given the size you have here you may hit issues.

Dan -

Thanks, Dan. I already replaced a failed HDD in an older Mac with an SSD (using all iFixit know-how and tools!) so I am comfortable going in as far to the space where the SATA drive would be. Sounds like there should be a connector there. Understand completely moving the data files, not the OS over to the SATA drive; that would have been my intent. I have no knowledge of GUID so I need to research that. So the only new things I need to purchase besides the 1 or 2 TB drive are the adhesive strips to re-seal the screen? Thanks so much!—Don

Don Zvareck -

You’ll need the Adhesive kit with the special pizza cutter tool. Four credit cards or iFixit plastic cards. If the system didn’t have the SATA drive you’ll need the cable and the rubber mounts to mount it to the drive in.

iMac 21.5" (Late 2013-2017) SATA Cable

21.5” iMac Hard Drive Rubber Frame v2

iMac Intel 21,5" (2012-2019) Klebestreifen

Kunststoffkarten

Dan -

Great. I have the cards and 2 pizza cutters from my previous operation and the iFixit kit my wife bought me. So I guess I need the frame, cable and strips. Is there a brand of SSD you have found works best? I see Samsung, WD and Mercury 6G units popping up.

Don Zvareck -

I used Samsung drives 860 EVO is the current series.

Dan -

Hi Dan. Will the 870 series from Samsung also work? They appear to be newer and lower in price than the 860 but I wanted to confirm compatibility. I have purchased an 860 but can return it if the 870 is preferred. Thanks!

Don Zvareck -

Sometimes newer is not necessary better! The construct of the NAND chips need to be investigated. The 860 uses MLC (Multi Level Cell) whereas the 870 uses TLC (Triple Level Cell). While TLC is cheaper it is slower and may not last as long as the MLC. To improve the speed Samsung uses a MLC buffer area but the depth of this space is limited so large data moves slow down once you exceed it. In addition we also face the same issues all NAND flash chips hit the total number of rewrites.

The bottom line here is stick with the 860 as that’s better drive.

Reference: EVERYTHING YOU NEED TO KNOW ABOUT SLC, MLC, & TLC NAND FLASH

Dan -

Roger! Thanks for the explanation. I will hold tight with what I have. Much appreciated.—Don

Don Zvareck -

I have an iMac 21,5” retina 4k 2017 model A1468 and EMC 3069 with a Fusion drive that seeking to upgrade. Does my iMac have a blade drive installed? If no, would be the port available to install one and have the Osx boot up from the blade drive?

Thanks a lot

christos -

A Fusion Drive is leveraging both drive ports your system offers! Basically you have a 2.5” SATA based HDD and a PCIe/NVMe blast SSD.

So depending on what your direction is deeper storage and/or faster storage! As an example you could replace your HDD with a much larger HDD and re-enable the Fusion Drive setup (depending on the SSD units size this might not offer much)

You could just replace the HDD with a SSD but I would not bother with the blade SSD leaving it unused. The performance will be better but you are then limited to the limits of the SATA III (6.0 Gb/s) interface.

You could replace the blade SSD with a much larger unit (500 GB/1 or 2TB depending on your work flow needs) making it your OS boot drive and holding your applications. Ideally, leaving the rest unused for virtual RAM, scratch space. If you are into video production then using the space to hold your current project, and using your current HDD as your data drive. This is the best performance setup!

Dan -

Hi Dan,

I successfully added the Samsung EVO 860 today. Thanks for all your support. Long (3.5-4 hours) but straightforward thanks to the guides and your assistance. There was one TINY connector on the logic board near the frame that I did not see covered and getting it back on was a son of a gun. The real concern was the adhesive package…a couple of the pieces tore prematurely and I had to be creative to try and pull out the remainder. I think I will mention that to customer service as the last time I removed a screen I did not have that problem. Thanks again!

Don

Don Zvareck -

Is it needed to disable the Fusion HDD in the terminal, when removing and upgrade to aa NVME SSD?

How do you do that?

Marco -

Yes, that is needed as the HD has the expectation the caching SSD is present. Different versions of macOS use different methods. The newer OS's require reformatting the HD, so you'll need to back up any data first.

Dan -