Einleitung

Es handelt sich hierbei um eine private Anleitung, die als grundständige Anleitung benutzt wird.

  1. jJhwSRnKSjThYh5y
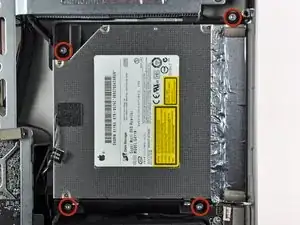
    • Entferne die vier Torx T10 Schrauben, welche das optische Laufwerk am äußeren Gehäuse befestigen.

    Is it possible to use the DVD drive after installing the SSD, or is there no space left?

    Joel -

    Yes, it is possible. The SSD fits below the dvd drive; it doesn't replace it

    Dan -

  2. DgBKVDwBG5aVgdNS
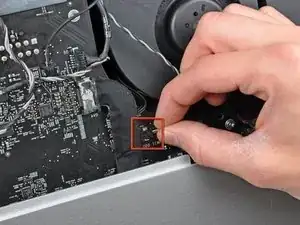
    • Ziehe den Verbinder des Thermosensors vom optischen Laufwerk gerade aus seinem Sockel auf dem Logic Board heraus.

    This step is not necessary. I have problems with the pulling out, and found that it's not necessary to out it in this case.

    Steve -

    Agreed. Leave it plugged in and peel the buffer tape and temp sensor off the optical drive assembly while it's still in the computer.

    John Lavenia -

    What problems did you have?

    Toni Marmol -

    Don't do that! It's not necessary to pull the sensor cable out. And it cost me an hour to find out that it was this sensor cable and not the LCD sensor cable that made the fans spin at 3000+rpm. The less sensor cables you remove, the easier to find the culprit if you stumble into fan issues.

    bhager -

  3. GVsLm2KxXMKTOIUq
    GVsLm2KxXMKTOIUq
    awAqRpRHhQhBTtqU
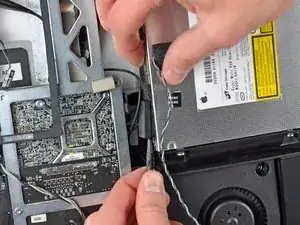
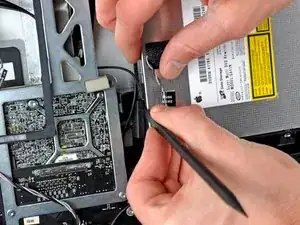
    • Setze einen Spudger zwischen dem Stecker des optischen Laufwerks und dem optischen Laufwerk ein.

    • Verdrehe den Spudger, um den Stecker leicht vom Laufwerk zu lösen, ziehe ihn dann mit den Fingern ganz ab.

    Hello, is the sata & power cabla from the mac can directly feet inside the SSD?

    Roman Quenin -

    Can the superdrive connector cable (possibly just SATA and SATA power bundled) be used for SSD? I wanted to replace the superdrive completely with an SSD, and thus having in total 2 SSDs and one HDD inside the iMac. Thanks in advance.

    Krisna -

    There is another SATA connector on the back side of the logic board for an SSD.

    Neal Sofge -

  4. q53pwUVhpfY1CeWA
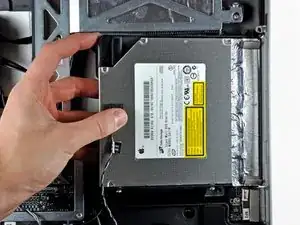
    • Hebe die linke Kante des optischen Laufwerks etwas an und ziehe es von der rechten Seite des äußeren Gehäuses weg.

    • Achte beim Zusammenbau darauf, dass sich in der Frontplatte des optischen Laufwerks zwei Löcher befinden. In diese müssen zwei recht dicke Plastikzapfen passen, damit das Laufwerk richtig sitzt.

Abschluss

Um dein Gerät wieder zusammenzusetzen, folge den Schritten in umgekehrter Reihenfolge.
Walter Galan

685540 Reputation

0 Kommentare