Einleitung
Hier wird der Austausch des Lüfters am optischen Laufwerk gezeigt.
Werkzeuge
Ersatzteile
-
-
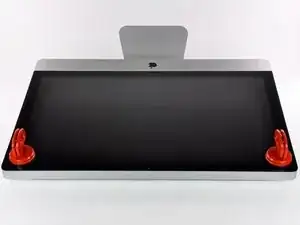
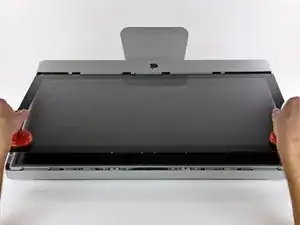
Befestige je einen Heavy Duty Saugheber in den beiden oberen Ecken der Glasscheibe.
-
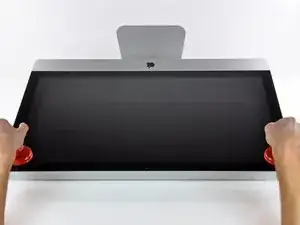
Halte den Saugheber leicht an der Scheibe und hebe den beweglichen Henkel bis er parallel mit dem anderen ist (wie im dritten Bild gezeigt).
-
-
-
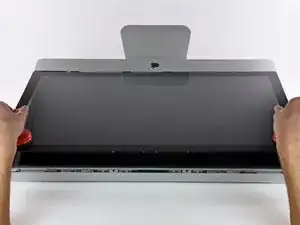
Hebe die Glasscheibe rechtwinklig so weit vom Display weg, dass sich die metallenen Befestigungsstifte an der Unterseite der Oberkante lösen.
-
Ziehe die Glasscheibe weg von der unteren Kante des iMac und lege sie vorsichtig beiseite.
-
-
-
Lege den iMac vorsichtig mit der Rückseite flach hin.
-
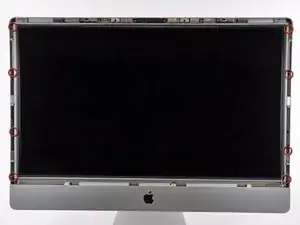
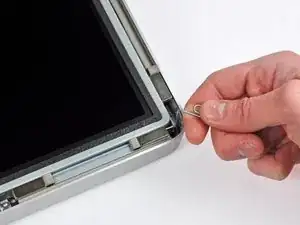
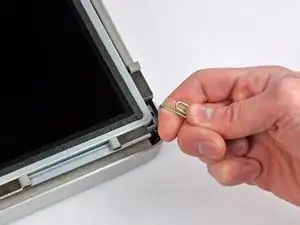
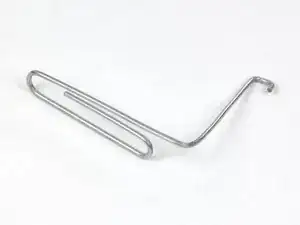
Hebe eine der oberen Ecken des Displays mit einem dünnen Haken am Metallrahmen leicht an.
-
-
-
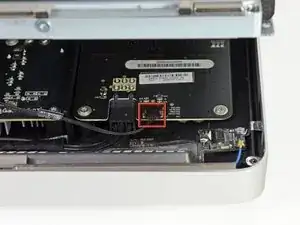
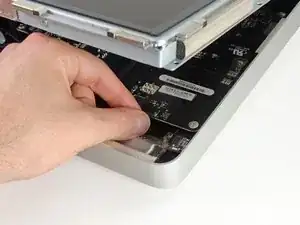
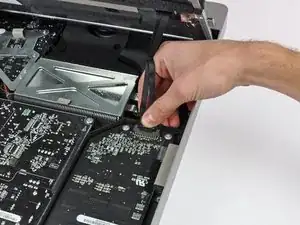
Ziehe vorsichtig mit deinen Fingern das vertical Sync-Kabel aus der Steckverbindung auf dem LED-Treiberboard nahe der oberen linken Ecke deines iMac.
-
-
-
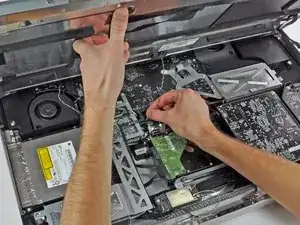
Drücke die beiden Pins des Displaykabels zusammen, um es aus seinem Anschluss auf dem Logic Board zu befreien.
-
Ziehe den Stecker des Displaykabels aus dem Anschluss auf dem Logic Board.
-
-
-
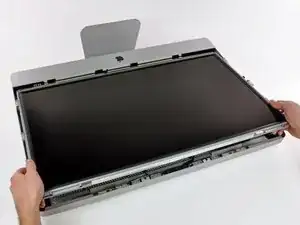
Hebe das Display weit genug aus dem Gehäuse, um das Kabel der LED Hintergrundbeleuchtung vom LED-Board zu trennen.
-
-
-
Hebe das Display weit genug an, um das Kabel des LCD-Temperatursensors von seinem Anschluss auf dem Logic Board trennen zu können.
-
-
-
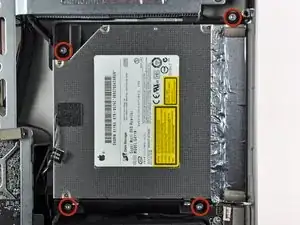
Entferne die vier Torx T10 Schrauben, welche das optische Laufwerk am äußeren Gehäuse befestigen.
-
-
-
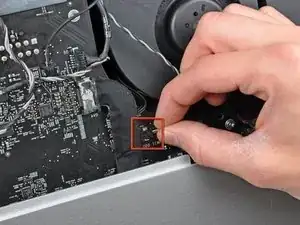
Ziehe den Verbinder des Thermosensors vom optischen Laufwerk gerade aus seinem Sockel auf dem Logic Board heraus.
-
-
-
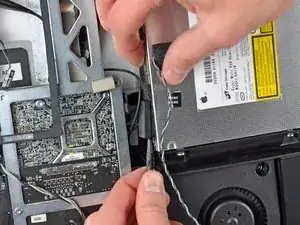
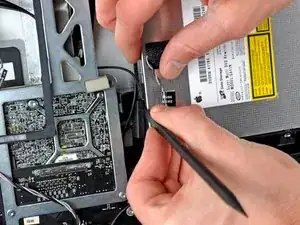
Setze einen Spudger zwischen dem Stecker des optischen Laufwerks und dem optischen Laufwerk ein.
-
Verdrehe den Spudger, um den Stecker leicht vom Laufwerk zu lösen, ziehe ihn dann mit den Fingern ganz ab.
-
-
-
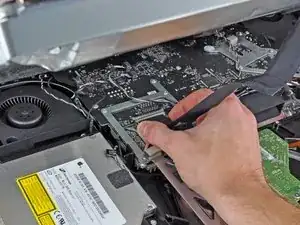
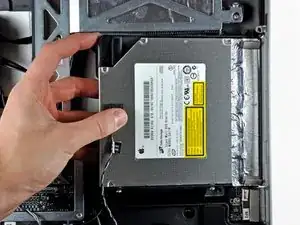
Hebe die linke Kante des optischen Laufwerks etwas an und ziehe es von der rechten Seite des äußeren Gehäuses weg.
-
Achte beim Zusammenbau darauf, dass sich in der Frontplatte des optischen Laufwerks zwei Löcher befinden. In diese müssen zwei recht dicke Plastikzapfen passen, damit das Laufwerk richtig sitzt.
-
-
-
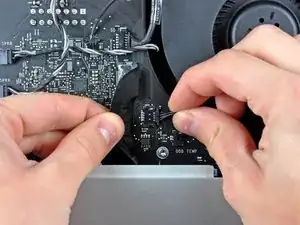
Schiebe vorsichtig das hintere I/O Flachbandkabel beiseite, um den Stecker zum Lüfter des optischen Laufwerks, der darunterliegt, freizulegen.
-
Löse den Stecker, indem du ihn aus seinem Sockel auf dem Logic Board ziehst.
-
-
-
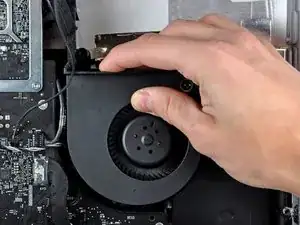
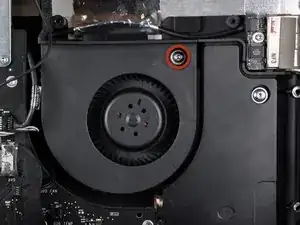
Eine einzelne Torx T10 Schraube befestigt den Lüfter des optischen Laufwerks am Gehäuse. Drehe sie heraus.
-
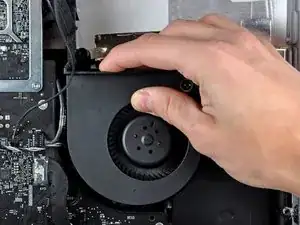
Ziehe den Lüfter des optischen Laufwerks weg vom Gehäuse, um ihn so aus den drei Plastikstiften an seinem Rand zu heben.
-
Bewege den Lüfter des optischen Laufwerks vorsichtig aus dem iMac, achte dabei daruf, dass sich keine Kabel verfangen.
-
Um dein Gerät wieder zusammenzusetzen, folge den Schritten in umgekehrter Reihenfolge.
3 Kommentare
Go slow, and take your time. Easy as long as you do not rush it.
Wish a view of the back of the fan was included to determine what fan specs are needed for replacement. ifixit doesn’t have the part.
The fan optical fan connector has four metal contacts. These face up when reinstalling the connector. IMPORTANT
matthew -



You can easily lift the glass panel off the magnets with only your fingernails (or something thin like a credit card or a guitar pick). No need to buy suction cups you will only use once.
Nick Caron -
Yes, you don't need the specific suction cups to remove the display cover - it's held on by magnets, and if you start at the center by the iSight you can work out to the edges and remove it. I had an iPhone screen suction cup around and it helped with balancing the screen when you pull it out fully, but by no ways is it required.
jtowner -
Great guide and pretty straight forward the only thing that took me ages and I didn't manage to undo were the power btn cable (step 28) and the thermal sensor (step 25) Seemed like they were glued on! Very difficult to remove and obviously conscious so I didn't break anything!
Eddie -
Thanks!!! Worked excellently.
I used a plunger (clean first ;-) to get the screen off, and http://exirion.net/ssdfanctrl/ for fan control.
Then, i did not take out the whole display and left it in the hinges on the bottom side and held it up with two small cardboard boxes. Easy enough to disconnect the hdd then.
I replaced with an ssd, put that into a ssd enclosure. Had to drill an extra hole in it to fasten the pins that hold it in place.
Used Carbon Copy Cloner to make an image from the old hdd, with the sad connected via usb. Checked it of it booted via System Preferences > Startup Disk. It worked so the took the imac apart and replaced the disk. Booted, everything was working as always, only faster!
Frank303 -
I'm replacing my optical drive too. what exactly needs to be plugged into the SSD? I don't have the kit - as I am not sure one is required if I buy something like this: http://www.amazon.com/gp/product/B0056OB...
Can you please advise? Can I do it with this piece, or do I need to get the entire bracket kit?
Allen Borza -
My display data cable forks, with a smaller section going up near the camera board. Where it forks, it is attached to the aluminum plate that attaches around the cpu board. I haven't seen any images that look similar, and I'm stumped at how to remove this second section of the cable. 2010 i7 build to order
Awolf -
Agree with the other comments here. Despite buying suction cups, not sure they were necessary as the screen removed very easily. A sat nav suction cup would do the job fine.
Stuart Bloomfield -
I can confirm that it is possible to remove the front glass using fingernails rather than suction cups. It isn’t easy, but if you try you should be able to pry off the glass.
I did this twice: once at the beginning of the procedure and once again at the end, when I realized that a big pice of lint was trapped under the glass.
gordonhamachi -
Don’t use suction cups. totally unnecessary. screen pops off with fingernails.
Kieran Hobbs -
The reason for caution about suction cups tends to be making sure you don’t apply uneven pressure on the edges of the glass and crack it in the process of removal. I do agree however that some pretty small suction cups would do fine. These suction cups can be had at your local princess auto (Harbor freight) for a few bucks and are useful elsewhere as well. if you use your fingernails or other items just try and do it evenly :)
Abirinder Brar -
good duct tape or gaffer tape wrapped around your hands makes an excellent glass removal 'tool'. Even clear packing tape works a charm.
Stu Blair -
A great first step that minimizes that first gust of dust migration when the glass is lifted is to clean the glass, sides *and the back* before lifting the glass, and then lift SLOWLY. Most of that dust is already trapped inside and pulled up as the screen lifts, but with care you can keep it there (or gently vacuum out with a micro vac…).
John -
before starting any of this…there is a device that you can use that comes with the IFixit kit to format and either clone or restore your hard drive to the new drive…it will save you a lot of headaches..it is a SSD enclosure that you can plug into your existing computer …
Tom Richter -
Thanks for the instructions. Before doing this the first time, suggest to everyone, read through at least twice. This is the easiest step, as you’ll soon see. As for removing the glass, USE suction cups, either the ones the sell here, or others. DON’T skimp. Also wear gloves when handling the glass. Don’t take chances.
ECJohansen -
Duct tape works too!
Dani -