Einleitung

Funktioniert dein optisches Laufwerk nicht mehr? Liest dein SuperDrive keine CDs und DVDs mehr? Möglicherweise kann eine kleine Reinigung dein SuperDrive wieder zum leben erwecken.

Werkzeuge

  1. jJhwSRnKSjThYh5y
    • Entferne die vier Torx T10 Schrauben, welche das optische Laufwerk am äußeren Gehäuse befestigen.

    Is it possible to use the DVD drive after installing the SSD, or is there no space left?

    Joel -

    Yes, it is possible. The SSD fits below the dvd drive; it doesn't replace it

    Dan -

  2. DgBKVDwBG5aVgdNS
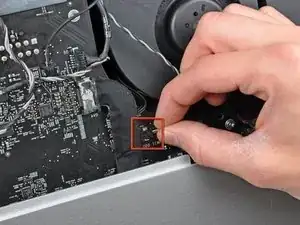
    • Ziehe den Verbinder des Thermosensors vom optischen Laufwerk gerade aus seinem Sockel auf dem Logic Board heraus.

    This step is not necessary. I have problems with the pulling out, and found that it's not necessary to out it in this case.

    Steve -

    Agreed. Leave it plugged in and peel the buffer tape and temp sensor off the optical drive assembly while it's still in the computer.

    John Lavenia -

    What problems did you have?

    Toni Marmol -

    Don't do that! It's not necessary to pull the sensor cable out. And it cost me an hour to find out that it was this sensor cable and not the LCD sensor cable that made the fans spin at 3000+rpm. The less sensor cables you remove, the easier to find the culprit if you stumble into fan issues.

    bhager -

  3. GVsLm2KxXMKTOIUq
    GVsLm2KxXMKTOIUq
    awAqRpRHhQhBTtqU
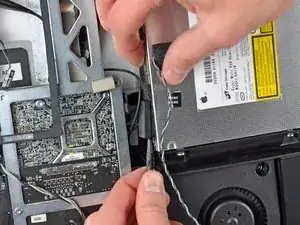
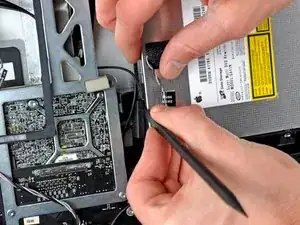
    • Setze einen Spudger zwischen dem Stecker des optischen Laufwerks und dem optischen Laufwerk ein.

    • Verdrehe den Spudger, um den Stecker leicht vom Laufwerk zu lösen, ziehe ihn dann mit den Fingern ganz ab.

    Hello, is the sata & power cabla from the mac can directly feet inside the SSD?

    Roman Quenin -

    Can the superdrive connector cable (possibly just SATA and SATA power bundled) be used for SSD? I wanted to replace the superdrive completely with an SSD, and thus having in total 2 SSDs and one HDD inside the iMac. Thanks in advance.

    Krisna -

    There is another SATA connector on the back side of the logic board for an SSD.

    Neal Sofge -

  4. q53pwUVhpfY1CeWA
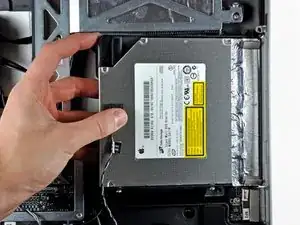
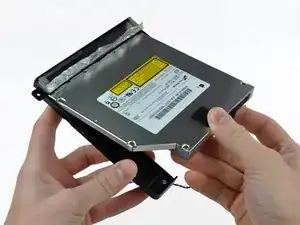
    • Hebe die linke Kante des optischen Laufwerks etwas an und ziehe es von der rechten Seite des äußeren Gehäuses weg.

    • Achte beim Zusammenbau darauf, dass sich in der Frontplatte des optischen Laufwerks zwei Löcher befinden. In diese müssen zwei recht dicke Plastikzapfen passen, damit das Laufwerk richtig sitzt.

  5. dE4nQPWgXqdSpsWv
    dE4nQPWgXqdSpsWv
    tV6f3TwnOKxFCxr5
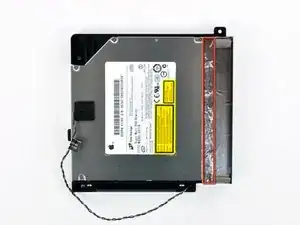
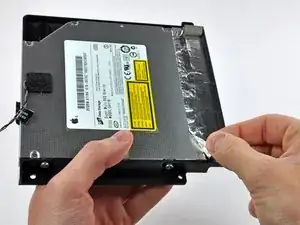
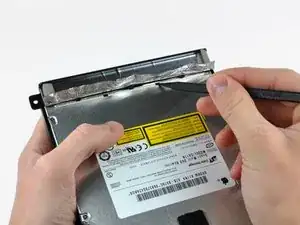
    • Löse den Teil des Klebebands aus Aluminium ab, welcher hier rot markiert ist. Lasse den restlichen Teil an der schwarzen Kunststoffhalterung kleben.

    • Es ist nicht nötig, das ganze EMI Abschirmband vom optischen Laufwerk abzulösen.

    Found it easier to remove the four screws in step 16, then rotate the drive out of the plastic frame so the tape acts as a hinge, making it easy to peel the tape. This also eliminates step 17 as the tabs vacate their slots as the drive is rotated.

    Dave Winn -

  6. lSdFTojIkwowSxkp
    lSdFTojIkwowSxkp
    LBaI1AmM1yu5nuqU
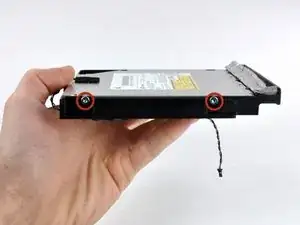
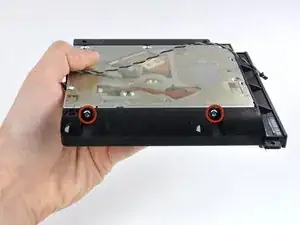
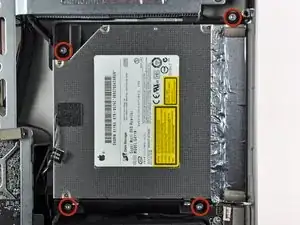
    • Entferne die beiden Torx T10 Schrauben auf jeder Seite des optischen Laufwerks (also insgesamt vier).

  7. NGT2hAsrnpRNLtw1
    NGT2hAsrnpRNLtw1
    Tj4GoLBU3jIq53Cd
    SWY6pIaBoP1Zt5By
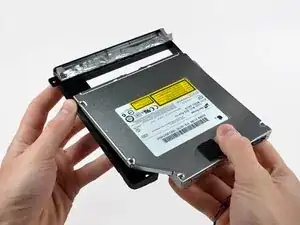
    • Drücke mit der Spudgersitze jede der Rasten in der Halterung aus ihren Vertiefungen am Boden des optischen Laufwerks heraus.

    • Drehe die Halterung leicht weg vom optischen Laufwerk.

    • Ziehe die Halterung des optischen Laufwerks weg vom offenen Ende des Laufwerks, achte dabei darauf, dass sich keine Kabel verfangen.

  8. DNcdQiNmRCQR3QEZ
    DNcdQiNmRCQR3QEZ
    XWKQ6KLOhfECRUyQ
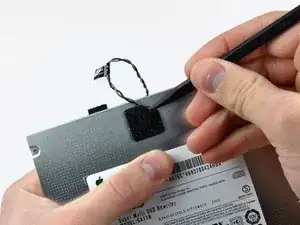
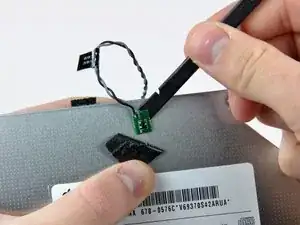
    • Löse mit der Spudgerspitze das Stückchen Schaumstoff ab, welches den Thermosensor des optischen Laufwerks bedeckt.

    • Heble vorsichtig mit dem flachen Ende des Spudgers den Thermosensor aus seiner Klebeverbindung zum optischen Laufwerk.

    • Wenn im Laufwerk noch eine Disc oder etwas anderes steckengeblieben ist, dann haben wir eine Anleitung, um dies zu reparieren.

    Do I have to reattach the optical drive thermal sensor to the SSD?

    Ignatius Lee -

    Yes, just stick it onto the SSD and cover it with the buffer. Better than leaving it loose in the computer, or worse omitting it altogether.

    John Lavenia -

    looks like you cracked the edge of that sensor :)

    Ivan Ivanov -

    Replacing an HDD was easy as PIE compared to this, the replacement Superdrive's holes did not line up the same way the original did. The original was a Sony drive, the replacement was made by H-L. But the shape was the same. By holding the bracket in place with my hand I was able to worm two screws in sideways until the pressure lined it up, then I was able to get the rest of the bracket screws back in. I had to do that while making sure the little tabs in the front of the drive were orientated properly - And not messing up the silver tape much. After that it was all relatively easy. The instructions were spot on and for the exact iMac (11,1) I was working on. The replacement Superdrive works perfectly despite the Brand change, I installed Bootcamp to make sure- It read and installed from my Windows 7 install DVD, NO Problem. I set the monitor screen in place without screwing it all back in just in case I had to open it back up again, not needed. Thank you SO much for your easily understood instructions.

    Jonny V -

    I had it easy with replacing dead optic drive in 2011 27" with a 2010 27" optic drive so did not even have to take the optic drive out of its holder. Now I have an internal dvd super drive again. Thank you ifixit.

    Michael -

    • Befolge alle Schritte, um das SuperDrive zu demontieren. Der Schritt 8 ist für diese Reparatur nicht notwendig. Bitte löse den Sensor des optischen Laufwerks nicht ab.

    • Nachdem das Laufwerk demontiert wurde, musst du nun die 5 kleinen Schrauben auf der Seite des Gehäuse mit den Etiketten lösen. Entferne den Deckel sobald die Schrauben entfernt wurden.

    • Benutze nun einen Staubsauger, um das Laufwerk auszusaugen. Achte darauf, das du nichts beschädigst und dein Staubsauger nicht zu stark eingestellt ist.

    • Mache nun die Linse vorsichtig sauber, dazu kannst du zum Beispiel ein in Alkohol-getränktes Wattestäbchen nutzen. Sei dabei vorsichtig, damit du die Linse nicht beschädigst.

    • Bringe den Deckel mit den Schrauben wider an und baue alles wieder zusammen.

    • Wenn alles wieder montiert ist, startest du den iMac und hoffst, das dieser wieder normal läuft, meist ist es nur ein Problem mit Staub.

    • Falls dein optisches Laufwerk nach wie vor nicht korrekt arbeitet, kann es sein, das du dieses austauschen musst.

Abschluss

Um das Gerät wieder zusammen zu bauen, musst du die Anleitung in umgekehrter Reihenfolge befolgen.

Quentin Hindley

Mitglied seit: 08/02/19

73 Reputation

0 Kommentare