Einleitung

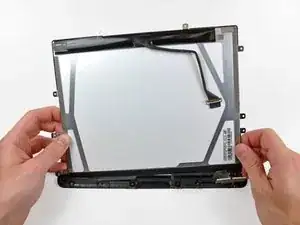
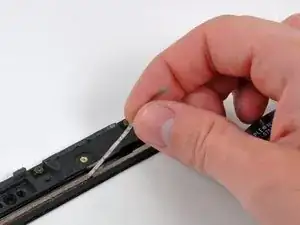
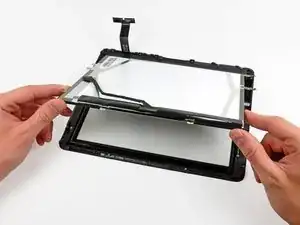
Use this guide to replace a burned-out LCD and/or backlight.

  1. CR4uCijdW1OugLYO
    CR4uCijdW1OugLYO
    H1FdIigqyDXVftPq
    juxJIpQPuYHqjCn5
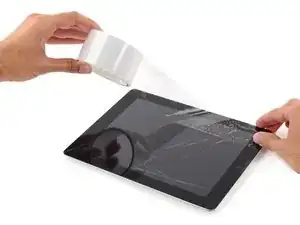
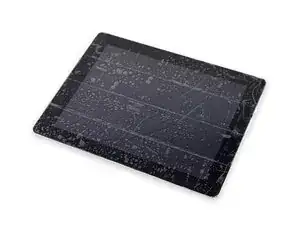
    • If your display glass is cracked, keep further breakage contained and prevent bodily harm during your repair by taping the glass.

    • Lay overlapping strips of clear packing tape over the iPad's display until the whole face is covered.

    • This will keep glass shards contained and provide structural integrity when prying and lifting the display.

    • Do your best to follow the rest of the guide as described. However, once the glass is broken, it will likely continue to crack as you work, and you may need to use a metal prying tool to scoop the glass out.

    • Wear safety glasses to protect your eyes, and be careful not to damage the LCD screen.

  2. MxqCUTyahFyGCMUM
    MxqCUTyahFyGCMUM
    dhC3co6rmldN4VR3
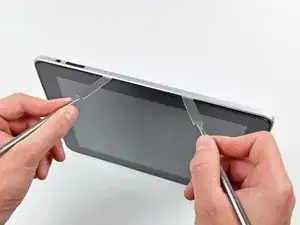
    • The iPad shown in the photos may look slightly different from your iPad, but the procedure is the same.

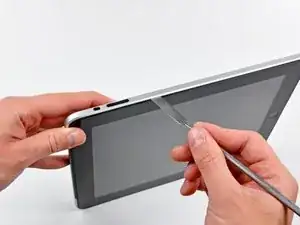
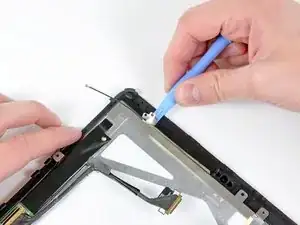
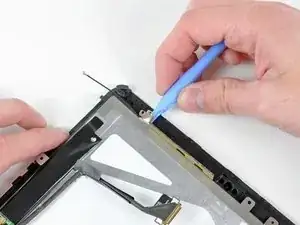
    • Insert a metal spudger between the right edge of the display assembly and the rear panel assembly.

    • Rotate the spudger away from you to release the tabs along the top edge of the display.

    Ok, a word of caution that can't be overstated. The off screen switch, the lock swith, and the volume switch can all be broken easily. I would stay away from this area completely. The bracket on the off switch is tack welded and can be broken. The volume/lock swith can be malformed to become unusable. So avoid the area and you will be better off.

    Carl Rossi -

    Most of the spring clips mounted to the digitizer panel (sandwitched between the LCD display mount tabs and digitizer frame) are guaranteed to break. I recommend just purchasing a set (I found on one Amazon for less then $6). With that said, even though I broke most of mine while removing the glass panel/frame assembly, I was able to remount the glass. It seems fairly secure, but I'm going to put the iPad (3G/Wifi) in a case, anyway.

    stevetsi -

    Pas besoin de pistolet a chaleur, il faut juste faire sauter les clips qui maintiennent l'ensemble écran et LCD. Bien commencer par la droite, car se sont juste des picots en plastique a faire sauter par dessus le rebord en alu, puis soulever la partie du bas en cassant les 4 clips ( pas moyen de les garder entier). Ensuite la partie gauche (avec 6 clips) se détachera facilement. La partie haute n'est pas éclipser mais retenus par un cable.

    tibo -

    Yes, most of the clips break easily, but I was able to reassemble the iPad by putting the left side in first at an angle, and then snapping in the rest of it. Even though most of the clips break, it still holds together pretty tight.

    Peter Hillman -

    not all clips break, and there are so many clips that despite breaking 2-3 clips it still fitted in nicely, if you do not have a metal spudger you can use any pack of screw drivers whose other end looks like the metal spudger, that’s about it, as far the instruction goes they are good for battery replacement.

    ztauseef -

  3. T3kjASSHLhfC6JOI
    T3kjASSHLhfC6JOI
    SIplIyVGNK1QC161
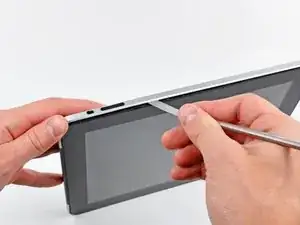
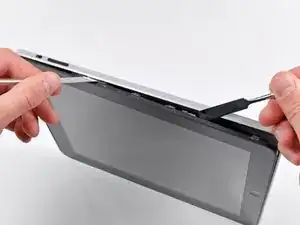
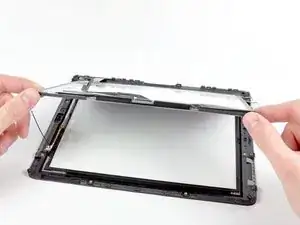
    • Insert a second metal spudger between the top edge of the display assembly and the rear panel assembly to keep the tabs from snapping back into place.

    • Pry the display assembly away from the rear panel.

  4. PEMgUMQuViASOYwo
    PEMgUMQuViASOYwo
    PmVL6K4PfQUYuEnC
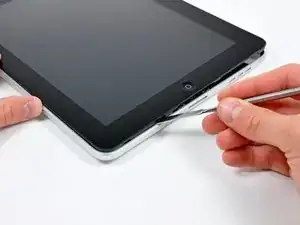
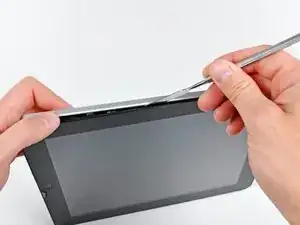
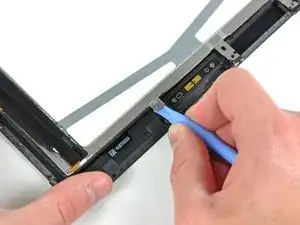
    • Continue prying the display assembly away from the rear panel along the bottom and left edges of the iPad.

    • Use extreme caution as you approach the top edge of the iPad. The digitizer ribbon cable is located near the edge of the rear panel and can easily be damaged.

    Be very careful as the left side has plastic pins that go into the cover, the right side and bottom have metal clips which break easily.

    After unlocking the left side, pull away from the right side, as to save the metal clips.

    Neven Dilkov -

    During reassembly, it can be difficult to get the clips back into the body. I found that I had to put two (sturdy) metal spudgers on either side of the lower-right clip in order to gain enough space to get the clip into the body. Even then it required a fair amount of force (obviously not so much as to damage the display).

    cgkemper -

  5. XTsZrsSq6rdV63XG
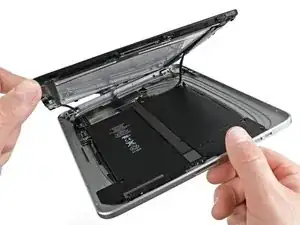
    • Lift the display assembly away from the rear panel assembly by its bottom edge.

    • Do not excessively lift the display assembly off the rest of the iPad, as a fragile antenna cable with very little slack still connects the two components.

    There are four black angle metal foil corner pieces that just fall out of the case. They are about 4 mm long and 2mm on each leg. Have no clue what they do or where they go.

    Carl Rossi -

    That's probably broken Metal Display Clips. Easy to replace, but you'll need to purchase a set of new clips. Luckily, they're not expensive :-)

    orb -

    The display data cable may be glued into place along the right and top side of the right battery. You should use an iPod opening tool to pry it away from the adhesive. This will allow you to get a wider opening between the display and iPad body in order to access and remove other cables.

    cgkemper -

    The photo above is the Wi-Fi version because the cellular communication board is missing in the photo. As I lifted the display, following the instructions, one of the cellular antennas snapped right out of the copper connector exposing bare wire. No big deal because it is an iPad 1 and no one would ever use cellular with an original iPad anyway. Not these days. But be very careful lifting the display because the antenna wires for the cellular board are very short and break easily.

    Peter Hillman -

  6. 2WFnGCBH2T3Uc6h4
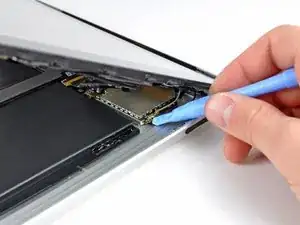
    • Use the flat end of a spudger to pry the antenna connector closest to the bottom of the iPad up off its socket on the communications board.

    Whats this antenna for? What is I accidentally tore it out? what will it affect?

    Laith -

    This is the GSM antenna cable connector.

    orb -

    did u find out what it did as I pulled the whole connector socket off can this be repaired

    dods -

    The antenna cable is easily broken when separating the screen from body.

    The whole antenna can be purchased for about $5 new on eBay.

    mpaint -

    Is there a tutorial? Mine broke and I did buy part. However, only thing I find is how to replace lcd. Just need how to replace 3G antenna.

    Marvin Dizon -

    I just need how to replace 3G antenna. Is there a tutorial? Mine broke and I did buy part. However, only thing that I find online is how to replace lcd.

    Marvin Dizon -

    There are 2 small cable with golden connector plugged into the sockets,

    unfortunately the lower one the cable and golden connector is broken when I move the display assembly off, what shall I do to fix it:-(

    oliveryb -

    Some know the function of these 2 cable? My lower cable broken with the golden connector...

    oliveryb -

    Mine broke and I simply soldered a new one on the bottom part of the old one, where the plastic wire cover ended. It worked. :)

    jessamy99 -

  7. IUEnPwHYdRl15lCH
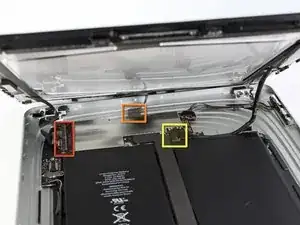
    • In the following steps, you will disconnect the three cables attaching the display assembly to the logic board. The cables are for the following components:

    • Digitizer

    • Ambient Light Sensor

    • Display Data Cable

  8. Osn5Mjog5LhnLRH2
    Osn5Mjog5LhnLRH2
    YcGdCmJXbExa2ke5
    Qr1fOvjrj4WeIvfJ
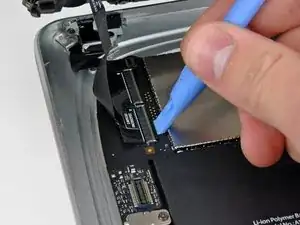
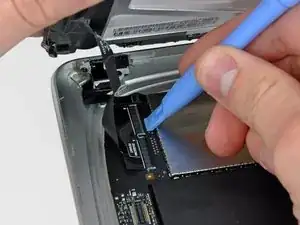
    • Use the edge of an iPod opening tool to flip up the retaining flaps holding the digitizer ribbon cables in their sockets on the logic board.

    • Be sure you are flipping up the retaining flap, not the socket itself.

    • Pull the digitizer ribbon cables straight out of their sockets.

  9. Tyf3AERL2ERFsQKy
    • Use an iPod opening tool to remove the ambient light sensor connector from its socket by gently prying upward.

  10. ddRTUuGDKNBk2bh6
    ddRTUuGDKNBk2bh6
    21FKNBGre42J6UWA
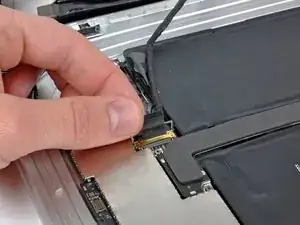
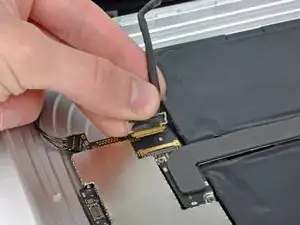
    • Disconnect the display data cable from the main board by flipping up the metal retainer by its black plastic pull tab.

    • Pull the cable connector away from its socket.

    • Pull the connector parallel to the face of the logic board.

    For iPad Wifi Users, there is a ‘3D Antenna’’ cable that also needs to be removed. This is not covered in this tutorial. Here is a YouTube link to that covers this procedure. https://youtu.be/iD8kGSD5r0A

    Amanda May -

  11. TM1PHArEjFrxUOCp
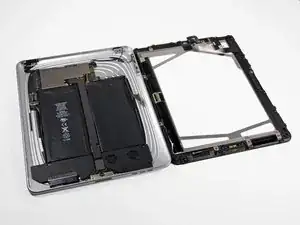
    • Remove the display assembly from the rear panel assembly.

  12. Mq3UKOadOWfBYHYQ
    • If necessary, peel the strip of foam tape off the ambient light sensor.

    • It is not necessary to completely remove the foam tape attached to the antenna.

  13. mTZEAx5Gej3eYB6U
    mTZEAx5Gej3eYB6U
    ToDtbqFqLF1OyTQN
    fmrLVjOXHxcGgVQT
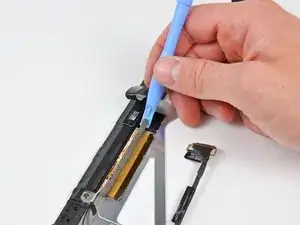
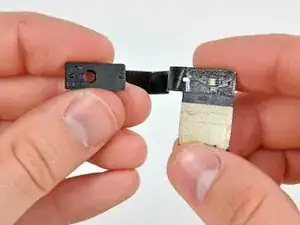
    • Use the edge of an iPod opening tool to carefully pry the ambient light sensor board off the adhesive securing it to the display frame.

    • Once you've gained enough clearance, peel the ambient light sensor off the LCD.

    • If necessary, attach the plastic view window to your new ambient light sensor before installation.

  14. avdUTRNKNFoRSmpm
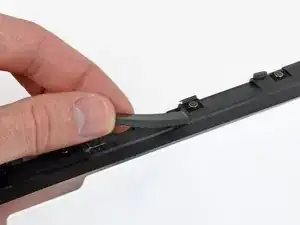
    • If present, remove the strip of foam tape along the long edge of the display assembly near the digitizer cable.

  15. hFafNycuxNReoxsk
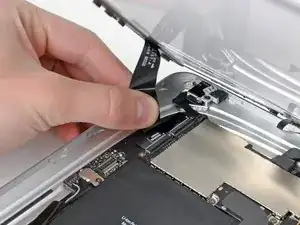
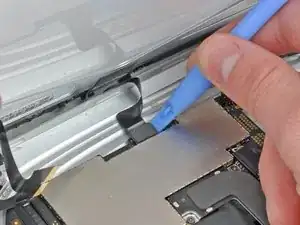
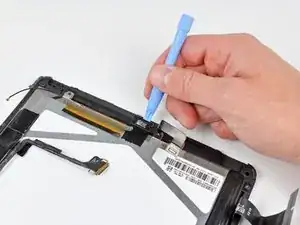
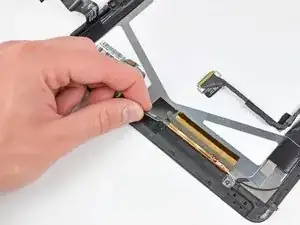
    • While holding the digitizer cable down, carefully peel back the piece of tape connecting the digitizer cable to the display frame.

  16. MZBHU1uVRKJDaNkk
    • Use the edge of an iPod opening tool to peel the antenna off the adhesive securing it to the top edge of the display.

  17. rOJMbRoQ2AMLSZGo
    rOJMbRoQ2AMLSZGo
    BGCQDIbljbQIlngW
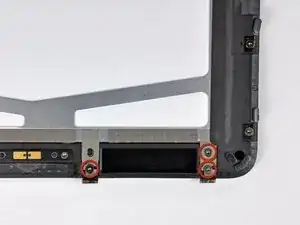
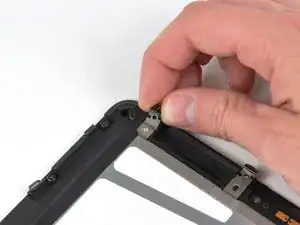
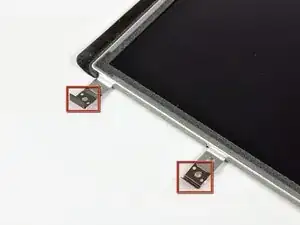
    • Remove the three T5 Torx screws securing the clips and LCD brackets covered in EMI tape near the home button switch.

    • Carefully peel the display clip and its attached tape off the black plastic display frame.

    • If you are replacing the LCD, be sure to transfer these pieces of EMI tape and their attached clips to the new LCD.

  18. i3m6M4PXNKatePNc
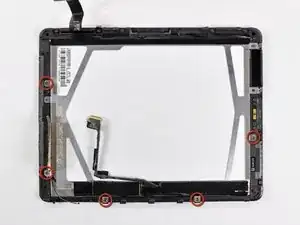
    • Remove the remaining T5 Torx screws securing the LCD to the black plastic display frame.

  19. K2rcoJAdRtrQijig
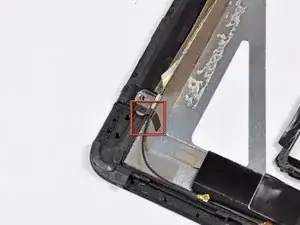
    • Remove the small strip of tape securing the antenna lead to the LCD.

  20. 5DKFdZBlIkxWTUXI
    5DKFdZBlIkxWTUXI
    6X6S1qwpjaVqATQa
    • Insert the edge of an iPod opening tool under one of the ears attached to the steel LCD frame.

    • Twist the iPod opening tool to gently pry the LCD up off the adhesive securing it to the front glass panel.

    • Be sure not to excessively bend the LCD, as it is made of glass.

  21. EB5jQlDSIgcUYiHe
    • Repeat the process detailed on the previous step to pry up the display around the three sides opposite the digitizer cable side of the display.

    Two opening tools make this process much easier allowing you to move progressively around the LCD while separating it from the frame.

    cgkemper -

  22. cG55RLB4UxeyBxwL
    cG55RLB4UxeyBxwL
    f2GXG3GX5iCXiT6B
    • Lift the LCD from its free end, and remove it from the display frame.

    • Carefully peel the adhesive securing the long side of the LCD to the display frame, then remove the LCD.

    My replacement screen required I transfer the cable (z-shaped with a flat socket at the other end) I removed the tape, revealing the socket and flipped a bar over that was securing it.

    William Boulby -

  23. PIYkqKEpcPymKARl
    • If it is still stuck to the front panel, remove the strip of EMI tape near the ambient light sensor socket.

    • If necessary, transfer this to your new LCD.

    • If it is attached to the LCD and you are reusing the LCD, skip this step. If you are replacing the LCD as well, transfer the strip of EMI tape to your new LCD.

  24. USNhbbHWWs3cnbhi
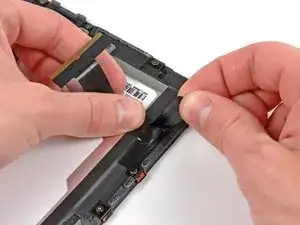
    • If they are still in good shape, transfer the clips and EMI tape near the bottom of the LCD to your new LCD.

Abschluss

To reassemble your device, follow these instructions in reverse order.

Andrew Bookholt

578335 Reputation

4 Kommentare

Did this and everything worked great, but I forgot to re-attach the 3G antenna so I went back in to do that, closed it back up again and now my wifi isn't working. Any thoughts on what I likely messed up?

The first repair didn't require a software/firmware restore, but the second one did. I've restored twice now and reset network settings... all the suggestions Apple makes for troubleshooting a software issue, so I do think I messed something up inside.

Loren -

Be very careful on step 14 as the piece of tape holding down the digitizer cable will TEAR your cable if not properly peeled. Ask me how I know.

to ifixit.com:

I'm very disappointed in the lack of caution advised during this step. Almost as if you wanted us to mess this up for the purpose of purchasing a digitizer from you. Shame.

Tony -

A short remark about how much force will then be needed to separate the old battery from the heated adhesive would be helpful. I found that even after I was able to begin the insertion of a plastic card between the battery and the case, it required a great deal of force to push the card further under the battery to complete the separation. Refer: soundcloud converter
Jennifer Brownz -
Thanks for this helpful steps, its clear and easy, Refer: children toys one and half olds

eriansso -