Einleitung

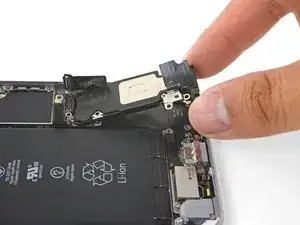
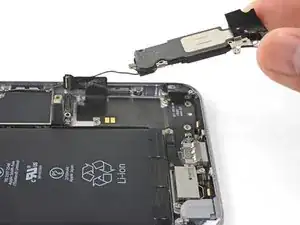
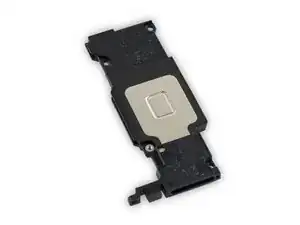
Dies ist nur eine grundständige Anleitung! Austausch des Lautsprechermoduls des iPhone 6s Plus. Aktualisierte Version mit Fotos eines intakten Logic Boards.

  1. kBKHw6cNKGYlXPrD
    kBKHw6cNKGYlXPrD
    oonLGkBNUcXayi3G
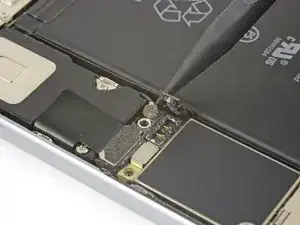
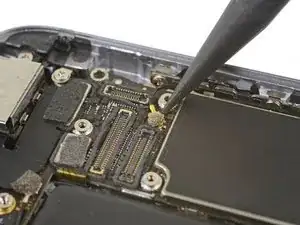
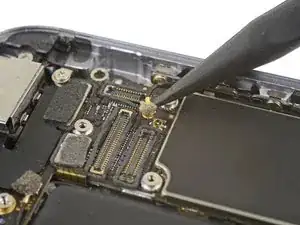
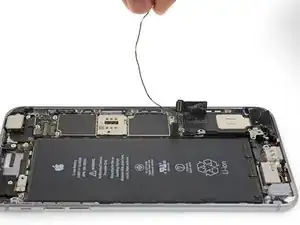
    • Heble und löse das Antennenkabel mit der Spudgerspitze unten vom Logic Board ab.

  2. WccJDnbsejP52V5X
    WccJDnbsejP52V5X
    V6sW6VnPGVXBQL6X
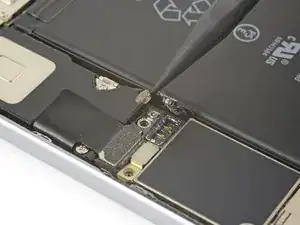
    • Heble und löse das Lightning Connector Kabel mit der Spudgerspitze vom Logic Board ab.

  3. elMW6qBvflWxenYP
    elMW6qBvflWxenYP
    gg1iRHpjPqxpQOIR
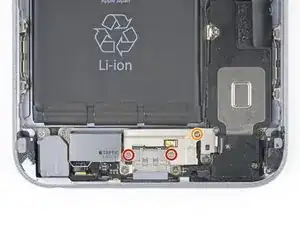
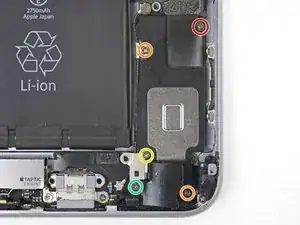
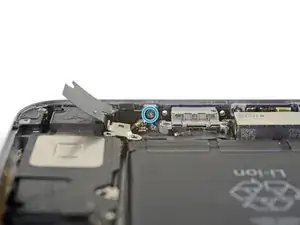
    • Entferne die drei Kreuzschlitzschrauben, mit denen die Halterung des Lightning Connectors befestigt ist:

    • Zwei 3,5 mm Schrauben

    • Eine 2,7 mm Schraube

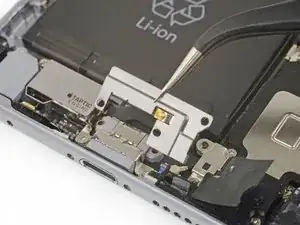
    • Entferne die Halterung.

  4. SgG53O6BSfrkOK2p
    SgG53O6BSfrkOK2p
    AEKrMNpft4K2HiLF
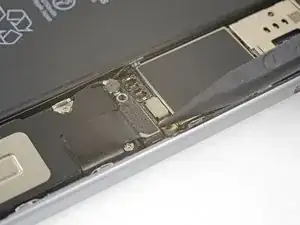
    • Heble und löse das Antennenkabel mit der Spudgerspitze von der Lightning Connector Einheit.

  5. qbgbwWkNrHBYkeXO
    qbgbwWkNrHBYkeXO
    wwbcCwfuQk35eDSr
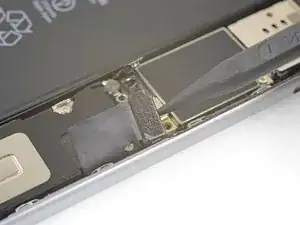
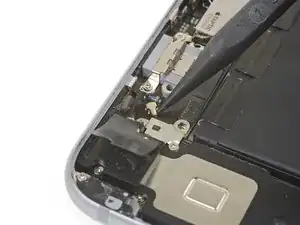
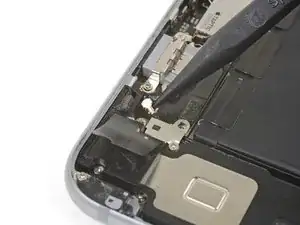
    • Heble und löse das Antennenkabel mit der Spudgerspitze oben vom Logic Board ab.

    I did not remove the antenna cable from the board because it does not necessary.

    István Borsányi -

    We were not able to remove the cable, despite following the tips; it meant that the speaker unit was tethered to the phone during repair, which is not ideal, but we took care of it and all went well.

    Matthew Dearden -

  6. qimK2fGrAUOWxHxM
    qimK2fGrAUOWxHxM
    tlvFaarUtguBjXVQ
    vQHHCTgY5VcZ6vyi
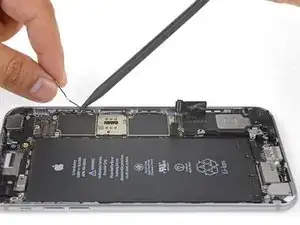
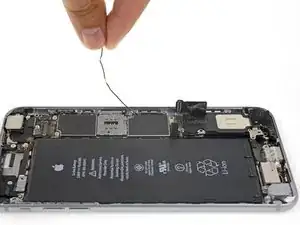
    • Hebe das Antennenkabel vorsichtig hoch und führe es aus der Kante des iPhones heraus. Benutze die Spudgerspitze, um das Kabel aus seinen Halteklammern zu heben.

    • Falls das Kabel nicht lang genug ist, um es anzuheben, dann löse diese Kreuzschlitzschraube, mit der das Logic Board befestigt ist, um mehr Spielraum zu haben.

    • Denke beim Zusammenbau daran, diese Schraube wieder anzuziehen.

    • Achte beim Zusammenbau darauf, das Antennenkabel unter der Ecke des Logic Boards durchzuführen.

    • Du kannst beim Zusammenbau, nachdem du das Antennenkabel wieder eingesetzt hast, auch den SIM Karteneinschub wieder einsetzten.

    • Falls du in irgendeiner Weise Widerstand spürst, dann halte an und stelle sicher, dass sich der Karteneinschub nicht am Antennenkabel verhakt hat.

    I didn’t need to do this step to remove the lightening charge port. In later steps I just put the speaker to the side with the cable attached. I also didn’t take the display off. I just left it at 90 degrees, attached to the iPhone box; like picture early. It made it much easier.

    Joel Sarmiento -

    I did not remove the antenna cable from the board because it does not necessary.

    István Borsányi -

    it also appears there is something under the sim tray keeping the antenna cable trapped and unable to remove all the way. luckily you dont need to remove it all the way to preform the repair.

    penguin2fish4rain -

  7. ykUNpAOehRyMM4KD
    ykUNpAOehRyMM4KD
    YXqg3QKovosQUUyT
    • Entferne die sechs Kreuzschlitzschrauben, mit denen der Lautsprecher am Rückgehäuse befestigt ist:

    • Eine 2,5 mm Schraube

    • Zwei 2,7 mm Schrauben

    • Eine 1,5 mm Schraube

    • Eine 1,7 mm Schraube

    • Eine 2,6 mm Schraube, mit der der Lautsprecher an der Unterkante des Rückgehäuses befestigt ist.

    Still working on it but I am not having any success getting the 2.6mm screw back in now 1+ hour into it.

    colfax80 -

    The blue one is the hard part to assembly back.

    István Borsányi -

    Do not pry-off the antenna from the speaker module!

    István Borsányi -

  8. dBNM36TPifSaKhkQ
    dBNM36TPifSaKhkQ
    IEQcC2KQUXUXIfdL
    vkMFJ4TFSCStgVP1
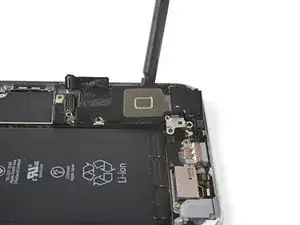
    • Setze das flache Ende des Spudgers zwischen die lange Kante des Lautsprechermoduls und dem Rand des Gehäuses ein.

    • Heble vorsichtig, um das Lautsprechermodul zu lösen.

    • Wenn das Modul gelöst ist, dann kannst du es anheben und zusammen mit dem daran befestigten Antennenkabel vom Smartphone entfernen.

    Peel off the adhered

    Anthony Fisher -

    There is also a screw to remove from the speaker near the lightning connector . It is a screw with the screwhole in the bottom of iPhone

    John Jaspers -

    Hi John,

    I think I noted all the screws in step 3 and step 7. Did I miss any?

    Arthur Shi -

Abschluss

Um dein Gerät wieder zusammenzubauen, folge dieser Anleitung in umgekehrter Reihenfolge.
Arthur Shi

Mitglied seit: 03/01/18

218620 Reputation

0 Kommentare