Werkzeuge
Ersatzteile
-
-
Schalte dein iPhone aus, bevor du mit der Demontage beginnst.
-
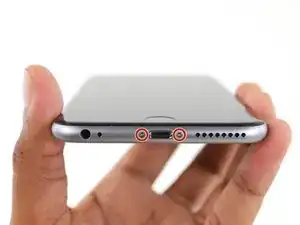
Entferne die zwei 3,4 mm Pentalobe Schrauben, die sich auf beiden Seiten des Lightning-Anschlusses befinden.
-
-
-
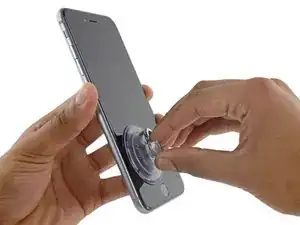
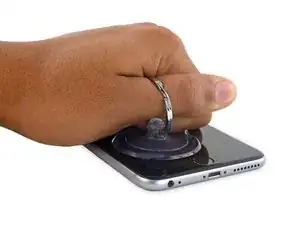
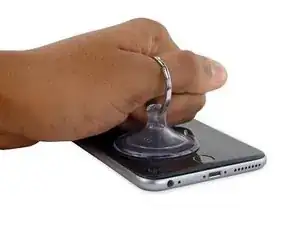
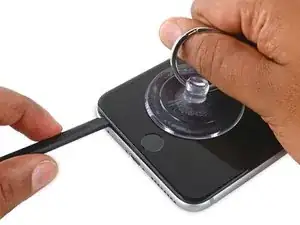
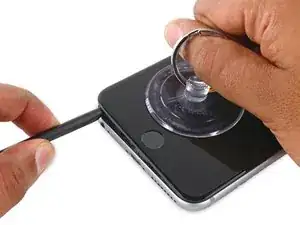
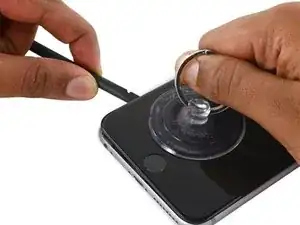
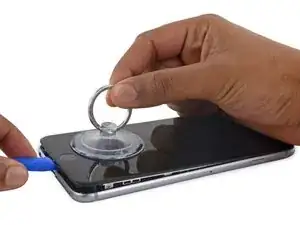
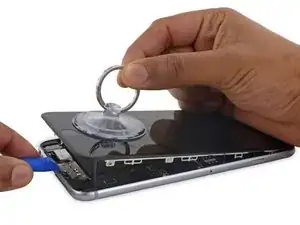
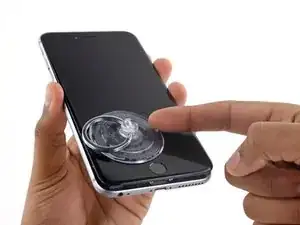
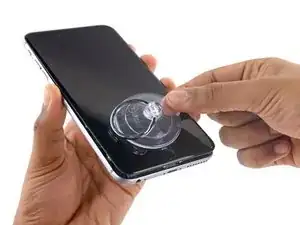
Ziehe mit etwas Kraft gleichmäßig den Saugnapf nach oben, um eine kleine Lücke zwischen dem Display und dem Gehäuse zu öffnen.
-
-
-
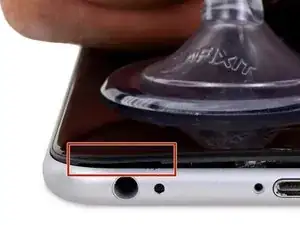
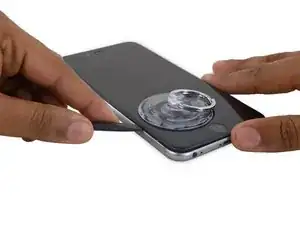
Die sicherste Stelle, um das iPhone zu öffnen, ist am Display über der Kopfhörerbuchse.
-
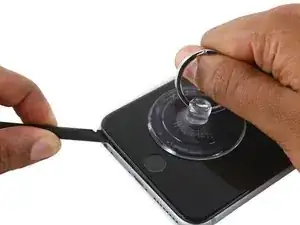
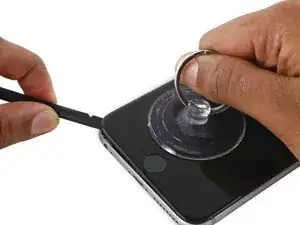
Während du noch am Saugnapf ziehst, führe das flache Ende eines Spudgers in die Lücke direkt über der Kopfhörerbuchse ein.
-
-
-
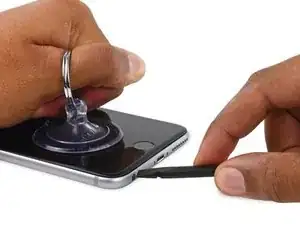
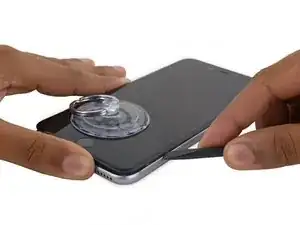
Während du immer noch leicht den Saugnapf nach oben ziehst, bewege das Ende des Spudgers unter die untere, linke Ecke vom Display.
-
-
-
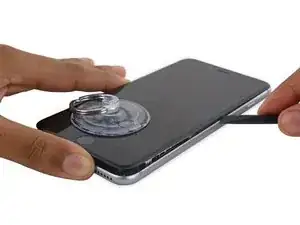
Führe die Spitze des Spudgers an der linken Seite des iPhones zwischen dem Display und dem Gehäuse hinauf.
-
-
-
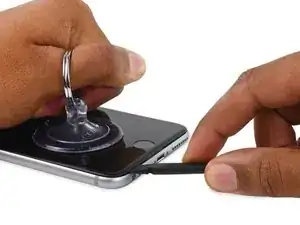
Führe das flache Ende des Spudgers unter der rechten Ecke des Displays ein.
-
Bewege den Spuger die rechte Seite hinauf.
-
-
-
Benutze ein Öffnungswerkzeug aus Plastik, um das Gehäuse unten zu halten und das iPhone zu öffnen.
-
-
-
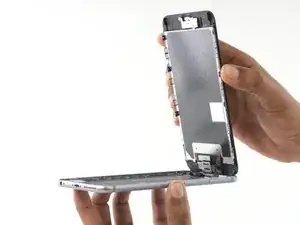
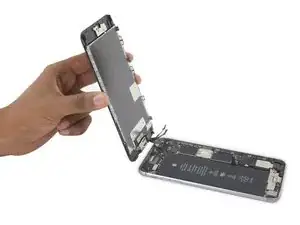
Greife das Display vorsichtig und öffne das iPhone, indem du das Display an den Befestigungen am oberen Ende drehst, um das iPhone zu öffnen.
-
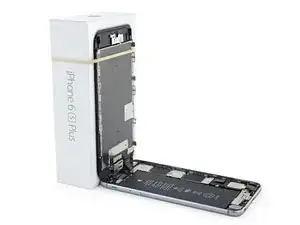
Öffne das Display zu ungefähr 90° und lehne es gegen etwas, um es während du arbeitest gestützt zu halten.
-
Füge ein Gummiband hinzu, um das Display sicher an seinem Platz zu halten, während du arbeitest. Das beugt Schäden an den Displaykabeln vor.
-
-
-
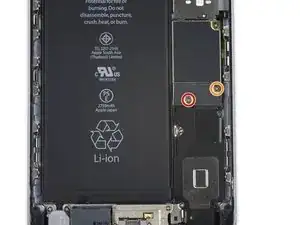
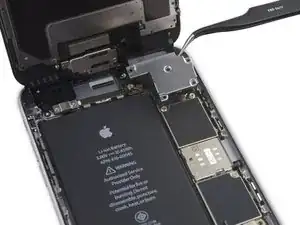
Entferne zwei Kreuzschlitz-Schrauben, mit denen die Abdeckung des Akuanschlusses am Logic Board fixiert sind. Sie haben folgende Längen:
-
Eine 2,9 mm Schraube
-
Eine 2,3 mm Schraube
-
-
-
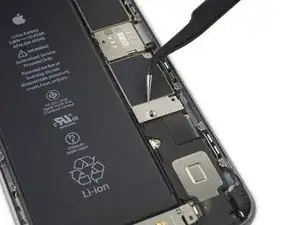
Heble den Akkustecker mit dem spitzen Ende eines Spudgers oder mit einem sauberen Fingernagel vorsichtig von seinem Anschluss auf dem Logic Board.
-
-
-
Drücke den Akkustecker vom Logic Board weg, so dass es während der Reparatur nicht zu einer unbeabsichtigten Verbindung mit dem Anschluss kommt.
-
-
-
Entferne die folgenden Kreuzschlitz-Schrauben:
-
Drei 1,3 mm Schrauben
-
Eine 1,6 mm Schraube
-
Eine 3,0 mm Schraube
-
-
-
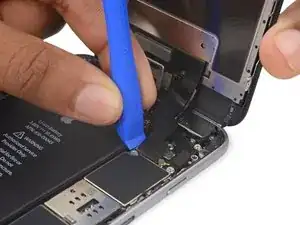
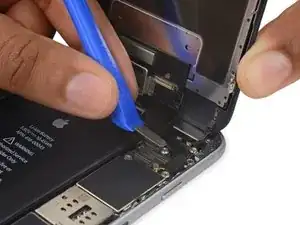
Mit einem Öffnungswerkzeug aus Plastik kannst du die Frontkamera und den Sensorkabelstecker abziehen.
-
-
-
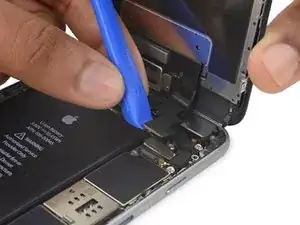
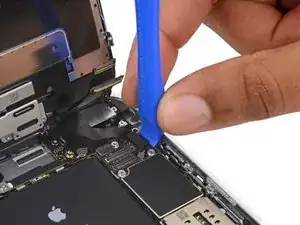
Löse das Touchscreen Kabel mit einem Öffnungswerkzeug aus Plastik von seinem Stecker auf dem Logic Board, indem du es gerade nach oben hebelst.
-
-
-
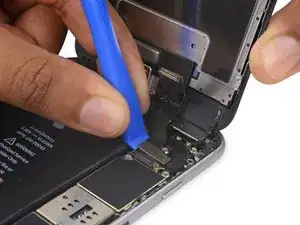
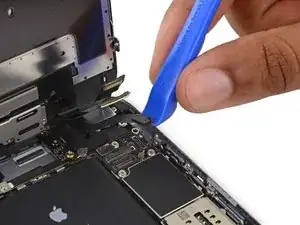
Heble das Kabel zum Home Button/Fingerabdrucksensor gerade nach oben und löse es aus seinem Anschluss auf dem Logic Board heraus.
-
-
-
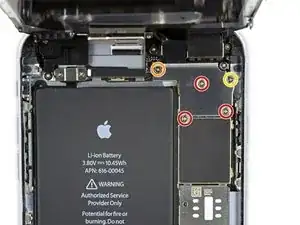
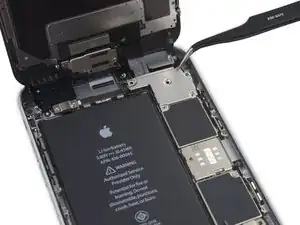
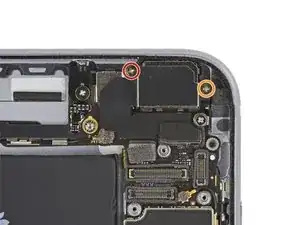
Entferne die folgenden Kreuzschlitz Schrauben über der Halterung der Kamera:
-
Eine 1,9 mm Schraube
-
Eine 2,4 mm Schraube
-
-
-
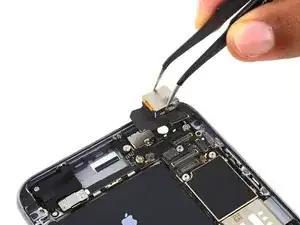
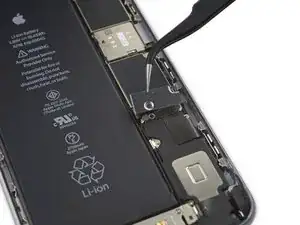
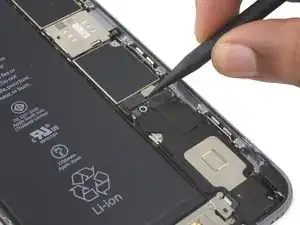
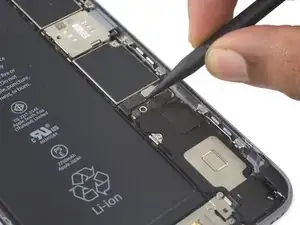
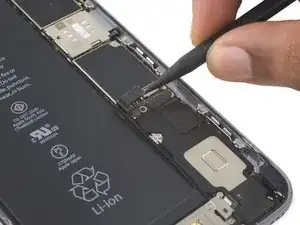
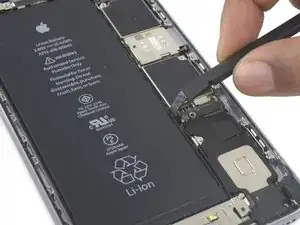
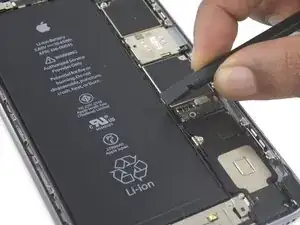
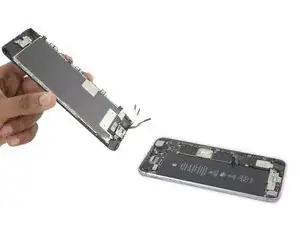
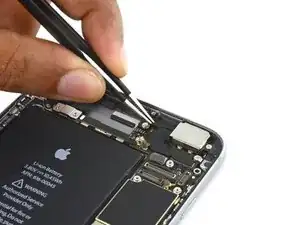
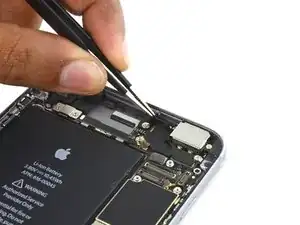
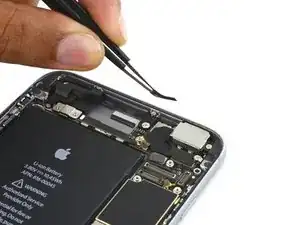
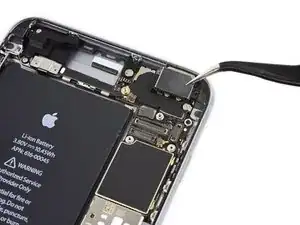
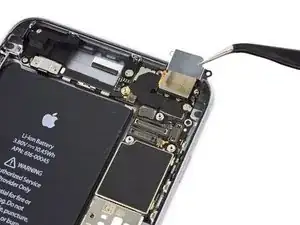
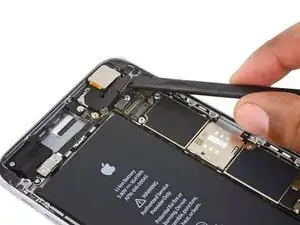
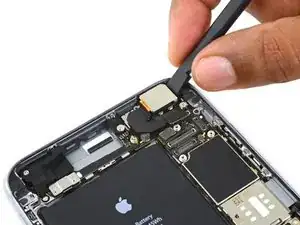
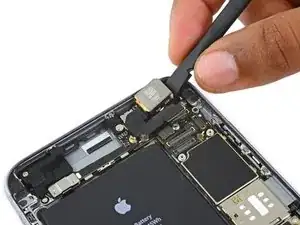
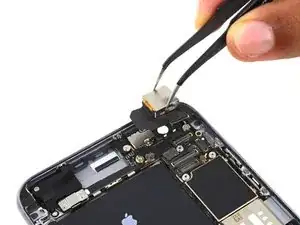
Führe das flache Ende des Spudgers zwischen die iSight Kamera und das hintere Gehäuse.
-
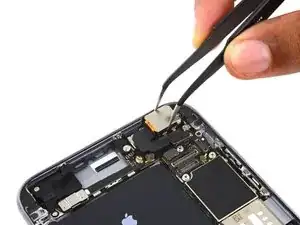
Nun hebelst du die Kamera vorsichtig aus ihrem Sitz heraus.
-
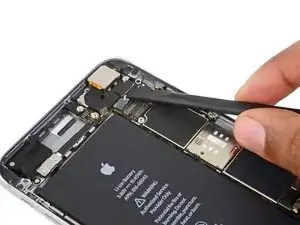
Arbeite die Schritte in umgekehrter Reihenfolge ab, um dein Gerät wieder zusammenzubauen.
35 Kommentare
really useful.
Great instructional video which saw me through the entire disassembly of my phone, and then clear and concise enough steps on the page to help me put it back together after installing the new camera. Thank you!!!!
I completed this repair at the same time as replacing my battery and headphone/lightening jack assembly. The problem I was experiencing with my camera was jittery video and unusable photos. The stabilization gimbal had died, though I am not sure that is the right word for it. It's more like it had an overdose. Anytime I would come to use the camera you could hear a tiny clicking noise as the lens armature shot itself about within its tolerances. Photos were out of focus and jittery, even when taken with the phone completely stable and untouched. I could most of the time just manage to make it take photos to deposit checks by holding the phone horizontally and in very bright sunlight, sometimes tapping the phone until the clicking noise stopped. Videos would hunt for focus and look as though I was actively shaking the camera, no matter what. Sometimes it was worse than others. Replacing this assembly completely fixed all issues.





Make sure you use the correct screw driver tip to remove these screws, which for the iPhone 6s Plus is the P2, otherwise you may strip the tip of the screw making it 10 times harder to remove. If once the screw is lose, it will not come off, use a magnet to remove it.
Miguel Perez -
If I do it by myself, will it damage the water resistant strip?
I know iphone 7 have it ,but I am not sure 6s plus have it.
Ganqian Zhu -
iPhone 6s has an adhesive gasket under the display, similar to the iPhone 7—however, it doesn’t add much in the way of waterproofing since the 6s has non-sealed openings in other parts of the phone. Water resistance on the 6s is primarily internal (seals around the logic board connectors, etc.). It may still be worthwhile to replace the adhesive on the 6s in order to help keep the display firmly seated so it doesn’t move/wobble at all under pressure, but the phone will continue to work fine whether you replace the adhesive or not.
Jeff Suovanen -
Salve nella procedura iniziale di smontaggio display con la ventosa non è menzionato il fatto di scaldare i lati del display per “ammorbidire” la striscia che incolla il display alla scocca.
Non è necessaria la cosa o è consigliabile ?
grazie
Hello, in the initial disassembling procedure with the suction cup, it is not mentioned how to heat the sides of the display to "soften" the strip that glues the display to the body.
Is not the thing necessary or is it advisable?
thank you
Daniele -
You’ve probably received your answer by now but for future enquirers, it does help the process of taking the screen off if heat is applied to the screen. If you have a hair Dryer use that on a low setting to heat the edges of the screen until it’s almost too hot to touch then slip very thin metal spudger around the edge to cut the adhesive. The carefully lift the screen with the help of the spudger and continue with your repair
Cheers Wayne
Wayne Lyell -
How do I know that the Battery has ZERO Charging Cycles on it when it arrives ? Is there a (downside) to Higher Capacity batteries ? It is INCREDIBLY DIFFICULT to maintain a “Zero Chinese Products Lifestyle”, so how do I know that I’m not getting a deficient Chinese battery, potentially a refurb. battery ?
integritybuilders -
When your repair is complete, you can use coconutBattery to check your new battery stats and cycle count. (A properly tested battery may already have a charge cycle or two on it.) Avoid higher capacity batteries on iPhones—they’re generally either gimmicks, unsafe, or both. As far as the quality of the part, that comes down to how much you trust your supplier and whether they guarantee the product.
Jeff Suovanen -
So I need to empty the battery to zero percent?
johnpatrickanat -
Below 25%, exactly as stated in the instructions. There’s no benefit to draining it further than that, and in fact you’ll slightly shorten the service life of the battery by draining it all the way to zero. Follow the instructions exactly as written—if you go off-script, you’re a lot more likely to break something.
Jeff Suovanen -
So my screen shattered completely and the screen first had colored lines on tge while right side then it went out completely. If i get an lcd and digitizer replacement I'd that oing to fix it
shellietheleo -
I would initially recommend a well-lit, comfortable area and placing the screws on a white piece of paper with the screw sizes written down (apparently there are magnetic mats, also). Also, I found placing the phone on a paper towel is good so that if a screw is dropped, it will lessen the likelihood of bouncing away.
Lou Fazio -