Einleitung
Kannst du deine SIM Karte nicht mehr aus deinem iPhone holen? Benutze diese Anleitung, um den defekten Auswurfhebels der SIM Karte auszutauschen, oder wieder neu einzusetzen.
Werkzeuge
-
-
Schalte dein iPhone aus, bevor du mit der Demontage beginnst.
-
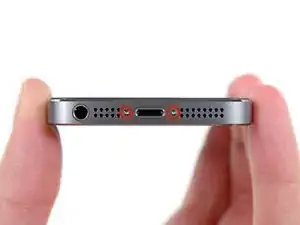
Entferne die zwei 3,9 mm Pentalobe-Schrauben neben dem Lightning Connector.
-
-
-
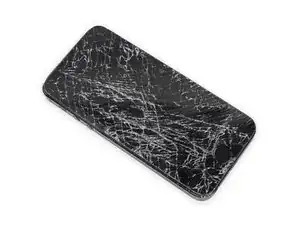
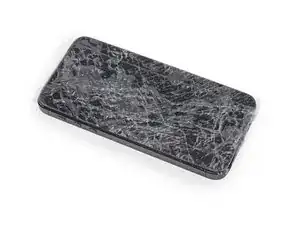
Falls dein Displayglas gesprungen ist, halte die Bruchstelle zusammen und vermeide Verletzungen, indem du das Glas mit Tape versiehst.
-
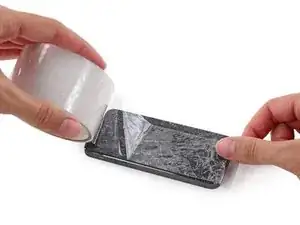
Lege sich überlagernde Streifen von durchsichtigem Paketband über das iPhone Display, bis die gesamte Frontseite bedeckt ist.
-
-
-
Unabhängig vom verwendeten Werkzeug musst du darauf achten das ganze Display auf einmal abzuheben.
-
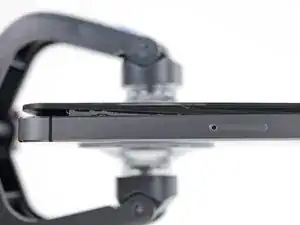
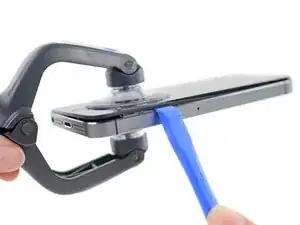
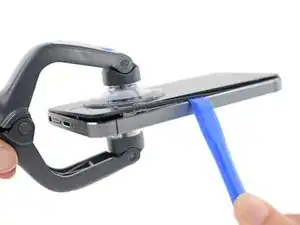
Wenn sich der Bildschirm vom Rahmen löst, wie es im ersten Bild zu erkennen ist, schiebe ein Plastik Opening Tool zwischen den Plastikrahmen und den unteren Teil des Gehäuses, um die Metallklammern zu lösen.
-
-
-
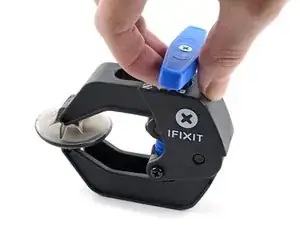
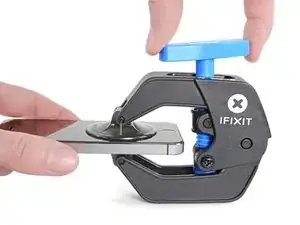
Drücke den blauen Griff zum Scharnier hin, um den Öffnungsmodus einzustellen.
-
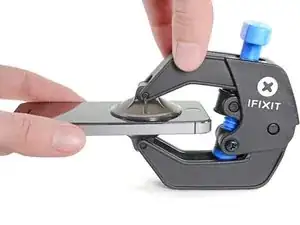
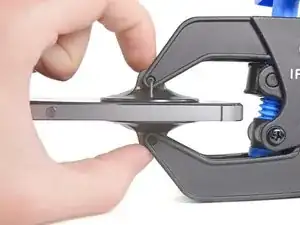
Bringe die Saugheber direkt über dem Home Button am Display an, einen auf der Vorderseite, den anderen auf der Rückseite.
-
Drücke die Saugheber auf den Oberflächen fest.
-
-
-
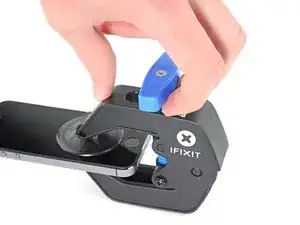
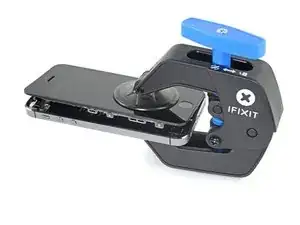
Drücke den blauen Griff vom Scharnier weg in die Stellung für den Öffnungsmodus.
-
Drehe den Griff im Uhrzeigersinn, bis du merkst, dass sich die Saugheber dehnen.
-
Warte eine Minute, damit sich der Kleber allmählich ablösen kann und sich das Display unten löst.
-
Überspringe die nächsten drei Schritte .
-
-
-
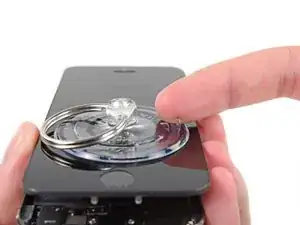
Wenn du keinen iSclack besitzt, benutze einen einzelnen Saugnapf, um die Display Einheit anzuheben:
-
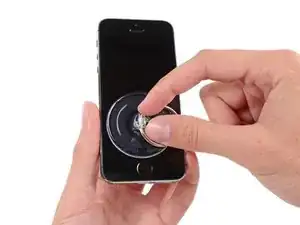
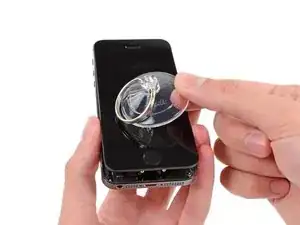
Presse einen Saugnapf auf das Display, direkt über dem Home Button.
-
-
-
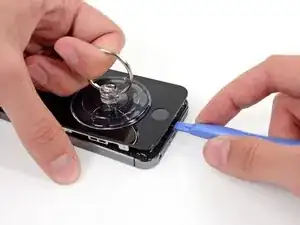
Während du das iPhone mit einer Hand unten hältst, ziehe an dem Saugnapf, um die Display Einheit auf der Home Button Seite etwas vom hinteren Gehäuse zu entfernen.
-
Heble mithilfe eines Plastik Opening Tools die Kanten des hinteren Gehäuses vorsichtig nach unten, weg von der Display Einheit, während du mit dem Saugnapf nach oben ziehst.
-
-
-
Ziehe an an der Kunststoffnoppe, um das Vakuum des Saugnapfes zu öffnen.
-
Entferne den Saugnapf vom Bildschirm.
-
-
-
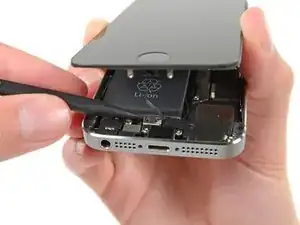
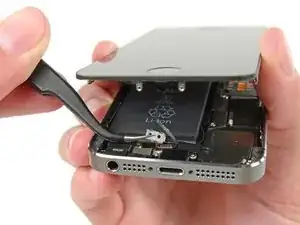
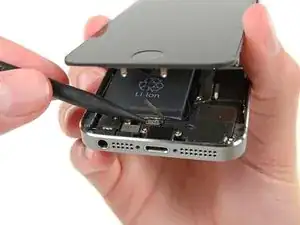
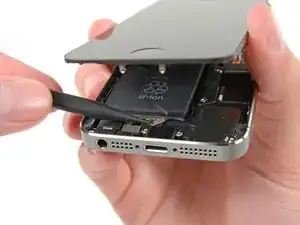
Öffne das Telefon weit genug, um die Metallklammer, die das Home Button Kabel bedeckt, offenzulegen.
-
Nur die Original Home Button Einheit ermöglicht die Nutzung der Touch ID Funktion. Falls das Kabel beschädigt wurde, stellt die Installation einer neuen Home Button Einheit nur die normalen Funktionen wieder her, nicht aber die Touch ID Funktion.
-
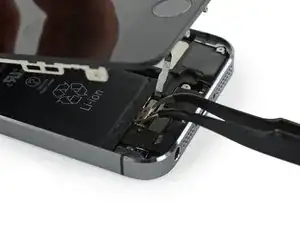
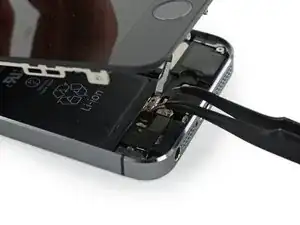
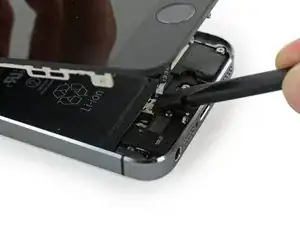
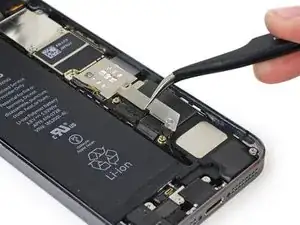
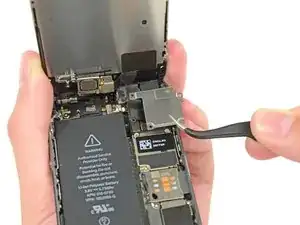
Benutze die Spitze eines Spudgers, um die Klammer freizulegen und sie mit einer Pinzette zu entfernen.
-
-
-
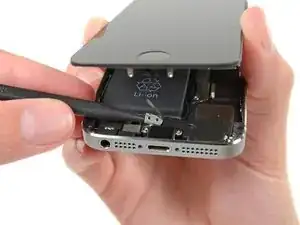
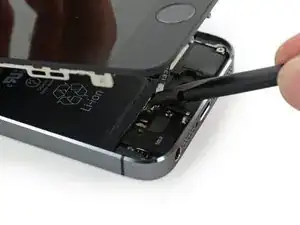
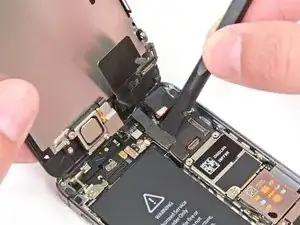
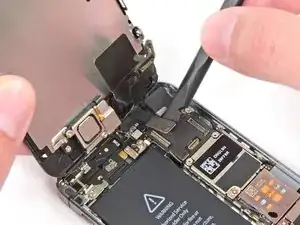
Benutze die Spitze eines Spudgers, um die Home Button Kabelverbindung nach oben aus ihrem Anschluss zu hebeln.
-
-
-
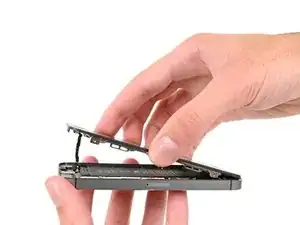
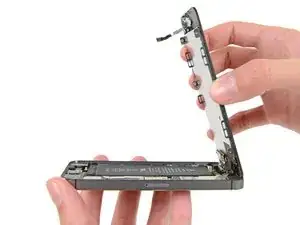
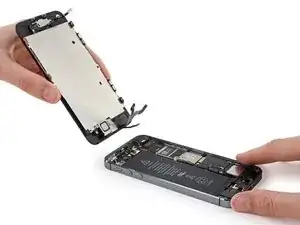
Sobald der Stecker gelöst wurde, ziehe die Einheit am Ende mit dem Home Button weg vom hinteren Gehäuse, indem du das obere Teil des Telefons als Drehgelenk benutzt.
-
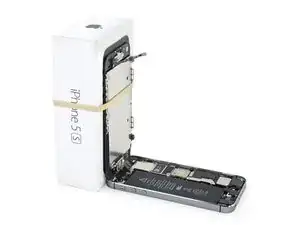
Öffne das Display bis zu einem 90°-Winkel und lehne es gegen einen festen Gegenstand, um es beim Arbeiten in dieser Position zu halten.
-
Ein Gummiband könnte hilfreich sein, um es in dieser Position zu halten und sicherzustellen, dass die Displaykabel nicht beschädigt werden.
-
-
-
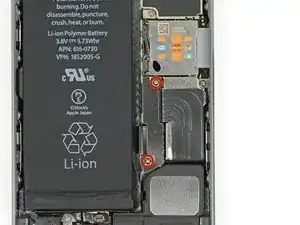
Entferne die beiden 1,6 mm Kreuzschlitz #000 Schrauben, die die Metallabdeckung über dem Akkuanschluss auf dem Logic Board befestigen.
-
-
-
Heble den Akkustecker mit einem Spudger vorsichtig von seinem Anschluss auf dem Logic Board.
-
-
-
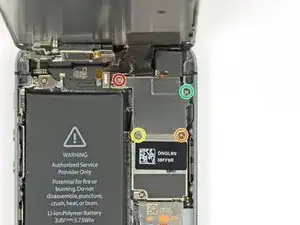
Entferne die folgenden Schrauben, die die Abdeckung der Displaykabel am Logic Board befestigen:
-
Eine 1,7 mm Kreuzschlitz #000 Schraube
-
Eine 1,2 mm Kreuzschlitz #000 Schraube
-
Eine 1,3 mm Kreuzschlitz #000 Schraube
-
Noch eine 1,7 mm Kreuzschlitz #000 Schraube
-
-
-
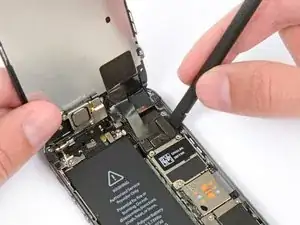
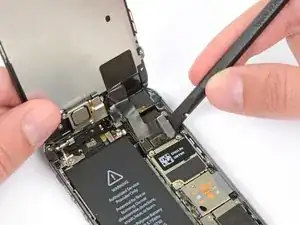
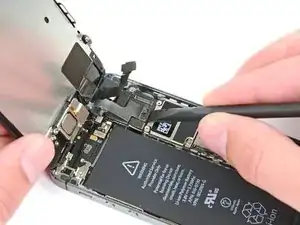
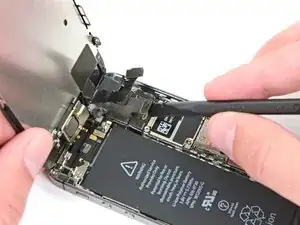
Benutze das flache Ende eines Spudgers, um die Frontkamera sowie das Sensorkabel zu trennen.
-
-
-
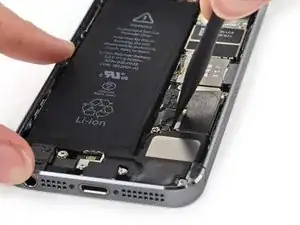
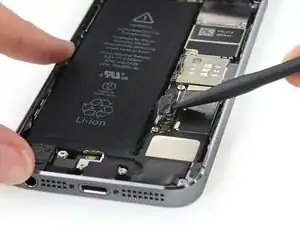
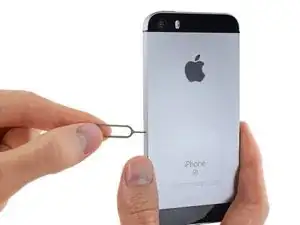
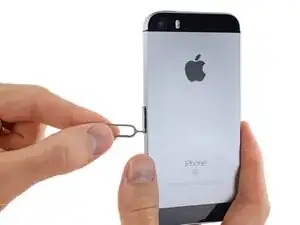
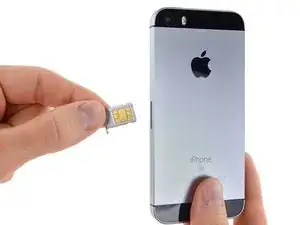
Setze ein SIM Karten Auswurfwerkzeug oder eine aufgebogene Büroklammer in das kleine Loch am SIM Einschub ein.
-
Drücke darauf, um den Einschub herausspringen zu lassen. Dazu brauchst du eventuell recht viel Kraft.
-
-
-
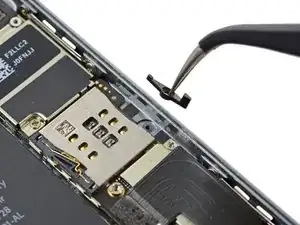
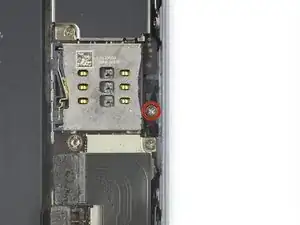
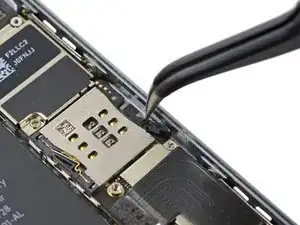
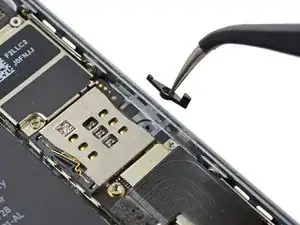
Entferne die 2,1 mm Kreuzschlitzschraube (Phillips #00), die den SIM Karten Auswurfhebel befestigt.
-
Um dein Gerät wieder zusammenzusetzen, folge den Schritten in umgekehrter Reihenfolge.

I used a white terrycloth hand towel as my work surface and to position and retain all the screws and part in their relative positions, so I didn't mix things up. I also magnetized the screwdriver tips and that made it very easy to deal with these tiny, tiny screws.
Magnus Dalen -
For a secure working, put a small pot with lid on your workplace. When the battery starts burning, throw it in the pot, close it with the lid and get the pot safely out of the building, e.g. on the balcony or throw it out of the window. Do not try to extinct the battery with water, just let it burn out outside. This might take some hours.
Raymond Willems -
This is a really helpful one! My battery caught fire but luckily it was only one cell and not the entire battery. So it was done after a few seconds and I could go on with the replacement.
Matthias Blab -
Directions should say “use the P2 screwdriver head.”
William Kolb -
This step should have included that information. It was very helpful and important. Thank you very much.
Jeffery -
ifixit supplied a set of replacement philips screws (marked “Liberate!”). Thanks but I’m sticking with the pentalobe since they fit more securely than philips which have a chance of stripping if not held with the right amount of pressure.
Don Libes -
What are you supposed to do if the screws are stripped or won’t come out. No luck with the tweezers either.
ibrokeit -
Yep i‘ve had the same problem. One screw out, one that won‘t budge!!!
Stennett -
“cheater” reading glasses are a big help. Carolyn
Carolyn Green -
In this step, it is the P02 screwdriver from the kit (see that the nib has five sides , exactly for ‘pentalobe’ screws). All the other steps involving screws it was the Philips 000 (there was a third screwdriver Y 000 in the kit which I did not use). Did not have any problems at all removing and readding screws back through the process.
Andre Silva -
I'm trying to fix my 5s’s but one has some water damage, and impeccable screen but won't turn on,then I have another one that has no water damage, screens a bit busted but won't turn because of the screen. If I use the good screen from the water damaged phone would it work?
samuel.m.fudge -
After removing the phone from a very good plastic case and before I started the repair I cleaned the entire phone with a soft cloth misted with rubbing alcohol. That removes all the grunge which builds up in the seams of the phone and the small spaces inside the case. Having a clean phone to work on makes the job a lot easier and prevents grunge from falling into the phone.
David Park -
General comment about the screwdriver tips and reassembly: If you get a screw nicely set in place using tweezers and then use the screwdriver, the magnet will probably pull the screw out before you can tighten it. If this is a problem use just the tip (without the handle) to start the screw, then tighten using the handle.
Kevin Patfield -
DO NOT disconnect the screen.
Benjamin Piscopo -
Having two SE’s needing batteries, I ordered an extra battery. The extra battery did not come with the Phillips replacement screws. It would be helpful if every battery came with a set of case replacement screws.
Dorothy Campbell -
Upon reassembly I found it useful to squeeze the phone right above the screws so everything lines up nice. I noticed that when I didn’t do this the new Phillips screws were trying to go in crooked. So just holding the phone together helps.
Samara Sullivan -
hello i am replacing my iphone 5s battery but i am stucked because the adhesive broke whiles pulling it out
before i started i made sure my battery was 0% but i am afraid that when i mistakenly puncture it with the spudger it might catch fire
please is the battery capable of catching fire when it has no power (0%)?
please can someone give me the honest answers before i continue
thank you
George Rockson -
The screws in my iPhoneSE were not P2 (1,2mm) but P1 (0,8mm). I had to order an extra screwdriver which is not available at iFixit.
Tadeus Nawka -
Instructions were fine until removing the battery , No adhesive strip at the bottom of the battery . Unable to remove battery as the battery was stuck sold with adhesive but could not get at the adhesive strip to remove battery . seems whoever put the battery together did not put a strip across the bottom . Had the phone from new and this was the first time I tried to replace the battery . Now I need a new phone
J Caley -
Instructions fine until removing the battery . No strip at bottom of the battery hence impossible to get at the adhesive strips around the battery . This must have been done in the factory as I have had the phone from new and this was the first time the battery was being replaced . Cheesed off as I now need a new phone
J Caley -
30 minutes - to an hour? I gave up after removing the screws and spending an hour trying to lift the display with a suction pad.
harwood -
iPhone 5s maderbored
Rahan Ali -