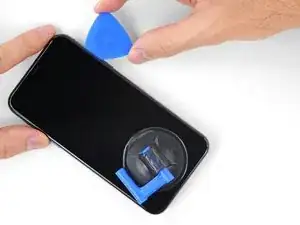
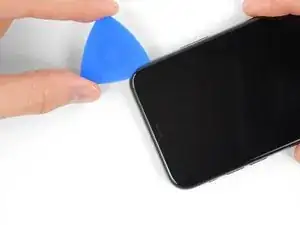
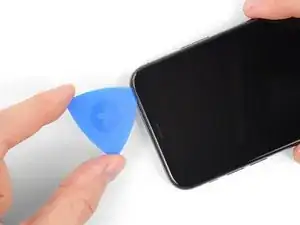
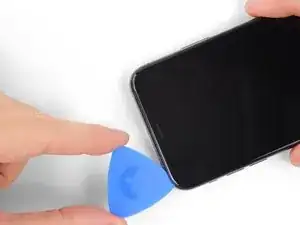
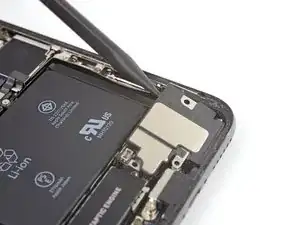
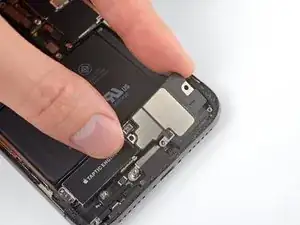
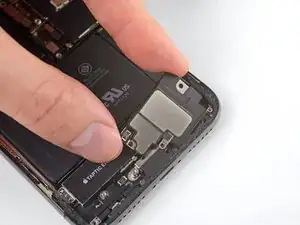
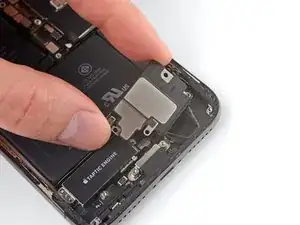
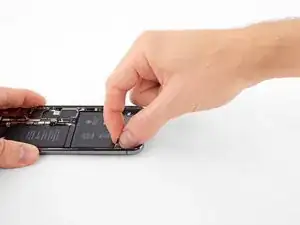
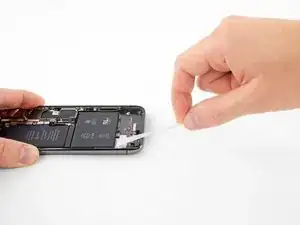
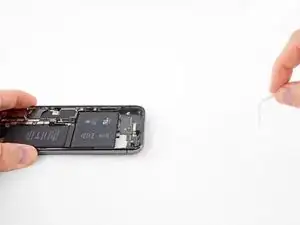
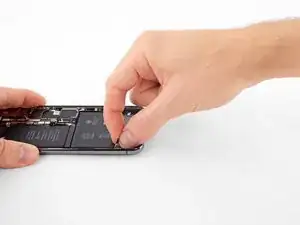
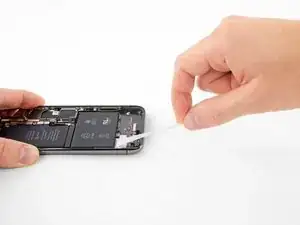
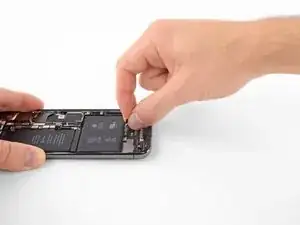
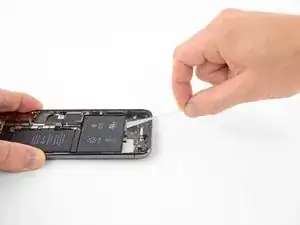
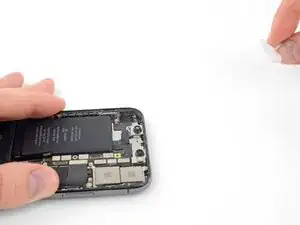
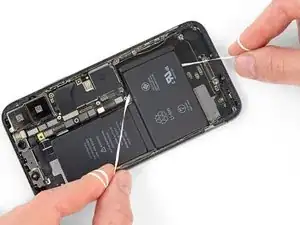
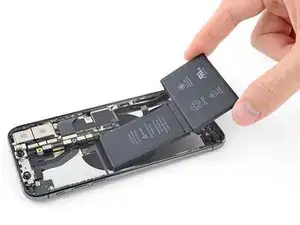
Einleitung

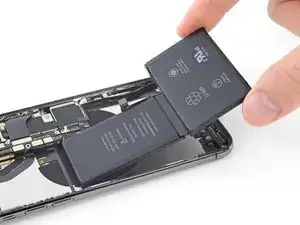
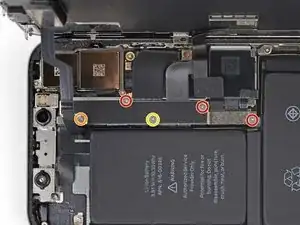
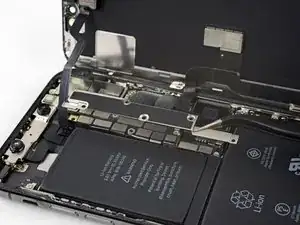
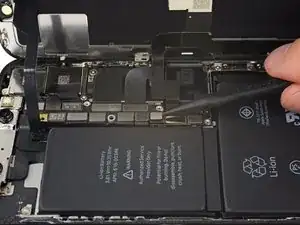
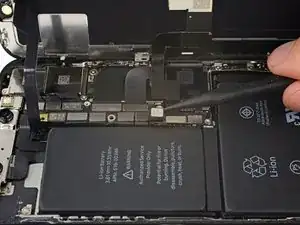
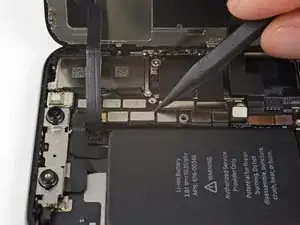
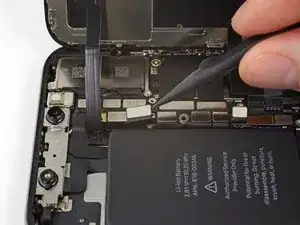
iPhone Akkus werden im Laufe der Zeit schwächer, sie verlieren die Fähigkeit die Ladung gut zu halten. Apples Akkus sind so gebaut, dass sie für bis zu 500 Ladezyklen 80% der Ladung halten, das sind etwa 18 - 24 Monate bei den meisten Benutzern. Wenn der Akku schwach wird, dann läuft das iPhone auch langsamer. Gewinne mit Hilfe dieser Anleitung wieder volle Leistung, indem du den Akku austauschst.

Wenn dein Akku aufgebläht ist, musst du entsprechende Vorsichtsmaßnahmen treffen.

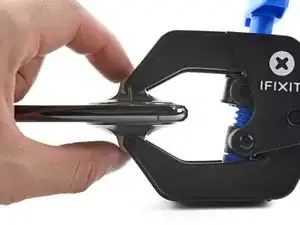
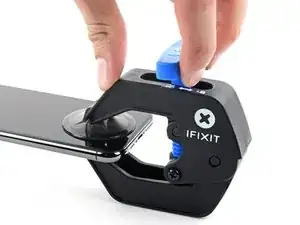
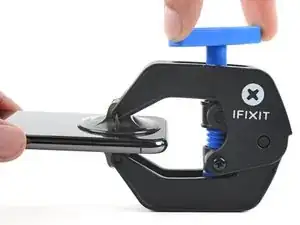
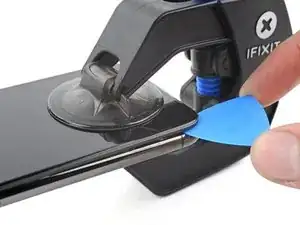
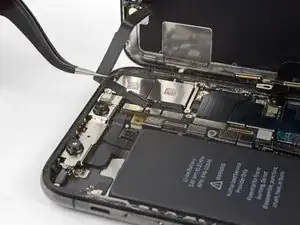
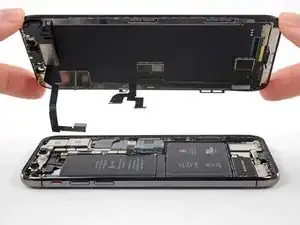
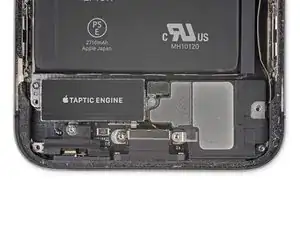
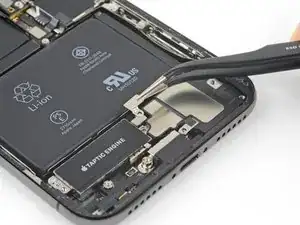
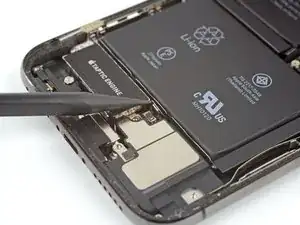
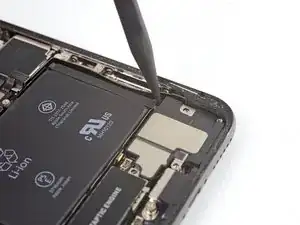
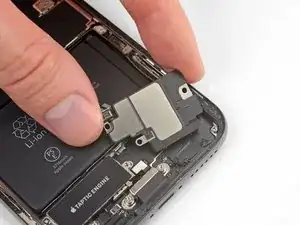
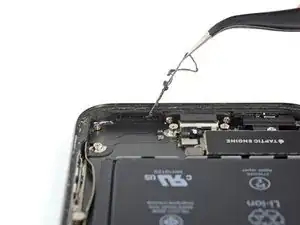
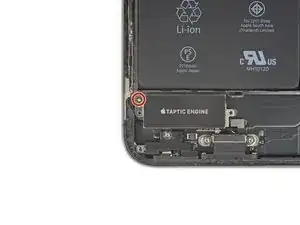
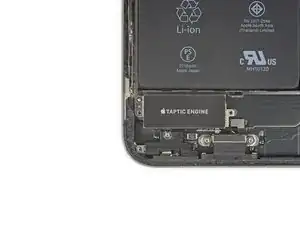
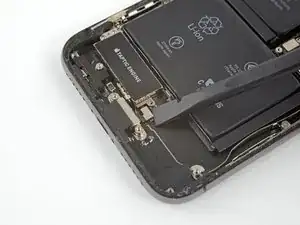
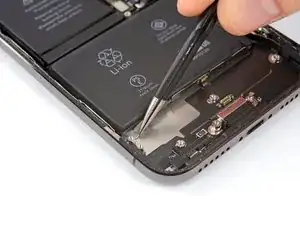
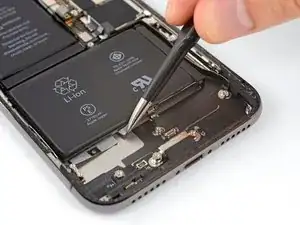
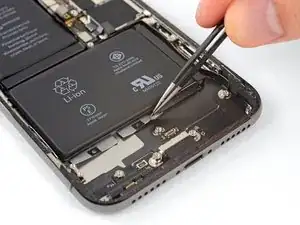
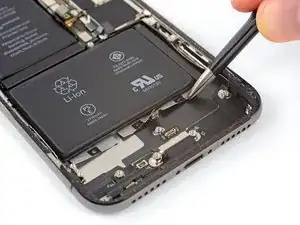
Um besser an die Klebestreifen des Akkus zu gelangen, zeigt dir diese Anleitung, wie du das Display ganz ablöst, den unteren Lautsprecher ausbaust und die Taptic Engine entfernst.

Für eine optimale Leistung sollte der neu eingebaute Akku nach Abschluss der Reparatur kalibriert werden: Lade ihn auf 100% auf, und lasse ihn mindesten zwei weitere Stunden laden. Benutze dann dein iPhone bis es sich aufgrund eines leeren Akkus ausschaltet. Lade den Akku dann erneut ohne Unterbrechung auf 100% auf.

  1. BO6lEF2W1kX5S1sI
    • Bevor du anfängst, sollte der Akku deines iPhones auf unter 25% entladen sein. Ein geladener Lithium-Ionen Akku kann Feuer fangen und/oder explodieren, wenn er beschädigt wird.

    • Schalte dein iPhone aus, bevor du daran arbeitest.

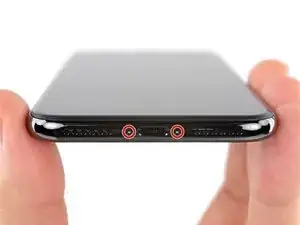
    • Drehe die beiden 6,9 mm langen Pentalobe Schrauben an der unteren Kante heraus.

    • Wenn die Schrauben beschädigt sind, musst du sie ersetzen.

    • Wenn du ein iPhone öffnest werden seine wasserfesten Dichtungen beschädigt. Halte Ersatzdichtungen bereit, bevor du nach diesem Schritt weitermachst, oder vermeide es, dein iPhone der Feuchtigkeit auszusetzen, wenn du es ohne neue Dichtungen wieder zusammenbaust.

    There are 6.81mm long screws!

    Daniel -

    One of the pentalobe screws is stripped :( - suggestions for how to get it out?

    cgtyoder -

    same situation here
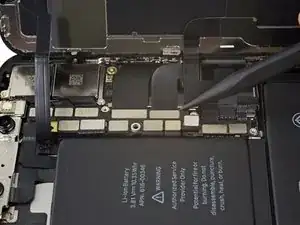
    kaunomarcius -

    Same issue for me too, how do I get the stripped screw out?

    patronics -

    Update: I was able to get the “stripped” screw out using another Pentalobe-2 screwdriver bit from another company. It seems it wasn’t the screw, but the screw driver that was actually stripped. Hence why the other screwdriver kit I got came with 3 of this bit, I suppose.

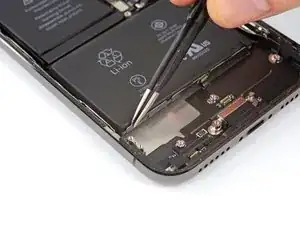
    patronics -

    I ended up going to a jewelry store, and they drilled down into the screw, with of course an incredibly tiny bit. That allowed me to insert the P2 driver, and I was able to unscrew it at that point. Good luck!

    cgtyoder -

    Same issue with the stripping. The tip of the iFixit P2 head in my $70 kit just ground off on the first screw and that was that. Not much you can do.

    Kyle Harris -

    yes correct the same happened to me, the screws were perfect shaped never been open and as soon as i used the P2 it stripped the screws, seems like the P2 is slightly smaller but Dremel kit with a very small drill bits and precise knife tool is the way to go.

    Dulce Vidal -

    This step in automatically followed through, without any thought. Why remove these screws? Can anybody explain? The Screen is detachable all the same, with them well screwed in…

    Uri -

    These screws attach to a plate that’s part of the screen half of the phone. If you succeed in detaching the screen without removing those, it would seem reasonable that you will have damaged that plate or its ability to keep the two halves together.

    Dan Long -

    @Dan Long is right

    Uri -

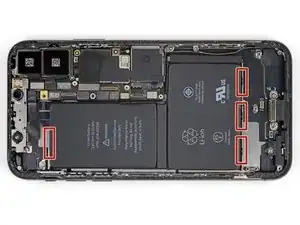
    Clean out the pentalobe screw heads first so the tool goes all the way in. A small sewing needle works well to loosen any build up and then press some putty/chewing gum into the screw head and pull away quickly for a final clean out.

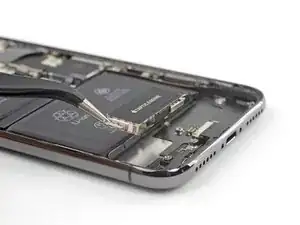
    William Olstad -

    The this kit should include screws because you’re going to strip them. Can’t even get past step one. Did anybody figure this out

    justin -

    Never opened my phone ever, when I went to look at the first step.. I noticed one of my screws was stripped. I thought it was impossible, but I removed the non stripped one, then once I got to the stripped one.. I learned my assumptions were correct. I bought this one straight from the apple site years ago ahaha Any tips to remove the stripped screw?

    Clarence Williams -

    William Olstad's tip about cleaning the screws with a needle and a bit of poster putty worked well for me. There was a lot of crud in there! The opening is shallow, so it's easy to see how the screwdriver wouldn't catch with even a bit of grit in the way, No problem getting the pentalobe screws out with the ifixit screwdriver.

    punkinann -

  2. JYhTvDYuGLQw3jiI
    • Das Öffnen des iPhones wird leichter, wenn du seine Unterkante erwärmst und damit den Kleber darunter aufweichst.

    • Benutze einen Haartrockner oder ein Heißluftgebläse oder bereite unseren iOpener vor. Erwärme damit die Unterkante des iPhones etwa eine Minute lang, um den Kleber darunter aufzuweichen.

    General tip regarding heating necessary to remove adhesive:

    consider using a heated tip of a small screwdriver or metal spudger (not the one made of plastic, provided in kit), rather than to heat the device itself.

    Uri -

    You then need to be careful about the temp of the tool which if hot enough can melt plastic components or harm them. Keeping the heat source (heat gun) far enough away from the object that you’ll eventually melt the glue but would be much harder to melt components. I try to keep 4” or 5” gap between the source & object

    Sandman619 -

    Thanks for the info. Could a air convector do the job

    dominique.br -

    When opening a device that has previously been worked on, and on which the adhesive might not have been replaced, be extremely carful when opening the phone. It will open much more easily than expected. If you’re not careful you might rip a cable.

    jonpol -

    Is this tool required or can I just use the Anti-Clamp by itself.

    Mikail -

  3. aaO4KYlBJShASHjk
    aaO4KYlBJShASHjk
    P14Q2IsesXcDg3bR
    FL4SxVBCEswKVb4Q
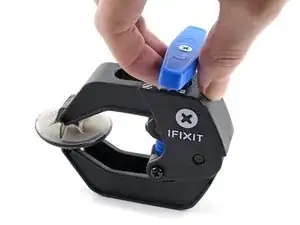
    • Wir haben die Anti-Clamp entwickelt, um das Öffnen von Geräten zu erleichtern. Die nächsten beiden Schritte zeigen, wie sie verwendet wird. Wenn du sie nicht benutzen willst, überspringe die nächsten zwei Schritte und folge einer anderen Methode.

    • Genaue Anweisungen für die Anti-Clamp findest du hier.

    • Drücke den blauen Griff zum Scharnier hin, um den Öffnungsmodus einzustellen.

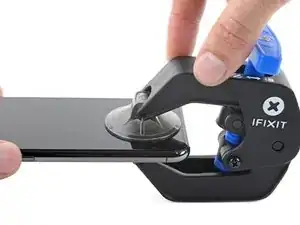
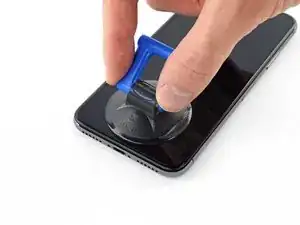
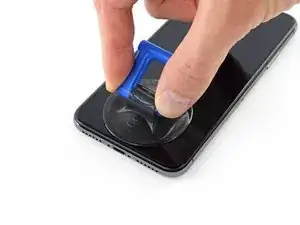
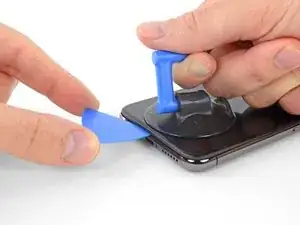
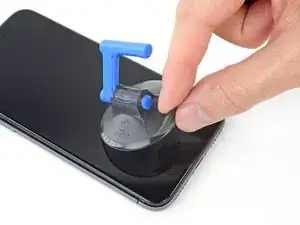
    • Setze die beiden Saugnäpfe am unteren Rand des iPhones an, einen auf der Vorder-, den anderen auf der Rückseite.

    • Drücke die Saugheber auf den Oberflächen fest.

    • Wenn die Saugheber nicht gut auf den Flächen haften, dann klebe Paketband darüber.

  4. kTgWgl5YBSrfGm6a
    kTgWgl5YBSrfGm6a
    PEAeHxQEDm6MFsIP
    ARgsyvJBDFcfSDoP
    • Drücke den blauen Griff vom Scharnier weg in die Stellung für den Öffnungsmodus.

    • Drehe den Griff im Uhrzeigersinn, bis du merkst, dass sich die Saugheber dehnen.

    • Achte darauf, dass sich die Saugheber weiterhin gegenüber stehen. Wenn sie sich nicht mehr gegenüber stehen, dann löse die Saugheber ein wenig ab und schiebe sie in die richtige Position.

    • Warte eine Minute, damit sich der Kleber allmählich ablösen kann und sich das Display unten löst.

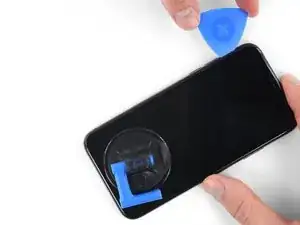
    • Wenn der Spalt groß genug ist, dann setze ein Plektrum an der Unterkante ein.

    • Wenn es nicht gelingt, mit der Anti-Clamp einen ausreichend großen Spalt zu erzeugen, dann erwärme die Stelle nochmals und drehe den Griff eine halbe Umdrehung im Uhrzeigersinn weiter.

    • Drehe den Griff jeweils nicht mehr als eine halbe Umdrehung weiter und warte jedes Mal eine Minute lang. Gib der Anti-Clamp Zeit, ihre Arbeit zu erledigen.

    • Überspringe die nächsten zwei Schritte .

    DO NOT separate the glass from the plastic bumper or rim around it. These instructions don't clarify that the pick has to be inserted between the plastic rim and the metal body. It is likely that the glass will lift slightly off the plastic surround before the plastic will lift out of the metal body. I had success sliding a card or pick back and forth along the bottom edge of the plastic rim while pulling on the suction cup. Eventually there was a space large enough for the pick to go under the plastic rim.

    Anessa -

  5. qXGGZ2MpZIYeQjKI
    qXGGZ2MpZIYeQjKI
    tGDwxj5neYkh3MDh
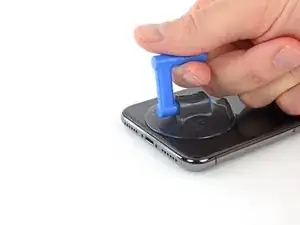
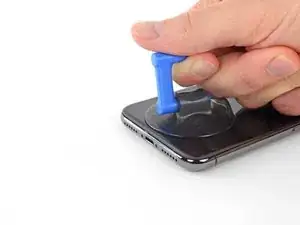
    • Wenn du einen einzelnen Saugheber benutzt, dann setze ihn am unteren Rand des iPhone auf, wobei du den gebogenen Teil vermeiden musst.

    • Wenn das Displayglas sehr zersplittert ist, dann wird das Anbringen des Saughebers vielleicht möglich, wenn du die Scheibe mit starkem durchsichtigem Klebeband abklebst. Alternativ kannst du auch sehr kräftiges Klebeband anstelle des Saughebers benutzen. Wenn alles nicht funktioniert, dann kannst du den Saugheber mit Sekundenkleber anbringen.

    If you were using some form of screen protector, it may come off first as soon as you pull on the suction cup. Do not be alarmed. That is normal behavior.

    Alain-Daniel Wa-Baguma -

    3m VSB double stick tape will stick to the screen when the suction cups fail (see my comment on step 1)

    Tawan Khamapirad -

  6. mQXXaF3tPiGDXl2a
    mQXXaF3tPiGDXl2a
    uTXCGQFa5j4E5T3Y
    DWfsuj4RCooAtKRa
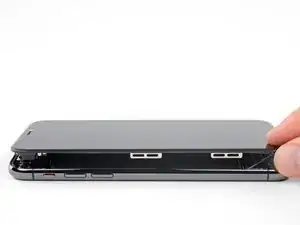
    • Ziehe fest und gleichmäßig am Saugheber und erzeuge dadurch einen kleinen Spalt zwischen Frontscheibe und Rückgehäuse.

    • Setze ein Plektrum in den Spalt ein.

    • Der wasserfeste Kleber, der das Display festhält, ist sehr stark. Um den anfänglichen Spalt zu erzeugen, musst du recht viel Kraft aufbringen. Wenn der Spalt schwer zu öffnen ist, musst du mehr Wärme anwenden. Bewege die Scheibe vorsichtig hoch und runter und löse so den Klebstoff, bis der Spalt groß genug ist, um das Werkzeug einzusetzen.

    In addition to safety goggles, I would recommend you also wear good gloves to avoid getting cut with the glass as you try to pry it open.

    Alain-Daniel Wa-Baguma -

    The top about applying more heat and gently rocking the screen up and down to weaken the adhesive did the trick for me. Thank you!

    Monil Shah -

    There needs to be more clarity on where to shove the opening pick into. There is actually two openings that the pry tool can be forced into: one below the black plastic bezel, and one above the black plastic bezel. When I heated my screen with a warming pad and pulled up the suction cup, it actually pried apart above the black plastic bezel which removed the touch screen from the display panel. With this being the first newer iPhone I'd opened since the 3GS, I didn't realize that I was opening the wrong opening as the directions only mentioned one opening and did not warn of this. I was pretty disappointed in the lack of mentioning this, as I was taking my time and following it to the tee. As a result, it destroyed my original iPhone screen.

    Caleb Davison -

    DO NOT separate the glass from the plastic bumper or rim around it. As someone else noted, these instructions don't clarify that the pick has to be inserted between the plastic rim and the metal body of the phone. When pulling upwards with the suction cup, it is likely that the glass will lift slightly off the plastic surround before the plastic will lift out of the metal body. I had success sliding a card or pick back and forth along the bottom edge of the plastic rim while pulling on the suction cup. Eventually there was a space large enough for the pick to go under the plastic rim.

    Anessa -

  7. QE4lOUoglbyWQUwm
    QE4lOUoglbyWQUwm
    cHHBBJPBr4bVv24U
    agDTTsHWFYyI2WBC
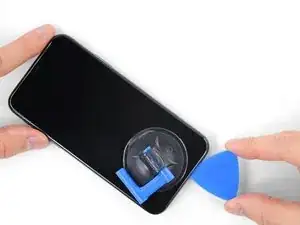
    • Schiebe das Plektrum um die linke untere Ecke und am linken Rand des iPhone hoch, zerschneide damit den Kleber, der das Display festhält.

    • Setze das Plektrum nicht zu tief in das iPhone ein, damit du keine internen Bauteile beschädigst.

  8. OEUEsoSAmOAWxAMR
    OEUEsoSAmOAWxAMR
    YOhTValkxrevLipu
    aSZ2MAdtw4ZImiCD
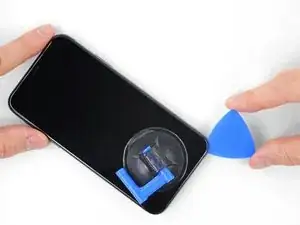
    • Setze da Plektrum wieder an der Unterkante des iPhone ein und schiebe es die rechte Seite hoch, um den Kleber darunter aufzutrennen.

    • Setze das Plektrum nicht zu tief ein, sonst riskierst du es, die Displaykabel an dieser Seite des iPhone beschädigen. Setze es nur wenige Millimeter tief ein, etwa die Breite der Displayblende.

    If you have flat feeler gauges (for adjusting engine valve tappet clearance, ignition points … old school) the .003” thick gauge goes right in. Work your way up in thickness until you can get the pic or supplied pry tool in. Don’t insert metal feeler gauge in too far, just enough to hold crack open. I didn’t need to use the suction cup. I used a hot/cold gel pack heated in microwave to heat edges to soften glue a bit. Made sure it wasn’t so hot I couldn’t stand it on my skin.

    William Olstad -

  9. WfcjjEBfMZqEySEf
    WfcjjEBfMZqEySEf
    PCXKpWMWg6GWEViY
    McqYslJ4vV1SOOnm
    • Die Oberkante des Displays ist mit Klebstoff und mit Klammern befestigt.

    • Schiebe das Plektrum um die obere Ecke des Displays herum und ziehe gleichzeitig vorsichtig das Display mit wackelnden Bewegungen herunter in Richtung des Lightninganschlusses.

    • Wenn du nicht vorsichtig bist, können die Klammern brechen. Sei geduldig und wende nicht zu viel Kraft an.

    • Setze das Plektrum wiederum nicht tiefer als ein paar Millimeter ein, etwa so tief wie die Breite der Blende. Du könntest sonst die Frontsensorgruppe beschädigen.

    • Schiebe das Plektrum zur gegenüberliegenden Ecke und trenne die restlichen Klebeverbindungen, welche das Display noch befestigen.

    These are the best instructions I’ve ever read for anything.! Thank you!

    Peter Andrew -

  10. GnieimxVeXdJJobM
    • Ziehe an der kleinen Noppe am Saugheber, um ihn vom Display zu entfernen.

  11. XFu5RLJA6ncMAhxo
    XFu5RLJA6ncMAhxo
    nCGOAuVQLFmYsrOd
    XjQSuyqDe1k51mua
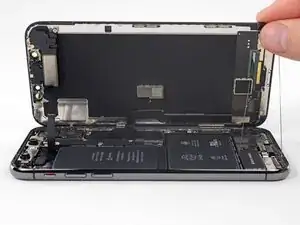
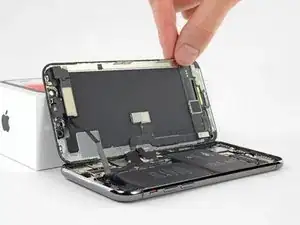
    • Öffne das iPhone, indem du das Display von der linken Seite her hochklappst, wie die Seite eines Buches.

    • Versuche noch nicht, das Display ganz zu trennen, mehrere empfindliche Flachbandkabel verbinden es immer noch mit dem Logic Board des iPhones.

    • Achte darauf, dass der Rahmen wie gezeigt zusammen mit dem Display herauskommt und nicht im Gerät steckenbleibt.

    • Lehne das Display gegen einen Gegenstand, damit es abgestützt ist, wenn du daran arbeitest.

    • Lege das Display beim Zusammenbau richtig in Position, richte die Klammern an der Oberkante aus und drücke die Oberkante hinein, bevor du den Rest des Displays einrasten lässt. Wenn es nicht leicht einrastet, dann prüfe, ob die Klammern am Rand des Displays ringsum richtig sitzen und achte darauf, dass sie nicht verbogen sind.

    My phone came apart in a different way and looks not right the little box at the top of the display as actually bolted to the top of the frame body I think something went really wrong when I opened it.

    Mike Kostersitz -

    It opens like a book but be careful not to open it all the way — only as far as shown in the photo. Otherwise it will strain the thin cable that connects the sensor module and then no more FaceID for you (or, as it turns out me). This could have been made more explicit in the instructions.

    Richard Tucker -

    It opens like a book but be careful not to open it all the way  … the small stainless steel tabs that hold the screen around the metal frame, that are on the bend place (right side of the phone)… are tend to bend, you can straighten them back to 90 deg. but the plastic base that they are on? very fragile- watch out not to break the plastic bezel … it may come apart of the glass.

    dabur872 -

    Advice for re-assembly: Before closing up the phone with the seal, check if phone is powering up again and speaker, mic and sensors are still working. If done this check even before installing the board connector bracket in Step 13.

    Alexander Nowak -

  12. XWpMWTY4DJnfeUAy
    • Entferne fünf Y000 Schrauben, welche die Halterung des Verbinders des Logic Board befestigen:

    • Drei 1,1 mm Schrauben

    • Eine 3,1 mm Schraube

    • Eine 3,7 mm Schraube

    • Achte bei dieser Reparatur auf jede Schraube und stelle sicher, dass jede Schraube wieder genau an ihren alten Platz eingedreht wird. Vermeide damit, dass das Smartphone beschädigt wird.

    One thing I found helpful for replacing the screws was to use only the 000screwdriver tip, without the handle. This way, the tip isn’t magnetized and the screw doesn’t tend to ‘roll’ off the screwdriver tip (the screw has almost no mass, so the head (largest surface) is pulled around to the side of the screwdriver tip when magnetized).

    Rich May 23, 2020

    ungodly -

    My 3.1mm screw had a stripped head, could not remove it. (Factory defect, this iPhone was never opened)

    So I had to give up removing the display assembly, and jumped directly to battery replacement, Step 20.

    That was tricky as I had to keep the display at 90º with a risk of breaking display connectors, but hopefully the replacement went well.

    I would not recommend to do this but to follow the guide, but, in case someone encounters a similar issue, that could help!

    vingu -

    My 1.1mm screw had a stripped head. Used a 3mm steel drill to cut the head off (just 1 mm deep haha) so i could remove the bracket.

    Renout -

    Be careful on reassembly. Keep the screen supported and not moving. I had difficulty getting the screws in and ended up ruining the screen connectivity at the back of the screen where the ribbon cables go in near the center. I was trying to hand hold the screen and it ended up moving around too much.

    SETH GREEN -

    To keep track of the screws, I copy the photos showing their places, then arrange these photos on document in Pages, print it. Next I apply two sided sticky tape (the roll-on type). So all screws have their corresponding places …

    Max Glanzmann -

  13. SmLayTUTWhZPb5Kb
    • Entferne die Halterung.

    • Die Halterung ist unter Umständen leicht angeklebt. Hebe sie vorsichtig, aber fest hoch, um sie zu lösen.

    • Beim Zusammenbau ist dies ein guter Zeitpunkt, um dein iPhone einzuschalten und alle Funktionen zu testen, bevor du das Display wieder festklebst. Denke dran, es danach wieder auszuschalten, bevor du weiter arbeitest.

    I tested it, then proceeded to close up the device without the bracket. Do I need to reopen and install? All connections are good?

    monastra7 -

    The bracket helps those many connectors underneath maintain good contact. Probably in the short term nothing bad will happen, but I’d hang onto the bracket and reinstall it when convenient.

    Jeff Suovanen -

    Agree with Jeff

    cgtyoder -

    I tested all imaginable functionality on the new OLED screen. Taptics are fine. Then, I noticed that the battery wasn't charging. Any ideas as to what could have gone wrong?

    Monica -

    for me, the replacement battery was completely dead, small panic when the power-on button was pressed, but quickly realised that this was the situation, and now watching the phone take a power cycle.

    James Stanbridge -

    Before clicking the screen assembly back, I tried to test the iPhone by pushing the start button, but nothing happened. After taking off the bracket, reseating the plugs I tried again - nothing happened! Then I plugged in the charging cable connected with the iMac, and it started immediately. So if the phone does not start using the startup button, it might just be a glitch when reconnecting the battery.

    Max Glanzmann -

  14. eJ1ACHc4FfhUTGYs
    eJ1ACHc4FfhUTGYs
    JGUunolihfMkY3fR
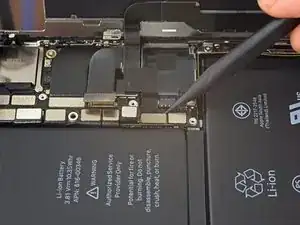
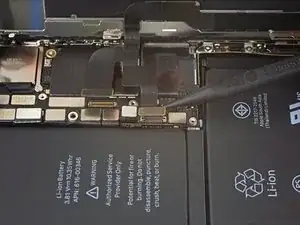
    • Hebele den Akkustecker mit einem sauberen Fingernagel oder einem Spudger aus seinem Sockel auf dem Logic Board.

    • Achte dabei darauf, nicht die schwarze Silikondichtung zu beschädigen, welche an diesem und anderen Verbindern auf der Platine angebracht ist. Diese Dichtungen sorgen für einen Extraschutz gegen Wasser und Staub.

    • Biege den Stecker etwas weg vom Logic Board, damit er nicht versehentlich einen Kontakt zum Sockel herstellen kann. Dadurch würde das iPhone während der Reparatur mit Strom versorgt werden.

    cosa può succedere se non si disconnette la scheda logica'?

    luca.valli -

    note: be careful not to crush or puncture your battery at this step!! I gave mine a minor dent, which I hope wont be a problem.. but something to keep in mind for fxlks in the future!

    Noal Balint -

    Thanks, already did it)

    Stephen Hedrick -

  15. cHVLkYDwhlp2A1Pw
    cHVLkYDwhlp2A1Pw
    K2c31fAgxStY4xjS
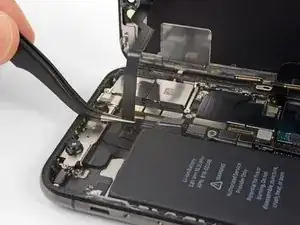
    • Löse den Verbinder der Sensoreinheit des Frontpanels mit der Spudgerspitze oder dem Fingernagel.

  16. cpYKZSxRSWRr1pJ3
    cpYKZSxRSWRr1pJ3
    ROpbLqGuPSYmQUk2
    • Löse den Verbinder des Kabels zum OLED Panel mit der Spudgerspitze oder dem Fingernagel.

    • Um Press - Fit - Verbinder wie diesen wieder anzuschließen, musst du ihn erst vorsichtig ausrichten und an einer Seite herunter drücken, bis er einklinkt, wiederhole das dann auf der anderen Seite. Drücke nicht in der Mitte.Wenn der Verbinder schlecht eingesetzt ist, können sich die Kontaktstifte verbiegen und irreparabel beschädigt werden.

    Snap ‘em in like little Legos.

    Ray Johnson -

    Maybe the manual should flip step 17 and 18 (as the digitizer cable from 18, is in the way of the OLED cable of step 17) ?

    Renout -

  17. TD3L6MwMyjAtBQJu
    TD3L6MwMyjAtBQJu
    6ApXsETwRu6PQnKr
    • Hebele den Verbinder des Touchscreen Kabels mit der Spudgerspitze aus seinem Sockel.

    • Der Verbinder sitzt etwas vertieft, das macht es schwierig, ihn wieder festzustecken. Lasse dir Zeit und richte ihn sorgfältig aus, und drücke ihn dann vorsichtig mit der Fingerspitze fest - erst auf einer Seite, dann auf der anderen. Du solltest es spüren, wenn er einrastet.

    • Wenn der Touchscreen an irgendeiner Stelle nach der Reparatur nicht reagiert, musst du den Akku trennen und diesen Verbinder wieder neu einsetzen. Achte dabei darauf, dass er richtig einklinkt und dass kein Staub oder etwas anderes im Sockel befindet.

    This was probably the hardest part other than trying to get the screen off with the crappy suction cups. I re-installed the bracket only the find out that the touch screen would not respond to touch. Had to remove the five screws, remove the bracket and reseat the recessed screen connector. Reseating the bracket took another 10+ minutes. I carefully used the angled forceps to grab the cable and align the connector being careful not to damage the cable.

    Once you have the connector seated, I would reconnect the battery, power on the phone, and check the touch screen response before re-installing the bracket (step 13).

    Tawan Khamapirad -

    Yeah, this was probably the trickiest part of the reassembly. The power connector cable kept getting in the way so I moved it carefully but fully out of the way. Then it was a matter of fiddling around with it a bit and being careful not to force it on.

    Jeffrey Hoy -

    I was positive that I had messed something up, I had powered up the phone to test three different times and everything seemed find except there was no touch at all. On my fourth attempt, I carefully examined everything for dust and debris (blowing gently), and I did notice that a corner of the connector (more like part of the ribbon) was bent slightly, and I straightened it. I don't know if it was the ribbon or some tiny debris, but after reseating a fourth time, it worked.

    Pol Llovet -

    Very important part of the tutorial. Be careful and patience! In my case the screen and camera didn't respond after assemble, so I tried again to reconnect the connector like tutorial said and it worked well. Now my iPhone feel like a new one 💪🏼

    Efrain Maestre -

  18. T4COCwpNIPZglkVc
    T4COCwpNIPZglkVc
    q145rGUkFfAEwOf1
    EgtbW5Mf1lUuPrWK
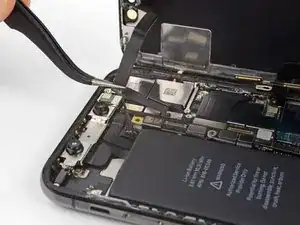
    • Das Flachbandkabel der Sensoreinheit am Frontpanel ist leicht festgeklebt.

    • Hebe das Kabel vorsichtig an, bis es sich ablöst.

    Do this sensor affect face id?

    bonglkv -

    It is part of the face id part so yes. This is the ear piece too so if the ribbon tears there is a chance the ear piece will stop working as well.

    Stephen Patterson -

    Be super careful handling this ribbon particularly. I did a battery install and, when I was done, I had a phone with a new battery and no Face ID. That’s a $300 Apple repair, and no 3rd party shop will touch it. I believe the ribbon lays vertically (i.e., perpendicular to the “floor” of the phone, against the side edge of the battery. During the re-install, I must have forced the ribbon into position after seating the connector, causing fatal flexing of the ribbon. (Don’t know this for sure, but I see another comment saying that this cable is part of Face ID.) Anyway, bottom line: BE CAREFUL REMOVING AND REINSTALLING THIS RIBBON!

    Jonathan Pines -

    My flex cable was more than lightly adhered in place. I needed to use a guitar pic or similar to help encourage adhesive to separate. I wouldn’t pull too hard like shown in pictures unless you had just the right grip on the ribbon cable so as to avoid damaging flex cable. See note above (5/31/20)

    William Olstad -

    Bizarre — it turns out my whole front panel sensor assembly came entire off of the front screen and is stuck to the logic board.

    Karl Jarvis -

    I also found the glue quite recluctant to release so I applied a second or two of heat using the wife's hair dryer which softened it and the cable lifted much easier then. Be careful not to apply too much heat though which could then impact other internal components.

    LosBenitos -

    Cho ít cồn 90° vào để mềm keo dễ tháo

    huuhaukimngan -

    my iphone x doesn't have a front panel sensor? in fact, it looks completely different than the picture???

    Kenneth McLeod -

  19. 6ik3wBhFQRTApGki

    I tried this and broke the cable can it still repair

    Alexis Rodriguez -

    At this point I would have found it easier to remove the glue from the edges than later on when I was reassembling it. I bought the kit that had the replacement glue in it.

    Grant -

    Excellent guide! Would love to have a link to moving the sensor assembly from the old display to the new here.

    Nicole -

  20. BoHxHxepsDZEp5B4
    BoHxHxepsDZEp5B4
    dXwiSZ3WZcIoWD1U
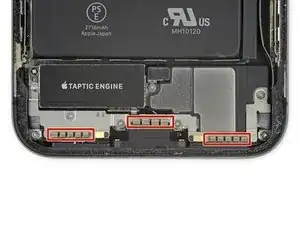
    • Achte darauf, dass du die drei Reihen Erdungspads unten am iPhone nicht berührst.

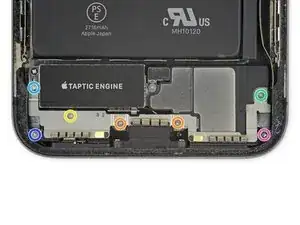
    • Entferne die sieben Schrauben, die die Halterung unterhalb der Taptic Engine und dem Lautsprecher befestigen:

    • Zwei 1,9 mm Y000 Schrauben

    • Eine 1,2 mm Y000 Schraube

    • Eine 1,6 mm Y000 Schraube

    • Eine 2,4 mm Kreuzschlitzschraube

    • Eine 1,7 mm Kreuzschlitzschraube

    • Eine 1,5 mm Kreuzschlitzschraube

    For battery replacement:

    It is not necessary to remove Taptic Engine and speaker to replace a battery. Go straight to the step #33

    Additional video: https://youtu.be/2GfBOlJEW10

    Alexander -

    I wish I seen this before I did all that! Thank you for that information. Next time I do something like this. I'm gonna pay more attention to the comments.

    Eric Marino -

    Removing the Taptic Engine and speaker greatly improves your chances of getting the battery adhesive strips out intact. If those break, you’ll have a much tougher time.

    Jeff Suovanen -

    Boy, I tried to skip removing these items but was unable to get the glue strips out with them in place, not much to grab and tabs were kind of stuck to a seam in the battery, and hard to tell the difference between the seam and the strip tabs. For me I had to remove these items to get this done.

    marshallburchard -

    I stopped removing things after getting the display side off. There were 3 screws stripped on the speaker cover which wouldn't come out so I punted. Just pried the battery out with a smudger tool and some patience, starting at the top and working towards the bottom. New battery is in and working fine.

    Andy Price -

    The 2.4mm screw identified as “green” needs a Y000 screwdriver

    seb6po -

    Thanks for not removing the following steps. this made me break the connector for the bottom speakers >:(

    Andrew Romano -

    The color codes are missing from my display — only on this step.

    nat2 -

    The screws color and quantities in list don’t match the schematic ! I wish i had a magnetic screw mat before starting, because not only i removed the Taptic Engine and speaker unnecessarily, but i also lost a screw ?

    fb.mailing.lists -

    For first timer, dont think its possible to skip these steps and remove battery. It’s hard to remove the glue

    Wex -

    Does anyone know the purpose of this bracket "with grounding pads"? What would be the possible side effects if it was damaged or not connected properly during reassembly?

    Anne Aunyme -

    I had to remove the tactic and speaker could not get the glue strips out so glad the steps to do so were in this guide.

    P Bond -

    Sure would like to know WHY the warning "Be careful not to touch the three rows of grounding pads..." What would or could happen if I did touch them??

    Chad Gagnon -

    Removing the battery strips is a major PITA, just skip this step and everything onwards, remove the one strip on the top part of the battery (according to step 33) and for the bottom part of the battery, pry it off with a plastic spudger.

    Yes, this is not the elegant solution, but the quickest and easiest one. This method is better, as you don't want to keep the old battery anyway, so why bother. (You must not puncture the battery though! But as long as you're only working with a plastic tool and are careful, nothing can happen from my experience.)

    speaker gasket -

  21. A6XdCYVX6JwfIKyE
    A6XdCYVX6JwfIKyE
    A4EHUTn22AgwPZxR
    • Hebe nun die Halterung von der Ecke, welche der Batterie am nächsten ist an. Versuche nicht, sie vollständig zu entfernen, da sie weiterhin mit einem kleinen Flex-Kabel verbunden ist.

  22. c5QjrHSAGoEVorBq
    c5QjrHSAGoEVorBq
    qMqUiBcQJqrsMsyd
    • Halte die Halterung so, dass sie dich nicht stört, und benutze die Spudgerspitze, um das darunterliegende Flex-Kabel mit einer Hebelbewegung zu lösen.

  23. eoTqiltfnhM1iScH
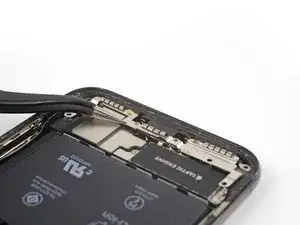
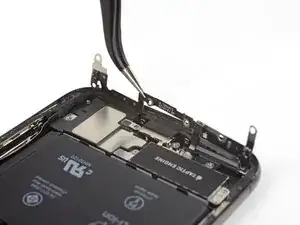
    • Entferne die Halterung.

  24. KVsQuGUlRSYJCgwc
    KVsQuGUlRSYJCgwc
    1oMPc41ZwNKvWSjt
    • Entferne die 2,1 mm Y000-Schraube, welche die Abdeckung des Lautsprecherverbinders befestigt.

    L'unique vis non?

    Easy Repair -

    Effectivement ;-) Merci pour les bons yeux et la remarque !

    Claire Miesch -

  25. kEdiRARZCyTLEXJG
    • Entferne die Abdeckung des Lautsprecherverbinders.

  26. oTiIqEVBPENNIfRv
    oTiIqEVBPENNIfRv
    bPVea3cUUG5ydybE
    • Benutze die Spudgerspitze, um den Lautsprecherverbinder hochzuheben und zu trennen.

    As mentioned in a comment by timblake2112 (see step 29), this step is not necessary and can be skipped skipped. I would advise you to do so, as removing your speaker is guaranteed to ruin your gasket and rubber seal. This will result in loss of water resistancy of your iPhone and could potentially harm the sound quality of your speaker.

    Try removing the Taptic Engine without removing the speaker. It might still be possible removing the battery adhesive strips and your speaker will stay in its original condition.

    speaker gasket -

  27. nbqXImWqlhcmZwLp
    nbqXImWqlhcmZwLp
    XKBNris4snqB4vTl
    • Passe beim Hochhebeln des Lautsprechers auf, dass du nicht das gerade gelöste Flexkabel beschädigst. Drücke es, wenn nötig, zur einer Seite hin, so dass der Lautsprecher beim Herauskommen Platz hat.

    • Setze einen Spudger unter die Oberkante des Lautsprechers in der Nähe vom Rand des iPhone Gehäuses.

    • Hebele vorsichtig nach oben und hebe die Oberkante des Lautsprechers an.

    • Prüfe beim Einbau des Lautsprechers die Position des Flexkabels und achte darauf, dass es nicht unter dem Lautsprecher eingeklemmt wird.

  28. vP52MSMbQMQVGXDv
    vP52MSMbQMQVGXDv
    jdpMlj6ohBmkmRoF
    aBojFlY2A4cLssW2
    • Greife den Lautsprecher an den Seitenkanten an und rücke ihn etwas hin und her. Dadurch löst sich die Klebeverbindung zur Unterkante des iPhones.

    • Ziehe den Lautsprecher von der Unterkante des iPhones weg, bis sich die Klebedichtung löst.

    As mentioned in a comment by timblake2112 (see step 29), this step is not necessary and can be skipped skipped. I would advise you to do so, as removing your speaker is guaranteed to ruin your gasket and rubber seal. This will result in loss of water resistancy of your iPhone and could potentially harm the sound quality of your speaker.

    Try removing the Taptic Engine without removing the speaker. It might still be possible removing the battery adhesive strips and your speaker will stay in its original condition.

    speaker gasket -

  29. G1qam2tn3Av5D6ub
    G1qam2tn3Av5D6ub
    RhZADdTaatNHENVB
    • Entferne den Lautsprecher.

    • Die Klebedichtung des Lautsprechers lässt sich nicht mehr verwenden. Ziehe alle Reste davon mit einer Pinzette ab.

    • Damit das iPhone weiterhin gegen Staub und Feuchtigkeit geschützt ist, musst du beim Zusammenbau die Klebedichtung erneuern. Reinige die Klebefläche mit Isopropylalkohol und einem fussellfreien Tuch oder Filterpapier, damit die Dichtung gut klebt. Klebe die Dichtung zuerst am Lautsprecher an und baue ihn dann ein.

    You don’t need to remove the speaker and ruin its gasket. You can wiggle and slide the taptic engine out without removing the speaker. I’ve done this twice on rear shell replacement jobs.

    timblake2112 -

    Maybe I'm a bit daft, but where's the instruction just how to line up the speaker gasket when replacing? I only have one so I'd like to avoid wrecking it. And I completely cleaned off the old one in order to do a good job of things. Why no simple instruction from part supply link?

    MrRoundel -

  30. XATHudC6esRZFEKI
    XATHudC6esRZFEKI
    4b6hhSLIlJT6Pjum
    • Entferne die 2,3 mm Kreuzschlitzschraube, welche die Taptic Engine festhält.

  31. aSBjBVvQXPjDTMPE
    aSBjBVvQXPjDTMPE
    JrsJ3crZXUQsaBpo
    • Löse das Flexkabel der Taptic Engine, indem du es mit dem Spudger gerade aus seinem Sockel hochhebelst.

  32. FeOXDWVO1kSwkRYc
    • Entferne die Taptic Engine.

  33. jPH2WfaMKMfl6WaH
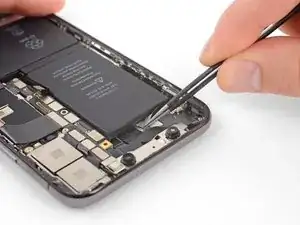
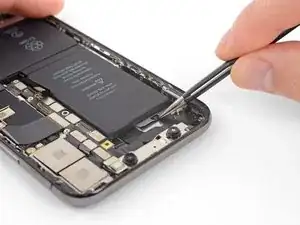
    • Der Akku des iPhone X ist mit vier Stück "Stretch-Release" Klebeband befestigt. Dieses Band muss erst gedehnt werden, dann löst es sich. Ein Stück Klebeband befindet sich an der oberen Zelle, drei an der unteren.

    • Jedes Stück Klebeband hat eine schwarze Zuglasche am Ende, die an der Seitenkante des Akkus leicht angeklebt ist.

  34. N2cLTmaAEDoneIBe
    N2cLTmaAEDoneIBe
    CEKvyMgO5tpSfUtV
    XLkNcMvasaA2Sut6
    • Löse die erste Klebezuglasche von der Unterkante des Akkus ab.

    • Jede Lasche hat eine kleine Öse in der Mitte. Wenn du Schwierigkeiten hast, die Lasche anzufassen, kannst du ein Werkzeug in diese Öse einsetzen.

    • Steche nicht mit einem spitzen Werkzeug in den Akku hinein. Auslaufende Chemikalien sind gefährlich und der Akku könnte Feuer fangen.

    hole breaks instantly on pulling. adhesive tab does not release from side of battery

    Dominick garton -

    I had a lot of trouble with this. Only two came out properly and the others snapped off. I heated up the back of the phone with a hair dryer then used the flat end of the spudger to slowly pry it off right to left, bottom to top.

    Grant -

    just pry it off, why bother

    speaker gasket -

  35. bTtUqSlDgjwAjjCA
    bTtUqSlDgjwAjjCA
    jIovnoJnOMqiF2F5
    D2SOJ6hkUYoGjXof
    • Wiederhole den vorigen Schritt, um auch die beiden restlichen beiden Klebezuglaschen von der Unterkante des Akkus zu lösen.

    • Achte darauf, dass du nicht den Stecker des Lautsprecherkabels direkt unter der mittleren Klebezuglasche beschädigst.

  36. MUaEmAlJJAnWJQ63
    MUaEmAlJJAnWJQ63
    tQV5stGtdxojbKII
    LPbLvYDYU62ADtRY
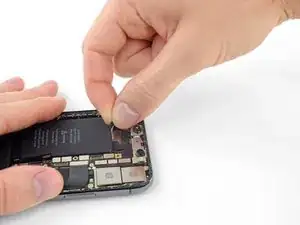
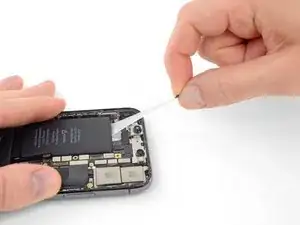
    • In den folgenden Schritten wirst du jede Zuglasche herausziehen, um langsam die Klebestreifen unter dem Akku zu dehnen. Diese speziellen "Stretch-Release" Bänder verlieren ihre Klebekraft, wenn sie gedehnt werden, dann hast du sie in der Hand und kannst den Akku leicht entnehmen.

    • Rege dich nicht auf, wenn ein Band zerreißt! Es klappt nicht immer so, wie beabsichtigt. Lies weiter, um herauszufinden, wie du ein gerissenes Band entfernen kannst.

    • Um deine Chancen zu verbessern:

    • Drücke den Akku nicht nach unten. Halte das iPhone an den Seiten fest.

    • Halte die Klebestreifen flach und faltenfrei während du ziehst.

    • Ziehe sehr langsam und lasse dem Klebestreifen Zeit, sich zu lösen. Der Streifen braucht 15 bis 30 Sekunden bis er sich löst.

    • Ziehe in einem flachen Winkel, so dass der Streifen sich nicht an der Unterkante des Akkus verhakt.

    • Wenn ein Streifen unter dem Akku reißt und nicht hervor geholt werden kann, dann fahre mit den anderen Streifen fort und folge dann den zusätzlichen nachfolgenden Schritten.

  37. WfOG2GCU2PCL1gXL
    WfOG2GCU2PCL1gXL
    qfPWHNgPTIgHkisT
    rCTaTAQHPhqflORV
    • Fasse eine der äußeren Zuglaschen des Akkus an und ziehe sie langsam vom Akku weg in Richtung Unterkante des iPhones.

    • Ziehe gleichmäßig und halte die Spannung auf dem Streifen konstant, bis er zwischen Akku und Rückgehäuse hervorrutscht.

    • Der Streifen dehnt sich dabei auf ein Vielfaches seiner ursprünglichen Länge aus. Ziehe immer weiter daran und fasse , falls nötig, am Streifen nahe am Akku nach.

    • Wenn einer der Klebestreifen am Akku während des Herausziehens reißt, dann kannst du ihn mit den Fingern oder einer stumpfen Pinzette herausholen und weiter ziehen.

    • Wenn einer der Klebestreifen unter dem Akku reißt und nicht herausgeholt werden kann, fahre mit den restlichen Streifen fort, und folge dann den unten beschriebenen Schritten.

    I found it easier to grab the end of the adhesive strip sideways with narrow tweezers, "twirl " the tweezers to wrap the strip around them a few times, then gently pull the strip with the tweezers.

    punkinann -

  38. DM151YZVc2wm3vIF
    DM151YZVc2wm3vIF
    6rGGVFvvjL5bSKUa
    aB1QyvxZDyNEVIvj
    • Wiederhole den vorherigen Schritt und entferne den Klebestreifen auf der gegenüberliegenden Seite. Der mittlere Streifen kommt als letztes dran.

  39. ePixhb61PIEnTUMP
    ePixhb61PIEnTUMP
    upCGIsYEMa6WjVqZ
    VDoEuCDFI6xdsPeY
    • Entferne den mittleren Streifen, achte dabei darauf, dass er nicht am Flexkabel des Lautsprechers hängen bleibt.

  40. ORPTGZTFTGmDxjAS
    ORPTGZTFTGmDxjAS
    KLHsUkUXMWJHNNUY
    • Diese letzt Zuglasche befindet sich sehr nahe an der Hardware für die Face ID. Wenn sie beschädigt wird, kann diese Hardware nur von Apple repariert werden, sei deswegen sehr vorsichtig.

    • Löse die Zuglasche am letzten Klebestreifen an der Oberkante der oberen Akkuzelle ab.

    surtout ne pas passer avec la spatule par le bas, vous risqueriez d arracher la nappe du volume et du nfc,

    Ludovic Klein -

  41. cjEUeU2SWe3u4sH3
    cjEUeU2SWe3u4sH3
    w2YjaKwLVcrI2iPs
    FYxaRBOiruSCn6Rg
    • Ziehe den letzten Klebestreifen heraus und entferne ihn.

    • Der Streifen kann den Akku herausschleudern, wenn er sich vom iPhone ablöst. Halte deine Hand deswegen über den Akku, um ihn zu sichern. Drücke ihn aber nicht nach unten, sonst kann der zusätzliche Druck dazu führen, dass der Klebestreifen unter dem Akku reißt.

    • Wenn alle vier Klebestreifen erfolgreich und vollständig entfernt worden sind, kannst du den nächsten Schritt überspringen.

    • Falls einer der Streifen gerissen ist und Reste unter dem Akku kleben, gib einige Tropfen von hochkonzentriertem Isopropylalkohol (mehr als 90%ig) an der Stelle, wo der Klebestreifen gerissen ist, unter die Kante des Akkus.

    • Lasse den Alkohol etwa eine Minute lang wirken, damit der Klebestreifen geschwächt wird. Hebe dann den Akku mit dem flachen Ende des Spudgers vorsichtig hoch.

    • Versuche nicht, den Akku mit Gewalt herauszuhebeln. Tröpfle mehr Alkohol hinein, falls das nötig ist, um den Kleber zu schwächen. Verforme niemals den Akku und stich ihn nicht an.

    • Sei vorsichtig und beschädige nicht die Flachbandkabel oder die Spule zum drahtlosen Laden direkt unter dem Akku.

    • Im folgenden Schritt wird noch eine Alternativmethode zum Ablösen des Akkus gezeigt.

  42. SIqoxjaCLQVGQQTw
    SIqoxjaCLQVGQQTw
    M5YQx5XjHGWUVKWj
    • Wenn einer der Streifen gerissen ist und der Akku noch im Rückgehäuse festklebt, dann bereite einen iOpener vor oder benutze einen Haartrockner, um das Gehäuse direkt hinter dem Akku zu erwärmen.

    • Erwärme das iPhone so, dass du das Rückgehäuse kaum noch anfassen kannst. Überhitze es aber auch nicht, sonst könnte der Akku versehentlich in Brand geraten.

    • Drehe das iPhone herum und ziehe einen starken Faden (etwa Zahnseide oder eine dünne Gitarrensaite) unter dem Akku ein.

    • Schlinge die Enden des Fadens um ein Tuch (oder ziehe Handschuhe an), um deine Finger zu schützen.

    • Ziehe den Faden in einer sägenden Bewegung unter dem Akku hin und her, um die Klebeverbindung aufzuschneiden. Das kann etwas dauern, da sich der Kleber nur langsam verformen lässt, aber mit etwas Geduld wird er frei kommen. Verforme oder beschädige nicht den Akku!

    • Wenn du dich dafür entscheidest, Hebelwerkzeuge zu benutzen, um den Akku herauszuheben, dann musst du sehr vorsichtig sein. Du könntest sonst die Flachbandkabel oder die Ladespule beschädigen, die direkt unter dem Akku angebracht sind.

    if you use a guitar string, remember NOT to use a METALLIC guitar string.

    Ross King -

    flexible plastic rules with alcohol work too

    Wex -

    I can confirm that IPA (Iso Propyl Alcohol) and, in my case, the plastic plectra in any iFixit kit worked a treat.

    P Bond -

  43. NNcTVEVsOCUmEsVA
    • Fasse den Akku an der Unterkante an und entferne den Akku vom iPhone.

    • Wenn noch Reste vom Alkohol im Smartphone verblieben sind, dann wische sie sorgfältig weg oder lasse das Gehäuse gut austrocknen.

    • Baue die Taptic Engine und den Lautsprecher ein, bevor du den neuen Akku einsetzt. Dadurch bleibt der Akku beim Einbauen korrekt an seinem Platz.

    • Stecke vor dem Festkleben des neuen Akkus den Akkustecker vorläufig in den Anschluss auf dem Logic Board ein. Dadurch nimmt der Akku die richtige Position in seiner Vertiefung ein.

    • Klebe den Akku fest, löse den Stecker wieder ab und fahre mit dem Zusammenbau fort.

    • Wenn an deinem neuen Akku noch keine Klebestreifen dran sind, dann hilft dir diese Anleitung beim Anbringen der neuen Klebestreifen.

    • Führe einen erzwungenen Neustart nach dem Zusammenbau durch. Das kann verschiedenen Schwierigkeiten vorbeugen und hilft bei der Fehlersuche.

    When reinstalling the battery, the Taptic Engine does serve as a useful way to orient the battery, but it should also be noted that if you push right up against that as you install the battery (as I did) and don’t pay any attention to power connector (shown in step 14), there is a risk that the connector from the battery will not line exactly with the connector port on the board. Mine was only off a mm so I had to get a little creative to try to get it to stretch to reach and connect to the port on the board. Just keep that in mind as you place the battery (with adhesive) down.

    Jesse Bolane -

    Connect the battery first then put it in place. Other way it is hard to adjust power connector.

    Alexander -

    I would also HIGHLY suggest re-installing the speaker as well before installing the battery - it was a very tight squeeze as the bottom-right of the battery was snug against the speaker when I tried to get that back in.

    cgtyoder -

Abschluss

Vergleiche dein neues Ersatzteil genau mit dem Originalteil. Möglicherweise musst du fehlende Bauteile übertragen oder Schutzfolien abziehen, bevor du es einbauen kannst.

Um dein Gerät wieder zusammenzusetzen, folge den Schritten in umgekehrter Reihenfolge.

Entsorge deinen Elektroabfall sachgerecht.

Die Reparatur verlief nicht wie geplant? In unserem Forum findest du Hilfe bei der Fehlersuche.

Jeff Suovanen

Mitglied seit: 06/08/13

407156 Reputation
45 Kommentare

In the store it says the iSlack is only for iPhone 5 and 6. In this review the iSlack is used (without tray). Does that mean it can be used on the iPhone X as well?

Ronald van der Meer -

@rvdm The little bracket in the middle of the iSclack is sized for iPhone 5, but that bracket is optional and very easy to detach. At that point you have a really great general-purpose suction tool that works for all kinds of devices (even bigger ones like tablets). I’ll see about updating the description on the store page to reflect that fact. ;)
Jeff Suovanen -
Have you all ever had a problem of the phone staying stuck on a percentage and takes so long to charge plz let me know because I just got my iPhone X and it take so long to charge and I got it brand new from AT&T

Cristan Montes -

Esta solucionado el tema del Chip Texas instrument para baterias no reemplazadas en Apple, gracias.

FELIX MARQUEZ -

C’è un errore di traduzione al passo 33 BATTERIA , iphone X diventa iphone 8.

Marco

Marco Pautasso -

Ciao Marco! Hai occhi di lince! Grazie per il commento. Ho corretto la traduzione. Commenti di questo tipo sono sempre benvenuti. Hai anche la possibilità di adattare direttamente la traduzione, cliccando sull’icona “Traduci”. Saluti, Claire

Claire Miesch -

Note that my replacement battery was completely dead when I installed it, so when I tested it, I thought perhaps something wasn’t hooked up right. After removing the bracket for the connectors and reattaching the battery connector I tried again. Since that failed, I plugged the phone in. I got a “no charge” battery icon. After a few minutes I removed the phone from the charger. The phone stayed on with the “plug in the phone” icon, so I knew everything was put back together correctly.

Jon12 -

Critical Note! When installing the new battery make sure the connector lines up. The instructions mention having the speaker and taptic engine in place so I focused on squaring up with those. This was a mistake! Now my connector is 2mm too low and won’t line up. Not sure how I will fix this yet but hopefully I won't need to remove everything again.

Christopher Jones -

Where can I buy a genuine original iPhone X battery as amazon Walmart sells fake batteries

masrin -

You can not buy a genuine battery.

Alexander -

How to make out a genuine original battery from a fake one sold all over the globe?

masrin -

Super Set, auch toll das hier die Dichtung dabei ist. Akku lädt und zeit die %-Werte an. Beim nächsten Mal kauf Ichs gleich hier"! War jetzt schon die 2te Reparatur. Mittlerweile schaff ich das schon ca. 40 min ;)

Danke

Peter -

Aparecerá el porcentaje de la batería en el apartado de “salud”?

Gustavo González Martínez -

removing the components that are below the battery seems rather unnecessary to me, you could remove the battery without taking those out

Samuel Casas -

I had an issue with a swollen battery on a iphone X, the battery was pushing the display assembly and the phone couldn’t close properly. Replaced with new battery and all went fine. Great guide as always

Georgi Ivanov -

This battery already comes with battery health indicator or need to reprogram the battery ?

danial nabil -

Big thank you for introduction!

commaai -

It would be nice if this addressed the waterproof adhesive, mentioned in Step 6. Doesn’t pulling the phone apart make it no longer watertight?

Winston -

Instructions for replacing the adhesive seals are linked in the guide (Step 19). I wouldn’t count on your phone being waterproof after a repair, but a phone from 2017-2018 likely won’t be particularly water-resistant anymore, anyway. Those seals tend to degrade over time.

Jeff Suovanen -

Hi, I bought the battery from you and installed it exactly like your steps.

But after two days of use, a message appears to me that this battery is not original and its percentage cannot be read !!!

What to do now ???

Fahad Mohammad Fahad -

When changing the battery to a third party one, are there any notifications that appear such as “not a genuine battery” and does reprogramming the battery help prevent this.

Farjad Akram -

BE WARNED! THE IPHONE’S OUTSIDE IS VERY, VERY SHARP! I escaped with 4 cuts on my fingers.

AemVR -

I replaced two of these in one night. The first one worked great but the second’s OLED screen won’t come on. The phone is on because I can hear it charge when I plug it in, but for some reason the screen is dead.

Lucas -

If you’re buying the battery from iFixit I strongly suggest getting the full kit and not the battery-only option so that you get the glue and the gasket. Great guide, thank you!

Grant -

It is perfectly possible to do the replacement without removing anything other than the bracket and the battery connector.

This reduces the number of steps to about 10 and takes about 15 minutes.

Neil Roberts -

Awesome guide! I finished it, and now I have a fully working X

Just one thing: the video and the instructions differ on step 20, making the rest unnecessary according to the video guide. On the other hand, it may facilitate taking the glue off, especially for newbies.

Ed Oliver -

I don’t want to sound like “that guy,” but the cost of a battery replacement is only $69 at an Apple Store. This DIY solution, which can go t!ts up anywhere along the 43 steps, requires the purchase of parts that cost almost as much as just letting Apple do it. I love fixing/replacing/upgrading my hardware as much as the next guy, but this seems like a scenario where the majority of people would be better off visiting an Apple Store.

koelpien -

Except that authorized stores won’t replace a swollen battery, and neither will Apple. Otherwise yes, if the few hours extra and a few 10s of dollars is the additional price for a turnkey solution, most folks are better off having the work done for them.

Mike Hocker -

Was suffering from a hugely swollen battery so it made removing the adhesive pretty difficult (and I was being super careful since the battery had swollen so much). The “stretch and pull” with the adhesive was a no-go and I was hesitant to heat the phone. I ended up slowly pulling up on the battery at the top and gently working the adhesive away. It took some time, but worked out.

Great guide, as usual!

Patrick C -

Jeg har lige skiftet batteri på min iPhone X i starten kunne jeg kun oplade trådløst, men nu kan jeg slet ikke oplade Den reagerer slet ikke på noget mere den er helt død Hvad kan jeg gøre ???

enok -

The adhesive under the original battery broke. ALL TABS RIPPED APART! I have no floss nor metal guitar string. Help please. This is my only mobile phone. I need it 24/7.

vmm -

Commentary on swelled batteries: don’t tell Apple, they will mark your iPhone SerialNumber in their database as not repairable and you will never be able to get a battery replacement in the future (per Apple phone support, as we tried to get their swollen battery replaced by appointment). We are not happy campers, now I need to use up valuable time replacing the battery. At least replacing the battery is an option with the help of iFixit. (oh, and they won’t put in a new battery if I remove the old one either— although once the old one is removed the hardest part of the work is done)

Mike Hocker -

Wasn’t too bad, except some of the screws that need to be removed are tiny and I found out that my eyes are not the best anymore ?.

jabuka -

Many thanks for this great tutorial !! Just changed the battery of my 4 years old iPhone X, I’m very happy to have a fresh one inside !

Faabio -

Hello,

I have an iPhone X Model number MQAF2LZ/A bought in Perú and once I started removing the display I noticed it doesn’t open like in the pictures or video here. There is a connector behind the ear piece that connects to the main board and I can’t open it. I see if I force it I will break this connector. Have somebody worked with this model? and recommend where to buy a replacement display? The one I bought is for model number MQAF2LL/A (USA). (the ribbon cables look different)

John W -

Today I show you how to replace the battery of the Iphone X. We need one screwdriver, one suction cup, 1 iopener, 1 pair of tweezers, 1 plastic pry tool, and 1 spudger.  Remember to turn off the power. The replacement can cause the loss of water resistance. To replace the battery for iphone X, do the following steps. Step 1, use the screwdrive to remove the screws at the bottom. Use Iopener to soften the adhesive. Clip the suction cup onto the screen and use a pry tool to pry out the screen. Lift up the screen 90 degrees on the right. Take off the small screws holding the battery cable and the motherboard. Next, use the tweezers to lift up the metal bracket. Use a spudger to pry away the battery connector and 3 display connectors. Use tweezers to remove the battery stripe. Remove the old battery. Reverse the above steps to install the new battery.

Hội Nguyễn -

This takes me like 2 mins no tools required and I reused the adhesives also so less waste . I dont pull anything or use tools bar a tri star….. Should be updated . Soak in alcohol slightly leave for 2 mins remove battery , dry and replace using old adhesive (which is perfect) no cleaning ….Digithaiz

Sam Barton -

Jeez I dont mind even making you a guide for this as its mostly sit and wait for all of the 5 mins max this takes!

Sam Barton -

Porcentaje de la Condición de la batería funcionará bien?

Inksane BēLCK -

Hallo,

ich habe mein iphone x display und batterie ausgetauscht, allerdings bekomme ich die fehlermeldung

Apple erfasst die Hardwarekennungen Ihres iPhones, um unsere Dienste zu identifizieren und zu aktivieren.

İch habe mein iphone x damals in der türkei gekauft und leider komme ich nach weiter woran kann das liegen ?

mst Ozyn -

Excellent guide! Took about1,5 - 2 hours too including trying to remove all of that black sticky stuff! :) Should have bought some isopropanol... Aligning and fixing the new sealing was a bit tricky! Really had to think for a while which layer of plastic to remove first...

No problem removing the adhesive under the battery which never has worked on older iphones! pehww.... :)

Thomas Lundström -

Worked great. Only putting the display adhesive on was difficult. I am thinking about fixing the broken display now, because it maked so much fun!

Mike Stanke -

Personnellement je n’ai pas démonté les haut parleur et le bas de l’iPhone … j’ai directement chauffé à l’arrière et décollé la batterie …. Plus rapide et moins dangereux pour le reste

Dark Stig -

I don't know if it's common knowledge, but I just flashed on what the first sign of my battery expanding was. I used an Otterbox Defender case on my iPhone X. 3-6 months before the battery made its expansion obvious, the volume buttons started not working well. I thought it was the Otterbox. But now that I've replaced the battery the volume buttons are working fine. Somehow the battery was distorting the physical interface between the phone buttons and the case buttons. By the time I noticed the battery inflating, it had pushed up the display screen away from its frame. Apparently the battery was getting rather dangerous for possible setting itself ablaze.

MrRoundel -