Einleitung

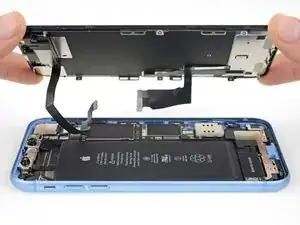
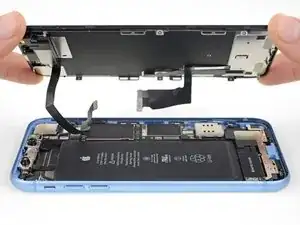
Grundständige Anleitung zum Entfernen der Displayeinheit.

  1. Pm3XuCwO4BcYdoNT
    Pm3XuCwO4BcYdoNT
    dbH2ibTJKmdNSytC
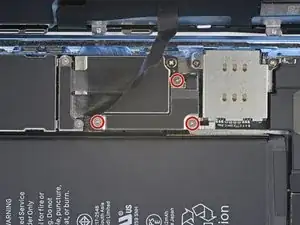
    • Entferne die drei 1,2 mm Y000 Schrauben, mit denen die Abdeckung des Akkusteckers befestigt ist.

    • Entferne die Halterung.

    • Im Verlauf dieser Reparatur solltest du den Überblick über alle Schrauben behalten und sicherstellen, dass jede einzelne Schraube wieder genau dort eingesetzt wird, wo sie vorher war, um Schäden an deinem iPhone zu vermeiden.

    • Beim Zusammenbau ist jetzt ein guter Zeitpunkt, das iPhone einzuschalten und alle Funktionen zu testen, bevor das Display wieder festgeklebt wird. Achte darauf, dein iPhone wieder ganz auszuschalten, bevor du weiterarbeitest.

    Definitely make sure all three lobes of your tool are aligned before use (it’s a little harder to tell with this style of bit) and apply even and adequate pressure to ensure it grabs as you spin the driver to prevent disfiguring the lobes/slot of the screw head.

    Unfortunately my Y000 tool was perhaps not the best fit (tolerance a bit off) in these screws and I ended up stripping out the heads of all three of these. I started to panic but after I sanded the tip of my Y000 bit down a little with super fine grit (1000CW-C) sand paper to flatten the domed tip (visible with macro lens) and give it a bit more bite I was able to remove and reinstall without issue—in fact I had to remove and install them twice since I forgot my adhesive tape during reassembly, so the screws survived and the sanded bit worked.

    Erica -

    +1 to above comment. I bought a cheap kit from Amazon and the Y000 screw driver is not good for this job. I’m concerned that I may have disfigured the heads and i type this comment in the midst of my fix :D Be gentle and assess if you can remove at least one screw with your driver before rummaging through all three and other similar screws holding display connector as well.

    Shan Potti -

    Update to above comment. I got hold of a Y0.8 screw driver bit (lucky to find an ORIA screw driver kit in my office) and it works like wonders :) Now back to work…

    Shan Potti -

  2. wTxgGtY4ALPOaL6M
    wTxgGtY4ALPOaL6M
    oLrG4CKHkHQWnl5b
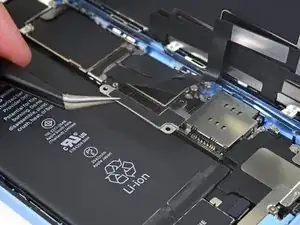
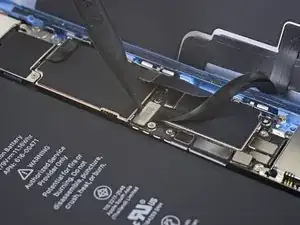
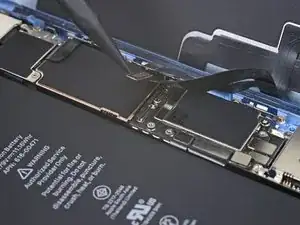
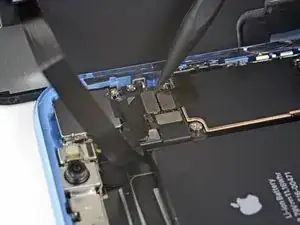
    • Heble den Akkustecker mit der Spudgerspitze aus seinem Anschluss.

    • Versuche, die schwarze Silikondichtung um diesen und die anderen Stecker nicht zu beschädigen. Diese Dichtungen gewährleisten einen zusätzlichen Schutz vor Wasser und Staub.

    • Biege den Stecker leicht vom Logic Board weg, um zu vermeiden, dass er sich versehentlich wieder mit dem Anschluss verbindet und so dein iPhone während der Reparatur mit Strom versorgt.

  3. ycOPoUnmEuOGtRXs
    ycOPoUnmEuOGtRXs
    AiuRYCepIGVGVEUA
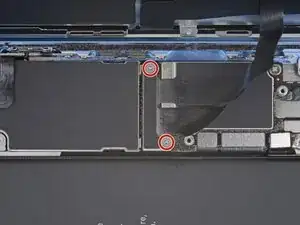
    • Entferne die beiden 1,2 mm Y000 Schrauben, mit denen die Halterung des Displaysteckers befestigt ist.

    • Entferne die Halterung.

    What if the screw is damaged and you can’t get one out?

    Kashawn Benjamin -

  4. CFAlA4IEWSGKiQBn
    CFAlA4IEWSGKiQBn
    NAhKByGJ4iRqHGvE
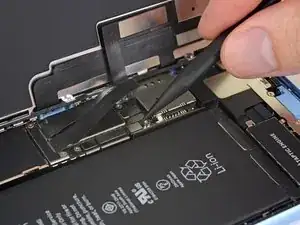
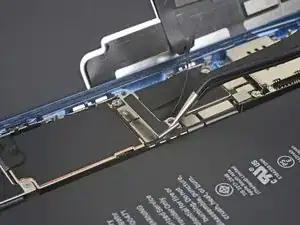
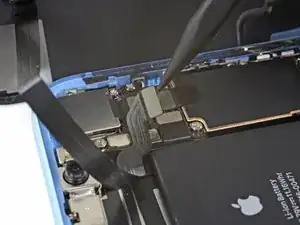
    • Heble das Touchscreenkabel mit der Spudgerspitze hoch und löse es ab.

    • Um Steckverbinder wie diesen hier wieder zu verbinden, musst du ihn sorgfältig ausrichten und auf einer Seite herunterdrücken bis er einrastet und dann das gleiche auf der anderen Seite wiederholen. Drücke nicht in der Mitte. Falls der Stecker nicht korrekt ausgerichtet ist, können sich die Stifte verbiegen, was dauerhaften Schaden verursacht.

    • Falls irgendein Bereich deines Bildschirms nach der Reparatur nicht mehr auf Berührungen reagiert, dann trenne den Akku und setze diesen Stecker erneut ein. Achte darauf, dass er richtig einrastet und dass sich kein Staub oder Ähnliches im Anschluss gesammelt hat.

  5. EF5KUKKN1562jycp
    EF5KUKKN1562jycp
    hqHtSbHNDEqk2pPD
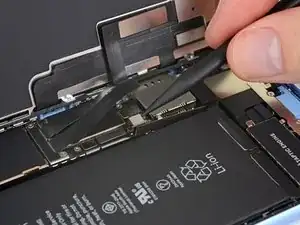
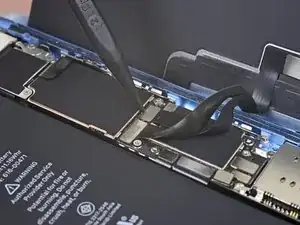
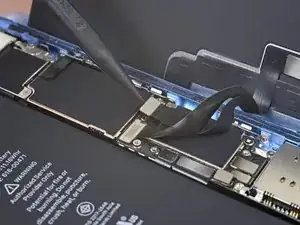
    • Trenne den Stecker des Displaykabels mit der Spudgerspitze.

    The new display cable isn’t snapping in but I was just able to snap in the old one. Did I break the new one somehow?

    Andrew Pierson -

    Same it is really frustrating, just keeps slipping up and its bound to get damaged

    Daniel Maldonado -

  6. erV5SYvpSFqRXnWJ
    erV5SYvpSFqRXnWJ
    C5NmtarPVEAnBWBm
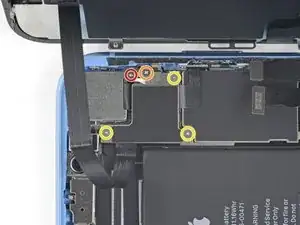
    • Entferne die fünf Schrauben, mit denen die Halterung des Logic Board Steckers am Rückgehäuse befestigt ist:

    • Eine 1,3 mm Kreuzschlitzschraube #000

    • Eine 1,5 mm Kreuzschlitzschraube #000

    • Drei 1,2 mm Y000 Schraube

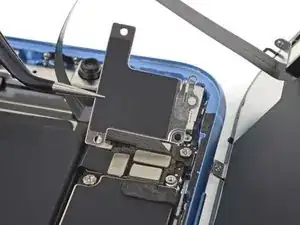
    • Entferne die Halterung.

    • Achte auf die kleinere Halterung auf der Stecker-Halterung, die darfst du nicht verlieren. Sie ist mit einem kleinen Clip befestigt, und kann leicht versehentlich von der größeren Halterung heruntergeschubst werden.

    Phillips screw 1.3 mm on last step is not working. The small clipped bracket has been damaged. This screw perhaps should be the first, before 1.2 Y000. - To be confirmed by others.

    Dmitri -

    I’m not sure it makes much if any difference, but we went ahead and swapped the order for you guys. Thanks for your comments!

    Jeff Suovanen -

    I just repaired another XR, and you are right! It doesn’t make any differnerce in the order these screws come out. I still damaged this fragile piece. As I work on more of these, I’ll figure out a way to remove this screw without damaging the clip. For now everyone, just use extra caution when removing the 1.3mm phillips screw! Thanks Jeff

    fabianowens -

    I’ve now done at least 6 of these so far and I have fairly consistent good results by taking the 2 Philips head screws out first, then doing the Y screws.

    Stow -

    Is this piece important for the repair if broken? I have broken it on a home repair. What is it used for? Is it a grounding connection or is it completely unimportant. More information needed please

    Squishy Horses -

    I’m wondering that too. Is this piece important?

    Phillip Gross -

    My clip broke too! on iphone XR. Any word on necessity?

    Beth Buer -

    I can confirm that taking out the 1.3 mm screw first then the 1.5 mm screw works the best. If done correctly, you should be able to to remove the rest of the screws and pull the panel off with the clip still attached to the panel. For reassembly, start with the 1.5 mm screw then the 1.3 mm screw.

    Carlos Oulman -

    I don’t remove the small screw at all. I just slide out the metal cover plate and slide back in to reassemble.

    Kyaw-Zin Win -

    I too broke this shield. In looking over this problem I believe it’s best to loosen, but not remove, either screw first then the other. To be clear, loosen the red or yellow screw but only just to break it free, then the second screw. Then remove both and the others and the shield should remain in one piece. I put it back with the broken part (on the red screw) and made sure the two are in contact so there’s conductivity as these shields serve a purpose other than just holding in connectors. My phone works fine with this fix.

    pgrobin -

    Is this small bracket important if broken??

    Phillip Gross -

    Mine is broken

    Easy Repair -

    Mine is broken and my apple pay doesn’t work. Something to do with NFC antenna this little clip??

    Marcos Fernández -

    On the 1.3 mm screw I actually chose not to remove it. I broke it loose then used the tip of the spudger to simply twist the bracket out of the way, with the screw still attached. Then I could remove the larger bracket.

    mpalma -

    Kyaw-Zin is right because the shield contains of two tin parts. But there is another option:

    1. Unscrew the yellow and orange screws first.

    2. Lift the shield gently that it can turn about 20° anticlockwise.

    3. Open the red screw and let the shield turn with it the first degrees.

    Daniel Brehm -

    The first time I did this repair, I didn’t see the comments ahead of time and broke the bracket, even removing the 1.3mm screws first. The second time I did the repair, I was prepared and being extra careful, but the simple act of turning the 1.3mm screw head was enough to break it. If I ever have to do this repair again, I’ll just leave the screw in and try to slide the plate out with the screw (and bracket, hopefully) still in tact, as per Kyaw-Zin Win.

    Debbie Thompson -

    None of the screw driver bits I got fits the 1.3mm and 1.5mm screws. How do I remove them?

    Jonatious Joseph Jawahar -

    Same issue as above. The bits provided in the kit do not work with the 1.3mm and 1.5mm screws

    Graham Hammell -

    Further to above comment about bit not working. Had to go and purchase another PH000 from Home Depot and that worked

    Graham Hammell -

    I’ve broken that little bracket attached to the red screw. Is it important and can I get a replacement????? Thanks all

    steve.arfa -

    Broken the clip. Is this important??

    kyledrumtutor -

  7. ZKgyTMB3J2eBa6Se
    ZKgyTMB3J2eBa6Se
    RGEOVxym6PmnJXjF
    • Heble den Stecker der Frontsensorgruppe mit der Spudgerspitze aus seinem Anschluss.

    During testing, make sure your proximity sensor is not on upside down, as it’s easy to connect upside down. Your phone will boot loop if it’s on incorrectly.

    Tristan England -

  8. GIZLarh6sZTr4iYM

    unclear if this is where screen removal ends

    Daniel Maldonado -

    I had the same question, but the answer is yes. Steps 21-30 are removing parts from the original screen that need to be reattached onto the new screen. You are no longer working inside the frame, but on the back of the screen itself.

    amclean78 -

    I apologize for missing these comments initially, but yes that’s correct, the screen is removed now and the rest of the guide goes on to other parts, either in the phone or on the back of the screen. Good luck with the repair!

    Adam O'Camb -

Abschluss

Um dein Gerät wieder zusammenzubauen, folge der Anleitung in umgekehrter Reihenfolge.
Adam O'Camb

Mitglied seit: 11/04/15

178852 Reputation

0 Kommentare