Einleitung
Diese Anleitung zeigt, wie der Akku im iPod (1. Generation) getauscht werden kann.
Werkzeuge
Ersatzteile
-
-
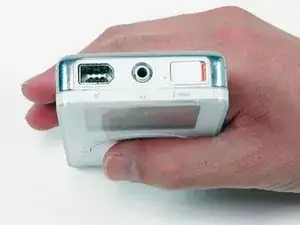
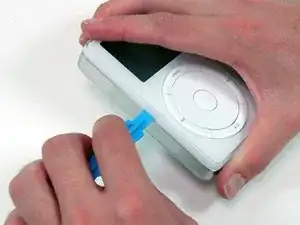
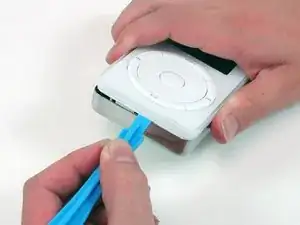
Setze ein Öffnungwerkzeug aus Kunststoff in die Naht zwischen der weißen Plastikvorderseite und der Metallrückseite des iPods ein. Es wird etwas leichter, wenn du den iPod wie gezeigt oben und unten festhältst und zusammendrückst, bis die Kante herausspringt. Wenn das Werkzeug drinsteckt, dann schiebe es zum Lösen der fünf Rasten entlang der Naht.
-
-
-
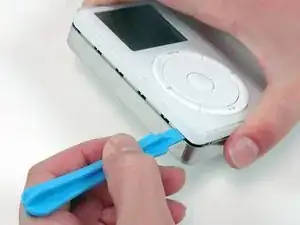
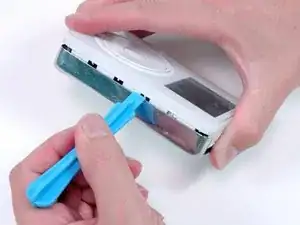
Führe das Werkzeug um die Ecke des iPods herum, um die beiden Rasten nahe am Dock-Anschluss zu lösen.
-
-
-
Löse auch die fünf Rasten auf der anderen Seite. Möglicherweise kannst du sie lösen, indem du vorsichtig am Frontpanel des iPods wackelst.
-
Hebe die Rückseite vom iPod weg.
-
-
-
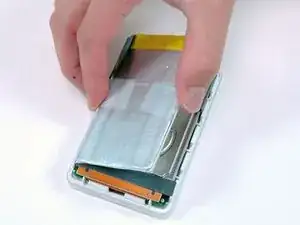
Hebe den Akku hoch, damit er sich aus der Klebeverbindung zum iPod löst.
-
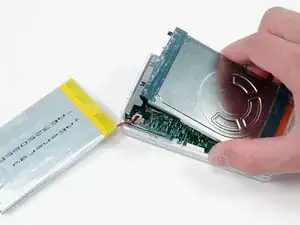
Lege den Akku neben dem iPod ab. (Er ist immer noch am Logic Board angeschlossen).
-
-
-
Hebe die Festplatte am Ende nahe am Firewire-Anschluss hoch, um leichter an den Akkuanschluss heranzukommen.
-
-
-
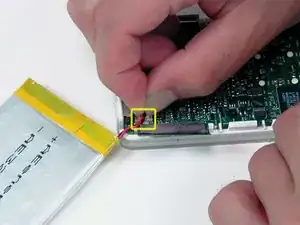
Trenne vorsichtig den weißen Akkustecker vom Logic Board ab. Ziehe nur am Stecker, nicht an den Kabeln.
-
Um dein Gerät wieder zusammenzubauen, folge den Schritten in umgekehrter Reihenfolge.
2 Kommentare
There are so many iPods, it's confusing as to what battery to buy. I have 3 of these old bricks and sure it's battery time. Can you please provide a link to the specific battery for this (above) iPod?
The iPod that I,m trying to resssurect has a connection that has 50t pin connection. I ordered the battery shown in the picture and now have to exchange it

Boy, are these cases hard to open! I got nowhere with the spudger, but I did have success using duct tape. This is worth trying as it reduces the likelihood of scratching the case. Make a tab by sticking duct tape to the metal case starting on the side down by the scrolll wheel and ending up where the metal case ends on the firewire side. Fold excess duct tape back on itself so that it is 2x thick anywhere it isn’t stuck to the iPod. This is where you are going to grab it. Rub the duct tape with a spudger or a fingernail where it touches the iPod to make it stick better. Make a similar tab on the other side. Now grab the iPod in your right hand with your thumb at the 1/8” audio connector, squeeze gently, and pull on one of the duct tape tabs. (I stared with the one of the lock button side, but I don’t think it matters.) It is smooth sailing once the case starts to open up. Clean off any duct tape residue with alcohol wipes before re-assembly.
R Calhoun -
Well, maybe for you because you have baby hands and, it Took me less Then a minute to do it
Matthew Cabanas -