Einleitung
Akku hält nur kurz, oder gar nicht mehr? Tausch ihn aus!
Werkzeuge
Ersatzteile
-
-
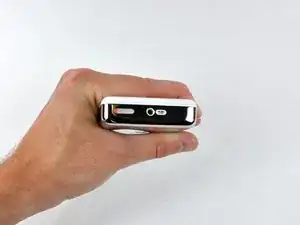
Bevor du deinen iPod öffnest, kontrolliere, ob dein iPod sich im gesperrten Zustand befindet. Oben am iPod sollte der orangene Streifen sichtbar sein.
-
-
-
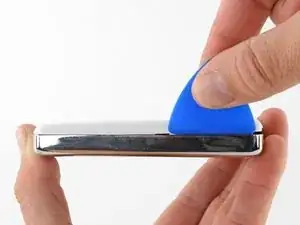
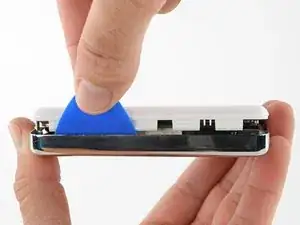
Führe Plektrum so weit wie möglich in die Lücke zwischen der Plastikvorderseite und der metallenen Rückseite, an der rechten Seite des iPods.
-
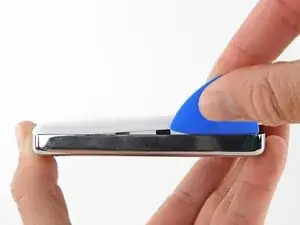
Heble mit dem Plektrum seitlich gegen die Plastikvorderseite, um die fünf Haltelaschen aus ihrer Verankerung zu drücken (siehe drittes Foto).
-
Schiebe das Plektrum seitlich an der Kante des iPods entlang, um die restlichen Haltelaschen zu lösen.
-
Wenn alle fünf Laschen auf der rechten Seite frei sind, sollte sich das Gehäuse leicht öffnen lassen.
-
-
-
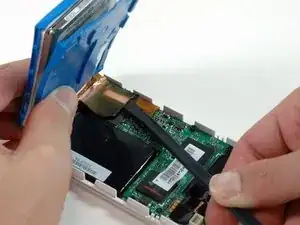
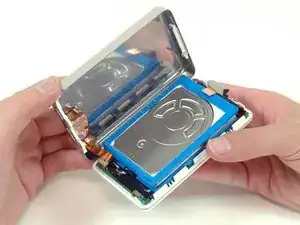
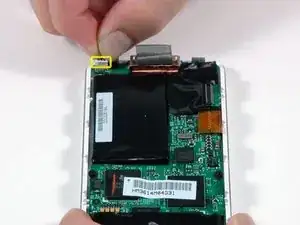
Öffne das Gehäuse wie ein Buch mit dem Dock-Verbinder oben und lege die Rückseite neben die vordere Hälfte des iPods.
-
-
-
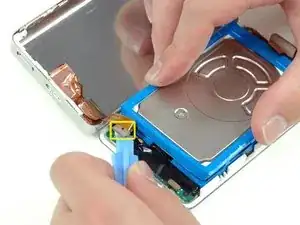
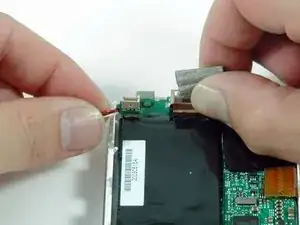
Nutze ein Plastikwerkzeug oder deine Fingernägel, um vorsichtig das orangene Kopfhöreranschlusskabel abzulösen. Achte darauf, nur am Stecker zu ziehen und auf keinen Fall am Kabel selbst.
-
-
-
Hebe die Festplatte mit einer Hand hoch und trenne das Festplattenkabel behutsam vom Logic Board ab.
-
Hebe die Festplatte aus dem iPod heraus.
-
-
-
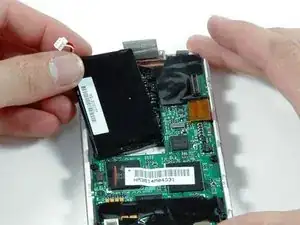
Trenne vorsichtig den weißen Akkustecker vom Logic Board ab. Ziehe nur am Stecker selbst und nicht an den Kabeln.
-
-
-
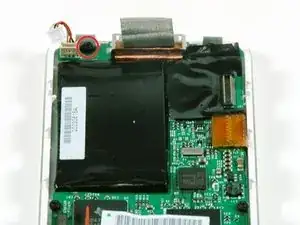
Führe das Akkukabel sorgfältig um das Ende des Logic Boards herum. Sei beim Ablösen des Akkukabels vorsichtig und ziehe dabei nicht zu sehr das Logic Board hoch.
-
Um das Gerät wieder zusammenzubauen, folge der Anleitung in umgekehrter Reihenfolge.
18 Kommentare
If you are real careful you don't have to remove the Torx screw to get the battery out.
I found this quite easy. The tools worked great. I agree with Andy, if you push the tool into the groove, then lift or pry it up so the tip of the tool is down inside the back cover, you should be able to slide it across to pop the clips quite easily. Once you get the first two sides open, it goes quick.
I also did this without having to remove the Torx screw. It helped to lift the battery up a bit to give the wires a little slack, and then just feed them around the corner of the motherboard. Putting the new battery in, I just fed the wires around the corner, and used the opening tool to push them the final bit of the way around the corner.
My old iPod is like new now! Hours and hours of battery life, when it would previously die after 5 minutes.
Changing the battery was simular to when I changed the HD in the same iPod. Quite easy. No need to remove the torx screw, Just be sure where the (lock) button (on the top) is when you close it, this time I didnt forget, as I did replacing the HD :)
Olafur -
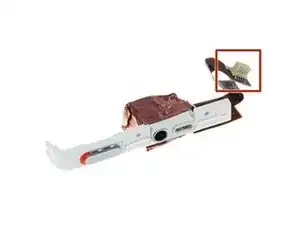

Note that the lock will move out of position again easily once you have the case open (when disengaged from the internal switch). That being said, you will want to keep this little switch in mind even beyond making sure the lock is in the right place, as the little plastic tab that is the switch is extremely small and fragile. I ended up breaking mine off somehow while trying to get the case closed. It is small enough that I never felt it break; I finally got the iPod back together and found that the lock switch didn’t work. I was able to re-open it and use a pick tool to unlock what was left of the switch, so my iPod works, but no longer locks. I’m happy to have a working battery anyhow, but I’d have been happier yet to have completed the repair without breaking anything - be careful with this little switch.
Joe Sutton -