Einleitung

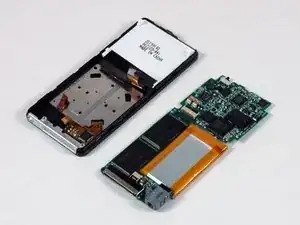
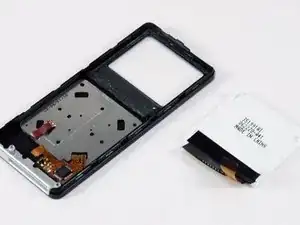
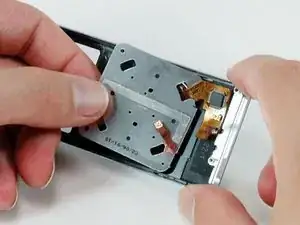
Die Metallabschirmung unter dem Click Wheel.

  1. 4CVLIRsHAsLo1jAZ
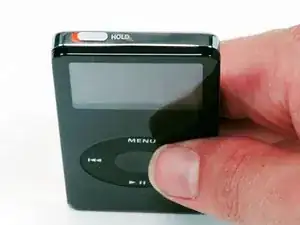
    • Bevor Du dein iPod öffnest, stelle sicher, dass der Hold-schalter in der gesperrten Position ist.

    Turn on the notes and READ thru all the steps and the notes, especially the ones involving the ribbon cables.

    patjmccarthy -

  2. 1GVJZdOsmcLBXFHf
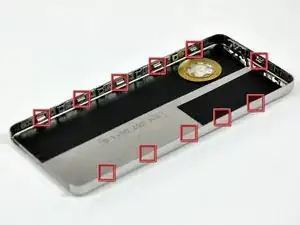
    • Die Rückseite ist an die Vorderseite mit elf Klammern befestigt. Diese Klammern rasten in kleine Laschen an der Vorderseite ein.

    • Um die Klammern zu lösen, müssen sie heruntergedrückt und vom Gehäuse weggedrückt werden. Merke dir die Position jedes Tabs an der Rückseite. Wenn das iPod Opening Tool benutzt wird, um die Rückseite zu lösen, stelle sicher diese Stellen zu nutzen.

  3. qfmiSDxy6TkBPK1I
    qfmiSDxy6TkBPK1I
    JEmZodMSxa2pgEsJ
    • Das Öffnen des iPods kann herausfordernd sein. Verliere nicht den Mut, wenn es einige Versuche braucht, um den iPod zu öffnen.

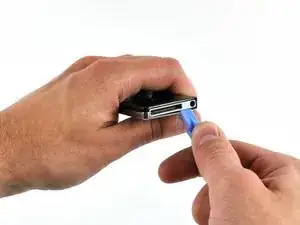
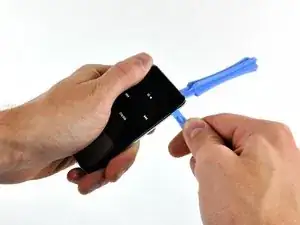
    • Füge das große iPod Opening Tool in die Ritze zwischen der Vorder- und Rückseite unter den Dock-Connector ein. Fahre das Werkzeug vor und zurück, um eine Öffnung zu erzeugen. Die Kante des Werkzeugs sollte in die Richtung der Rückseite zeigen, um die Aluminium Vorderseite nicht versehentlich zu verkratzen.

  4. Fobhbi6n3IFSGe2x
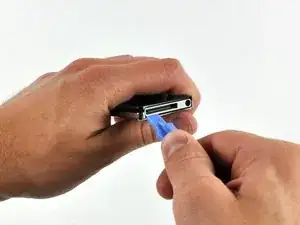
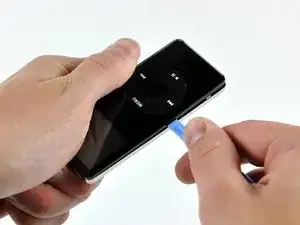
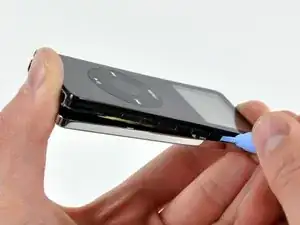
    • Schiebe ein kleines iPod Opening Tool in die Ritze auf der Seite des Hold-Schalters mit der Kante in Richtung Rückseite zeigend.

  5. 6gPgDdWsAn2t3P4K
    • Das große iPod Opening Tool wird nicht mehr gebraucht, um Zugang zur linken Seite des iPods zu gelangen.

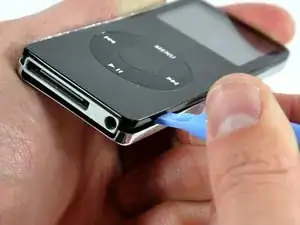
    • Vergrößere den Spalt vorsichtig durch Drücken und Wackeln des kleinen iPod Opening Tools in dem Spalt in der Nähe jeder der Laschen, die auf der Rückseite befestigt sind, um die Klammern zur Mitte des iPods hin zu drücken bis beide Seiten frei sind.

  6. nUBlhNKg2gUVqPRx
    nUBlhNKg2gUVqPRx
    IMOeL4VyTS6JC1fh
    Bw4G4NEAvYZJEwRe
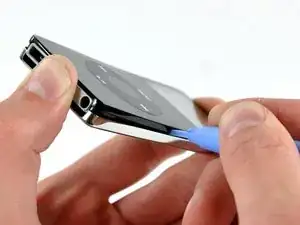
    • Wiederhole denselben Vorgang wie im vorigen Schritt, um die fünf Klammern an der Seite der Kopfhörerbuchse zu lösen.

  7. yHpybLw1ZHZG5P65
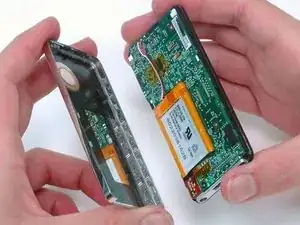
    • Nachdem die Klammern befreit sind, löse die zwei Hälften des iPods.

    • Die Rückseite ist nun losgelöst vom iPod.

  8. ncfQwcJ22mt6ffMk
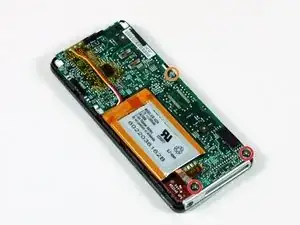
    • Falls nötig, entferne jegliches Kapton Klebeband über den Schrauben.

    • Entferne die folgenden 3 Schrauben

    • Zwei 3mm Kreuzschlitzschrauben neben dem Dock-Connector.

    • Eine 4 mm Kreuzschlitzschraube entlang der Kante des Logic Boards.

    • Achte beim Zusammenbau darauf, alle Plastikteile und Klebestreifen, die du entfernt hast, wieder einzusetzen. Das verhindert Kurzschlüsse zwischen der Hauptplatine und dem hinteren Gehäuse. Wenn das Klebeband nicht mehr brauchbar ist, benutze Kaptonband, das online erhältlich ist.

    Note that the 4mm screw has slightly wider pitch; you'll need this when putting the unit back together.

    daisystanton -

  9. UbGHhmtwYdoAIjhE
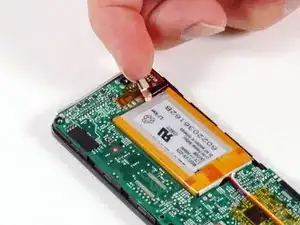
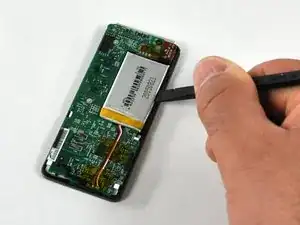
    • Löse die Erdungs-Lasche, die den Akku mit dem Logic Board verbindet.

    The battery ground strap does not have to be replaced. It works fine without it.

    henrymf -

  10. wH6l6FUPfrKkQtdk
    wH6l6FUPfrKkQtdk
    rhStROfje1cPnmDq
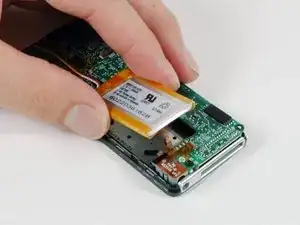
    • Stecke das flache Ende eines Spudgers zwischen den Akku und die Seite mit der Kopfhörerbuchse auf der Vorderseite und hebele den Akku vom Kleber mit dem er im GehPause befestigt ist.

    • Drehe den Akku aus dem iPod heraus und lege ihn neben dem iPod. Der Akku ist noch mit drei Drähten an das Logic Board gelötet, entferne ihn daher noch nicht ganz.

  11. 5BUVWquuCxXXPEZC
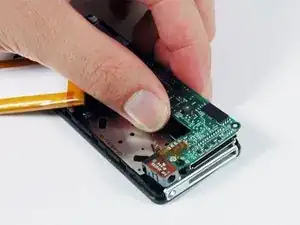
    • Hebe das Logic Board vorsichtig am Dock-Connector Ende hoch, um sicher zu gehen, dass das Logic Board frei ist.

  12. vx224ON4xOw1NA6K
    • Greife das Ende des Logic Boards neben dem Akkuanschluss mit einer Hand und halte den Rest des iPods mit der anderen Hand.

    • Stelle sicher, dass das Logic Board etwas über die weiße Kerbe auf der Akkuseite gehoben wird. Diese Kerbe verhindert, dass das Logic Board im nächsten Schritt herausrutscht.

    • Schiebe das Logic Board aus den Halteklammern auf der Rückseite des Displays heraus .

    • Das Logic Board ist noch durch zwei Flachbandkabel mit dem iPod verbunden .

    During the disassembly of the board I somehow "delaminated" the display. The result was that the display (after the battery was changed and the device closed again) looked "cloudy". From some angle you couldn't see anything at all anymore. The solution was to heat up the hole device with a hair dryer and rest it on it's front side for about an hour. After that it looked absolutely perfect again. I am not sure whether the heating is really necessary (maybe just lying the ipod on the front side over night would have the same effect) and surely one should be careful to not overheat the device.

    Michael Benner -

  13. 5yC2XJ4m6U21sN26
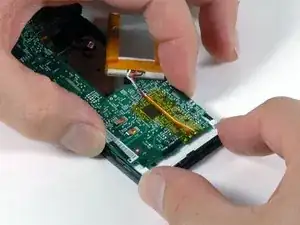
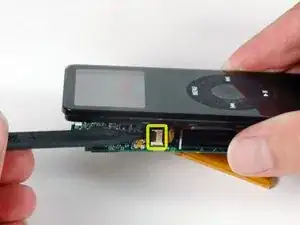
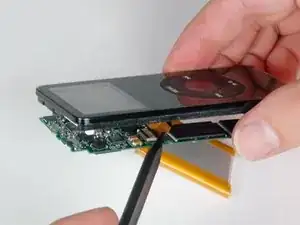
    • Das Trennen der folgenden zwei Flachbandkabel kann schwer werden. Um die zwei Kabel oder Anschlüsse nicht zu beschädigen, kann man die zwei Hälften des iPods nur ca. 1 cm auseinander halten.

    • Verwende einen Spudger, um die schwarze Plastikklappe des orangenen Displaykabels nach oben zu klappen. Die schwarze Klappe wird 90 Grad nach oben klappen und das Kabel freigeben.

    Both ribbon cables were especially difficult to put back in. I can't say I succeeded in getting the nano to work again. If you can avoid detaching the cables, do it. If you're replacing the clickwheel, there's no way of avoiding it unfortunately.

    patjmccarthy -

    A little tip if you are replacing the screen: Reconnect this ribbon cable from the new screen BEFORE affixing the screen to the adhesive! It will make it much easier. Also be sure that the little black things are UP before trying to put the ribbon in, and make sure you put them DOWN before closing up! The black things on the receptacle "lock" the cable in place, so it is important that you have it STRAIGHT or it wont work. Good luck!

    Schovelbuddy -

  14. LQR16nBhaAVvJVIG
    • Verwende einen Spudger, um das Display Flachbandkabel aus dem Stecker zu schieben.

    Getting the display ribbon back in place is the most difficult maneuver in the whole fix. I actually broke the black plastic tab in half while trying to close it back down, (be very gentle with it!). Managed to put the broken half back in(tweezers and patience) and get that ribbon in and put it back down. This battery replacement was the most difficult/tedious repair I have ever done. Don't do it unless you are brave and stubborn.

    checheconleche -

    You can leave out this steps with disconnecting the two cables.

    Without disconnecting the two cables, one can separate the two pieces only 1/2 inch. This is enough to work carefully with the soldering iron and change the battery.

    It's a little bit difficult to work with the needle to open the three holes after removing the old battery - but you can do it.

    From the reading of the other notes it seems to me easier than to disconnect the two cables

    cguenther -

    Ribbon connectors and absolute ##&&%

    Dan Fitz -

  15. xlFskeijACDRTClA
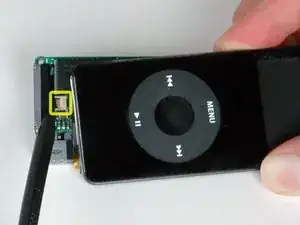
    • Verwende einen Spudger, um die schwarze Klappe des orangenen Click-Wheel Flachbandkabels nach oben zu klappen. Sie wird im 90 Grad Winkel nach oben klappen, und das Kabel freigeben.

  16. BEUQjVG2U1YHxBJw
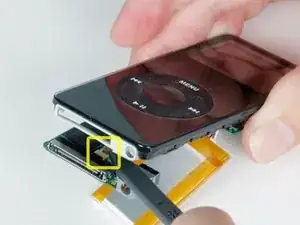
    • Verwende einen Spudger um das Click-Wheel Flachbandkabel aus dem Stecker zu schieben.

    Don't do this unless you have to. Getting this ribbon back in is nearly impossible.

    daisystanton -

    Zitat von daisystanton:

    Don't do this unless you have to. Getting this ribbon back in is nearly impossible.

    Try using tweezers or medical clamps to reach in that tight spot. Use these tools to also connect the click wheel ribbon back to the logic board.

    Ryan -

    Stamp tweezers worked great for the ribbon cable! (Search eBay or Amazon, or your local hobby store.) This would be a useful tool for iFixIt to add to their inventory.

    Michael Lance -

    yeah i just finished puting in a brand new display but it only goes white - no text or anything just white.

    any tips?

    Mabrew -

    Zitat von Mabrew:

    yeah i just finished puting in a brand new display but it only goes white - no text or anything just white.

    any tips?

    Did you ever fix it from white?

    katie -

    I wish I had read this thread before trying to remove the ribbons. I was unable to successfully restore these connections after installing the battery. Now my ipod, previously sick, is now dead.

    gregkotis -

  17. tcfiBDrCBbXLoRSa
    • Das Logic Board und der Akku sind nun vom iPod losgelöst.

  18. QFjooyME3xBjYbP4
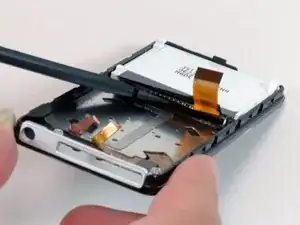
    • Benutze einen Spatel (Spudger), um vorsichtig den Kleber zu lösen, mit dem die Kante des Displays befestigt ist.

    • Achte darauf, den Spatel (Spudger) nicht zu weit einzusetzen, um Kratzer auf dem Display zu vermeiden.

    Be careful when you are trying to remove a working display from the nano it came on (when replacing the faceplate as well). Because of the adhesive, too much force or pressure can cause the display to crack and cause the display to "bleed"... resulting in replacing that part if it was still good. Try using a hairdryer to gently warm the adhesive to then remove the display. Warning: Too much heat can also ruin the display or melt the front panel.

    Ryan -

    Also watch out as the display is in two parts that can separate.

    patjmccarthy -

    I replace 2 displays, and they are still white,nothing else...maybe I damage

    SpeedManiac -

  19. G2NLuYPBZbmGxqVL
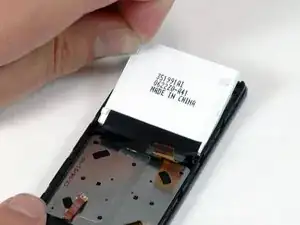
    • Hebe das Display vorsichtig oben an der Ecke an, um den Kleber zu lösen, mit dem das Display befestigt ist.

    • Hebe die andere Ecke des Display genau so an.

  20. NUXHxOdbjCxtJUO2
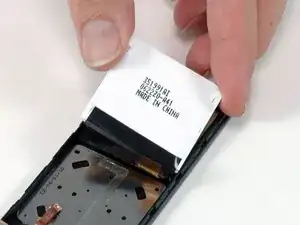
    • Hebe das Display hoch und aus dem iPod heraus.

  21. 52np2bJJGvblFmh5
    • Das Display ist jetzt komplett vom iPod abgelöst.

  22. 3Ur1Bk5cHgQvQvsP
    • Hebe die Abdeckung des Click Wheels an und fädle vorsichtig das orangene Flachbandkabel des Click Wheels durch den Schlitz in der Click Wheel Abdeckung.

    • Entferne die Click Wheel Abdeckung nun aus dem iPod.

    The click wheel cover is secured with extremely strong adhesive, so "lifting the click wheel cover" out of the iPod will only come after prying it up with a razor blade or something equally thin.

    daisystanton -

    Ma è saldato? Non riesco ad estrarlo

    romanostefy -

Abschluss

Um den iPod wieder zusammenzubauen, folge den Schritten in umgekehrter Reihenfolge.
iRobot

Mitglied seit: 25/09/09

0 Reputation

0 Kommentare